
DIY bell pepper gardening: Ready to ditch the grocery store and grow your own vibrant, crunchy bell peppers right in your backyard? I’m so excited to share some amazing tips and tricks that will transform your garden into a bell pepper paradise! For centuries, bell peppers have been a staple in cuisines around the world, adding color and flavor to everything from stir-fries to salads. Originating in South America, these versatile veggies made their way across the globe, becoming a beloved ingredient in countless dishes.
But let’s be honest, sometimes growing bell peppers can feel a little tricky. Maybe you’ve struggled with blossom end rot, or perhaps your plants just aren’t producing as many peppers as you’d like. That’s where these DIY hacks come in! I’ve gathered the best, most effective techniques to help you overcome common challenges and achieve a bountiful harvest.
Why do you need these DIY tricks? Because fresh, homegrown bell peppers taste infinitely better than anything you can buy at the store! Plus, you’ll know exactly what went into growing them, ensuring they’re free from harmful pesticides and chemicals. So, grab your gardening gloves, and let’s dive into the world of DIY bell pepper gardening and unlock the secrets to a thriving pepper patch!

Paprika-Paradies: Dein DIY-Guide für den Anbau von Paprika zu Hause
Hey Gartenfreunde! Ich liebe Paprika – in Salaten, als Snack, gefüllt, gegrillt… die Liste ist endlos! Und was gibt es Besseres, als sie selbst anzubauen? Es ist einfacher, als du denkst, und das Ergebnis ist einfach unschlagbar. In diesem Artikel zeige ich dir, wie du dein eigenes kleines Paprika-Paradies erschaffen kannst, egal ob du einen großen Garten oder nur einen kleinen Balkon hast. Los geht’s!
Was du für deinen Paprika-Garten brauchst
Bevor wir loslegen, lass uns sicherstellen, dass wir alles Nötige beisammen haben. Hier ist eine Liste der Dinge, die du brauchst:
* Paprikasamen: Wähle deine Lieblingssorten! Es gibt so viele verschiedene Farben und Formen, von süßen Glockenpaprika bis hin zu scharfen Chilis.
* Anzuchttöpfe oder -schalen: Kleine Behälter, in denen du die Samen vorziehen kannst.
* Anzuchterde: Spezielle Erde, die nährstoffarm ist und eine gute Drainage hat.
* Größere Töpfe oder ein Gartenbeet: Für die Paprikapflanzen, wenn sie größer werden.
* Gartenerde: Hochwertige Erde, die reich an Nährstoffen ist.
* Dünger: Ein ausgewogener Dünger, der speziell für Gemüse geeignet ist.
* Pflanzstäbe: Um die Pflanzen zu stützen, wenn sie Früchte tragen.
* Gießkanne oder Schlauch: Zum Bewässern der Pflanzen.
* Sonniger Standort: Paprika lieben die Sonne!
* Geduld: Paprika brauchen Zeit, um zu wachsen und Früchte zu tragen.
Phase 1: Die Anzucht – So bringst du deine Paprikasamen zum Keimen
Die Anzucht ist ein wichtiger Schritt, um gesunde und kräftige Paprikapflanzen zu bekommen. Paprika brauchen eine lange Wachstumsperiode, daher ist es ratsam, sie früh im Jahr vorzuziehen.
1. Vorbereitung der Anzuchttöpfe: Fülle die Anzuchttöpfe oder -schalen mit Anzuchterde. Drücke die Erde leicht an.
2. Aussaat der Samen: Lege 2-3 Samen pro Topf auf die Erde. Bedecke die Samen mit einer dünnen Schicht Erde (ca. 0,5 cm).
3. Bewässerung: Befeuchte die Erde vorsichtig mit einer Sprühflasche oder einer Gießkanne mit feinem Strahl. Die Erde sollte feucht, aber nicht nass sein.
4. Abdeckung: Decke die Anzuchttöpfe mit Frischhaltefolie oder einem transparenten Deckel ab, um die Luftfeuchtigkeit zu erhöhen.
5. Standort: Stelle die Anzuchttöpfe an einen warmen und hellen Ort. Eine Temperatur von 22-25°C ist ideal für die Keimung.
6. Regelmäßige Kontrolle: Überprüfe die Erde regelmäßig und befeuchte sie bei Bedarf. Lüfte die Abdeckung täglich kurz, um Schimmelbildung zu vermeiden.
7. Keimung: Die Samen keimen in der Regel innerhalb von 1-3 Wochen. Sobald die ersten Keimlinge erscheinen, entferne die Abdeckung.
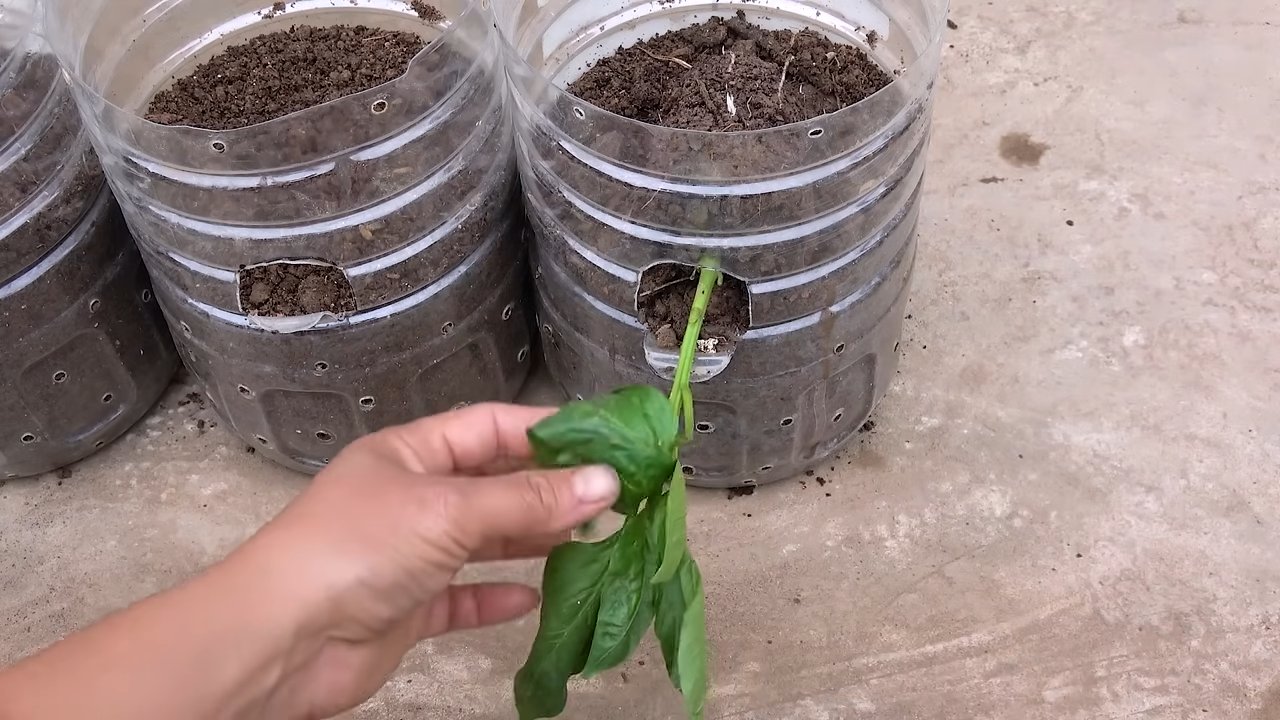
8. Pikieren: Wenn die Keimlinge 2-3 echte Blätter haben (nicht nur die Keimblätter), ist es Zeit, sie zu pikieren. Das bedeutet, dass du die schwächeren Pflanzen entfernst und die stärksten in größere Töpfe umpflanzt. Fülle die größeren Töpfe mit Gartenerde und setze die jungen Paprikapflanzen vorsichtig ein. Achte darauf, die Wurzeln nicht zu beschädigen.
Phase 2: Die Pflege der jungen Paprikapflanzen
Nach dem Pikieren brauchen die jungen Paprikapflanzen besondere Aufmerksamkeit, um kräftig zu wachsen.
1. Standort: Stelle die pikierten Paprikapflanzen an einen hellen und warmen Ort. Direkte Sonneneinstrahlung ist wichtig, aber vermeide die Mittagssonne, da sie die Blätter verbrennen kann.
2. Bewässerung: Gieße die Pflanzen regelmäßig, aber vermeide Staunässe. Die Erde sollte immer leicht feucht sein.
3. Düngen: Beginne etwa 2 Wochen nach dem Pikieren mit dem Düngen. Verwende einen ausgewogenen Dünger, der speziell für Gemüse geeignet ist. Befolge die Anweisungen auf der Verpackung.
4. Drehen: Drehe die Töpfe regelmäßig, damit die Pflanzen gleichmäßig wachsen und nicht zum Licht hin wachsen.
5. Aushärten: Bevor du die Paprikapflanzen ins Freie pflanzt, musst du sie abhärten. Das bedeutet, dass du sie langsam an die Bedingungen im Freien gewöhnst. Stelle die Pflanzen für ein paar Stunden pro Tag ins Freie, beginnend mit einer Stunde und steigere die Zeit allmählich.
Phase 3: Das Auspflanzen – Ab ins Beet oder in den Topf!
Sobald die Paprikapflanzen kräftig genug sind und die Temperaturen im Freien konstant über 15°C liegen, können sie ausgepflanzt werden. Das ist normalerweise ab Mitte Mai der Fall.
1. Vorbereitung des Beets oder der Töpfe: Lockere die Erde im Beet oder in den Töpfen auf und reichern sie mit Kompost oder anderem organischen Material an.
2. Pflanzabstand: Achte auf einen ausreichenden Pflanzabstand. Paprikapflanzen brauchen Platz, um sich auszubreiten. Ein Abstand von 40-50 cm zwischen den Pflanzen ist ideal.
3. Auspflanzen: Grabe ein Loch, das groß genug ist, um den Wurzelballen der Paprikapflanze aufzunehmen. Setze die Pflanze vorsichtig ein und fülle das Loch mit Erde. Drücke die Erde leicht an.
4. Bewässerung: Gieße die Pflanzen nach dem Auspflanzen gründlich.
5. Stützen: Stecke Pflanzstäbe neben die Pflanzen, um sie zu stützen, wenn sie Früchte tragen.
6. Mulchen: Bedecke die Erde um die Pflanzen mit Mulch, um die Feuchtigkeit zu halten und Unkraut zu unterdrücken.
Phase 4: Die Pflege im Freien – So bleiben deine Paprikapflanzen glücklich und gesund
Auch nach dem Auspflanzen brauchen die Paprikapflanzen regelmäßige Pflege, um optimal zu wachsen und viele Früchte zu tragen.
1. Bewässerung: Gieße die Pflanzen regelmäßig, besonders während trockener Perioden. Achte darauf, dass die Erde immer leicht feucht ist.
2. Düngen: Dünge die Pflanzen alle 2-3 Wochen mit einem ausgewogenen Dünger.
3. Ausgeizen: Entferne regelmäßig die Seitentriebe, die zwischen dem Hauptstamm und den Blättern wachsen. Dies fördert das Wachstum der Früchte.
4. Schutz vor Schädlingen und Krankheiten: Überprüfe die Pflanzen regelmäßig auf Schädlinge und Krankheiten. Bei Bedarf kannst du biologische Schädlingsbekämpfungsmittel einsetzen.
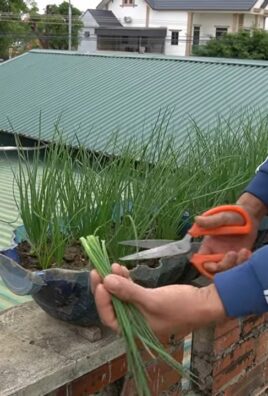
5. Ernte: Die Paprika sind reif, wenn sie ihre endgültige Farbe erreicht haben und sich fest anfühlen. Schneide die Früchte mit einem scharfen Messer oder einer Schere ab.
Zusätzliche Tipps für den Paprika-Anbau
* Sonniger Standort: Paprika lieben die Sonne! Stelle sicher, dass deine Pflanzen mindestens 6 Stunden Sonne pro Tag bekommen.
* Gute Drainage: Paprika vertragen keine Staunässe. Achte darauf, dass die Erde eine gute Drainage hat.
* Windschutz: Paprikapflanzen sind empfindlich gegen Wind. Schütze sie vor starkem Wind, indem du sie an einem geschützten Ort pflanzt oder einen Windschutz aufstellst.
* Fruchtfolge: Pflanze Paprika nicht jedes Jahr am selben Ort. Wechsle die Anbaufläche, um Krankheiten und Schädlingen vorzubeugen.
* Begleitpflanzen: Pflanze Begleitpflanzen wie Basilikum, Ringelblumen oder Knoblauch neben deine Paprika. Diese Pflanzen können Schädlinge abwehren und das Wachstum fördern.
Häufige Probleme beim Paprika-Anbau und wie du
Conclusion
So, there you have it! Transforming kitchen scraps into thriving bell pepper plants is not just a fun experiment; it’s a sustainable and rewarding way to enhance your gardening experience. This DIY bell pepper gardening trick offers a unique opportunity to connect with nature, reduce waste, and enjoy the fruits (or rather, vegetables!) of your labor. Forget expensive seedlings and trips to the garden center – with a little patience and these simple steps, you can cultivate your own vibrant bell pepper patch right from the comfort of your home.
But why is this a must-try? Beyond the obvious cost savings and environmental benefits, growing bell peppers from scraps allows you to select varieties you truly love. Tired of the bland, mass-produced peppers at the grocery store? Now you can choose heirloom varieties, experiment with different colors (red, yellow, orange, even purple!), and enjoy the unparalleled flavor of homegrown produce. Imagine the satisfaction of serving a dish made with bell peppers you nurtured from a single seed!
And the possibilities don’t stop there. Consider these variations to personalize your bell pepper gardening journey:
* **Hydroponics:** For those with limited space or a penchant for modern gardening techniques, try growing your bell pepper seedlings hydroponically. This method involves suspending the roots in nutrient-rich water, eliminating the need for soil.
* **Container Gardening:** If you don’t have a traditional garden plot, no problem! Bell peppers thrive in containers, making them perfect for patios, balconies, or even indoor spaces with sufficient sunlight. Choose a pot that’s at least 12 inches in diameter to allow for adequate root growth.
* **Companion Planting:** Enhance your bell pepper garden by incorporating companion plants like basil, marigolds, or carrots. These plants can deter pests, attract beneficial insects, and improve the overall health of your bell pepper plants.
* **Seed Saving:** Once your bell peppers mature, save the seeds from your best-performing plants to continue the cycle year after year. This ensures a consistent supply of your favorite varieties and allows you to adapt your bell peppers to your specific growing conditions.
This DIY bell pepper gardening method is more than just a gardening hack; it’s a gateway to a more sustainable and fulfilling lifestyle. It’s a chance to reconnect with the natural world, reduce your environmental footprint, and enjoy the delicious rewards of homegrown produce.
We wholeheartedly encourage you to give this DIY trick a try. Whether you’re a seasoned gardener or a complete beginner, the process is surprisingly simple and incredibly rewarding. Don’t be afraid to experiment, adapt the techniques to your specific environment, and most importantly, have fun!
And once you’ve experienced the joy of growing your own bell peppers from scraps, we’d love to hear about it! Share your successes, challenges, and tips in the comments below. Let’s build a community of DIY bell pepper gardeners and inspire others to embrace this sustainable and rewarding practice. Happy gardening!
Frequently Asked Questions (FAQ)
1. What kind of bell peppers work best for this DIY method?
Any type of bell pepper can be used for this DIY method, but it’s generally recommended to start with organic bell peppers. Organic peppers are less likely to have been treated with chemicals that could inhibit germination. However, even non-organic bell peppers can work, so don’t hesitate to experiment with what you have available. Consider the variety of pepper as well. If you prefer a specific color or flavor, choose a pepper of that variety. Remember that hybrid varieties may not produce true-to-type seeds, meaning the offspring may not be identical to the parent plant. Heirloom varieties are generally more reliable for seed saving.
2. How long does it take for bell pepper seeds to germinate?
Bell pepper seeds typically take 7 to 21 days to germinate, but this can vary depending on factors such as temperature, moisture, and seed quality. To optimize germination, maintain a consistent soil temperature of 70-80°F (21-27°C). Use a heat mat if necessary. Keep the soil consistently moist but not waterlogged. Providing adequate light, even artificial light, can also encourage germination. If your seeds haven’t germinated after three weeks, it’s possible they are not viable, and you may need to try a new batch.
3. What kind of soil is best for growing bell peppers?
Bell peppers thrive in well-draining, fertile soil with a slightly acidic pH (6.0-6.8). A good potting mix for bell peppers should contain a blend of peat moss, perlite, and vermiculite. You can also amend your garden soil with compost or well-rotted manure to improve its fertility and drainage. Avoid heavy clay soils, as they can become waterlogged and inhibit root growth. If you have clay soil, consider growing your bell peppers in raised beds or containers with a suitable potting mix.
4. How much sunlight do bell pepper plants need?
Bell pepper plants require at least 6-8 hours of direct sunlight per day to produce a bountiful harvest. Choose a sunny location in your garden or on your patio where your plants will receive ample sunlight throughout the day. If you’re growing bell peppers indoors, supplement with grow lights to ensure they receive enough light. Insufficient sunlight can lead to leggy growth, reduced flowering, and smaller peppers.
5. How often should I water my bell pepper plants?
Water your bell pepper plants regularly, especially during hot, dry weather. Aim to keep the soil consistently moist but not waterlogged. Water deeply at the base of the plant, avoiding wetting the foliage, which can increase the risk of fungal diseases. Check the soil moisture regularly by sticking your finger about an inch into the soil. If it feels dry, it’s time to water. Reduce watering frequency during cooler, wetter periods.
6. What are some common pests and diseases that affect bell pepper plants, and how can I prevent them?
Common pests that affect bell pepper plants include aphids, spider mites, and whiteflies. These pests can be controlled with insecticidal soap, neem oil, or by introducing beneficial insects like ladybugs. Common diseases include blossom end rot, fungal leaf spot, and powdery mildew. Blossom end rot is caused by calcium deficiency and can be prevented by ensuring adequate calcium levels in the soil and consistent watering. Fungal diseases can be prevented by providing good air circulation, avoiding overhead watering, and applying a fungicide if necessary.
7. When should I harvest my bell peppers?
Harvest your bell peppers when they have reached their mature size and color. The exact size and color will depend on the variety of pepper you’re growing. Gently twist or cut the pepper from the plant, leaving a small stem attached. Regularly harvesting your bell peppers will encourage the plant to produce more peppers. You can also harvest green bell peppers before they fully ripen, but they will have a milder flavor.
8. Can I grow bell peppers indoors year-round?
Yes, you can grow bell peppers indoors year-round, but it requires providing them with the right conditions. This includes adequate sunlight (or grow lights), proper temperature, humidity, and pollination. You may need to hand-pollinate the flowers using a small brush to ensure fruit set. Choose a compact bell pepper variety that is well-suited for container gardening.
9. How can I encourage my bell pepper plants to produce more peppers?
To encourage your bell pepper plants to produce more peppers, ensure they are receiving adequate sunlight, water, and nutrients. Fertilize regularly with a balanced fertilizer or a fertilizer specifically formulated for peppers. Prune your plants to remove suckers (small shoots that grow from the base of the plant) to improve air circulation and encourage fruit production. Regularly harvest your peppers to stimulate the plant to produce more.
10. What if my bell pepper plants are flowering but not producing fruit?
There are several reasons why your bell pepper plants might be flowering but not producing fruit. One common reason is lack of pollination. If you’re growing your plants indoors, you may need to hand-pollinate the flowers. Other factors that can affect fruit set include temperature extremes, insufficient sunlight, and nutrient deficiencies. Ensure your plants are receiving adequate sunlight and nutrients, and try to maintain a consistent temperature.
Leave a Comment