
DIY Dawn Powerwash Cleaner: Ever wished you could bottle the magic of a sparkling clean kitchen without breaking the bank? I know I have! For years, I’ve been captivated by the promise of effortless cleaning solutions, and that’s what led me down the path of creating my own version of a popular cleaning product.
The quest for a spotless home isn’t new. Historically, people have always sought innovative ways to tackle grime and dirt, often relying on natural ingredients and resourceful methods. Think about it – our grandmothers probably had their own secret cleaning concoctions passed down through generations! Today, we’re taking that spirit of resourcefulness and applying it to modern cleaning challenges.
Let’s face it, store-bought cleaning products can be expensive, and sometimes, their ingredient lists are a bit…intimidating. That’s where this DIY Dawn Powerwash Cleaner trick comes in. Not only will you save money, but you’ll also have complete control over what goes into your cleaning solution, making it a safer and more eco-friendlier option for your home. Plus, who doesn’t love the satisfaction of creating something useful with their own two hands? Get ready to ditch the expensive sprays and embrace a cleaner, greener, and more budget-friendly way to keep your kitchen gleaming!
DIY Dawn Powerwash Cleaner: Save Money and Get Sparkling Clean!
Okay, let’s be honest, Dawn Powerwash is amazing. But those refills? They can really add up! I’m going to show you how to make your own version that works just as well, for a fraction of the cost. Trust me, your wallet (and your dishes) will thank you!
What You’ll Need
Before we dive in, let’s gather our supplies. This is a pretty simple recipe, so you probably already have most of these things on hand.
* **Dawn Dish Soap (Original Blue):** This is the key ingredient! The original blue formula seems to work best.
* **Rubbing Alcohol (Isopropyl Alcohol – 70% or 91%):** This helps with drying and sanitizing.
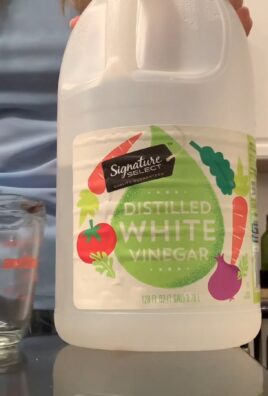
* **Water (Distilled is best, but tap water works too):** Distilled water will prevent mineral buildup in your sprayer.
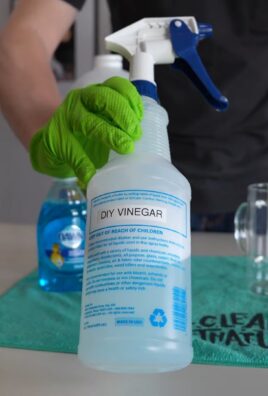
* **Spray Bottle:** You can reuse your empty Dawn Powerwash bottle (that’s what I do!), or any other sturdy spray bottle. Just make sure it’s clean!
* **Measuring Cups and Spoons:** For accurate measurements.
* **Funnel (Optional, but helpful):** Makes pouring easier and less messy.
Why This Works
You might be wondering, “Why does this simple mixture work so well?” The magic lies in the combination of ingredients:
* **Dawn Dish Soap:** This is a powerful degreaser and surfactant, meaning it breaks down grease and grime.
* **Rubbing Alcohol:** This helps the solution dry quickly and streak-free. It also acts as a disinfectant.
* **Water:** This dilutes the soap and alcohol to the right consistency for spraying.
Step-by-Step Instructions
Alright, let’s get to the fun part – making our DIY Dawn Powerwash!
1. **Empty and Rinse Your Spray Bottle:** If you’re reusing an old Dawn Powerwash bottle, make sure it’s completely empty and thoroughly rinsed with warm water. Any leftover soap residue can affect the performance of your homemade cleaner. I usually rinse mine several times to be sure.
2. **Measure the Rubbing Alcohol:** Using your measuring cup, pour 1/3 cup of rubbing alcohol into the spray bottle. The alcohol concentration (70% or 91%) doesn’t make a huge difference, but I prefer using 91% because it evaporates a bit faster.
3. **Add the Dawn Dish Soap:** Now, carefully measure 1/3 cup of Dawn dish soap and add it to the spray bottle. Be careful not to create too many bubbles while pouring. If you do, let them settle down before moving on to the next step.
4. **Top Off with Water:** Fill the rest of the spray bottle with water, leaving a little bit of space at the top. If you’re using distilled water, great! If not, tap water is fine too. Just be aware that tap water might leave some mineral deposits over time, especially if you have hard water.
5. **Gently Mix the Solution:** Screw the spray nozzle back onto the bottle tightly. Now, gently swirl the bottle to mix the ingredients. Avoid shaking vigorously, as this will create a lot of bubbles. You just want to make sure everything is well combined.
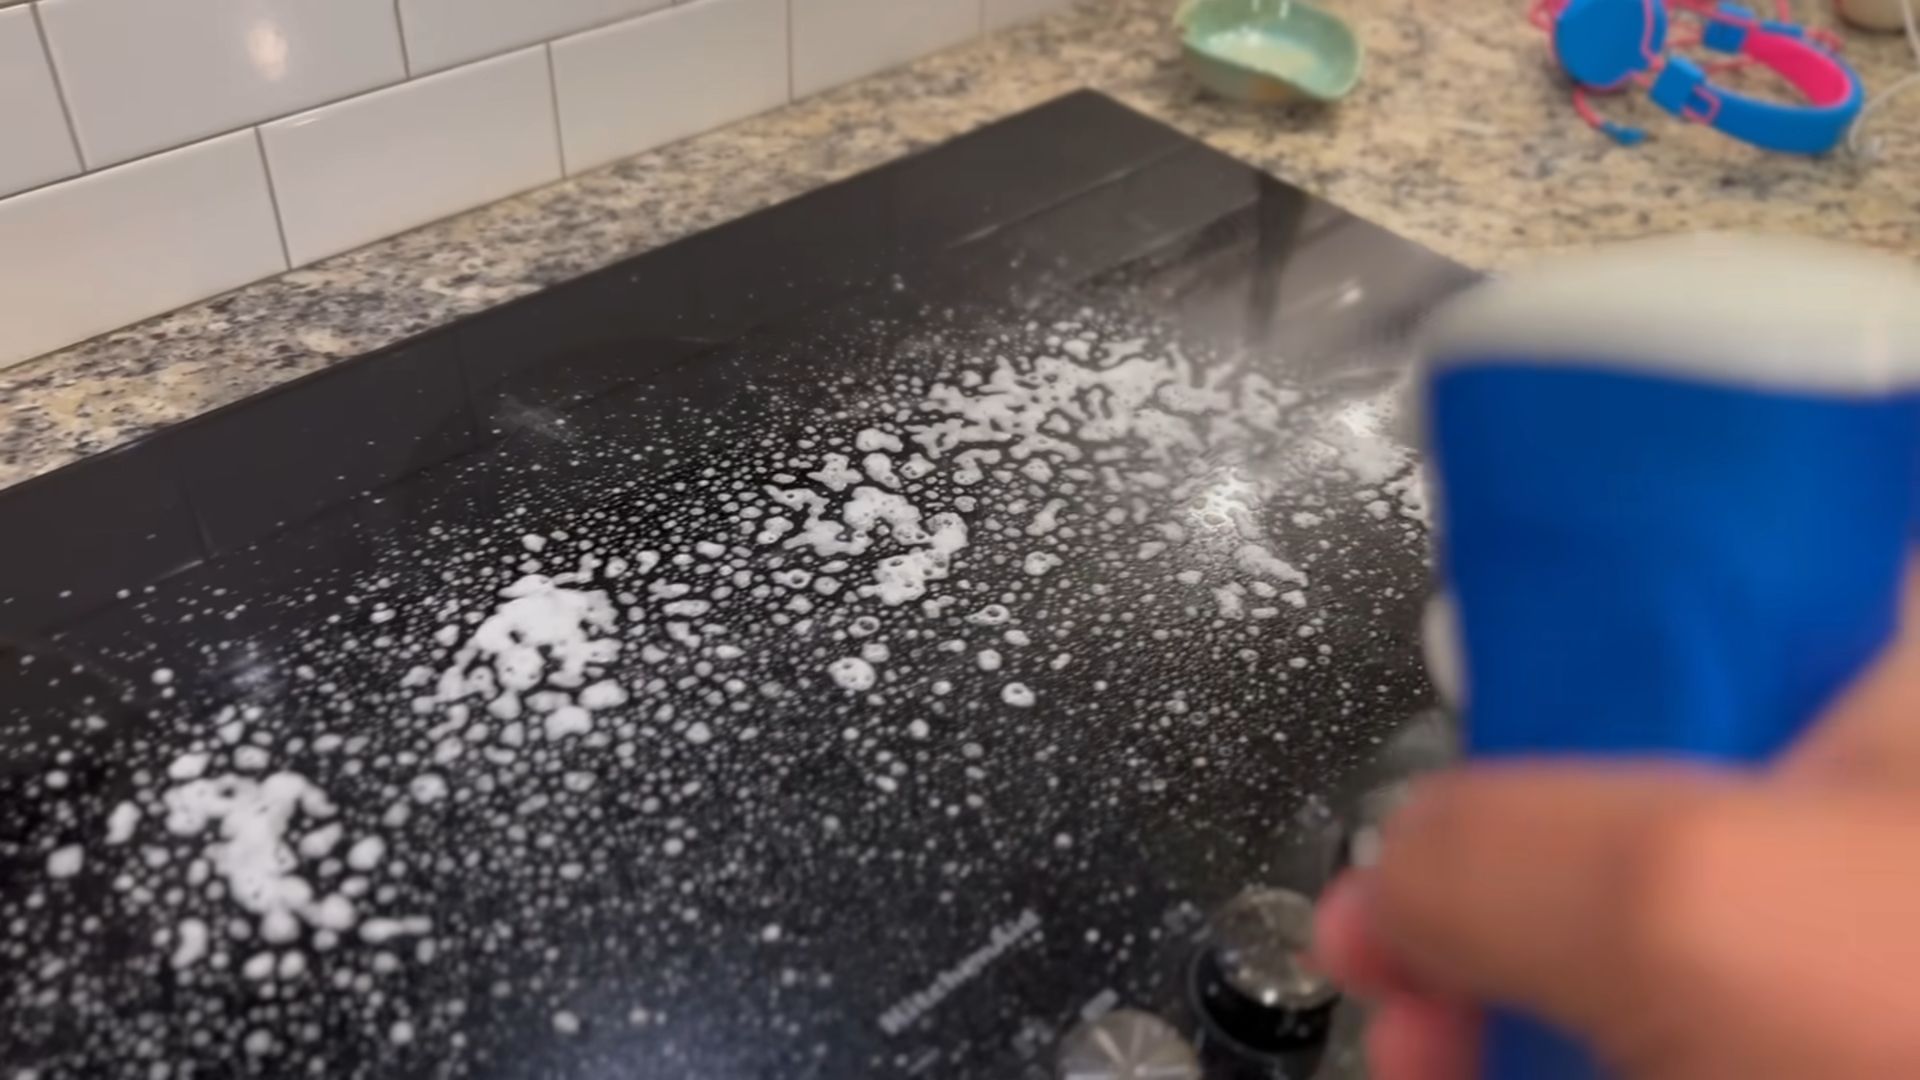
6. **Test Your DIY Powerwash:** Before you start spraying everything in sight, test your homemade Powerwash on a small, inconspicuous area. This will ensure that it doesn’t damage or discolor any surfaces. I usually test it on the bottom of my sink or on a small corner of my stovetop.
Using Your DIY Dawn Powerwash
Now that you’ve made your own Dawn Powerwash, let’s talk about how to use it effectively.
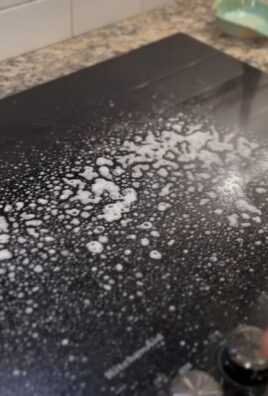
* **Spray Directly onto Surfaces:** Just like the original, you can spray your DIY Powerwash directly onto dishes, countertops, stovetops, sinks, and other surfaces that need cleaning.
* **Let it Sit for a Minute or Two:** For tough grease and grime, let the Powerwash sit for a minute or two before wiping it away. This gives the soap time to break down the dirt and make it easier to clean.
* **Wipe Clean with a Damp Cloth or Sponge:** After letting the Powerwash sit, wipe the surface clean with a damp cloth or sponge. You may need to rinse the cloth or sponge several times to remove all the soap residue.
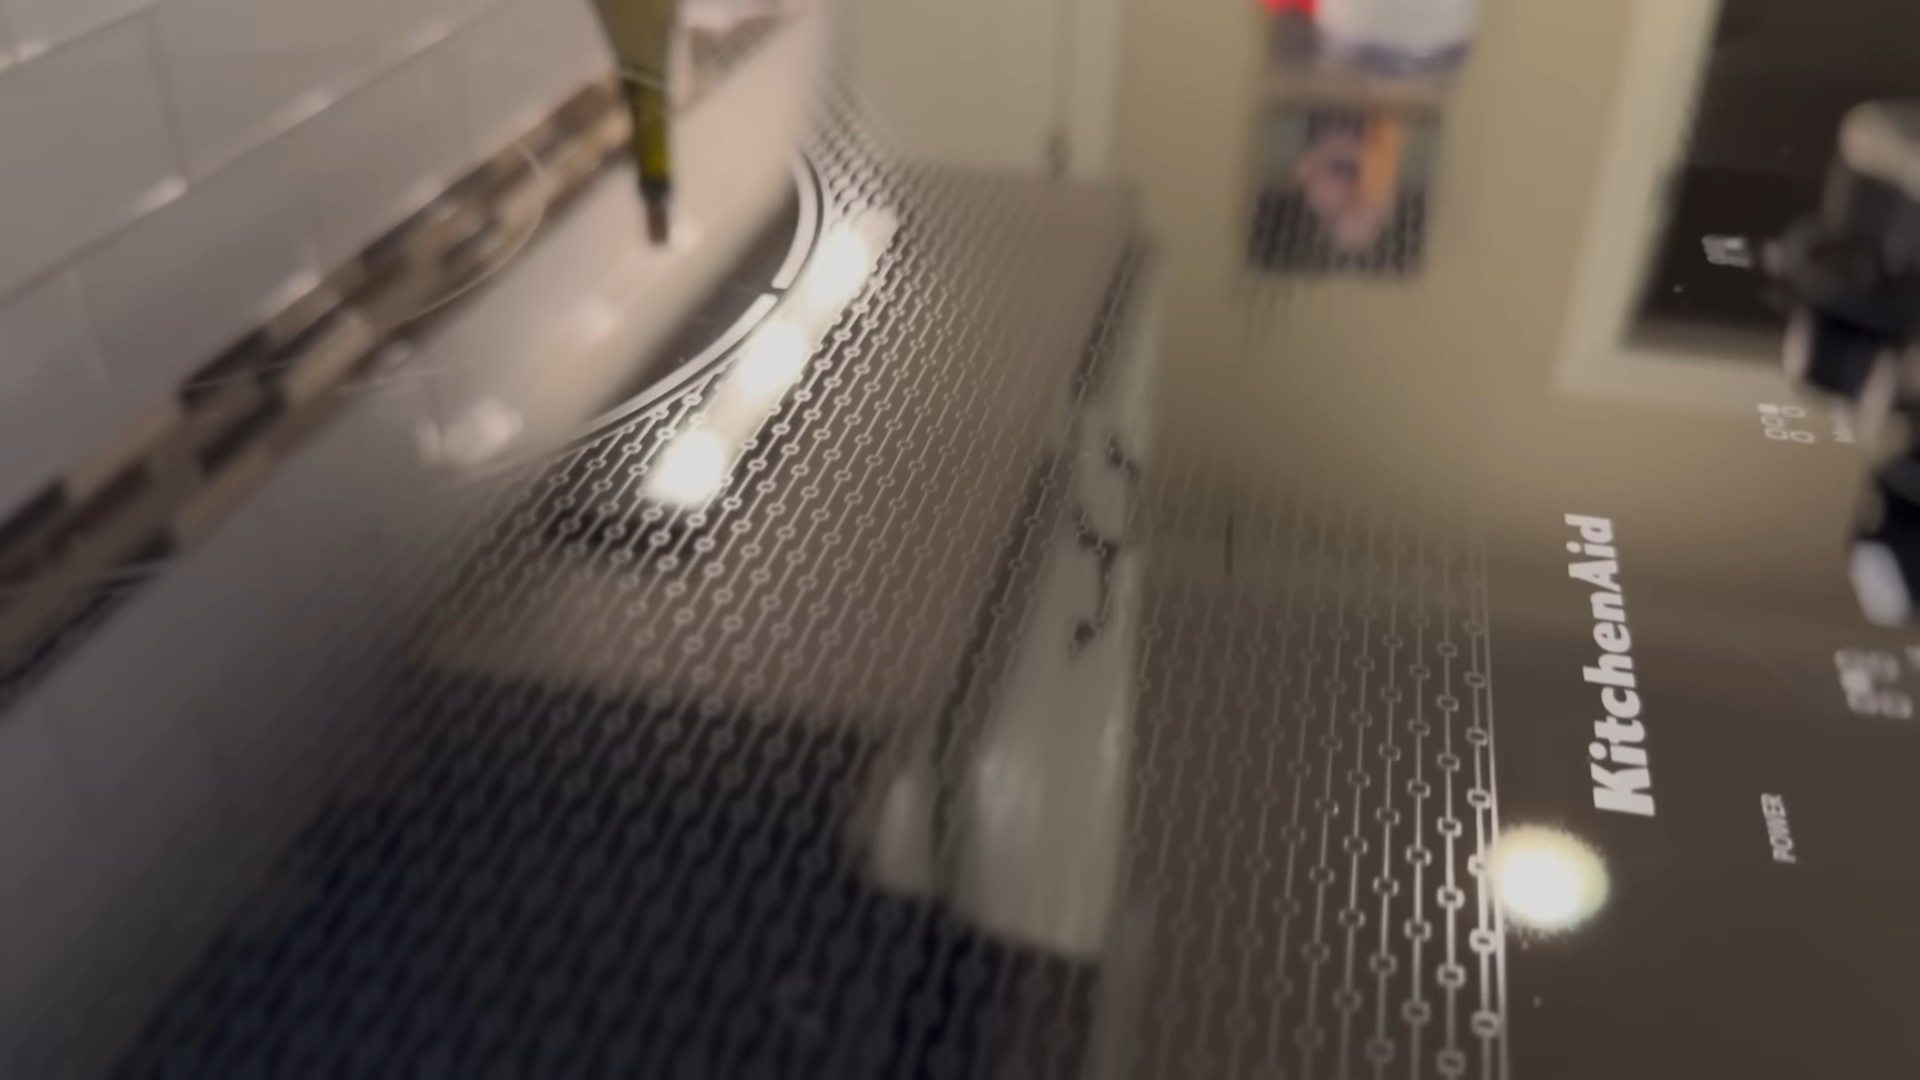
* **Dry with a Clean Towel:** For a streak-free finish, dry the surface with a clean towel. This is especially important for glass and stainless steel.
Where to Use Your DIY Powerwash
The great thing about this DIY cleaner is that it’s incredibly versatile. Here are just a few of the places where you can use it:
* **Dishes:** This is the most obvious use! It works great on greasy pots, pans, and plates.
* **Countertops:** Wipe down your countertops after cooking to remove spills and splatters.
* **Stovetop:** Clean up grease and food residue on your stovetop.
* **Sink:** Keep your sink sparkling clean by spraying it down with Powerwash after each use.
* **Microwave:** Clean up splatters and spills inside your microwave.
* **Oven Door:** Remove grease and grime from your oven door.
* **Bathroom:** Clean your bathroom sink, shower, and toilet with this versatile cleaner.
* **Greasy Tools:** Use it to degrease tools in your garage or workshop.
* **Outdoor Furniture:** Clean your outdoor furniture to remove dirt and grime.
Troubleshooting
Sometimes, things don’t go exactly as planned. Here are a few common issues you might encounter and how to fix them:
* **Too Many Bubbles:** If your Powerwash is creating too many bubbles, you may have used too much soap. Try diluting the mixture with a little more water.
* **Streaky Finish:** If you’re getting a streaky finish, you may not be using enough rubbing alcohol. Try adding a little more alcohol to the mixture. Also, make sure you’re drying the surface with a clean, dry towel.
* **Not Cleaning Effectively:** If your Powerwash isn’t cleaning as effectively as you’d like, you may need to let it sit on the surface for a longer period of time. You can also try using a slightly stronger concentration of soap.
* **Clogged Sprayer:** If your sprayer is clogged, try rinsing it with warm water. You can also try using a small needle or pin to clear any blockages. Using distilled water can help prevent clogs in the first place.
Tips and Tricks for Success
Here are a few extra tips and tricks to help you get the most out of your DIY Dawn Powerwash:
* **Use Warm Water:** Warm water helps to dissolve the soap and alcohol more effectively.
* **Don’t Overuse Soap:** A little bit of soap goes a long way. Using too much soap can leave a residue on surfaces.
* **Store in a Cool, Dark Place:** Store your DIY Powerwash in a cool, dark place to prevent the ingredients from breaking down.
* **Label Your Bottle:** Clearly label your spray bottle so you don’t accidentally use it for something else.
* **Experiment with Scents:** If you want to add a scent to your Powerwash, you can add a few drops of essential oil. Lemon, lavender, and tea tree oil are all great options. Just be sure to use essential oils that are safe for cleaning and won’t damage surfaces.
* **Make a Larger Batch:** If you use a lot of Powerwash, you can make a larger batch by simply multiplying the recipe. Just be sure to store it in an airtight container.
* **Adjust to Your Needs:** Feel free to adjust the recipe to suit your specific needs. If you have particularly greasy dishes, you might want to use a slightly stronger concentration of soap. If you have sensitive skin, you might want to use a slightly weaker concentration.
Safety Precautions
While this DIY cleaner is generally safe, it’s important to take a few precautions:
* **Keep Out of Reach of Children and Pets:** As with all cleaning products, keep your DIY Powerwash out of reach of children and pets.
* **Avoid Contact with Eyes:** Avoid getting the Powerwash in your eyes. If you do, rinse thoroughly with water.
* **Don’t Mix with Other Cleaners:** Never mix your DIY Powerwash with other cleaning products, as this could create dangerous fumes.
* **Test on a Small Area First:** Always test the Powerwash on a small, inconspicuous area before using it on a larger surface.
Cost Savings
One of the best things about making your own Dawn Powerwash is the cost savings. A bottle of Dawn Powerwash refill can cost several dollars, while the ingredients for this DIY version cost just pennies per batch. Over time, you can save a significant amount of money by making your own cleaner.
Environmental Benefits
In addition to saving money, making your own Dawn Powerwash is also better for the environment. By reusing your old spray bottle, you’re reducing plastic waste. You’re also using fewer chemicals than you
Conclusion
So, there you have it! Ditching the store-bought spray and embracing this DIY Dawn Powerwash Cleaner is more than just a cost-effective alternative; it’s a step towards a cleaner home, a greener planet, and a healthier wallet. We’ve walked you through the simple steps, highlighted the incredible versatility, and hopefully, convinced you that this is a game-changer for your cleaning routine.
But why is this DIY trick a must-try? Let’s recap. First, you’re saving money. Those pre-made Powerwash bottles add up quickly, and this homemade version costs pennies on the dollar. Second, you’re in control. You know exactly what’s going into your cleaner, avoiding harsh chemicals and unnecessary additives. This is especially important for those with sensitivities or allergies. Third, it’s incredibly effective. The combination of Dawn dish soap, rubbing alcohol, and water creates a powerful cleaning solution that tackles grease, grime, and everyday messes with ease. Fourth, it’s customizable. You can adjust the ratios to suit your specific needs and even add essential oils for a pleasant scent.
Speaking of customization, let’s explore some variations. For a boost of cleaning power, consider adding a tablespoon of borax to the mixture. Borax is a natural mineral that helps to cut through tough stains and deodorize surfaces. If you’re dealing with hard water, use distilled water instead of tap water to prevent mineral buildup. And for a refreshing scent, add a few drops of your favorite essential oils, such as lemon, lavender, or eucalyptus. Just be sure to research the safety of essential oils around pets and children before using them.
Another variation involves using different types of Dawn dish soap. While the original blue Dawn is a classic for a reason, you can experiment with other varieties, such as Dawn Platinum or Dawn Ultra. These formulas may offer even more cleaning power, especially for stubborn grease and grime. You can also try using Dawn Free & Clear for a fragrance-free option that’s gentle on sensitive skin.
Remember to always test your DIY cleaner on an inconspicuous area before applying it to the entire surface. This will help to ensure that it doesn’t damage or discolor the material. And be sure to store your homemade Powerwash cleaner in a labeled spray bottle to avoid confusion.
We’re confident that once you try this DIY Dawn Powerwash Cleaner, you’ll never go back to the store-bought stuff. It’s easy, effective, and eco-friendly – what’s not to love?
So, grab your ingredients, mix up a batch, and experience the cleaning power for yourself. We can’t wait to hear about your results! Share your experiences, tips, and variations in the comments below. Let’s build a community of DIY cleaning enthusiasts and help each other create a cleaner, healthier, and more sustainable home. What surfaces did you find it worked best on? Did you add any essential oils? What ratio did you find most effective for your cleaning needs? We want to know it all! Your feedback is invaluable and will help others discover the magic of this simple yet powerful cleaning solution. Happy cleaning!
Frequently Asked Questions (FAQ)
Is this DIY Dawn Powerwash Cleaner safe to use on all surfaces?
While this DIY cleaner is generally safe for most surfaces, it’s always best to test it on an inconspicuous area first. Avoid using it on delicate surfaces like unfinished wood, leather, or natural stone, as it may cause damage or discoloration. For these surfaces, consider using a cleaner specifically designed for them. Always read the manufacturer’s instructions for any surface you’re cleaning.
How long does this DIY cleaner last?
This DIY cleaner doesn’t contain any preservatives, so it’s best to use it within a few weeks. Over time, the ingredients may separate or lose their effectiveness. To ensure optimal cleaning power, make a fresh batch every month or so. Store it in a cool, dark place to prolong its shelf life.
Can I use a different type of dish soap instead of Dawn?
While Dawn dish soap is the recommended ingredient for this DIY cleaner, you can experiment with other brands. However, keep in mind that the results may vary. Dawn is known for its grease-cutting power and gentle formula, which makes it ideal for a variety of cleaning tasks. If you choose to use a different brand, be sure to select one that is non-toxic and safe for use on the surfaces you’ll be cleaning.
Can I add bleach to this DIY cleaner?
No, it is strongly discouraged to add bleach to this DIY cleaner. Mixing bleach with dish soap can create toxic fumes that are harmful to your health. Always use bleach separately and follow the manufacturer’s instructions carefully. Never mix bleach with any other cleaning products, as this can result in dangerous chemical reactions.
What is the best way to store this DIY cleaner?
Store your DIY cleaner in a labeled spray bottle in a cool, dark place. This will help to prevent the ingredients from separating and prolong its shelf life. Be sure to label the bottle clearly to avoid confusion and prevent accidental ingestion. Keep it out of reach of children and pets.
Can I use this DIY cleaner to clean my oven?
Yes, this DIY cleaner can be used to clean your oven, but it may require some extra effort. Preheat your oven to a low temperature (around 200°F) for 15-20 minutes, then turn it off. Spray the interior of the oven with the DIY cleaner and let it sit for several hours or overnight. Use a sponge or scrub brush to remove the loosened grime and grease. Rinse thoroughly with water. For stubborn stains, you may need to repeat the process or use a specialized oven cleaner.
Is this DIY cleaner safe for septic systems?
Yes, this DIY cleaner is generally safe for septic systems, as it contains biodegradable ingredients. However, it’s always a good idea to use it sparingly and avoid pouring large amounts down the drain. If you have any concerns about your septic system, consult with a professional.
Can I use this DIY cleaner to clean my car?
Yes, this DIY cleaner can be used to clean your car’s interior and exterior. However, be sure to test it on an inconspicuous area first to ensure that it doesn’t damage the paint or upholstery. Use a soft cloth or sponge to apply the cleaner and rinse thoroughly with water. Avoid using it on delicate surfaces like leather or suede.
What if I don’t have rubbing alcohol? Can I still make this?
While rubbing alcohol (isopropyl alcohol) is a key ingredient in this recipe due to its disinfecting and quick-drying properties, you can try substituting it with white vinegar. White vinegar is a natural disinfectant and degreaser, but it may leave a slight vinegar smell that will dissipate over time. The effectiveness might be slightly reduced without the rubbing alcohol, but it’s a viable alternative in a pinch. Use the same ratio as the rubbing alcohol in the original recipe.
My DIY cleaner is leaving streaks. What am I doing wrong?
Streaking can occur if you’re using too much cleaner or if the surface isn’t properly rinsed. Try using less cleaner and wiping the surface with a clean, damp cloth after spraying. You can also try using distilled water instead of tap water, as hard water can contribute to streaking. Ensure you’re using a microfiber cloth for wiping, as they are excellent at absorbing liquids and leaving a streak-free finish.
Leave a Comment