
DIY Dust Repellent Furniture Polish: Tired of battling dust bunnies that seem to multiply overnight? I know the feeling! It’s a never-ending cycle of dusting, only to find your furniture covered again within days. But what if I told you there’s a simple, natural solution that not only cleans but also repels dust, keeping your furniture looking pristine for longer?
For centuries, people have sought ways to protect and beautify their wooden furniture. From ancient beeswax polishes to modern chemical concoctions, the quest for a dust-free home has been a constant. But often, these solutions come with harsh chemicals and unpleasant odors. That’s where this DIY trick comes in!
In today’s busy world, who has time to dust every single day? This DIY dust repellent furniture polish is a game-changer because it saves you time and effort. It’s also a fantastic way to reduce your exposure to potentially harmful chemicals found in commercial polishes. Plus, you probably already have most of the ingredients in your pantry! I’m excited to share this simple recipe that will transform your dusting routine and leave your furniture gleaming.
DIY Dust Repellent Furniture Polish: Say Goodbye to Grime!
Okay, friends, let’s face it: dusting is the bane of our existence. It feels like the second you finish, the dust bunnies are already throwing a party on your coffee table. But what if I told you there’s a way to make your furniture stay cleaner, longer? That’s right, we’re diving into the world of DIY dust repellent furniture polish! This recipe is not only super effective, but it’s also made with natural ingredients, so you can ditch those harsh chemicals and breathe easy.
Why DIY Furniture Polish?
Before we get started, let’s talk about why making your own furniture polish is a fantastic idea:
* Cost-Effective: Store-bought polishes can be pricey. This DIY version uses ingredients you probably already have in your pantry, saving you money.
* Natural Ingredients: You control what goes into your polish, avoiding harsh chemicals, artificial fragrances, and potentially harmful ingredients.
* Customizable: You can adjust the recipe to suit your specific needs and preferences. Want a stronger scent? Add more essential oil!
* Dust Repellent: The ingredients in this recipe work together to create a protective barrier that repels dust and keeps your furniture looking cleaner for longer.
* Good for Your Furniture: Many commercial polishes contain silicones that can build up over time, dulling the finish of your furniture. This DIY polish nourishes and protects without the buildup.
What You’ll Need
Here’s a list of the ingredients and supplies you’ll need to whip up this amazing dust repellent furniture polish:
* 1/4 cup Olive Oil: This acts as a conditioner and adds shine to your furniture.
* 1/4 cup White Vinegar: Vinegar helps to remove grime and dirt, and it’s a natural disinfectant. Don’t worry, the smell dissipates quickly!
* 2 tablespoons Lemon Juice: Lemon juice adds a fresh scent and helps to cut through grease.
* 10-15 drops Lemon Essential Oil (optional): This enhances the lemon scent and adds extra cleaning power. You can substitute with other essential oils like orange, lavender, or cedarwood.
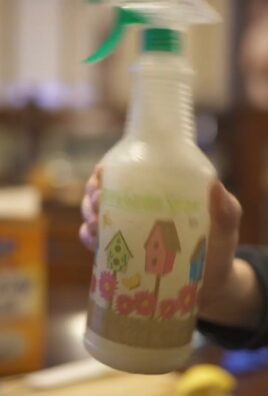
* Spray Bottle: A clean, empty spray bottle is essential for applying the polish.
* Microfiber Cloths: These are perfect for dusting and polishing because they trap dust and dirt without scratching the surface.
* Measuring Cups and Spoons: For accurate measurements.
* Funnel (optional): Makes it easier to pour the ingredients into the spray bottle.
Step-by-Step Instructions: Making Your Dust Repellent Polish
Alright, let’s get down to business! Here’s how to make your very own dust repellent furniture polish:
1. Gather Your Ingredients and Supplies: Make sure you have everything you need within easy reach. This will make the process smoother and more efficient.
2. Combine the Ingredients: In a measuring cup or small bowl, combine the olive oil, white vinegar, and lemon juice.
3. Add Essential Oil (Optional): If you’re using essential oil, add 10-15 drops to the mixture. Stir well to combine.
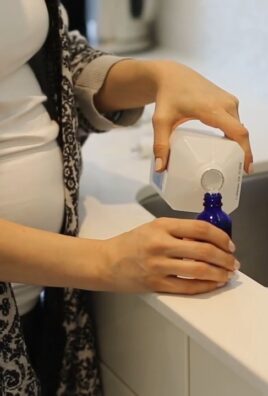
4. Pour into Spray Bottle: Using a funnel (if you have one), carefully pour the mixture into your clean spray bottle.
5. Shake Well: Secure the spray bottle lid and shake well to ensure all the ingredients are thoroughly mixed.
6. Label Your Bottle: It’s always a good idea to label your DIY products so you know what’s inside. You can use a label maker or simply write on a piece of tape.
Using Your Dust Repellent Polish: A Guide to Sparkling Furniture
Now that you’ve made your polish, it’s time to put it to work! Here’s how to use it effectively:
1. Dust First: Before applying the polish, use a dry microfiber cloth to remove any loose dust and debris from the surface of your furniture. This will prevent you from simply spreading the dust around.
2. Spray Lightly: Lightly spray the polish onto a clean microfiber cloth. Avoid spraying directly onto the furniture, as this can lead to over-saturation and potential damage.
3. Wipe the Surface: Gently wipe the surface of your furniture with the damp microfiber cloth, following the grain of the wood.
4. Buff to a Shine: Use a clean, dry microfiber cloth to buff the surface to a shine. This will remove any excess polish and leave your furniture looking its best.
5. Test in an Inconspicuous Area: Before polishing your entire piece of furniture, test the polish in a small, inconspicuous area to ensure it doesn’t damage the finish.
6. Repeat as Needed: Depending on how dusty your furniture is, you may need to repeat the process.
Tips and Tricks for Optimal Results
Here are a few extra tips and tricks to help you get the most out of your DIY dust repellent furniture polish:
* Shake Before Each Use: The ingredients in the polish may separate over time, so be sure to shake the bottle well before each use.
* Use Sparingly: A little goes a long way! Avoid over-saturating your furniture with polish.
* Clean Your Microfiber Cloths Regularly: Dirty microfiber cloths can spread dust and dirt, so be sure to wash them regularly.
* Store in a Cool, Dark Place: To prolong the shelf life of your polish, store it in a cool, dark place away from direct sunlight.
* Adjust the Recipe to Your Needs: If you find that the polish is too oily, reduce the amount of olive oil. If you want a stronger scent, add more essential oil.
* Use on a Variety of Surfaces: This polish can be used on a variety of surfaces, including wood, laminate, and even leather. However, always test in an inconspicuous area first.
* Don’t Use on Unsealed Wood: This polish is not suitable for use on unsealed wood, as the oil can penetrate the wood and cause staining.
* Consider the Finish: For antique furniture or pieces with delicate finishes, consult a professional before using any type of polish.
* Make a Larger Batch: If you have a lot of furniture to polish, you can easily double or triple the recipe.
* Experiment with Essential Oils: Try different essential oil combinations to create your own unique scent. Lavender and cedarwood are great options for a calming and relaxing aroma.
Troubleshooting Common Issues
Sometimes, things don’t go exactly as planned. Here are some common issues you might encounter and how to fix them:
* Streaky Finish: If you’re getting a streaky finish, you may be using too much polish. Try using less polish and buffing the surface more thoroughly.
* Oily Residue: If you’re leaving an oily residue, reduce the amount of olive oil in the recipe.
* Dull Finish: If your furniture looks dull after polishing, try using a different microfiber cloth or adding a few drops of lemon essential oil to the polish.
* Strong Vinegar Smell: The vinegar smell should dissipate quickly. If it lingers, try adding more lemon juice or essential oil to the polish.
* Allergic Reaction: If you experience an allergic reaction to any of the ingredients, discontinue use immediately and consult a doctor.
Beyond Furniture: Other Uses for Your DIY Polish
This amazing polish isn’t just for furniture! Here are a few other ways you can use it around your home:
* Leather Shoes and Bags: Use a small amount of polish to condition and shine your leather shoes and bags.
* Stainless Steel Appliances: Polish your stainless steel appliances to remove fingerprints and smudges.
* Wood Floors: Add a small amount of polish to your mop water to clean and shine your wood floors. (Test in an inconspicuous area first!)
* Car Interior: Use the polish to clean and condition the leather or vinyl surfaces in your car.
* Musical Instruments: Polish your wooden musical instruments to keep them looking their best.
The Science Behind the Shine
Let’s break down why this DIY polish works so well:
* Olive Oil: Olive oil is a natural emollient, meaning it helps to moisturize and protect the surface of your furniture. It also adds a beautiful shine.
* White Vinegar: Vinegar is a mild acid that helps to dissolve dirt, grime, and hard water stains. It also has antibacterial properties.
* Lemon Juice: Lemon juice contains citric acid, which is a natural cleaning agent. It also adds a fresh, clean scent.
* Essential Oils: Essential oils not only add a pleasant scent, but they also have various cleaning and disinfecting properties. Lemon essential oil, for example, is known for its degreasing and antibacterial properties.
By combining these ingredients, you create a powerful cleaning and polishing solution that is both effective and safe for your furniture.
Final Thoughts: Enjoy Your Dust-Free Home!
Conclusion
So, there you have it! Ditching the store-bought furniture polish and embracing this DIY dust repellent furniture polish is more than just a cost-effective choice; it’s a step towards a healthier home and a more sustainable lifestyle. We’ve shown you how simple it is to create a powerful cleaning solution using ingredients you likely already have in your pantry. Think about it: no more harsh chemicals lingering in the air, no more mysterious ingredients lists you can’t decipher, and significantly less dust clinging to your beloved furniture.
But the benefits extend beyond just cleanliness and cost savings. This homemade polish actually nourishes your wood, leaving it with a natural, healthy sheen that commercial products often fail to achieve. The olive oil moisturizes, the vinegar cleans and disinfects, and the essential oils add a delightful fragrance that will freshen up your entire room. It’s a win-win-win!
Don’t be afraid to experiment with different essential oil combinations to find your signature scent. Lavender and lemon create a calming and refreshing aroma, while cedarwood and orange offer a warm and inviting ambiance. You could even try adding a few drops of tea tree oil for its antibacterial properties, especially if you have pets or young children. Remember to always test a small, inconspicuous area first to ensure compatibility with your furniture’s finish.
For those with particularly delicate or antique furniture, consider reducing the amount of vinegar or substituting it with a gentler alternative like lemon juice. And if you’re dealing with stubborn stains or buildup, a slightly stronger concentration of vinegar might be necessary. The beauty of this DIY approach is that you can customize the formula to perfectly suit your needs and preferences.
We truly believe that once you try this DIY dust repellent furniture polish, you’ll never go back to the store-bought stuff. It’s effective, eco-friendly, and incredibly satisfying to create something so useful with your own two hands.
So, what are you waiting for? Gather your ingredients, mix up a batch, and experience the difference for yourself. We’re confident that you’ll be amazed by the results. And most importantly, we want to hear about your experience! Share your tips, variations, and before-and-after photos in the comments below. Let’s build a community of DIY enthusiasts who are passionate about creating a cleaner, healthier, and more beautiful home. Your feedback will not only help others but also inspire us to continue sharing valuable DIY solutions. Let us know what essential oil combinations you loved the most, or if you found a particular ratio of ingredients that worked wonders on your furniture. We can’t wait to see what you create!
Frequently Asked Questions
What types of furniture can I use this DIY polish on?
This DIY dust repellent furniture polish is generally safe for most types of finished wood furniture, including tables, chairs, dressers, and cabinets. However, it’s crucial to test it on a small, inconspicuous area first, especially if you have antique or delicate furniture. Avoid using it on unfinished wood, as the moisture could damage the surface. For furniture with a high-gloss finish, use the polish sparingly and buff thoroughly to prevent streaks. If you are unsure about the type of finish on your furniture, consult a professional before using any homemade polish.
How often should I use this DIY furniture polish?
The frequency of polishing depends on how quickly dust accumulates in your home and the type of furniture you’re polishing. Generally, polishing every 2-4 weeks is sufficient for most furniture. However, if you live in a dusty environment or have furniture that is frequently exposed to sunlight, you may need to polish it more often. Over-polishing can lead to buildup, so it’s best to err on the side of caution. Observe your furniture and polish it only when it starts to look dull or dusty.
Can I use different types of oil instead of olive oil?
Yes, you can experiment with different types of oil, but olive oil is generally recommended for its moisturizing properties and availability. Other options include almond oil, jojoba oil, and coconut oil (melted). Almond oil is a good choice for its light texture and pleasant scent. Jojoba oil is similar to the natural oils produced by our skin, making it a gentle and effective moisturizer for wood. Coconut oil can add a nice shine, but it’s important to use it sparingly as it can leave a greasy residue if overapplied. Always test any new oil on a small, hidden area before applying it to the entire piece of furniture.
What if I don’t have essential oils? Can I still make the polish?
Yes, you can definitely make the polish without essential oils. The essential oils primarily add fragrance and some potential antibacterial benefits, but they are not essential for the polish to be effective. If you don’t have essential oils, simply omit them from the recipe. The olive oil and vinegar will still clean and polish your furniture effectively. You can also consider adding a small amount of lemon juice for a fresh scent.
How long does this DIY furniture polish last?
This DIY dust repellent furniture polish typically lasts for about 2-3 months when stored in an airtight container in a cool, dark place. Over time, the essential oils may lose their potency, and the mixture may separate slightly. If you notice any significant changes in color, odor, or consistency, it’s best to discard the polish and make a fresh batch. To maximize its shelf life, avoid exposing the polish to direct sunlight or extreme temperatures.
Is this polish safe for pets and children?
While this DIY dust repellent furniture polish is generally safer than commercial polishes, it’s still important to exercise caution when using it around pets and children. The essential oils can be irritating if ingested or applied directly to the skin. Keep the polish out of reach of children and pets, and avoid using it on surfaces that they frequently come into contact with. If you are concerned about potential allergies or sensitivities, consider using essential oils that are known to be safe for pets and children, such as lavender or chamomile. Always supervise children when they are helping with cleaning activities.
How do I clean the cloth after using the polish?
After using the polish, wash the cloth thoroughly with warm water and soap. You can also add a small amount of vinegar to the wash to help remove any oily residue. If the cloth is heavily soiled, you may need to pre-soak it in a solution of water and baking soda before washing it. Allow the cloth to air dry completely before storing it. Avoid using fabric softener, as it can leave a residue on the cloth that may interfere with the effectiveness of the polish.
Leave a Comment