
DIY Peroxide Cleaners Recipes: Unlock the sparkling potential of your home with the power of hydrogen peroxide! Are you tired of harsh chemicals and sky-high cleaning bills? I know I was! That’s why I dove headfirst into the world of DIY cleaning, and let me tell you, it’s been a game-changer. For generations, resourceful homemakers have sought natural and effective ways to keep their homes clean, often turning to simple, readily available ingredients. Think about your grandmother’s cleaning rituals – chances are, she had a few tricks up her sleeve that didn’t involve a trip to the chemical aisle.
Today, we’re rediscovering that wisdom, and one of the most versatile tools in our arsenal is hydrogen peroxide. But why peroxide? Well, it’s a fantastic disinfectant, deodorizer, and stain remover, and when used correctly, it’s a much gentler alternative to many commercial cleaners. Plus, it’s incredibly affordable! This article isn’t just about cleaning; it’s about empowering you to create a healthier, happier home environment, one DIY recipe at a time. We’ll explore a range of DIY Peroxide Cleaners Recipes, from tackling stubborn bathroom grime to freshening up your kitchen, all while saving money and reducing your environmental impact. Get ready to ditch the chemicals and embrace the clean!
DIY Peroxide Cleaners: Your Guide to Sparkling Clean with a Single Ingredient!
Hey there, fellow cleaning enthusiasts! I’m so excited to share my favorite DIY peroxide cleaner recipes with you. Hydrogen peroxide is a fantastic, eco-friendly alternative to harsh chemicals, and it’s probably already sitting in your medicine cabinet! It’s a natural disinfectant, deodorizer, and stain remover. I’ve been using these recipes for years, and they’ve saved me a ton of money and kept my home sparkling. Let’s dive in!
Why Hydrogen Peroxide?
Before we get started, let’s quickly recap why hydrogen peroxide is such a cleaning superstar:
* It’s a disinfectant: Hydrogen peroxide kills bacteria, viruses, and fungi, making it perfect for sanitizing surfaces.
* It’s a deodorizer: It neutralizes odors instead of just masking them.
* It’s a stain remover: It can lift stains from fabrics, carpets, and other surfaces.
* It’s eco-friendly: It breaks down into water and oxygen, so it’s safe for the environment.
* It’s affordable: You can find it at any drugstore or supermarket for a few bucks.
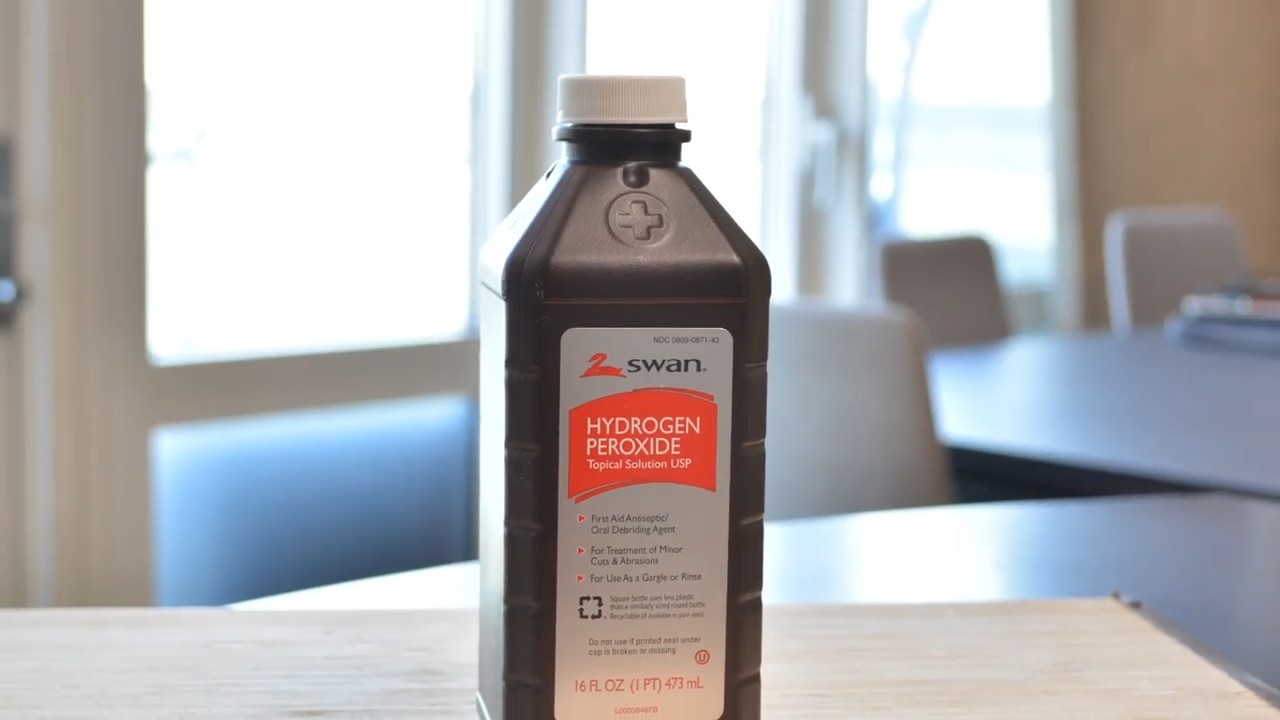
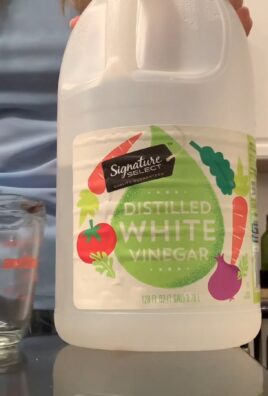
Important Safety Note: Always use 3% hydrogen peroxide (the kind you find in drugstores) for cleaning. Higher concentrations can be dangerous. Always test any cleaner in an inconspicuous area first to ensure it doesn’t damage the surface. And never, ever mix hydrogen peroxide with vinegar or bleach, as this can create toxic fumes!
General Guidelines for Using Hydrogen Peroxide
* Storage: Store hydrogen peroxide in its original dark bottle in a cool, dark place. Light and heat can cause it to break down and lose its effectiveness.
* Application: Use a spray bottle for easy application.
* Contact Time: Allow the hydrogen peroxide to sit on the surface for at least 5-10 minutes to disinfect properly.
* Rinsing: Rinse the surface with water after cleaning, especially if it’s a food-contact surface.
* Testing: Always test on a small, hidden area first to ensure it doesn’t discolor or damage the material.
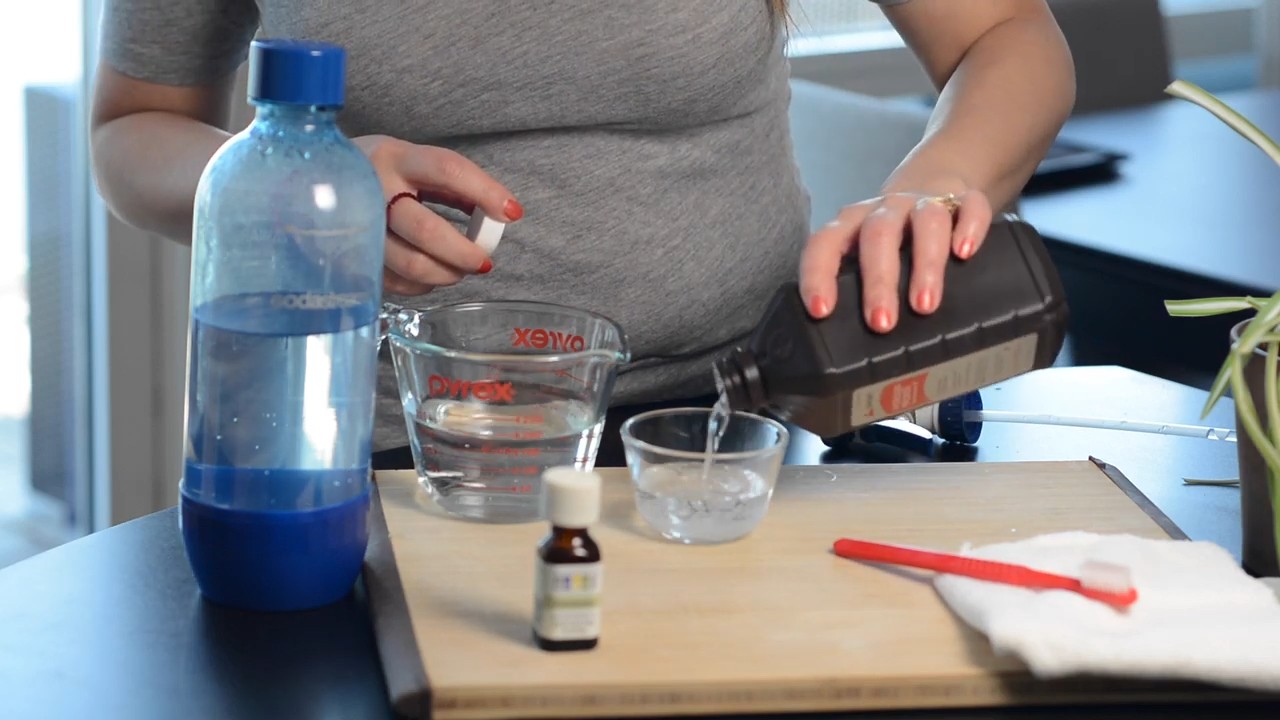
Recipe 1: All-Purpose Hydrogen Peroxide Cleaner
This is my go-to cleaner for almost everything! It’s gentle enough for everyday use but powerful enough to tackle grime and germs.
Ingredients:
* 1 part 3% hydrogen peroxide
* 2 parts water
* Optional: A few drops of your favorite essential oil (lemon, lavender, or tea tree are great choices)
Instructions:
1. Mix the solution: In a clean spray bottle, combine the hydrogen peroxide and water.
2. Add essential oil (optional): If you’re using essential oil, add a few drops to the spray bottle. I usually go for about 5-10 drops, depending on the size of the bottle and the strength of the oil.
3. Shake well: Give the bottle a good shake to mix everything together.
4. Spray and wipe: Spray the cleaner onto the surface you want to clean and let it sit for a few minutes.
5. Wipe clean: Wipe the surface with a clean cloth or sponge.
6. Rinse (optional): If you’re cleaning a food-contact surface, rinse it with water after wiping.
Where to Use It:
* Countertops
* Sinks
* Toilets
* Showers
* Doorknobs
* Light switches
* Kids’ toys
Recipe 2: Hydrogen Peroxide Toilet Bowl Cleaner
Say goodbye to harsh chemical toilet bowl cleaners! This recipe is simple, effective, and much better for the environment.
Ingredients:
* 1/2 cup 3% hydrogen peroxide
Instructions:
1. Pour into the bowl: Pour the hydrogen peroxide directly into the toilet bowl.
2. Let it sit: Let it sit for at least 30 minutes, or even overnight for tough stains.
3. Scrub: Scrub the bowl with a toilet brush.
4. Flush: Flush the toilet.
Tips and Tricks:
* For extra cleaning power, sprinkle some baking soda into the bowl before adding the hydrogen peroxide. The fizzing action will help loosen stains.
* For stubborn stains, repeat the process or use a pumice stone to gently scrub the stain.
Recipe 3: Hydrogen Peroxide Laundry Stain Remover
This is a lifesaver for those pesky stains on clothes! I’ve used it on everything from grass stains to blood stains, and it works like a charm.
Ingredients:
* 3% hydrogen peroxide
Instructions:
1. Test on a hidden area: Before applying to the entire stain, test the hydrogen peroxide on a hidden area of the fabric to make sure it doesn’t cause discoloration.
2. Apply to the stain: Pour or spray the hydrogen peroxide directly onto the stain.
3. Let it sit: Let it sit for 10-15 minutes.
4. Blot the stain: Blot the stain with a clean cloth or paper towel. Don’t rub, as this can spread the stain.
5. Launder as usual: Wash the garment as usual.
Important Notes:
* This works best on fresh stains.
* Avoid using on delicate fabrics like silk or wool.
* Do not use on colored fabrics without testing first, as it may cause fading.
Recipe 4: Hydrogen Peroxide Mold and Mildew Remover
Mold and mildew can be a real pain, but hydrogen peroxide can help! This recipe is great for bathrooms, kitchens, and other areas prone to moisture.
Ingredients:
* 3% hydrogen peroxide
Instructions:
1. Spray the affected area: Spray the hydrogen peroxide directly onto the mold or mildew.
2. Let it sit: Let it sit for 10-15 minutes.
3. Scrub: Scrub the area with a brush or sponge.
4. Wipe clean: Wipe the area with a clean cloth.
5. Repeat if necessary: If the mold or mildew is stubborn, repeat the process.
Safety Precautions:
* Wear gloves and eye protection when dealing with mold and mildew.
* Ensure proper ventilation in the area you’re cleaning.
* For large mold infestations, it’s best to consult a professional.
Recipe 5: Hydrogen Peroxide Whitening Paste for Grout
Dirty grout can make your whole bathroom look dingy. This whitening paste will bring your grout back to life!
Ingredients:
* 1/2 cup baking soda
* 1/4 cup 3% hydrogen peroxide
Instructions:
1. Mix the ingredients: In a small bowl, mix the baking soda and hydrogen peroxide to form a paste.
2. Apply to the grout: Apply the paste to the grout lines using an old toothbrush or grout brush.
3. Let it sit: Let it sit for 5-10 minutes.
4. Scrub: Scrub the grout lines with the brush.
5. Rinse: Rinse the grout with water.
Tips and Tricks:
* For extra cleaning power, add a few drops of dish soap to the paste.
* Use a grout sealant after cleaning to help prevent future staining.
Recipe 6: Hydrogen Peroxide Cutting Board Sanitizer
Cutting boards can harbor bacteria, so it’s important to sanitize them regularly. This recipe is quick, easy, and effective.
Ingredients:
* 3% hydrogen peroxide
Instructions:
1. Wash the cutting board: Wash the cutting board with soap and water.
2. Spray with hydrogen peroxide: Spray the cutting board with hydrogen peroxide.
3. Let it sit: Let it sit for 5-10 minutes.
4. Rinse: Rinse the cutting board with water.
5. Dry: Allow the cutting board to air dry or dry it with a clean towel.
Important Notes:
* This is safe for wood, plastic, and glass cutting boards.
* For wooden cutting boards, you can also rub the surface with lemon juice after sanitizing to help deodorize and prevent odors.
Recipe 7: Hydrogen Peroxide Produce Wash
I always wash my fruits and vegetables before eating them, and hydrogen peroxide is a great way to remove dirt, pesticides, and bacteria.
Ingredients:
* 1/4 cup 3% hydrogen peroxide
* 1 gallon of water
Instructions:
1. Mix the solution: In a large bowl or sink, mix the hydrogen peroxide and water.
2. Soak the produce: Soak the fruits and
Conclusion
So, there you have it! Ditching those expensive, chemical-laden cleaners and embracing the power of DIY Peroxide Cleaners is not just a trend; it’s a smart, effective, and environmentally conscious choice. We’ve explored a range of recipes, from the simple yet potent all-purpose spray to the targeted solutions for stubborn stains and grimy bathrooms. The versatility of hydrogen peroxide, combined with readily available ingredients like vinegar, baking soda, and essential oils, allows you to create customized cleaning solutions tailored to your specific needs and preferences.
Why is this a must-try? Because it’s effective, affordable, and safer for your family and the environment. You’re reducing your exposure to harsh chemicals, saving money on cleaning supplies, and minimizing your environmental footprint, all while achieving sparkling clean results. It’s a win-win-win!
But don’t stop there! Feel free to experiment with different essential oil combinations to create your signature scents. Lavender and tea tree oil offer antibacterial properties and a calming aroma, while lemon and eucalyptus provide a refreshing and invigorating clean. For tougher stains, consider adding a small amount of borax to your peroxide solution, but always test it in an inconspicuous area first. You can also use these DIY Peroxide Cleaners to freshen up your laundry, whiten your grout, or even sanitize your cutting boards. The possibilities are endless!
We’re confident that once you experience the cleaning power and cost-effectiveness of these DIY Peroxide Cleaners, you’ll never go back to store-bought alternatives. It’s time to take control of your cleaning routine and create a healthier, happier home.
Now, we want to hear from you! Try out these recipes, experiment with your own variations, and share your experiences in the comments below. What are your favorite DIY Peroxide Cleaners? What challenges did you encounter, and how did you overcome them? Let’s build a community of DIY cleaning enthusiasts and empower each other to create cleaner, greener homes. Don’t forget to share this article with your friends and family so they can join the DIY cleaning revolution too!
Frequently Asked Questions (FAQs)
What is the concentration of hydrogen peroxide I should use for cleaning?
The most common concentration of hydrogen peroxide available for household use is 3%. This is generally safe and effective for cleaning purposes. Higher concentrations, such as 6% or higher, are available but should be handled with extreme caution, as they can cause skin and eye irritation. Always wear gloves and eye protection when working with higher concentrations of hydrogen peroxide. For most of the recipes outlined in this article, 3% hydrogen peroxide is perfectly adequate.
Can I mix hydrogen peroxide with vinegar?
While both hydrogen peroxide and vinegar are effective cleaning agents, it’s generally not recommended to mix them directly in a closed container. When combined, they can create peracetic acid, which in high concentrations can be irritating to the respiratory system and skin. However, you can use them sequentially. For example, you can spray a surface with vinegar, let it sit for a few minutes, and then spray it with hydrogen peroxide. This method allows you to harness the cleaning power of both without the risk of creating harmful fumes. Always ensure proper ventilation when using either product.
Is hydrogen peroxide safe to use on all surfaces?
Hydrogen peroxide is generally safe for most surfaces, but it’s always a good idea to test it in an inconspicuous area first, especially on delicate or colored materials. It can sometimes lighten or discolor certain fabrics or finishes. Avoid using it on natural stone surfaces like marble or granite, as it can etch or damage them. It’s also best to avoid using it on unsealed wood, as it can penetrate and cause discoloration. When in doubt, test a small area first.
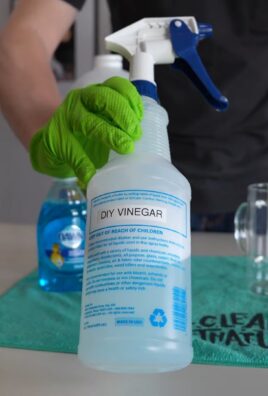
How should I store my DIY Peroxide Cleaners?
Store your DIY Peroxide Cleaners in a dark, opaque spray bottle. Hydrogen peroxide degrades when exposed to light, so using a dark bottle will help maintain its effectiveness. Label the bottle clearly with the contents and the date it was made. Store the bottle in a cool, dry place away from direct sunlight and heat. Keep it out of reach of children and pets.
How long will my DIY Peroxide Cleaners last?
DIY Peroxide Cleaners typically have a shelf life of about 1-3 months. The hydrogen peroxide will gradually break down over time, reducing its effectiveness. To ensure optimal cleaning power, it’s best to make small batches of your cleaners and use them within a few months. You can tell if your cleaner is losing its potency if it no longer bubbles or fizzes when applied to a surface.
Can I use essential oils in all of the DIY Peroxide Cleaners recipes?
Yes, you can add essential oils to most of the DIY Peroxide Cleaners recipes. Essential oils not only provide a pleasant scent but also offer additional cleaning and disinfecting properties. Some popular choices include tea tree oil, lavender oil, lemon oil, and eucalyptus oil. Start with a few drops and adjust the amount to your preference. Be sure to use high-quality, pure essential oils for the best results.
What are some safety precautions I should take when using DIY Peroxide Cleaners?
Always wear gloves when handling hydrogen peroxide, especially in higher concentrations. Avoid getting it in your eyes, and if you do, rinse immediately with plenty of water. Ensure proper ventilation when using DIY Peroxide Cleaners, especially in enclosed spaces. Never mix hydrogen peroxide with bleach, as this can create toxic chlorine gas. Keep DIY Peroxide Cleaners out of reach of children and pets.
Can I use DIY Peroxide Cleaners to clean my toilet?
Yes, hydrogen peroxide is an excellent choice for cleaning and disinfecting your toilet. You can pour about a cup of 3% hydrogen peroxide into the toilet bowl and let it sit for about 30 minutes. Then, scrub the bowl with a toilet brush and flush. For stubborn stains, you can combine hydrogen peroxide with baking soda to create a paste and apply it to the stains. Let it sit for a few hours or overnight before scrubbing and flushing.
Are DIY Peroxide Cleaners septic-safe?
Yes, DIY Peroxide Cleaners are generally considered septic-safe. Hydrogen peroxide breaks down into water and oxygen, which are not harmful to septic systems. However, it’s always a good idea to use these cleaners in moderation and avoid pouring large quantities down the drain at once.
What if I accidentally swallow some DIY Peroxide Cleaner?
If you accidentally swallow a small amount of DIY Peroxide Cleaner, rinse your mouth with water and drink plenty of fluids. If you experience any symptoms such as nausea, vomiting, or abdominal pain, seek medical attention immediately. Keep DIY Peroxide Cleaners out of reach of children and pets to prevent accidental ingestion.

Leave a Comment