
DIY Wheatgrass Juice at Home: Unlock the vibrant health benefits of this superfood right from your kitchen! Have you ever wondered how to bring that refreshing, nutrient-packed wheatgrass shot from your local juice bar into your daily routine without breaking the bank? Well, you’re in the right place! For centuries, cultures around the globe have revered the power of sprouted grains, and wheatgrass, with its concentrated vitamins and minerals, is no exception.
Growing your own wheatgrass and making juice at home is not only incredibly rewarding but also ensures you’re getting the freshest, most potent product possible. Think about it: no more questionable sourcing or sky-high prices! Plus, it’s a fantastic way to connect with nature and add a touch of green to your living space.
In this guide, I’ll walk you through every step of the process, from sprouting the seeds to juicing the vibrant green blades. Whether you’re a seasoned gardener or a complete beginner, I’ll share simple, effective techniques and tips to help you successfully cultivate your own supply of DIY wheatgrass juice at home. Get ready to experience the energy boost and health benefits of this amazing superfood, all while saving money and enjoying a fun, hands-on project!
DIY Wheatgrass Juice at Home: A Beginner’s Guide
Hey there, health enthusiasts! Ever wanted to jump on the wheatgrass bandwagon but felt intimidated by the price or the process? Well, fear not! I’m here to guide you through the surprisingly simple journey of growing and juicing your own wheatgrass at home. It’s easier than you think, and the fresh, vibrant juice is a fantastic boost to your daily routine.
What You’ll Need
Before we dive in, let’s gather our supplies. Don’t worry, you probably have a lot of this stuff already!
* Wheatgrass Seeds: Look for hard red winter wheat seeds specifically for sprouting. You can find these at most health food stores or online. Make sure they are untreated and food-grade!
* Growing Trays: You’ll need at least two shallow trays with drainage holes. One tray will act as the growing tray, and the other as a drip tray.
* Potting Soil: Organic potting soil is best. Avoid anything with added fertilizers or chemicals.
* Spray Bottle: For misting the seeds and grass.
* Juicer: A dedicated wheatgrass juicer is ideal (masticating juicers work best), but a regular juicer can work in a pinch if you wrap the wheatgrass in cheesecloth. I’ll explain more about this later.
* Water: Filtered water is always a good idea.
* Optional: A small fan to improve air circulation and prevent mold.
Phase 1: Soaking and Sprouting the Seeds
This is where the magic begins! We need to wake up those little seeds and get them ready to grow.
1. Rinse the Seeds: Place about 1 cup of wheatgrass seeds in a bowl and rinse them thoroughly with cool water. Remove any debris or floating seeds.
2. Soak the Seeds: Cover the rinsed seeds with fresh, cool water. You’ll want about 2-3 times the amount of water as seeds. Let them soak for 8-12 hours, or even overnight. This helps soften the seed coat and kickstarts the germination process.
3. Drain and Rinse Again: After soaking, drain the seeds completely and rinse them again with cool water.
4. Sprout the Seeds: Find a clean jar or container. Place the drained seeds inside. Cover the opening with cheesecloth or a sprouting lid and secure it with a rubber band.
5. Rinse and Drain Regularly: Rinse and drain the seeds 2-3 times a day for the next 1-2 days. This keeps them moist and prevents mold growth. Make sure to invert the jar completely to drain all excess water.
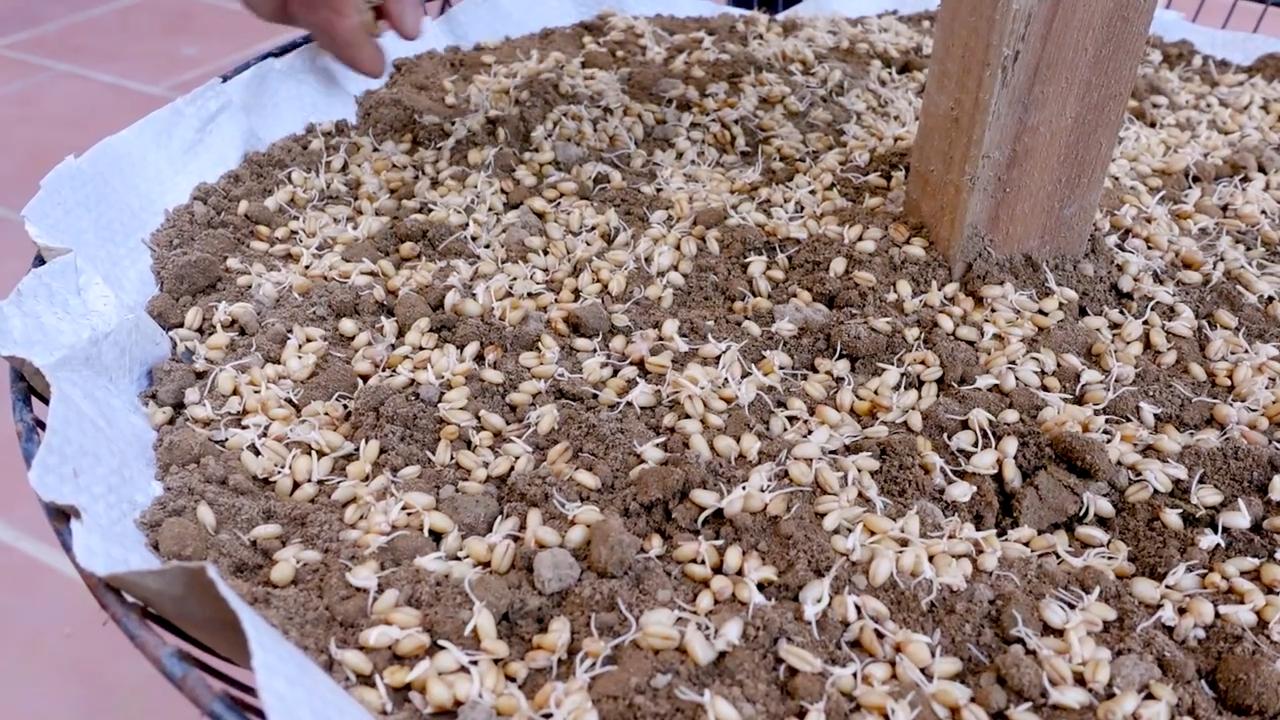
6. Observe the Sprouts: You’ll start to see tiny white sprouts emerging from the seeds. This is a sign that they’re ready to be planted!
Phase 2: Planting and Growing the Wheatgrass
Now it’s time to give those sprouts a home and watch them flourish!
1. Prepare the Growing Tray: Fill your growing tray with about 1-2 inches of potting soil. Gently pat it down to create a level surface.
2. Spread the Sprouted Seeds: Evenly distribute the sprouted seeds over the surface of the soil. Don’t overcrowd them; they need space to grow.
3. Cover with Soil (Optional): You can lightly cover the seeds with a thin layer of soil, but it’s not strictly necessary. I usually skip this step.
4. Water Gently: Use your spray bottle to gently mist the seeds and soil. You want to moisten the soil without soaking it.
5. Cover and Darken: Cover the tray with a lid or another tray to create a dark, humid environment. This encourages the seeds to root.
6. Maintain Moisture: Mist the seeds and soil 1-2 times a day to keep them moist.
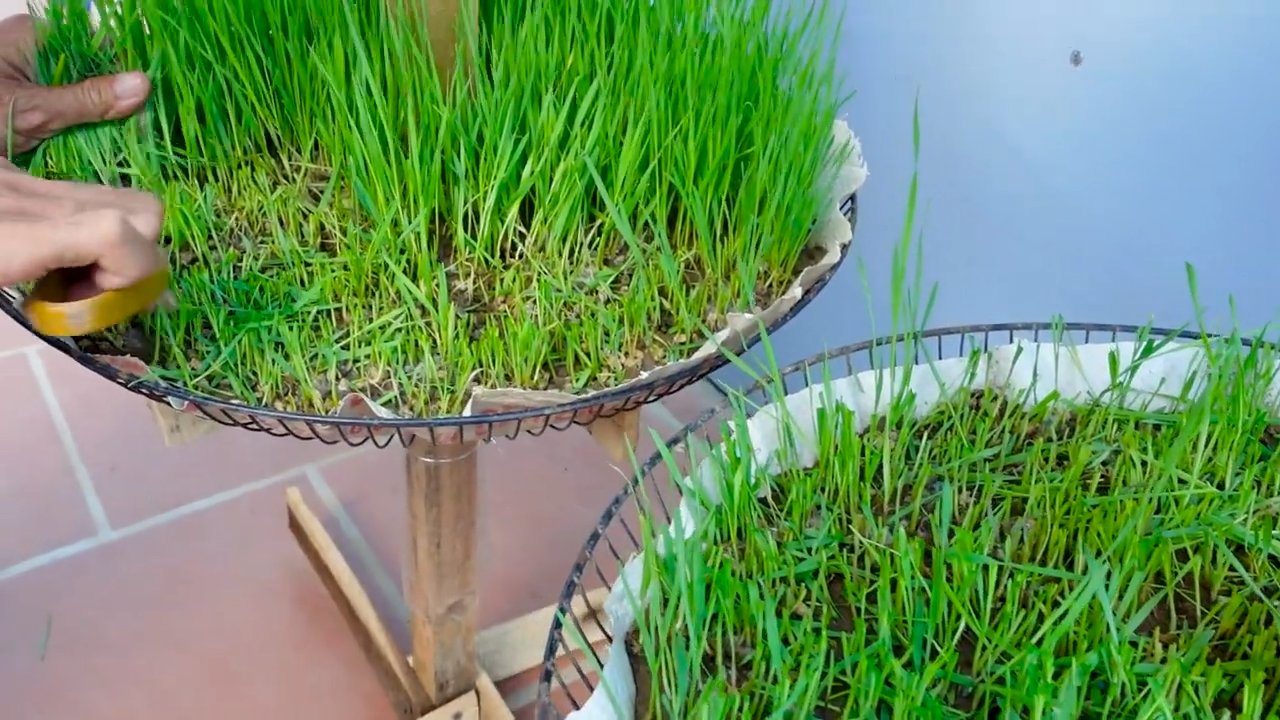
7. Introduce Light Gradually: After 2-3 days, when the sprouts have started to turn green, gradually introduce them to indirect sunlight. Start with a few hours a day and increase the exposure over the next few days.
8. Water Regularly: Continue to water the wheatgrass regularly, keeping the soil moist but not waterlogged. You can water from the bottom by pouring water into the drip tray and allowing the soil to absorb it.
9. Air Circulation: If you live in a humid environment, consider using a small fan to improve air circulation and prevent mold growth.
10. Watch it Grow!: Your wheatgrass will grow quickly! In about 7-10 days, it should be ready to harvest.
Phase 3: Harvesting and Juicing the Wheatgrass
The moment we’ve been waiting for! Time to reap the rewards of our labor.
1. Harvesting: When the wheatgrass is about 6-8 inches tall, it’s ready to harvest. Use scissors or a sharp knife to cut the grass close to the soil surface.
2. Rinse the Harvested Grass: Rinse the harvested wheatgrass thoroughly with cool water to remove any dirt or debris.
3. Juicing with a Wheatgrass Juicer: This is the ideal scenario. Feed the wheatgrass into the juicer, following the manufacturer’s instructions. The juicer will extract the juice, leaving behind the pulp.
4. Juicing with a Regular Juicer (Alternative): If you don’t have a wheatgrass juicer, you can still use a regular juicer, but you’ll need to take extra steps. Wrap a handful of wheatgrass in a piece of cheesecloth, forming a tight bundle. Feed the bundle into the juicer. The cheesecloth will help prevent the wheatgrass from clogging the juicer. You may need to repeat this process several times to extract all the juice.
5. Enjoy Immediately: Wheatgrass juice is best consumed immediately after juicing. It starts to lose its nutrients quickly.
6. Dosage: Start with a small amount, like 1-2 ounces, and gradually increase your intake as tolerated. Wheatgrass juice can be quite potent!
Tips and Tricks for Success
Here are a few extra tips to help you grow the best wheatgrass possible:
* Mold Prevention: Mold can be a common problem when growing wheatgrass. To prevent mold, ensure good air circulation, avoid overwatering, and use clean growing trays and soil. If you see any mold, remove the affected area immediately.
* Second Harvest: You can often get a second harvest from your wheatgrass by watering it after the first harvest. However, the second harvest may not be as potent as the first.
* Storage: If you can’t drink all the juice immediately, you can store it in an airtight container in the refrigerator for up to 24 hours. However, it’s best to drink it fresh.
* Taste: Wheatgrass juice has a strong, earthy taste. Some people find it unpleasant at first. You can mix it with other juices, like apple or pineapple juice, to make it more palatable.
* Experiment: Don’t be afraid to experiment with different growing techniques and juicing methods to find what works best for you.
Troubleshooting Common Issues
Even with the best intentions, things can sometimes go wrong. Here’s how to troubleshoot some common wheatgrass growing problems:
* Seeds Not Germinating: Make sure your seeds are fresh and viable. Also, ensure they are properly soaked and kept moist during the sprouting process.
* Slow Growth: Slow growth can be caused by insufficient light, water, or nutrients. Make sure your wheatgrass is getting enough light and water, and consider adding a small amount of organic fertilizer to the soil.
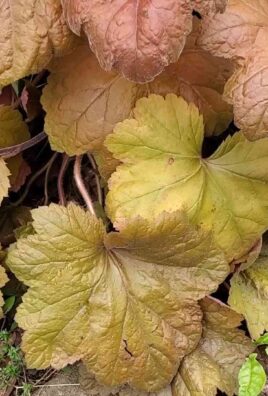
* Yellowing Leaves: Yellowing leaves can be a sign of overwatering or nutrient deficiency. Adjust your watering schedule and consider adding a small amount of organic fertilizer to the soil.
* Mold Growth: As mentioned earlier, mold can be a common problem. Ensure good air circulation, avoid overwatering, and use clean growing trays and soil.
Why Grow Your Own Wheatgrass?
Growing your own wheatgrass is not only cost-effective but also incredibly rewarding. You know exactly what you’re putting into your body, and you can enjoy the freshest, most nutrient-rich juice possible. Plus, it’s a fun and engaging project that connects you with nature.
So, what are you waiting for? Give it a try! You might be surprised at how easy and enjoyable it is to grow your own wheatgrass at home. I hope this guide has been helpful. Happy juicing!
Conclusion
Making your own wheatgrass juice at home isn’t just a trend; it’s a commitment to your well-being, a step towards embracing a more vibrant and energized you. We’ve walked you through the process, demystifying what can often seem like a daunting task. From sourcing the best wheatgrass seeds to nurturing their growth and finally extracting that potent, emerald elixir, you now possess the knowledge and tools to create fresh, nutrient-packed wheatgrass juice whenever you desire.
Why is this DIY trick a must-try? Simply put, it’s about control and freshness. Store-bought wheatgrass juice, while convenient, often lacks the vitality and nutritional punch of freshly squeezed juice. The time spent in transit and on shelves inevitably diminishes its potency. By growing and juicing your own wheatgrass, you’re guaranteeing that every sip is brimming with live enzymes, vitamins, and minerals at their peak. You know exactly where it came from and how it was handled, ensuring a clean and healthy product.
Beyond the superior nutritional value, making your own wheatgrass juice is surprisingly economical in the long run. While the initial investment in seeds and a juicer might seem significant, it quickly pays for itself compared to the recurring cost of purchasing pre-made juice. Plus, the satisfaction of nurturing something from seed to juice is incredibly rewarding.
But the benefits don’t stop there. This DIY approach allows for endless customization. Experiment with different growing mediums, such as soil or hydroponics, to see which yields the best results for you. Try adding a squeeze of lemon or a slice of ginger to your wheatgrass juice for a flavor boost and added health benefits. You can even blend it with other fruits and vegetables to create a personalized green smoothie that caters to your specific taste preferences and nutritional needs. Consider adding a touch of apple or pineapple for sweetness, or cucumber and celery for a more refreshing and hydrating blend.
We encourage you to embark on this journey of self-sufficiency and wellness. Don’t be intimidated by the process; it’s simpler than you might think. Start small, experiment, and learn as you go. The rewards – a healthier body, a clearer mind, and a deeper connection to nature – are well worth the effort.
So, grab your seeds, prepare your growing medium, and get ready to experience the transformative power of homemade wheatgrass juice. We’re confident that once you taste the difference, you’ll never go back to store-bought again.
And most importantly, we want to hear about your experience! Share your tips, tricks, and variations in the comments below. Let’s build a community of wheatgrass enthusiasts and inspire others to embrace this incredible DIY project. Tell us about your growing setup, your favorite juice combinations, and any challenges you encountered along the way. Your insights could be invaluable to someone just starting out. Let’s cultivate a healthier, happier world, one glass of wheatgrass juice at a time! Remember, the key to success with **DIY wheatgrass juice** is patience and persistence. Don’t be discouraged if your first batch isn’t perfect; keep experimenting and refining your technique until you achieve the results you desire.
Frequently Asked Questions (FAQ)
What type of juicer is best for wheatgrass?
The best type of juicer for wheatgrass is a masticating juicer, also known as a slow juicer or cold-press juicer. These juicers use a slow-turning auger to crush and squeeze the wheatgrass, extracting the maximum amount of juice while preserving its nutrients. Centrifugal juicers, on the other hand, use high-speed spinning blades, which can generate heat and oxidize the juice, reducing its nutritional value. Masticating juicers are more efficient at extracting juice from leafy greens like wheatgrass and produce a higher yield with less waste. They also tend to produce a drier pulp, indicating that more juice has been extracted. While masticating juicers are generally more expensive than centrifugal juicers, the investment is worthwhile if you plan to juice wheatgrass regularly.
How long does wheatgrass juice last?
Freshly squeezed wheatgrass juice is best consumed immediately for maximum nutritional benefit. However, if you need to store it, keep it in an airtight container in the refrigerator for up to 24 hours. After that, the juice will start to lose its potency and flavor. To minimize nutrient loss, fill the container to the top to reduce air exposure. You can also add a squeeze of lemon juice, which acts as a natural preservative. Freezing wheatgrass juice is another option for longer-term storage. Pour the juice into ice cube trays and freeze. Once frozen, transfer the cubes to a freezer bag. Frozen wheatgrass juice can be stored for up to 3 months. When ready to use, thaw the cubes in the refrigerator or add them directly to smoothies.
How much wheatgrass juice should I drink per day?
It’s generally recommended to start with a small amount of wheatgrass juice, such as 1-2 ounces (30-60 ml) per day, and gradually increase the amount as your body adjusts. Wheatgrass juice is very potent and can cause detoxification symptoms like nausea, headaches, or diarrhea if consumed in large quantities too quickly. Listen to your body and adjust the dosage accordingly. Most people find that 2-4 ounces (60-120 ml) per day is a good maintenance dose. It’s best to drink wheatgrass juice on an empty stomach, either first thing in the morning or between meals, to maximize absorption.
Can I grow wheatgrass indoors without soil?
Yes, you can grow wheatgrass indoors without soil using a hydroponic method. This involves growing the wheatgrass in water with added nutrients. Hydroponic growing can be cleaner and easier than growing in soil, as it eliminates the risk of soilborne diseases and pests. To grow wheatgrass hydroponically, you’ll need a tray with drainage holes, a growing medium like coco coir or hemp mats, and a nutrient solution specifically formulated for wheatgrass. Soak the wheatgrass seeds for 8-12 hours, then spread them evenly over the growing medium. Water the seeds with the nutrient solution and keep the tray moist. Place the tray in a well-lit area, but avoid direct sunlight. Harvest the wheatgrass when it reaches about 6-8 inches in height.
What are the potential side effects of drinking wheatgrass juice?
While wheatgrass juice is generally safe for most people, some individuals may experience side effects, especially when starting to consume it. These side effects can include nausea, headaches, diarrhea, constipation, and fatigue. These symptoms are usually temporary and are a sign that your body is detoxifying. To minimize side effects, start with a small amount of wheatgrass juice and gradually increase the dosage as your body adjusts. If you experience severe or persistent side effects, discontinue use and consult with a healthcare professional. People with allergies to wheat or grass should avoid wheatgrass juice. Pregnant or breastfeeding women should also consult with their doctor before consuming wheatgrass juice.
How do I know when my wheatgrass is ready to harvest?
Wheatgrass is typically ready to harvest when it reaches about 6-8 inches in height. The blades should be a vibrant green color and feel firm to the touch. The best time to harvest is just before the “jointing” stage, when the plant starts to develop a second blade. At this stage, the nutrient content is at its peak. To harvest, use sharp scissors or a knife to cut the wheatgrass close to the base, leaving about an inch of growth. This will allow the wheatgrass to regrow for a second harvest, although the second harvest will typically be less potent than the first.
How do I clean wheatgrass before juicing?
It’s important to clean wheatgrass thoroughly before juicing to remove any dirt, debris, or mold. Rinse the harvested wheatgrass under cold running water, gently rubbing the blades to dislodge any particles. You can also soak the wheatgrass in a bowl of cold water for a few minutes, then rinse again. If you suspect that the wheatgrass may be contaminated with mold, add a tablespoon of hydrogen peroxide to the soaking water. Rinse the wheatgrass thoroughly after soaking. After cleaning, pat the wheatgrass dry with a clean towel or spin it in a salad spinner to remove excess water.
Can I regrow wheatgrass after harvesting?
Yes, you can regrow wheatgrass after harvesting, but the second harvest will typically be less potent than the first. After harvesting, leave about an inch of growth at the base of the plants. Continue to water and care for the wheatgrass as usual. The wheatgrass will usually regrow within a week or two. However, the second harvest may be thinner and less nutrient-rich than the first. Some people choose to discard the wheatgrass after the first harvest and start a new batch, while others continue to harvest it for as long as it produces viable growth.
What are the benefits of drinking wheatgrass juice?
Wheatgrass juice is packed with nutrients and offers a wide range of potential health benefits. It’s a rich source of vitamins, minerals, enzymes, and antioxidants. Some of the potential benefits of drinking wheatgrass juice include: boosting the immune system, detoxifying the body, improving digestion, increasing energy levels, reducing inflammation, and promoting healthy skin and hair. Wheatgrass juice is also believed to have anti-cancer properties. However, it’s important to note that more research is needed to confirm these benefits.

Leave a Comment