
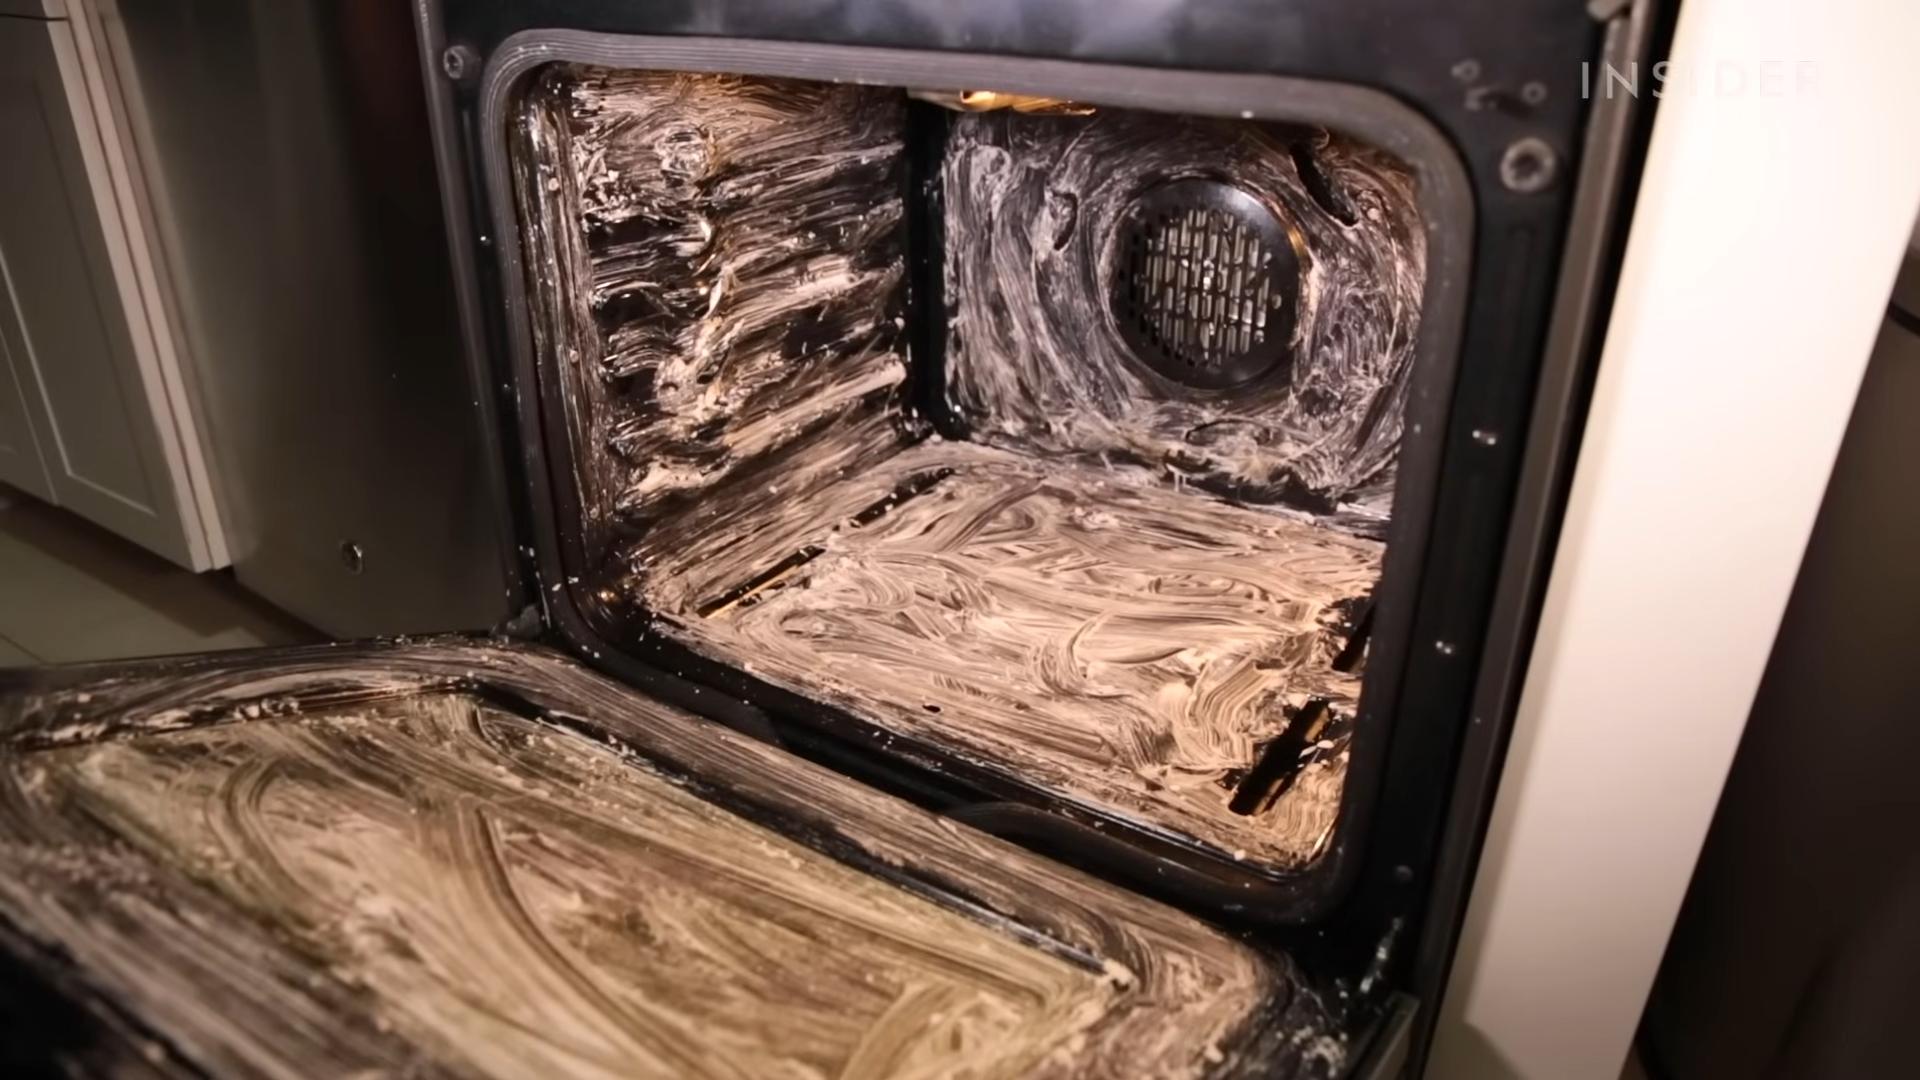
Eco Friendly Oven Cleaning: Are you tired of harsh chemicals and lingering fumes every time you tackle that baked-on grime in your oven? I know I was! For years, I dreaded oven cleaning day, resorting to products that promised sparkling results but left my kitchen smelling like a science lab. But what if I told you there’s a better way? A way to achieve a spotless oven without sacrificing your health or harming the environment?
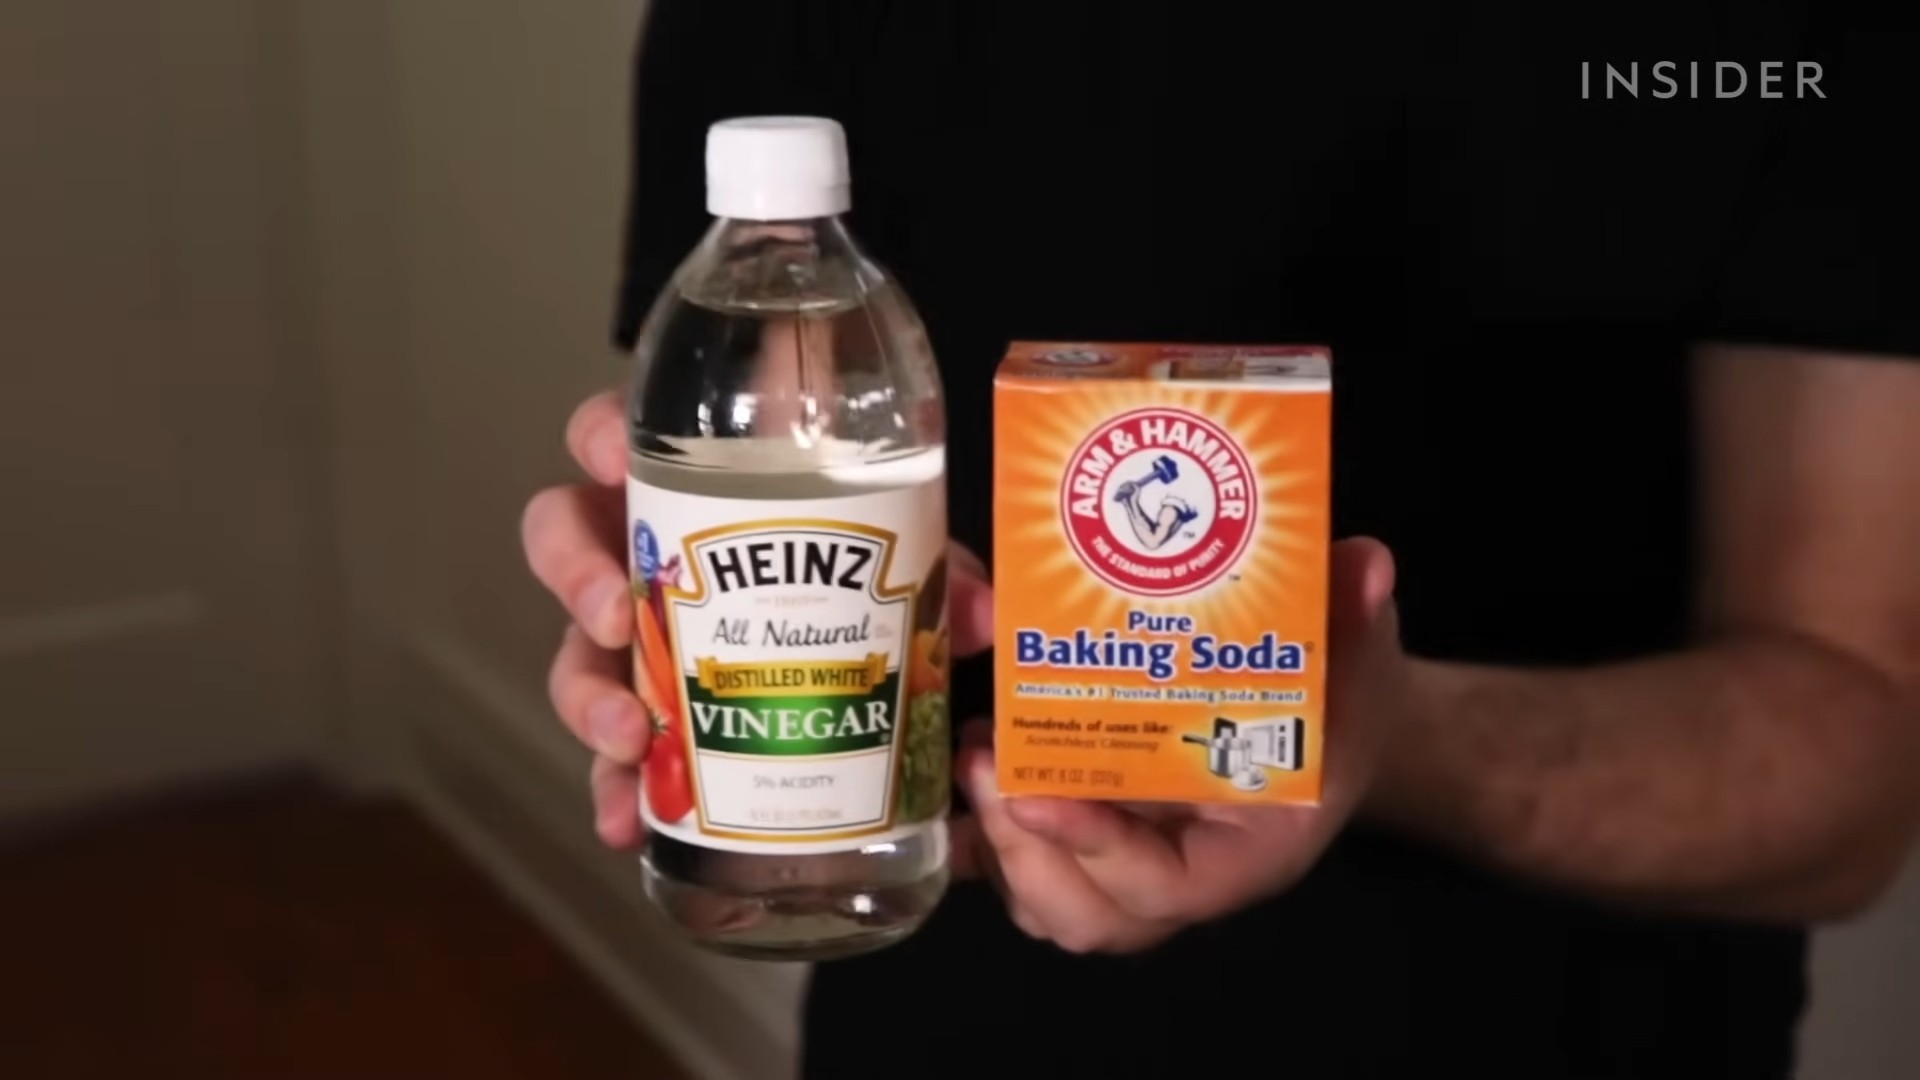
The desire for a clean and healthy home is as old as time. Historically, people relied on natural ingredients like vinegar and baking soda for cleaning long before the advent of commercial products. These time-tested methods are not only effective but also incredibly gentle on our planet.
That’s why I’m so excited to share these amazing DIY tricks for eco friendly oven cleaning. In this article, I’ll walk you through simple, step-by-step methods using ingredients you probably already have in your pantry. You’ll learn how to banish grease and grime with the power of nature, creating a healthier and happier home for you and your family. Say goodbye to harsh chemicals and hello to a sparkling clean oven, the eco-friendly way!
Grow Your Own Mint Magic Indoors!
Hey there, fellow plant enthusiasts! Ever dreamt of having fresh, fragrant mint readily available for your mojitos, teas, or culinary creations? Well, dream no more! I’m going to walk you through the surprisingly simple process of growing mint indoors. Trust me, even if you think you have a black thumb, you can totally nail this. Mint is a resilient and rewarding herb to cultivate, and having it right at your fingertips is a game-changer.
Choosing Your Mint Variety
First things first, let’s talk mint varieties. There’s a whole world beyond just “mint”! Spearmint is the classic, refreshing choice, perfect for teas and cocktails. Peppermint has a stronger, more intense flavor, ideal for desserts and candies. Then there are the more exotic options like chocolate mint (yes, it smells like chocolate!), apple mint, and even pineapple mint.
* Spearmint: The most common and versatile.
* Peppermint: Stronger flavor, great for desserts.
* Chocolate Mint: A unique, chocolatey aroma.
* Apple Mint: Mild and fruity.
* Pineapple Mint: Tropical twist.
I recommend starting with spearmint or peppermint, as they’re generally the easiest to grow. Once you get the hang of it, you can branch out and experiment with other varieties!
Gathering Your Supplies
Okay, time to gather our supplies. You won’t need much, which is part of what makes this DIY project so appealing.
* Mint Cuttings or a Starter Plant: You can either take cuttings from an existing mint plant (ask a friend or neighbor!) or purchase a small starter plant from a local nursery or garden center.
* Pot with Drainage Holes: Choose a pot that’s at least 6 inches in diameter. Drainage is crucial to prevent root rot.
* Potting Mix: Use a high-quality potting mix specifically formulated for herbs or vegetables. Avoid using garden soil, as it can be too dense and compact.
* Watering Can or Spray Bottle: For gentle watering.
* Sunny Location: Mint thrives in bright, indirect sunlight. A windowsill facing east or west is ideal. If you don’t have enough natural light, you can supplement with a grow light.
* Optional: Liquid Fertilizer: A balanced liquid fertilizer can help boost growth, but it’s not essential.
Taking Mint Cuttings (If You’re Not Using a Starter Plant)
If you’re going the cutting route, here’s how to do it:
1. Select Healthy Stems: Choose stems that are about 4-6 inches long and have several leaves. Avoid stems that are flowering, as they’re less likely to root.
2. Make the Cut: Use clean, sharp scissors or pruning shears to cut the stem just below a leaf node (the point where a leaf grows out of the stem).
3. Remove Lower Leaves: Gently remove the leaves from the bottom 1-2 inches of the stem. This is where the roots will grow.
4. Rooting in Water: Place the cuttings in a glass or jar filled with water, making sure the bottom nodes are submerged. Change the water every 1-2 days to keep it fresh.
5. Wait for Roots: Within a week or two, you should start to see roots emerging from the nodes. Once the roots are about an inch long, you can plant the cuttings in soil.
Planting Your Mint
Now for the fun part – planting!
1. Prepare the Pot: Fill the pot with potting mix, leaving about an inch of space at the top.
2. Plant the Mint:
* For Cuttings: Gently make a small hole in the soil and carefully place the rooted cutting in the hole. Cover the roots with soil and gently pat it down.
* For Starter Plant: Carefully remove the starter plant from its container and gently loosen the roots. Dig a hole in the potting mix that’s large enough to accommodate the root ball. Place the plant in the hole and cover the roots with soil. Gently pat the soil down.
3. Water Thoroughly: Water the soil thoroughly until water drains out of the drainage holes. This will help settle the soil and encourage root growth.
Caring for Your Indoor Mint
Once your mint is planted, it’s time to provide it with the care it needs to thrive.
1. Watering: Mint likes to be kept consistently moist, but not soggy. Water when the top inch of soil feels dry to the touch. Avoid overwatering, as this can lead to root rot.
2. Sunlight: Place your mint plant in a location that receives bright, indirect sunlight for at least 6 hours a day. If you don’t have enough natural light, you can supplement with a grow light.
3. Fertilizing (Optional): If you want to give your mint a boost, you can fertilize it every 2-4 weeks with a balanced liquid fertilizer. Follow the instructions on the fertilizer label.
4. Pruning: Regular pruning is essential for keeping your mint plant healthy and productive. Pinch off the top leaves of the stems to encourage bushier growth. You can also remove any yellowing or dead leaves.
5. Pest Control: Mint is generally pest-resistant, but it can occasionally be affected by aphids or spider mites. If you notice any pests, you can try spraying the plant with insecticidal soap or neem oil.
6. Repotting: Mint is a fast-growing plant, so you may need to repot it every year or two. Choose a pot that’s slightly larger than the current one.
Harvesting Your Mint
The best part of growing your own mint is, of course, harvesting it!
1. When to Harvest: You can start harvesting mint leaves as soon as the plant is established and has several leaves.
2. How to Harvest: Use clean scissors or pruning shears to cut the stems just above a leaf node. This will encourage new growth.
3. Harvest Regularly: The more you harvest, the more the plant will grow! Don’t be afraid to prune it back aggressively.
Troubleshooting Common Mint Problems
Even with the best care, you might encounter a few problems along the way. Here are some common issues and how to fix them:
* Yellowing Leaves: This could be a sign of overwatering, underwatering, or nutrient deficiency. Check the soil moisture and adjust your watering accordingly. If the soil is consistently moist, reduce watering. If it’s dry, water more frequently. You can also try fertilizing the plant with a balanced liquid fertilizer.
* Leggy Growth: This means the plant is not getting enough light. Move it to a brighter location or supplement with a grow light.
* Root Rot: This is caused by overwatering. Make sure the pot has drainage holes and avoid letting the plant sit in standing water. If the root rot is severe, you may need to repot the plant with fresh potting mix.
* Pests: As mentioned earlier, aphids and spider mites can sometimes be a problem. Spray the plant with insecticidal soap or neem oil to get rid of them.
Enjoying Your Homegrown Mint
Now that you’ve successfully grown your own mint, it’s time to enjoy the fruits (or rather, leaves) of your labor! Here are just a few ideas:
* Make Mint Tea: Steep fresh mint leaves in hot water for a refreshing and soothing tea.
* Add to Cocktails: Mint is a classic ingredient in mojitos, mint juleps, and other cocktails.
* Use in Cooking: Mint can be used to flavor a variety of dishes, from salads and soups to desserts and sauces.
* Garnish: Use mint leaves as a garnish for desserts, drinks, and savory dishes.
* Make Mint Syrup: Use mint syrup to flavor drinks, desserts, and pancakes.
Growing mint indoors is a simple and rewarding project that anyone can do. With a little bit of care and attention, you can have a constant supply of fresh, fragrant mint right at your fingertips. So go ahead, give it a try! You might just surprise yourself with your green thumb. Happy growing!
Conclusion
So, there you have it! Ditching harsh chemicals and embracing this eco-friendly oven cleaning method is not just a trend; it’s a smarter, safer, and ultimately more satisfying way to maintain a sparkling clean oven. We’ve shown you how simple it is to harness the power of readily available ingredients like baking soda, vinegar, and a little elbow grease to achieve professional-level results without exposing yourself, your family, or the environment to harmful toxins.
Why is this DIY trick a must-try? Because it’s effective, affordable, and aligns with a more conscious lifestyle. Commercial oven cleaners are often packed with corrosive chemicals that can irritate your skin, damage your respiratory system, and leave lingering odors in your kitchen. This eco-friendly alternative eliminates those risks while still delivering impressive cleaning power. You’ll be amazed at how easily baked-on grease and grime lift away with this simple paste and a little patience.
But the benefits extend beyond just safety and cost. Think about the satisfaction of knowing you’re contributing to a healthier planet. Every small change we make in our daily routines can have a significant impact, and choosing this eco-friendly oven cleaning method is a tangible step towards a more sustainable future.
Looking for variations? Consider adding a few drops of your favorite essential oil, like lemon or tea tree, to the baking soda paste for an extra boost of freshness and antibacterial properties. If you have particularly stubborn stains, you can let the baking soda paste sit overnight for maximum effectiveness. For ovens with self-cleaning functions, you can still use this method for spot cleaning and to maintain cleanliness between self-cleaning cycles, reducing the frequency of using the high-heat, energy-intensive self-cleaning feature. You can also use a pumice stone (carefully!) on particularly stubborn baked-on messes after the baking soda paste has done its work. Remember to always test a small, inconspicuous area first.
We’re confident that once you try this eco-friendly oven cleaning method, you’ll never go back to harsh chemicals again. It’s a game-changer for your kitchen, your health, and the planet.
So, what are you waiting for? Gather your ingredients, roll up your sleeves, and get ready to experience the joy of a sparkling clean oven, the natural way. We encourage you to try this DIY trick and share your experience with us! Let us know in the comments how it worked for you, any variations you tried, and any tips you discovered along the way. We’re all in this together, learning and sharing ways to create a healthier and more sustainable home. Share your before and after photos on social media and tag us! We can’t wait to see your sparkling ovens!
Frequently Asked Questions (FAQ)
Q: Is baking soda and vinegar really effective for cleaning a heavily soiled oven?
A: Absolutely! While it might require a bit more elbow grease than harsh chemical cleaners, the combination of baking soda and vinegar is surprisingly effective, even on heavily soiled ovens. The baking soda acts as a mild abrasive, helping to loosen baked-on grime, while the vinegar reacts with the baking soda to create a fizzing action that further lifts away dirt and grease. For particularly stubborn areas, you may need to repeat the process or let the baking soda paste sit overnight. The key is patience and persistence. Remember to scrape away any large chunks of food debris before applying the paste for optimal results.
Q: Will this eco-friendly oven cleaning method damage my oven?
A: No, this method is generally safe for most ovens. Baking soda is a mild abrasive and vinegar is a weak acid, so they are unlikely to damage the oven’s interior. However, it’s always a good idea to test a small, inconspicuous area first, especially if you have a self-cleaning oven with a special coating. Avoid getting the baking soda paste on the heating elements, as it can be difficult to remove completely. Also, be sure to wipe away all traces of baking soda and vinegar after cleaning to prevent any residue buildup.
Q: How often should I use this eco-friendly oven cleaning method?
A: The frequency of cleaning depends on how often you use your oven and how much it gets soiled. As a general guideline, cleaning your oven every 1-3 months is a good practice. However, if you notice spills or splatters, it’s best to clean them up immediately to prevent them from baking on and becoming more difficult to remove later. Regular maintenance with this eco-friendly method will help keep your oven clean and prevent the need for harsh chemical cleaners.
Q: What if I don’t have vinegar? Can I use something else?
A: While vinegar is the preferred choice for reacting with the baking soda, you can try using lemon juice as a substitute. Lemon juice is also acidic and can help to lift away grease and grime. However, it may not be as effective as vinegar, especially on heavily soiled ovens. Another option is to use a mixture of baking soda and water to create a paste, and then use a spray bottle filled with water to dampen the paste and activate its cleaning power.
Q: How do I clean the oven door glass using this method?
A: The baking soda paste works wonders on oven door glass! Simply apply the paste to the glass, let it sit for 15-20 minutes, and then scrub with a non-abrasive sponge or cloth. For stubborn stains, you can use a razor blade scraper (carefully!) to remove the baked-on grime. Be sure to wipe away all traces of baking soda and vinegar with a clean, damp cloth. You can also use a glass cleaner for a streak-free finish.
Q: Can I use this method on a self-cleaning oven?
A: Yes, you can use this method on a self-cleaning oven, but with a few precautions. Avoid getting the baking soda paste on the heating elements, as it can be difficult to remove completely. Also, be sure to wipe away all traces of baking soda and vinegar after cleaning to prevent any residue buildup. You can use this method for spot cleaning and to maintain cleanliness between self-cleaning cycles, reducing the frequency of using the high-heat, energy-intensive self-cleaning feature.
Q: What are some other eco-friendly cleaning tips for my kitchen?
A: There are many ways to make your kitchen cleaning routine more eco-friendly! Consider using reusable cloths and sponges instead of paper towels. Make your own all-purpose cleaner with vinegar, water, and essential oils. Use natural dish soap and avoid products with harsh chemicals. Compost food scraps to reduce waste. And, of course, continue using this eco-friendly oven cleaning method! Every small change you make can have a positive impact on the environment.
Q: My oven has a really bad smell. Will this method help?
A: Yes, this method can definitely help reduce or eliminate bad odors in your oven. The baking soda acts as a natural deodorizer, absorbing unpleasant smells. The vinegar also helps to neutralize odors. For particularly strong odors, you can leave a bowl of baking soda in the oven overnight after cleaning. You can also add a few drops of essential oils, like lemon or tea tree, to the baking soda paste for an extra boost of freshness.
Q: What kind of baking soda should I use?
A: Regular baking soda (sodium bicarbonate) is all you need for this cleaning method. There’s no need to buy a special “cleaning” baking soda. The baking soda you use for baking is perfectly effective for cleaning your oven.
Q: What kind of vinegar should I use?
A: White distilled vinegar is the best choice for cleaning. It’s inexpensive, readily available, and has a high acidity level, making it effective at cutting through grease and grime. Avoid using other types of vinegar, such as apple cider vinegar or balsamic vinegar, as they may leave a residue or stain.

Leave a Comment