
Grow Basil Kitchen Garden dreams are within your reach, even if you think you have a “brown thumb”! Have you ever walked past a vibrant Italian restaurant, inhaled the intoxicating aroma of fresh basil, and wished you could recreate that magic at home? Or perhaps you’re tired of buying expensive, wilted basil from the grocery store, only to use a tiny sprig and throw the rest away? I know I have!
For centuries, basil has been more than just a culinary herb. In some cultures, it’s considered sacred, a symbol of love, good fortune, and protection. From ancient Rome, where it was believed to ward off evil, to India, where it’s revered as a holy plant, basil boasts a rich and fascinating history. But beyond its cultural significance, basil is simply delicious and incredibly versatile in the kitchen.
That’s why I’m so excited to share these simple, yet effective, DIY tricks and hacks that will help you grow basil kitchen garden right on your windowsill or balcony. Imagine having a constant supply of fresh, fragrant basil at your fingertips, ready to elevate your pasta sauces, salads, and pesto to a whole new level. No more wasted money, no more disappointing store-bought herbs – just pure, homegrown goodness. These tips are designed for everyone, from complete beginners to seasoned gardeners looking for a few extra tricks. Let’s get started and transform your kitchen into a basil-lover’s paradise!
Your Own Basil Kitchen Garden: It’s This Easy!
Hey everyone! I love fresh herbs, especially basil. And what could be better than growing it right in your kitchen? This way, you always have fresh basil on hand, whether for pasta, pesto, or just as a garnish. In this article, I’ll show you how to easily create your own basil kitchen garden. Don’t worry, it’s really child’s play!
What You Need:
Here is a list of everything you’ll need for your basil kitchen garden:
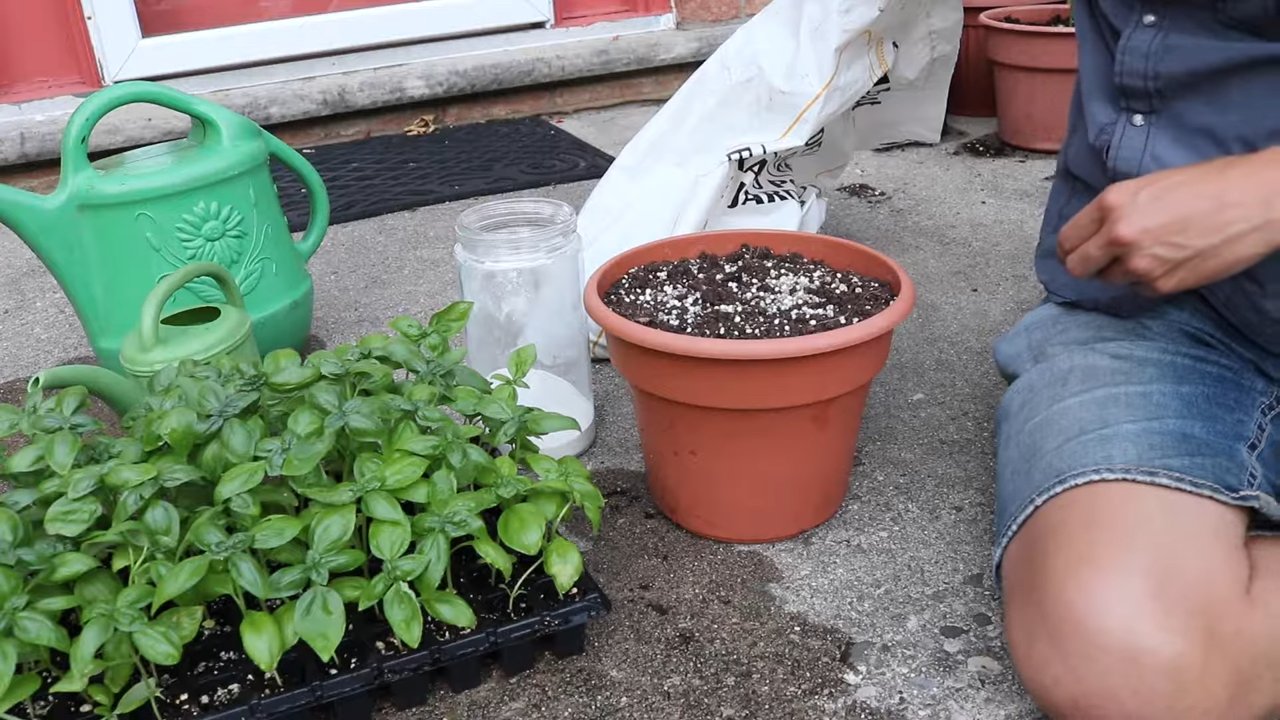
- Basil seeds or seedlings: You can either start with seeds or buy small basil plants directly from a garden center or hardware store. I personally find seedlings easier, as they already have a small head start.
- Pots or containers: Choose pots with sufficient drainage. Basil does not like waterlogged soil. The size depends on how many plants you want to grow.
- High-quality potting soil: It’s best to use a special herb soil or a high-quality potting soil. Avoid garden soil, as it is often too heavy.
- Drainage material: Expanded clay pebbles or pottery shards are ideal for ensuring good drainage in the pot.
- Watering can or spray bottle: For watering your basil plants.
- A sunny location: Basil loves the sun! A kitchen windowsill is perfect.
- Optional: Liquid fertilizer for herbs to promote growth.
Step-by-Step Guide: Growing Basil from Seed
If you’ve decided to start with seeds, here is a detailed guide:
- Prepare the pots: Fill your pots with a layer of drainage material (expanded clay pebbles or pottery shards). This prevents waterlogging.
- Fill with soil: Fill the pots with herb soil, but leave about 2-3 cm (1 inch) of space to the rim.
- Sow the seeds: Distribute the basil seeds evenly on the soil. They are very small, so be careful. Press the seeds down lightly, but do not cover them too thickly with soil. Basil is a light germinator, which means the seeds need light to sprout.
- Watering: Gently moisten the soil with a spray bottle. The soil should be damp, but not wet.
- Cover (optional): You can cover the pots with plastic wrap or a clear plastic bag to increase humidity. Don’t forget to air them out regularly to prevent mold.
- Location: Place the pots in a warm and bright place. A temperature of 20-25°C (68-77°F) is ideal for germination.
- Patience: Germination usually takes 1-2 weeks. Keep the soil moist during this time.
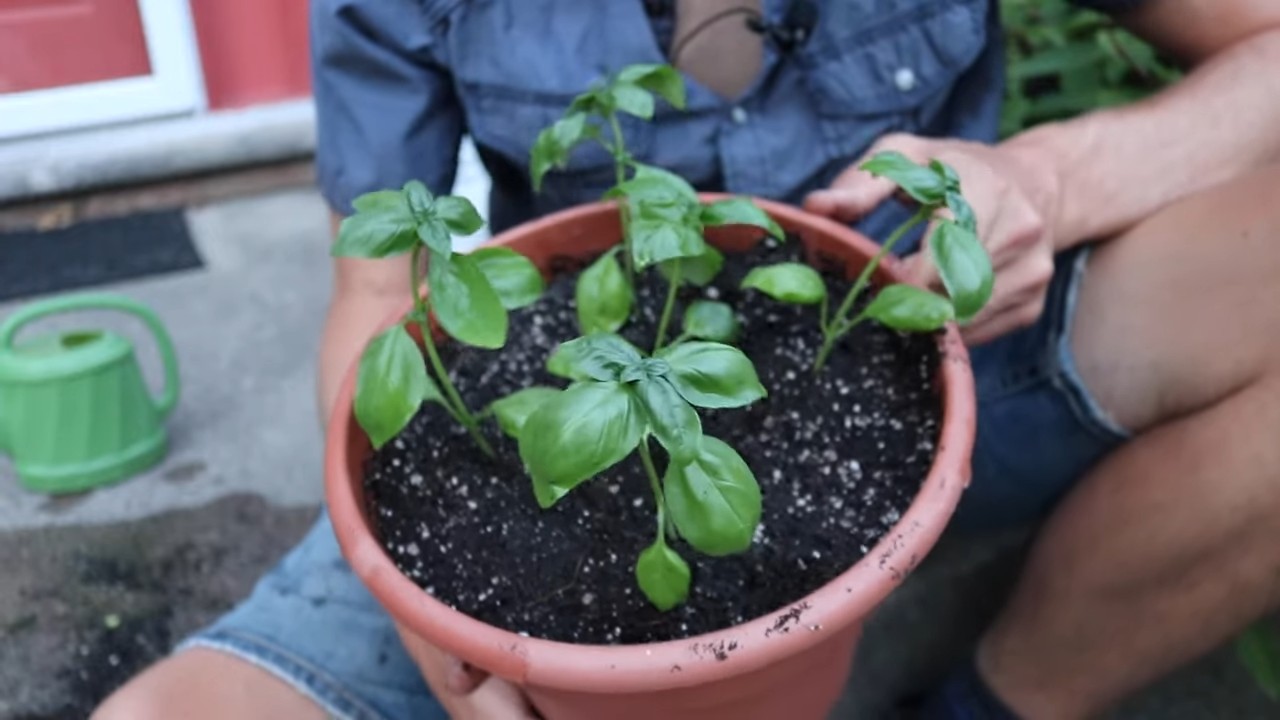
- Pricking out (thinning): Once the seedlings are large enough (about 5-7 cm / 2-3 inches high and with 2-3 pairs of leaves), you can prick them out. This means you transplant the individual seedlings into separate pots so they have enough space to grow. Be very careful not to damage the roots.
Step-by-Step Guide: Planting Basil from Seedlings
If you’re in a hurry or want to save yourself the effort of sowing, seedlings are a great alternative:
- Prepare the pots: Just like with sowing, start with a layer of drainage material in the pot.
- Fill with soil: Fill the pot with herb soil, but leave enough space for the seedling.
- Remove the seedling from its starter pot: Gently press on the bottom of the starter pot to release the plant. Be careful not to damage the roots.
- Insert the seedling: Place the seedling in the prepared pot. The top of the root ball should be level with the soil surface.
- Fill with soil: Fill the pot with soil and press it down lightly.
- Watering: Gently water the plant.
- Location: Place the pot in a sunny spot in your kitchen.
Caring for Your Basil Kitchen Garden
Proper care is crucial for your basil to thrive:
- Watering: Basil likes it moist, but not wet. Water regularly, but avoid waterlogging. The soil should feel slightly damp. On hot days, you may need to water daily. Check the soil’s moisture by sticking your finger about 2 cm (1 inch) deep into it.
- Sunlight: Basil needs at least 6 hours of sunlight per day. A kitchen windowsill is ideal. If your basil doesn’t get enough light, the leaves can become pale and the plant may be more susceptible to diseases.
- Fertilizing: During the growing season (spring and summer), you can feed your basil every 2-3 weeks with a liquid fertilizer for herbs. Follow the instructions on the packaging.
- Harvesting: Harvest the leaves regularly to stimulate growth. Pinch off the top shoots; this encourages branching and results in a bushier plant. Always cut just above a pair of leaves so the plant can form new shoots.
- Preventing flowering: Basil tends to produce flowers. If you prevent flowering, the plant will focus on growing leaves. Remove the flower buds as soon as you spot them.
- Repotting: When your basil gets too big for its pot, you can transplant it into a larger one. Choose a pot that is about 2-3 cm (1 inch) larger than the previous one.
Common Problems and Solutions
Problems can also arise when growing basil. Here are some common issues and how to solve them:
- Yellow leaves: Yellow leaves can have various causes, e.g., overwatering, nutrient deficiency, or too little light. Check your watering habits and fertilize the plant if necessary. Make sure the plant is getting enough light.
- Pests: Basil can be infested by aphids or spider mites. Spray the plant with a mild soap solution or use an organic pesticide.
- Fungal diseases: Fungal diseases can occur with high humidity. Ensure good ventilation and avoid wetting the leaves when watering.
- Wilting leaves: Wilting leaves can be a sign of a lack of water. Water the plant thoroughly and make sure the soil does not dry out.
Additional Tips for a Successful Basil Kitchen Garden
Propagating basil: You can easily propagate basil from cuttings. Cut off a shoot and place it in a glass of water. After a few days, roots will form, and you can plant the cutting in a pot.
Different varieties: Try different basil varieties, e.g., Genovese basil, lemon basil, or Thai basil. Each variety has its own taste and advantages.
Basil in winter: In winter, it can be difficult to grow basil indoors as the light conditions are often not optimal. You can use a grow light to promote growth.
Conclusion
So, there you have it! Transforming your kitchen windowsill into a thriving basil haven is not only achievable but also incredibly rewarding. We’ve walked you through the simple steps, from selecting the right container and soil to nurturing your basil plants for optimal growth. But why is this DIY trick a must-try?
Firstly, the sheer convenience of having fresh, fragrant basil readily available at your fingertips is unparalleled. No more last-minute dashes to the grocery store or settling for wilted, lackluster herbs. Imagine the burst of flavor you can add to your pasta sauces, pizzas, salads, and countless other dishes with your own homegrown basil.
Secondly, growing your own basil is a sustainable and cost-effective alternative to buying it from the store. You’ll be reducing your carbon footprint by eliminating the need for transportation and packaging, and you’ll save money in the long run by avoiding frequent herb purchases. Plus, there’s something deeply satisfying about nurturing a plant from seed or cutting to full maturity.
Thirdly, this project is incredibly versatile. Feel free to experiment with different varieties of basil, such as Genovese, Thai, or lemon basil, to create a diverse and flavorful herb garden. You can also try companion planting, adding other herbs like oregano, thyme, or rosemary to your container for a truly aromatic and functional kitchen garden. Consider adding some marigolds to deter pests naturally.
Don’t be afraid to get creative! You can use repurposed containers like mason jars, tin cans, or even old teacups to add a touch of personality to your basil garden. Just make sure they have adequate drainage.
We’ve focused on creating a thriving Grow Basil Kitchen Garden, but the principles apply to many other herbs as well. Once you’ve mastered basil, you can expand your indoor garden to include other favorites like mint, parsley, and chives.
We wholeheartedly encourage you to give this DIY trick a try. It’s a simple, affordable, and incredibly rewarding way to bring the freshness of the garden into your kitchen. The aroma alone is enough to brighten any day!
But don’t just take our word for it. We want to hear about your experiences! Share your photos, tips, and challenges in the comments below. Let’s create a community of indoor gardeners and inspire each other to grow our own delicious and sustainable food. What are you waiting for? Get your hands dirty and start growing your own basil today! We are confident that you will enjoy the process and the delicious results. Happy gardening!
Frequently Asked Questions (FAQ)
What kind of soil is best for growing basil indoors?
The best soil for growing basil indoors is a well-draining potting mix. Avoid using garden soil, as it can be too heavy and compact, leading to poor drainage and root rot. Look for a potting mix that contains ingredients like peat moss, perlite, and vermiculite, which will help to retain moisture while also providing good aeration. You can also amend your potting mix with compost to add nutrients and improve drainage. A slightly acidic to neutral pH (around 6.0 to 7.0) is ideal for basil.
How much sunlight does my indoor basil plant need?
Basil thrives in bright, indirect sunlight. Aim for at least 6-8 hours of sunlight per day. If you don’t have a sunny windowsill, you can supplement with a grow light. Place the grow light about 6-12 inches above the plants and keep it on for 12-14 hours per day. Rotate your basil plant regularly to ensure that all sides receive adequate sunlight. Signs of insufficient light include leggy growth, pale leaves, and a lack of aroma.
How often should I water my indoor basil plant?
Water your basil plant when the top inch of soil feels dry to the touch. Avoid overwatering, as this can lead to root rot. When you water, water thoroughly until water drains out of the bottom of the pot. Empty the saucer beneath the pot to prevent the plant from sitting in water. The frequency of watering will depend on factors such as the size of the pot, the type of soil, and the temperature and humidity of your home. In general, you may need to water more frequently during the warmer months and less frequently during the cooler months.
How do I harvest basil leaves without harming the plant?
The best way to harvest basil leaves is to pinch or cut them off just above a leaf node (the point where leaves grow from the stem). This will encourage the plant to branch out and produce more leaves. Avoid removing more than one-third of the plant’s leaves at a time, as this can stress the plant. Regularly pinching off the flower buds will also encourage the plant to focus its energy on producing leaves. Harvest your basil leaves in the morning, when the essential oils are most concentrated.
My basil plant is getting leggy. What should I do?
Leggy growth in basil plants is often a sign of insufficient light. Move your plant to a sunnier location or supplement with a grow light. You can also prune the plant back to encourage bushier growth. Cut the stems back to just above a leaf node. This will stimulate new growth and help to create a more compact and productive plant. Regular harvesting of the leaves will also help to prevent leggy growth.
How can I prevent pests and diseases from affecting my indoor basil plant?
To prevent pests and diseases, start with healthy plants and use a well-draining potting mix. Inspect your plants regularly for signs of pests or diseases. Common pests that can affect basil include aphids, spider mites, and whiteflies. You can control these pests by spraying the plant with insecticidal soap or neem oil. Avoid overwatering, as this can create conditions that are favorable for fungal diseases. Ensure good air circulation around the plant to prevent the buildup of moisture. If you notice any signs of disease, such as yellowing leaves or spots, remove the affected leaves immediately.
Can I grow basil from seed indoors?
Yes, you can easily grow basil from seed indoors. Start by sowing the seeds in a seed-starting tray or small pots filled with seed-starting mix. Keep the soil moist and warm (around 70-75°F). The seeds should germinate in about 5-10 days. Once the seedlings have developed a few sets of true leaves, you can transplant them into larger pots.
Can I propagate basil from cuttings?
Yes, propagating basil from cuttings is a quick and easy way to create new plants. Take a cutting that is about 4-6 inches long from a healthy basil plant. Remove the lower leaves, leaving only a few leaves at the top. Place the cutting in a glass of water, making sure that the leaves are not submerged. Place the glass in a bright, indirect light location. The cutting should develop roots in about 1-2 weeks. Once the roots are about an inch long, you can transplant the cutting into a pot filled with potting mix.
How long will my indoor basil plant last?
With proper care, an indoor basil plant can last for several months. However, basil is an annual plant, which means that it will eventually complete its life cycle and die. To prolong the life of your basil plant, provide it with plenty of sunlight, water, and nutrients. Regularly harvest the leaves and pinch off the flower buds to encourage continued growth. You can also propagate new plants from cuttings to ensure a continuous supply of fresh basil.
What are some variations I can try with my Grow Basil Kitchen Garden?
Beyond different basil varieties, consider adding other herbs like oregano, thyme, rosemary, or mint to your container garden. Companion planting with marigolds can help deter pests. You can also experiment with different container types, such as mason jars, tin cans, or even hanging baskets. Just ensure adequate drainage for whatever container you choose.


Leave a Comment