
Grow Bay Leaf Indoors? Absolutely! Imagine stepping into your kitchen and snipping fresh, aromatic bay leaves straight from your own plant. No more dried-up, flavorless leaves from the grocery store! This isn’t just a pipe dream; it’s a reality you can easily achieve with a few simple tricks and a little DIY magic.
Bay leaf, with its rich history dating back to ancient Greece and Rome, where it symbolized victory and honor, has been a culinary staple for centuries. But did you know you don’t need a sprawling garden to enjoy its fragrant goodness? Many people struggle to find fresh bay leaves, or they end up buying more than they need, only to have them lose their potency. That’s where the beauty of growing your own comes in.
I’m here to show you how to grow bay leaf indoors, regardless of your gardening experience. This DIY guide will provide you with all the essential tips and tricks to successfully cultivate your own bay leaf plant, bringing a touch of Mediterranean flavor and fragrance right into your home. Get ready to embark on a rewarding journey of indoor gardening, and say hello to fresh, flavorful bay leaves whenever you need them!
Growing Bay Leaf Indoors: A Comprehensive DIY Guide
Hey there, fellow plant enthusiasts! Ever dreamt of snipping fresh bay leaves right from your own kitchen? Well, dream no more! Growing bay leaf ( *Laurus nobilis*) indoors is totally achievable, and I’m here to guide you through every step. It’s a rewarding experience that brings a touch of the Mediterranean to your home and elevates your cooking. Let’s get started!
Choosing the Right Bay Leaf Variety
Before we dive into the nitty-gritty, it’s important to choose the right bay leaf variety. While there are several types, the true bay laurel ( *Laurus nobilis*) is what you want for culinary purposes. Avoid confusing it with California bay laurel ( *Umbellularia californica*), which has a much stronger, almost medicinal flavor.
* True Bay Laurel ( *Laurus nobilis*): This is the one you want! It has a milder, more aromatic flavor perfect for soups, stews, and sauces.
* Dwarf Bay Laurel: A smaller, more compact variety that’s ideal for indoor growing due to its manageable size.
* Avoid California Bay Laurel: This has a much stronger flavor and isn’t typically used in the same way as true bay laurel.
Essential Supplies You’ll Need
Okay, let’s gather our supplies. Having everything ready beforehand will make the process much smoother.
* Bay Leaf Plant: You can purchase a small bay leaf plant from a local nursery or online. Look for healthy plants with vibrant green leaves.
* Pot: Choose a pot that’s at least 12 inches in diameter. Terracotta pots are great because they allow for good drainage.
* Potting Mix: Use a well-draining potting mix specifically formulated for container gardening. Avoid using garden soil, as it can become compacted and doesn’t drain well.
* Watering Can: A watering can with a long spout will help you water your plant evenly without splashing.
* Pruning Shears: For trimming and shaping your bay leaf plant.
* Fertilizer: A balanced liquid fertilizer (e.g., 10-10-10) diluted to half strength.
* Grow Light (Optional): If you don’t have a sunny spot, a grow light can provide the necessary light for your bay leaf plant.
* Pebbles or Gravel: To improve drainage at the bottom of the pot.
Step-by-Step Planting Guide
Alright, let’s get our hands dirty! Here’s how to plant your bay leaf plant in its new home.
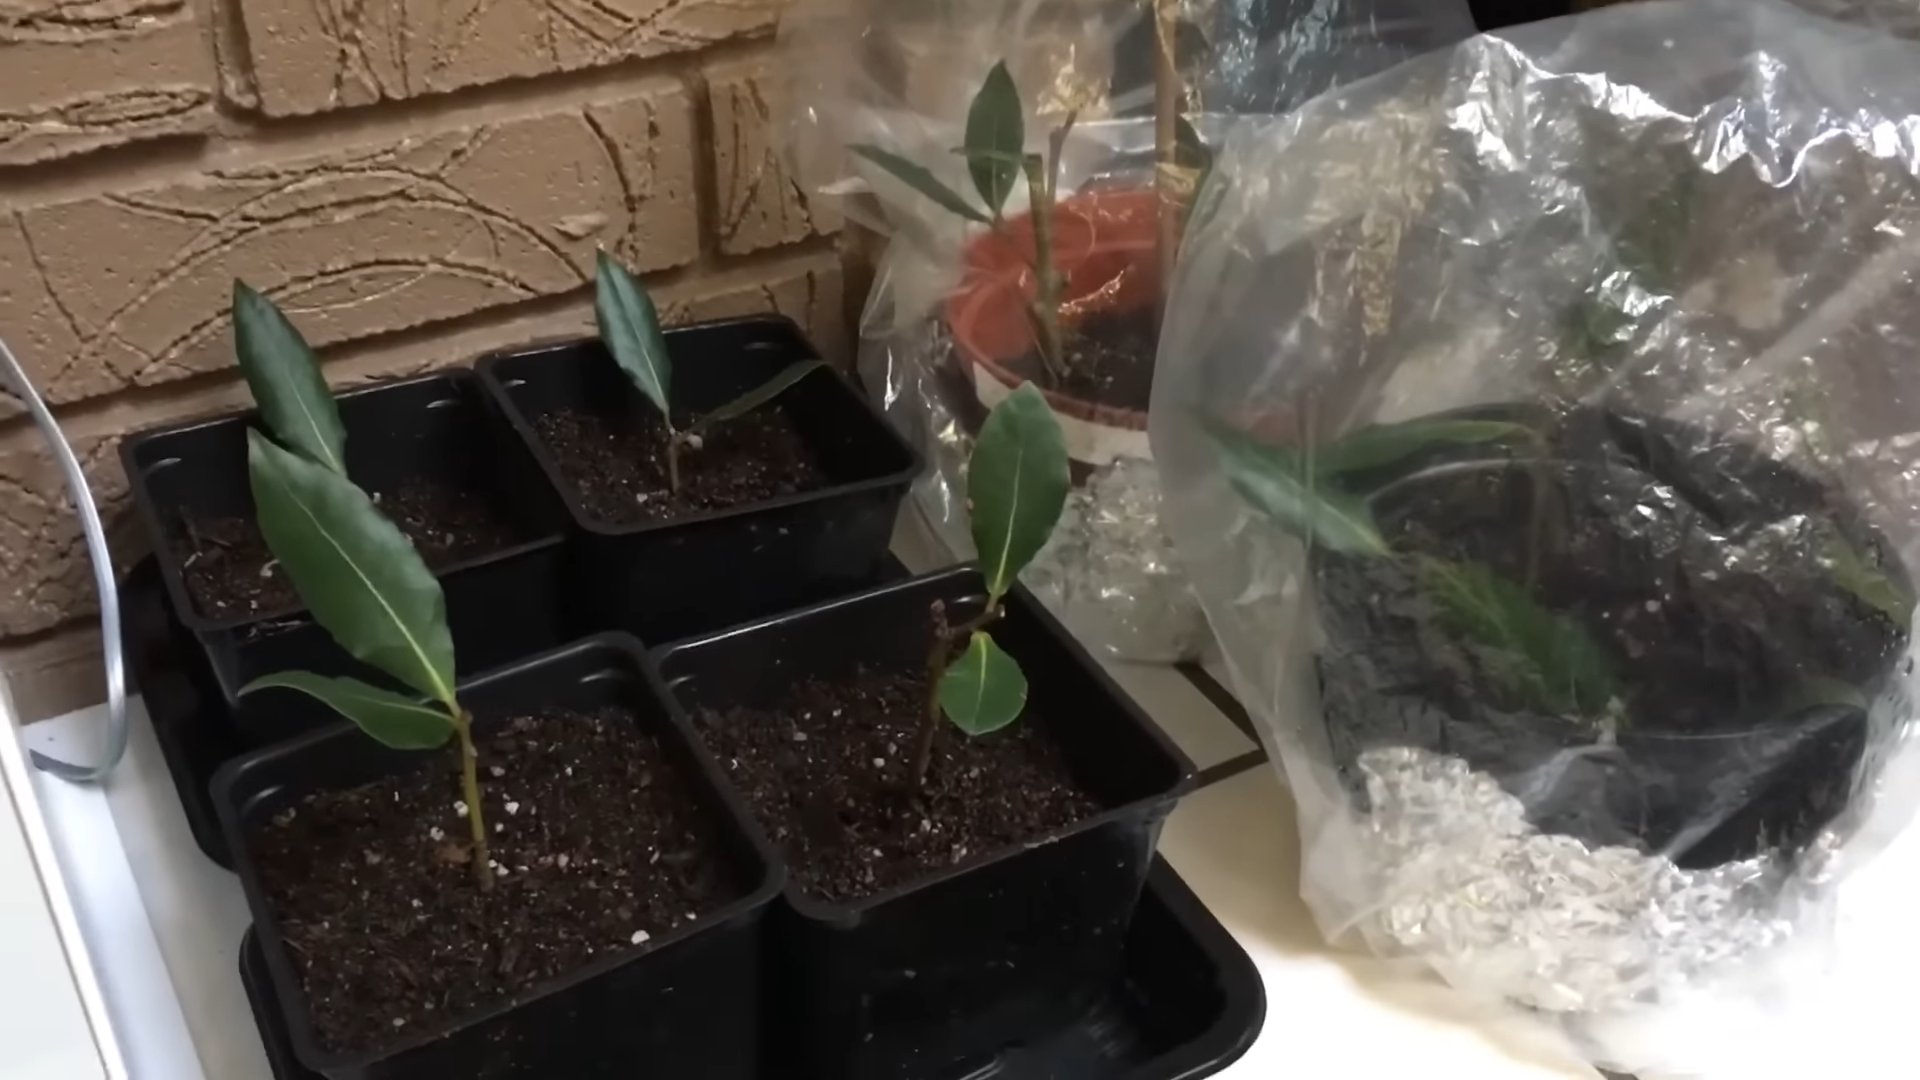
1. Prepare the Pot: Start by placing a layer of pebbles or gravel at the bottom of the pot. This will help with drainage and prevent the roots from sitting in water.
2. Add Potting Mix: Fill the pot about one-third full with the well-draining potting mix.
3. Remove the Plant from its Container: Gently remove the bay leaf plant from its original container. Loosen the roots slightly with your fingers to encourage them to spread out.
4. Position the Plant: Place the bay leaf plant in the center of the pot, making sure the top of the root ball is level with the top of the potting mix.
5. Fill with Potting Mix: Fill the rest of the pot with potting mix, gently pressing down around the plant to secure it.
6. Water Thoroughly: Water the plant thoroughly until water drains out of the bottom of the pot. This will help settle the soil and ensure the roots are well-hydrated.
Caring for Your Indoor Bay Leaf Plant
Now that your bay leaf plant is happily potted, let’s talk about how to keep it thriving.
Light Requirements
Bay leaf plants need plenty of sunlight, ideally at least 6 hours per day.
* Sunny Windowsill: Place your bay leaf plant near a south-facing or west-facing window where it can receive direct sunlight.
* Rotate the Plant: Rotate the plant regularly to ensure all sides receive equal sunlight. This will prevent it from leaning towards the light source.
* Grow Lights: If you don’t have enough natural light, supplement with a grow light. Position the grow light about 12-18 inches above the plant.
Watering
Watering is crucial, but it’s important to avoid overwatering.
* Check the Soil: Before watering, check the soil moisture by sticking your finger about an inch into the soil. If it feels dry, it’s time to water.
* Water Deeply: When you water, water deeply until water drains out of the bottom of the pot.
* Avoid Overwatering: Overwatering can lead to root rot, which is a common problem for indoor plants. Make sure the pot has good drainage and avoid letting the plant sit in standing water.
* Reduce Watering in Winter: During the winter months, when the plant is not actively growing, reduce watering frequency.
Humidity
Bay leaf plants prefer moderate humidity.
* Humidifier: If your home is dry, especially during the winter, use a humidifier to increase the humidity around your bay leaf plant.
* Pebble Tray: Place the pot on a tray filled with pebbles and water. As the water evaporates, it will increase the humidity around the plant.
* Misting: Mist the leaves of your bay leaf plant regularly with water to increase humidity.
Fertilizing
Fertilizing provides your bay leaf plant with the nutrients it needs to grow and thrive.
* Balanced Fertilizer: Use a balanced liquid fertilizer (e.g., 10-10-10) diluted to half strength.
* Fertilize Regularly: Fertilize your bay leaf plant every 2-4 weeks during the growing season (spring and summer).
* Avoid Over-Fertilizing: Over-fertilizing can burn the roots of your plant. Always dilute the fertilizer to the recommended strength.
* Reduce Fertilizing in Winter: During the winter months, reduce or stop fertilizing altogether.
Pruning and Shaping
Pruning helps maintain the shape of your bay leaf plant and encourages new growth.
* Prune Regularly: Prune your bay leaf plant regularly to remove dead or damaged leaves and to maintain its shape.
* Shape the Plant: You can shape your bay leaf plant into a topiary or other desired form.
* Harvest Leaves: You can harvest leaves for culinary use at any time. Simply snip off a few leaves as needed.
Repotting
Repotting is necessary as your bay leaf plant grows.
* Repot Every 1-2 Years: Repot your bay leaf plant every 1-2 years, or when it becomes root-bound.
* Choose a Larger Pot: Choose a pot that’s slightly larger than the current pot.
* Use Fresh Potting Mix: Use fresh, well-draining potting mix when repotting.
Dealing with Pests and Diseases
Even with the best care, your bay leaf plant may occasionally encounter pests or diseases.
* Common Pests: Watch out for common pests like aphids, spider mites, and scale.
* Inspect Regularly: Inspect your plant regularly for signs of pests or diseases.
* Treat Infestations: If you find pests, treat them with insecticidal soap or neem oil.
* Preventative Measures: Keep your plant healthy and well-ventilated to prevent pest infestations.
* Root Rot: Overwatering can lead to root rot. Ensure proper drainage and avoid letting the plant sit in standing water. If you suspect root rot, repot the plant with fresh potting mix and remove any affected roots.
Harvesting and Using Your Bay Leaves
The best part of growing your own bay leaf plant is harvesting fresh leaves for cooking!
* Harvesting: You can harvest leaves at any time. Simply snip off a few leaves as needed.
* Drying: To dry bay leaves, spread them out on a screen or tray in a cool, dry place. Allow them to dry for several days until they are brittle.
* Storage: Store dried bay leaves in an airtight container in a cool, dark place.
* Culinary Uses: Bay leaves are a versatile herb that can be used in a variety of dishes, including soups, stews, sauces, and braises. They add a subtle, aromatic flavor that enhances the overall taste of the dish. Remember to remove the bay leaf before serving, as it can be quite tough.
Troubleshooting Common Issues
Sometimes, things don’t go exactly as planned. Here are some common issues you might encounter and how to address them:
* Yellowing Leaves: This could be a sign of overwatering, underwatering, or nutrient deficiency. Check the soil moisture and adjust your watering accordingly. Fertilize
Conclusion
So, there you have it! Growing your own bay leaf indoors isn’t just a fun gardening project; it’s a gateway to fresher, more flavorful cooking and a touch of Mediterranean charm right in your home. Forget those brittle, often stale, dried bay leaves from the grocery store. Imagine the vibrant aroma and superior taste of freshly picked leaves enhancing your soups, stews, sauces, and braises. The difference is truly remarkable.
This DIY trick is a must-try for several compelling reasons. First, it puts you in control of the quality and freshness of your bay leaves. You know exactly where they came from and how they were grown, ensuring they are free from unwanted chemicals and additives. Second, it’s incredibly rewarding to nurture a plant from a small seedling or cutting to a thriving, aromatic herb. The satisfaction of harvesting your own ingredients is unparalleled. Third, a bay leaf plant adds a touch of greenery and elegance to your indoor space, acting as a natural air purifier and a conversation starter.
But the benefits don’t stop there. You can experiment with different varieties of bay leaf, such as the California bay laurel (Umbellularia californica), which has a stronger, more pungent flavor than the common sweet bay (Laurus nobilis). Just be sure to research the specific needs of each variety before planting. You can also try different potting mixes to see which one your bay leaf plant thrives in. Some gardeners swear by a mix of equal parts potting soil, perlite, and peat moss, while others prefer a slightly more acidic mix.
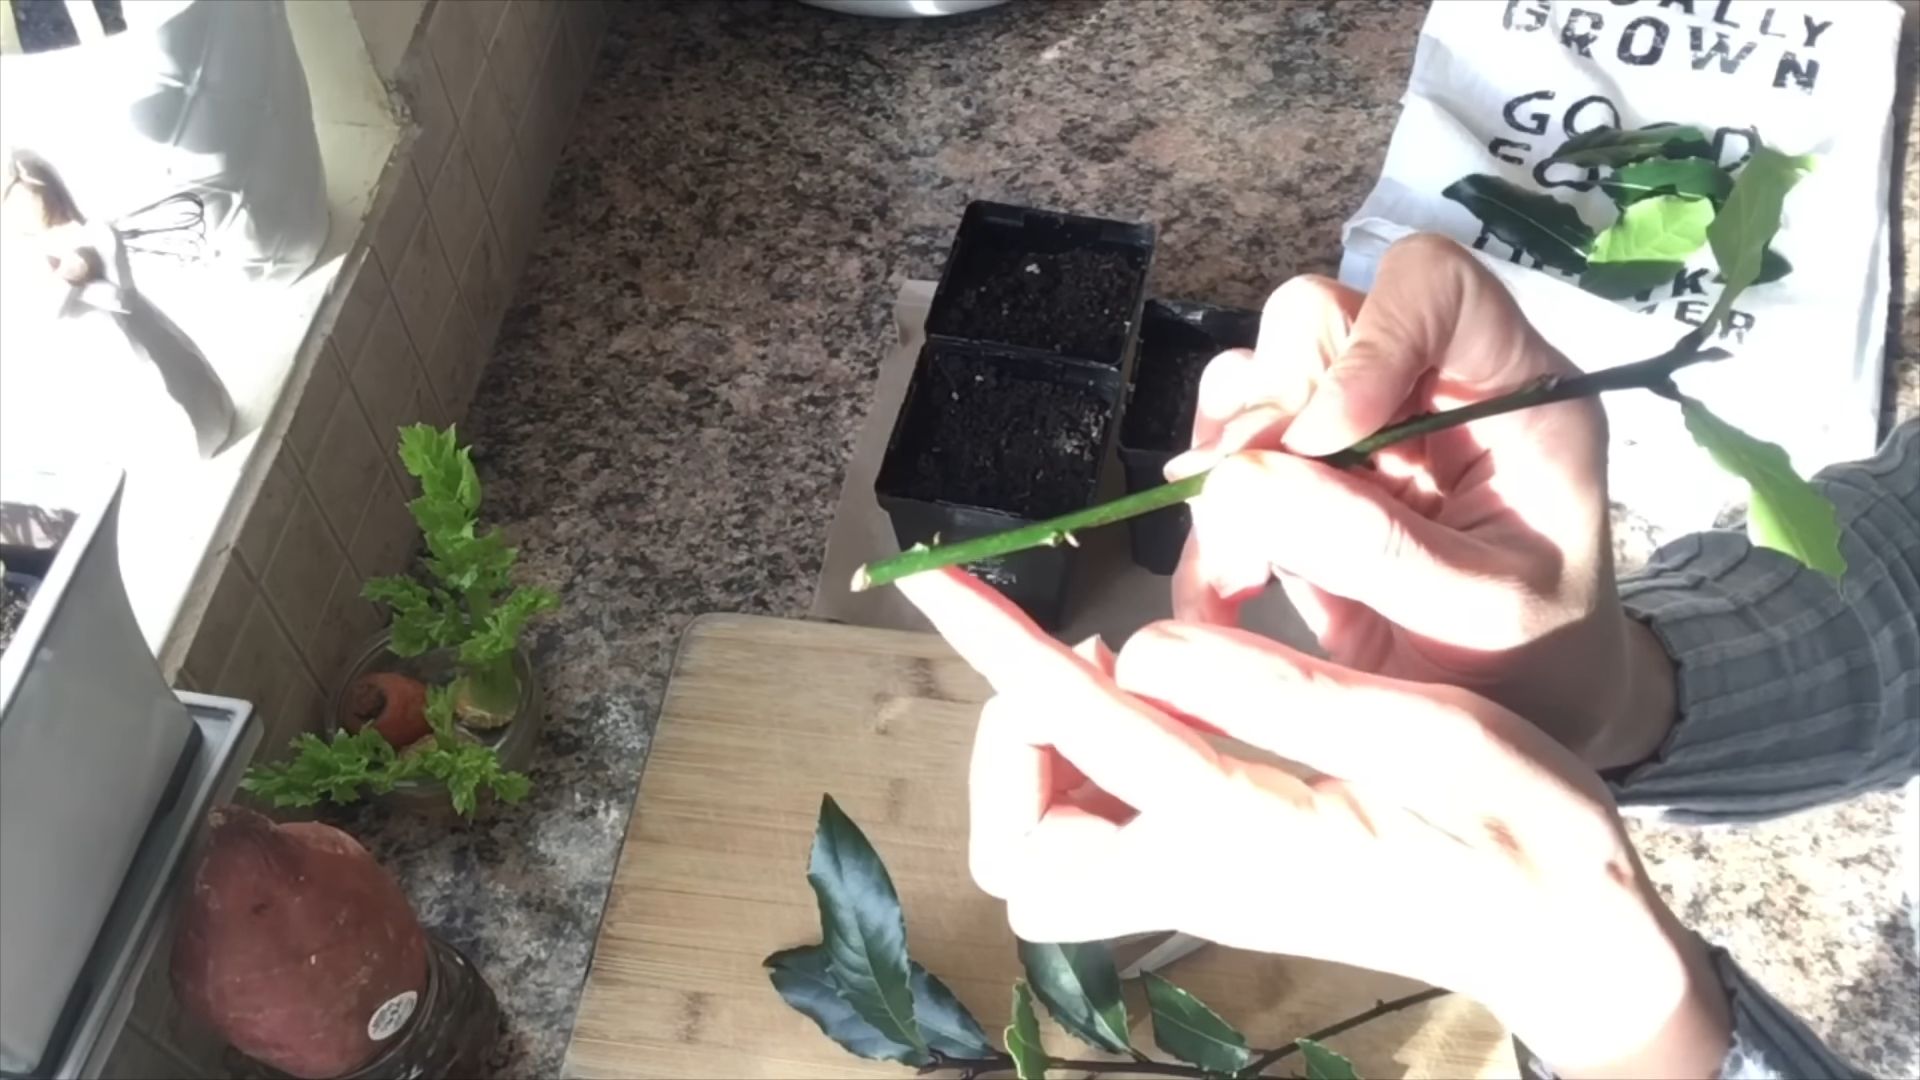
Consider propagating new bay leaf plants from cuttings of your existing plant. This is a great way to expand your herb garden and share the joy of growing bay leaf with friends and family. You can also dry your excess bay leaves for later use. Simply hang them upside down in a cool, dry place until they are completely dried and brittle. Store them in an airtight container to preserve their flavor.
Growing bay leaf indoors is an investment in your culinary creativity and your overall well-being. It’s a simple yet profound way to connect with nature and elevate your cooking to new heights. Don’t be intimidated by the prospect of growing your own herbs. With a little patience and attention, you can successfully cultivate a thriving bay leaf plant indoors, providing you with a constant supply of fresh, flavorful leaves for years to come.
We wholeheartedly encourage you to give this DIY trick a try. Start small, be patient, and don’t be afraid to experiment. Once you experience the joy of harvesting your own fresh bay leaves, you’ll never go back to store-bought dried leaves again.
We’d love to hear about your experiences growing bay leaf indoors! Share your tips, tricks, and photos in the comments below. Let’s create a community of bay leaf enthusiasts and inspire others to embark on this rewarding gardening journey. What growing medium did you find most effective? Did you encounter any challenges, and how did you overcome them? Your insights could be invaluable to other readers. Happy growing!
FAQ
Frequently Asked Questions About Growing Bay Leaf Indoors
1. What is the best location for my indoor bay leaf plant?
Bay leaf plants thrive in bright, indirect sunlight. A south-facing window is ideal, but an east- or west-facing window can also work. Avoid placing your plant in direct sunlight, as this can scorch the leaves. If you don’t have a sunny window, you can supplement with a grow light. Rotate the plant regularly to ensure even growth on all sides.
2. What type of soil should I use for my bay leaf plant?
Bay leaf plants prefer well-draining soil that is slightly acidic. A mix of equal parts potting soil, perlite, and peat moss is a good option. You can also add some compost to the mix to provide extra nutrients. Avoid using heavy clay soil, as this can retain too much moisture and lead to root rot. Ensure the pot has drainage holes to prevent waterlogging.
3. How often should I water my bay leaf plant?
Water your bay leaf plant when the top inch of soil feels dry to the touch. Avoid overwatering, as this can lead to root rot. During the winter months, when the plant is not actively growing, you can reduce watering frequency. Allow the soil to dry out slightly between waterings. Use room-temperature water to avoid shocking the plant.
4. What is the ideal temperature and humidity for my bay leaf plant?
Bay leaf plants prefer temperatures between 60°F and 75°F (15°C and 24°C). They can tolerate slightly cooler temperatures, but avoid exposing them to frost. Bay leaf plants also appreciate moderate humidity. If your home is dry, you can increase humidity by placing a tray of water near the plant, using a humidifier, or misting the leaves regularly.
5. How often should I fertilize my bay leaf plant?
Fertilize your bay leaf plant every 2-3 months during the growing season (spring and summer) with a balanced liquid fertilizer diluted to half strength. Avoid fertilizing during the winter months, when the plant is dormant. Over-fertilizing can damage the plant, so it’s always better to err on the side of caution.
6. How do I prune my bay leaf plant?
Prune your bay leaf plant regularly to maintain its shape and encourage bushier growth. You can prune at any time of year, but the best time to prune is in the spring, after the plant has finished flowering. Remove any dead, damaged, or diseased branches. You can also prune to control the size of the plant. Use clean, sharp pruning shears to avoid damaging the plant.
7. Can I harvest bay leaves from my indoor plant?
Yes, you can harvest bay leaves from your indoor plant once it is established and has produced enough leaves. Pick the leaves when they are mature and have a deep green color. You can use fresh bay leaves immediately or dry them for later use. To dry bay leaves, simply hang them upside down in a cool, dry place until they are completely dried and brittle. Store them in an airtight container to preserve their flavor.
8. What are some common problems with indoor bay leaf plants?
Some common problems with indoor bay leaf plants include root rot, spider mites, and scale. Root rot is caused by overwatering and can be prevented by ensuring the soil is well-draining and avoiding overwatering. Spider mites and scale are common pests that can be controlled with insecticidal soap or neem oil. Regularly inspect your plant for signs of pests and diseases.
9. Can I grow bay leaf from seed?
While possible, growing bay leaf from seed can be challenging and time-consuming. The germination rate is often low, and it can take several years for the plant to mature. A more reliable method is to propagate from cuttings.
10. Is growing bay leaf indoors worth the effort?
Absolutely! The superior flavor of fresh, homegrown bay leaves compared to store-bought dried leaves makes the effort worthwhile. Plus, the plant itself is attractive and adds a touch of greenery to your home. The satisfaction of harvesting your own herbs is an added bonus.

Leave a Comment