
Grow bean plants at home, even if you think you have a “brown thumb”! Have you ever dreamed of plucking fresh, crisp green beans straight from your own backyard, or balcony? Imagine the satisfaction of serving a meal featuring vegetables you nurtured from tiny seeds. This isn’t just a whimsical fantasy; it’s an achievable reality with a few clever DIY tricks and a little know-how.
For centuries, growing beans has been a staple in cultures worldwide, providing essential nutrients and a connection to the earth. From the ancient Incas who cultivated countless varieties to the modern-day gardener seeking sustainable food sources, the humble bean has played a vital role. But let’s face it, sometimes getting those beans to thrive can feel like a real challenge. That’s where our DIY hacks come in!
In this article, I’m going to share some of my favorite, tried-and-true methods for successfully growing bean plants at home, regardless of your space or experience level. We’ll cover everything from choosing the right bean variety for your climate to creating the perfect soil mix and warding off pesky pests – all with simple, affordable DIY solutions. So, ditch the grocery store beans and get ready to grow bean plants at home like a pro! I promise, with these tips, you’ll be harvesting a bountiful crop in no time.

Bohnen-Zauber: Dein eigener Bohnengarten für Zuhause
Hey Pflanzenfreunde! Habt ihr Lust, euch selbst mit frischen, knackigen Bohnen zu versorgen? Das ist einfacher, als ihr denkt! Ich zeige euch, wie ihr ganz easy zu Hause Bohnen anbauen könnt – egal ob im Garten, auf dem Balkon oder sogar auf der Fensterbank. Los geht’s!
Was du brauchst: Die Zutaten für deinen Bohnen-Erfolg
Bevor wir loslegen, schnappen wir uns alles, was wir brauchen. Keine Sorge, die meisten Sachen habt ihr wahrscheinlich schon zu Hause!
* Bohnensamen: Hier habt ihr die Qual der Wahl! Buschbohnen sind super für kleinere Gärten oder Töpfe, während Stangenbohnen in die Höhe wachsen und mehr Platz brauchen. Ich persönlich liebe die Vielfalt und probiere gerne verschiedene Sorten aus. Achtet beim Kauf auf Bio-Qualität, dann wisst ihr, dass keine schädlichen Pestizide im Spiel sind.
* Anzuchttöpfe oder -schalen: Für den Start brauchen wir kleine Behälter, in denen die Bohnen keimen können. Ihr könnt spezielle Anzuchttöpfe kaufen, aber auch Joghurtbecher oder Eierkartons tun es prima. Hauptsache, sie haben Löcher im Boden, damit das Wasser ablaufen kann.
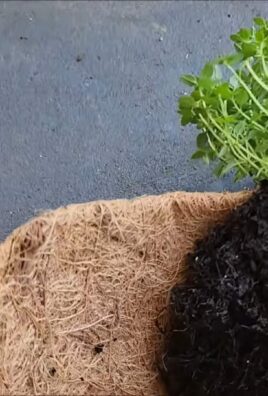
* Anzuchterde: Diese Erde ist besonders nährstoffarm und locker, ideal für die empfindlichen Keimlinge. Normale Blumenerde ist oft zu stark gedüngt.
* Blumenerde: Wenn die Bohnen größer sind, brauchen sie nährstoffreichere Erde. Hier kommt die Blumenerde ins Spiel.
* Töpfe oder ein Beet: Je nachdem, ob ihr Buschbohnen oder Stangenbohnen anbauen wollt, braucht ihr entsprechend große Töpfe oder ein Beet im Garten. Für Buschbohnen reichen Töpfe mit einem Durchmesser von 20-30 cm, für Stangenbohnen sollten sie größer sein oder ihr pflanzt sie direkt ins Beet.
* Rankhilfe (für Stangenbohnen): Stangenbohnen brauchen etwas zum Klettern. Ihr könnt Rankgitter, Stangen oder sogar einen alten Zaun verwenden.
* Gießkanne oder Sprühflasche: Zum Gießen brauchen wir natürlich etwas. Eine Gießkanne mit Brauseaufsatz ist ideal, um die Erde gleichmäßig zu befeuchten. Für die Keimlinge reicht oft eine Sprühflasche.
* Etiketten und Stift: Damit ihr nicht vergesst, welche Sorte ihr wo gepflanzt habt, sind Etiketten und ein Stift super hilfreich.
Phase 1: Die Vorbereitung – So weckst du die Bohnen zum Leben
Bevor wir die Bohnen in die Erde stecken, bereiten wir alles vor, damit sie sich so richtig wohlfühlen.
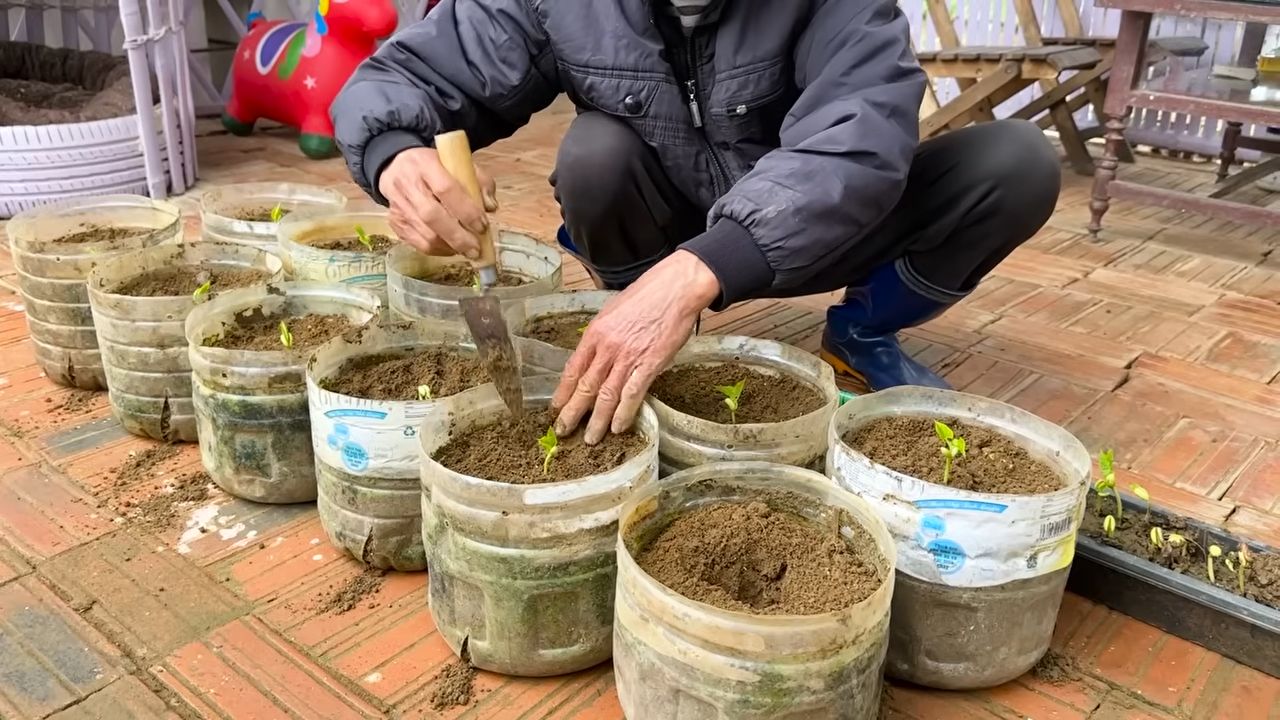
1. Anzuchttöpfe vorbereiten: Füllt die Anzuchttöpfe oder -schalen mit Anzuchterde. Drückt die Erde leicht an, aber nicht zu fest.
2. Bohnen einweichen (optional): Das Einweichen der Bohnen über Nacht in lauwarmem Wasser kann die Keimung beschleunigen. Ich mache das meistens, weil ich es kaum erwarten kann, die ersten grünen Spitzen zu sehen!
3. Bohnen säen: Steckt die Bohnen etwa 2-3 cm tief in die Erde. Legt pro Topf 2-3 Bohnen hinein, falls nicht alle keimen.
4. Angießen: Gießt die Erde vorsichtig an, sodass sie gut durchfeuchtet ist. Achtet darauf, dass keine Staunässe entsteht.
5. Warm und hell stellen: Stellt die Anzuchttöpfe an einen warmen und hellen Ort. Eine Fensterbank ist ideal. Die ideale Keimtemperatur liegt bei 18-25 Grad Celsius.
Phase 2: Die Aufzucht – Geduld ist der Schlüssel zum Erfolg
Jetzt heißt es warten und beobachten. Aber keine Sorge, die Zeit vergeht wie im Flug!
1. Feuchtigkeit halten: Die Erde sollte immer leicht feucht sein, aber nicht nass. Kontrolliert die Feuchtigkeit regelmäßig und gießt bei Bedarf nach.
2. Lüften: Wenn ihr die Anzuchttöpfe abgedeckt habt (z.B. mit Frischhaltefolie), solltet ihr sie regelmäßig lüften, um Schimmelbildung zu vermeiden.
3. Beobachten: Nach einigen Tagen (je nach Sorte und Temperatur) sollten die ersten Keimlinge zu sehen sein. Juhu!
4. Vereinzeln (optional): Wenn in einem Topf mehrere Bohnen gekeimt sind, könnt ihr die schwächsten entfernen, damit die stärkste Pflanze genug Platz hat. Ich lasse meistens die beiden stärksten stehen.
Phase 3: Umtopfen und Auspflanzen – Raus in die große weite Welt!
Sobald die Bohnenpflanzen kräftig genug sind (etwa 10-15 cm hoch), ist es Zeit, sie in größere Töpfe oder ins Beet umzupflanzen.
1. Vorbereitung: Füllt die größeren Töpfe oder das Beet mit Blumenerde. Lockert die Erde gut auf.
2. Auspflanzen: Hebt die Bohnenpflanzen vorsichtig aus den Anzuchttöpfen. Achtet darauf, die Wurzeln nicht zu beschädigen.
3. Einsetzen: Setzt die Bohnenpflanzen in die vorbereiteten Löcher. Der Abstand zwischen den Pflanzen sollte bei Buschbohnen etwa 20-30 cm betragen, bei Stangenbohnen etwa 40-50 cm.
4. Angießen: Gießt die Pflanzen gut an.
5. Rankhilfe anbringen (für Stangenbohnen): Wenn ihr Stangenbohnen gepflanzt habt, solltet ihr jetzt die Rankhilfe anbringen. Die Bohnen werden sich bald daran hochranken.
Phase 4: Pflege und Ernte – Belohnung für deine Mühe
Jetzt heißt es, die Bohnen gut zu pflegen, damit sie prächtig wachsen und viele leckere Früchte tragen.
1. Gießen: Gießt die Bohnen regelmäßig, besonders bei trockenem Wetter. Achtet darauf, dass die Erde immer leicht feucht ist.
2. Düngen: Bohnen sind Starkzehrer und brauchen ausreichend Nährstoffe. Düngt sie regelmäßig mit einem organischen Dünger. Ich verwende gerne Kompost oder Brennnesseljauche.
3. Unkraut jäten: Entfernt regelmäßig Unkraut, damit die Bohnen nicht um Nährstoffe konkurrieren müssen.
4. Schädlinge bekämpfen: Achtet auf Schädlinge wie Blattläuse oder Bohnenfliegen. Bei Befall könnt ihr natürliche Mittel wie Brennnesseljauche oder Schmierseife einsetzen.
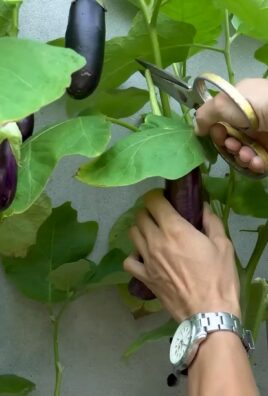
5. Ernten: Die Bohnen sind erntereif, wenn sie prall und knackig sind. Erntet sie regelmäßig, damit die Pflanze neue Früchte bilden kann. Am besten schmecken sie frisch aus dem Garten!
Extra-Tipps für den Bohnen-Profi
* Bohnen lieben die Sonne: Wählt einen sonnigen Standort für eure Bohnen.
* Bohnen sind gute Nachbarn: Sie vertragen sich gut mit Gurken, Salat, Radieschen und Karotten.
* Bohnen sind Stickstoffbinder: Sie reichern den Boden mit Stickstoff an, was anderen Pflanzen zugutekommt.
* Bohnen sind vielfältig: Es gibt unzählige Sorten mit unterschiedlichen Farben, Formen und Geschmäckern. Probiert einfach mal verschiedene aus!
* Bohnen sind gesund: Sie sind reich an Vitaminen, Mineralstoffen und Ballaststoffen.
Ich hoffe, diese Anleitung hilft euch dabei, euren eigenen Bohnengarten zu starten. Es ist wirklich ein tolles Gefühl, die eigenen Bohnen zu ernten und zu genießen. Viel Spaß beim Gärtnern! Und denkt dran: Auch wenn mal etwas nicht klappt, nicht aufgeben! Gärtnern ist ein Lernprozess, und jede Erfahrung macht dich besser.
Conclusion
So, there you have it! Growing bean plants at home is not only surprisingly simple, but it’s also incredibly rewarding. From witnessing the first tiny sprout emerge from the soil to harvesting your own fresh, crisp beans, the entire process is a testament to the magic of nature and the satisfaction of self-sufficiency. Forget those bland, store-bought beans – imagine the vibrant flavor and unparalleled freshness of beans you’ve nurtured yourself, right in your own home.
This DIY trick is a must-try for several compelling reasons. First, it’s a fantastic way to connect with nature, especially if you live in an urban environment. It offers a tangible reminder of where our food comes from and fosters a deeper appreciation for the natural world. Second, it’s an incredibly educational experience, particularly for children. They can learn about the life cycle of plants, the importance of sunlight and water, and the basics of gardening – all through hands-on involvement. Third, it’s a cost-effective way to enjoy fresh produce. Bean seeds are relatively inexpensive, and with a little care, you can yield a substantial harvest. Finally, and perhaps most importantly, it’s just plain fun! There’s something deeply satisfying about nurturing a plant from seed to harvest, and the pride you’ll feel when you serve your own homegrown beans is truly unmatched.
Don’t be afraid to experiment with different varieties of beans. Bush beans are a great option for smaller spaces, while pole beans will require a trellis or support structure but can produce a larger yield. Consider trying different colors and flavors, from classic green beans to vibrant purple or yellow varieties. You can also explore different planting methods, such as companion planting, where you grow beans alongside other vegetables like corn or squash to create a mutually beneficial ecosystem. For example, planting marigolds nearby can help deter pests.
Ready to embark on your bean-growing adventure? We encourage you to give this DIY trick a try. It’s easier than you think, and the rewards are well worth the effort. Once you’ve harvested your first crop, be sure to share your experience with us! We’d love to hear about your successes, challenges, and any variations you’ve tried. Share your photos and stories in the comments below, and let’s inspire others to discover the joy of growing their own food. Let’s all get growing bean plants at home!
Frequently Asked Questions (FAQ)
What kind of beans are easiest to grow at home?
Bush beans are generally considered the easiest type of bean to grow, especially for beginners. They are compact, don’t require trellising, and tend to produce a good yield in a relatively short amount of time. Green beans, such as ‘Blue Lake’ or ‘Contender’, are popular and reliable choices. Pole beans, while requiring more space and support, can also be relatively easy to grow and often produce a larger harvest over a longer period. Consider ‘Kentucky Wonder’ or ‘Scarlet Runner’ for pole bean options. The best choice depends on your available space and desired yield.
How much sunlight do bean plants need?
Bean plants require at least 6-8 hours of direct sunlight per day to thrive. Insufficient sunlight can lead to leggy growth, reduced flowering, and a smaller harvest. Choose a planting location that receives ample sunlight throughout the day. If you’re growing beans indoors, consider using grow lights to supplement natural sunlight, especially during the shorter days of winter. Rotate your plants regularly to ensure even light exposure on all sides.
What kind of soil is best for growing beans?
Bean plants prefer well-draining soil that is rich in organic matter. The ideal soil pH is between 6.0 and 7.0. Before planting, amend your soil with compost or well-rotted manure to improve its fertility and drainage. Avoid heavy clay soils, as they can become waterlogged and hinder root growth. If you have clay soil, consider adding sand or perlite to improve drainage. A soil test can help you determine the pH and nutrient levels of your soil and guide you in making necessary amendments.
How often should I water my bean plants?
Bean plants need consistent moisture, especially during flowering and pod development. Water deeply and regularly, aiming to keep the soil consistently moist but not waterlogged. The frequency of watering will depend on the weather conditions and the type of soil. Check the soil moisture by inserting your finger about an inch deep. If the soil feels dry, it’s time to water. Avoid overhead watering, as it can promote fungal diseases. Instead, water at the base of the plants. Mulching around the plants can help retain moisture and suppress weeds.
How do I know when my beans are ready to harvest?
The timing of harvest depends on the type of bean you’re growing. For snap beans (green beans), harvest when the pods are firm, plump, and snap easily when bent. They should be fully developed but not overly mature, as they can become tough and stringy. For shell beans, harvest when the pods are dry and the beans inside are fully mature. For dry beans, allow the pods to dry completely on the plant before harvesting. The pods should be brittle and the beans inside should be hard and dry.
What are some common pests and diseases that affect bean plants, and how can I prevent them?
Common pests that affect bean plants include aphids, bean beetles, and spider mites. Diseases include powdery mildew, bean rust, and anthracnose. To prevent pests and diseases, practice good garden hygiene. Remove any diseased or infested plants promptly. Rotate your crops each year to prevent the buildup of soilborne pathogens. Use insecticidal soap or neem oil to control pests. Ensure good air circulation around your plants to prevent fungal diseases. Choose disease-resistant varieties of beans whenever possible. Companion planting with herbs like basil or rosemary can also help deter pests.
Can I grow beans in containers?
Yes, you can successfully grow beans in containers. Choose a container that is at least 12 inches deep and wide to provide adequate space for root growth. Use a well-draining potting mix. Bush beans are generally better suited for container gardening than pole beans, as they are more compact. Ensure that your container receives at least 6-8 hours of direct sunlight per day. Water regularly and fertilize as needed.
How can I encourage more bean production?
To encourage more bean production, ensure that your plants receive adequate sunlight, water, and nutrients. Fertilize with a balanced fertilizer or a fertilizer specifically formulated for beans. Avoid over-fertilizing with nitrogen, as this can promote leafy growth at the expense of bean production. Pinch off the tips of the bean plants to encourage branching and more flower production. Regularly harvest your beans to encourage the plant to continue producing new pods.
What are some good companion plants for beans?
Good companion plants for beans include corn, squash, rosemary, marigolds, and nasturtiums. Corn provides a natural trellis for pole beans to climb. Squash helps to suppress weeds and retain moisture in the soil. Rosemary and marigolds deter pests. Nasturtiums attract aphids away from the bean plants. Avoid planting beans near onions or garlic, as they can inhibit bean growth.
How do I store my harvested beans?
Snap beans (green beans) can be stored in the refrigerator for up to a week. Store them in a plastic bag or container to prevent them from drying out. Shell beans can be stored in the refrigerator for a few days or frozen for longer storage. Dry beans should be stored in an airtight container in a cool, dry place. They can be stored for several months or even years.

Leave a Comment