
Grow Bitter Melon Easily and unlock a world of culinary possibilities right in your backyard! Have you ever dreamt of harvesting your own exotic vegetables, impressing your friends with unique dishes, and knowing exactly where your food comes from? Well, you’re in the right place! This DIY guide is your passport to cultivating this intriguing and nutritious vine with confidence, even if you’re a complete beginner.
Bitter melon, also known as bitter gourd or karela, has a rich history deeply intertwined with traditional medicine and cuisine across Asia, Africa, and the Caribbean. For centuries, it has been revered for its potential health benefits and distinctive, albeit acquired, taste. From stir-fries to curries, its unique flavor profile adds depth and complexity to countless dishes. But beyond its culinary appeal, growing your own bitter melon offers a sense of accomplishment and connection to nature.
Let’s be honest, sometimes store-bought produce just doesn’t cut it. It can lack flavor, freshness, and, frankly, the satisfaction of knowing you nurtured it from seed to table. That’s where this DIY trick comes in. Many people struggle to grow bitter melon easily due to its specific needs and perceived difficulty. But fear not! I’m here to demystify the process with simple, step-by-step instructions and insider tips that will have you harvesting a bountiful crop in no time. Get ready to transform your garden into a vibrant source of this amazing vegetable!

Bittermelone einfach selbst anbauen: Dein DIY-Guide für eine reiche Ernte
Hallo Gartenfreunde! Ich liebe Bittermelone, und ich finde, jeder sollte die Möglichkeit haben, diese gesunde und vielseitige Frucht selbst anzubauen. Es ist gar nicht so schwer, wie man vielleicht denkt! In diesem Artikel zeige ich dir Schritt für Schritt, wie du deine eigene Bittermelone erfolgreich anbauen kannst – von der Aussaat bis zur Ernte. Los geht’s!
Was du für den Anbau von Bittermelone brauchst:
* Bittermelonensamen: Am besten kaufst du qualitativ hochwertige Samen von einem vertrauenswürdigen Anbieter. Achte darauf, dass die Sorte für dein Klima geeignet ist.
* Anzuchttöpfe oder -schalen: Für die Voranzucht der Samen.
* Anzuchterde: Eine leichte, nährstoffarme Erde, die gut wasserdurchlässig ist.
* Pflanzerde: Eine nährstoffreiche Erde für das Auspflanzen ins Beet oder in größere Töpfe.
* Kompost oder organischer Dünger: Um den Boden anzureichern und die Pflanzen zu ernähren.
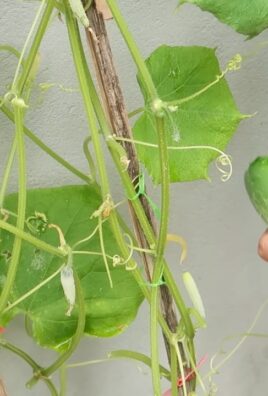
* Rankhilfe: Bittermelonen sind Kletterpflanzen und brauchen eine Rankhilfe, z.B. ein Spalier, ein Zaun oder ein Netz.
* Gießkanne oder Gartenschlauch: Zum regelmäßigen Gießen.
* Gartenschere: Zum Beschneiden der Pflanzen.
* Geduld und Liebe: Das Wichtigste!
Die Vorbereitung: Samen zum Keimen bringen
Die Bittermelone hat eine relativ lange Wachstumsperiode, daher ist es ratsam, die Samen vorzuziehen. Das gibt den Pflanzen einen Vorsprung und erhöht die Chancen auf eine reiche Ernte.
1. Samen vorbereiten: Bittermelonensamen haben eine harte Schale, die das Keimen erschweren kann. Um den Prozess zu beschleunigen, kannst du die Samen vor dem Einpflanzen anrauen. Nimm dazu ein Stück Schleifpapier oder eine Nagelfeile und raue die Oberfläche der Samen vorsichtig an. Achte darauf, die Samen nicht zu beschädigen!
2. Einweichen: Lege die angerauten Samen für 24 Stunden in lauwarmes Wasser. Das hilft, die Schale aufzuweichen und die Keimung zu fördern.
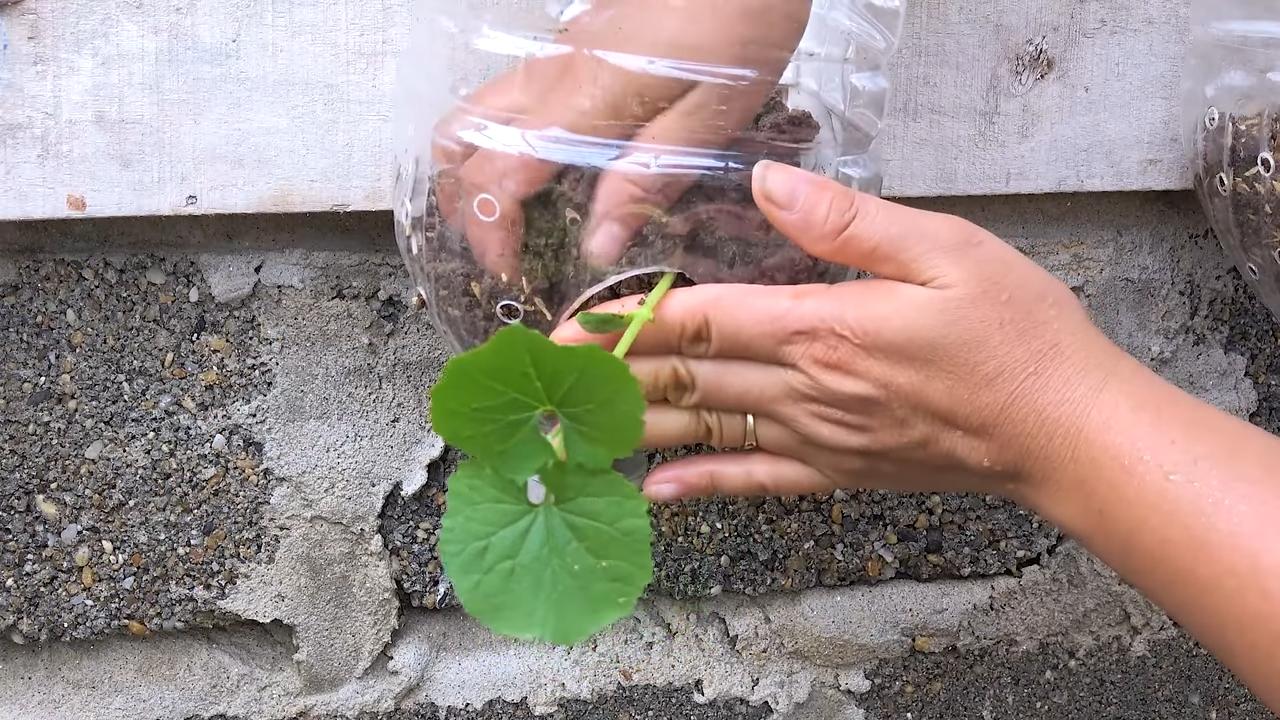
3. Aussaat: Fülle die Anzuchttöpfe oder -schalen mit Anzuchterde. Drücke die Erde leicht an und mache mit dem Finger kleine Löcher (ca. 1-2 cm tief). Lege in jedes Loch einen Samen und bedecke ihn mit Erde. Gieße die Erde vorsichtig an, sodass sie feucht, aber nicht nass ist.
4. Warm und feucht halten: Stelle die Anzuchttöpfe an einen warmen, hellen Ort. Die ideale Keimtemperatur liegt zwischen 25 und 30 Grad Celsius. Du kannst die Töpfe mit Frischhaltefolie abdecken, um die Luftfeuchtigkeit zu erhöhen. Achte darauf, die Folie regelmäßig zu lüften, um Schimmelbildung zu vermeiden.
5. Geduld haben: Die Keimung kann 1-3 Wochen dauern. Halte die Erde feucht, aber nicht nass. Sobald die ersten Keimlinge erscheinen, kannst du die Folie entfernen.
Das Auspflanzen: Der Umzug ins Freie
Sobald die Jungpflanzen kräftig genug sind (ca. 10-15 cm hoch und mit mehreren Blättern), können sie ins Freie umziehen.
1. Abhärten: Bevor du die Pflanzen ins Freie pflanzt, solltest du sie an die neuen Bedingungen gewöhnen. Stelle die Töpfe für einige Tage tagsüber ins Freie und hole sie abends wieder herein. So können sich die Pflanzen an die Sonne, den Wind und die Temperaturunterschiede anpassen.
2. Den richtigen Standort wählen: Bittermelonen lieben die Sonne! Wähle einen sonnigen Standort mit mindestens 6 Stunden direkter Sonneneinstrahlung pro Tag. Der Boden sollte gut durchlässig und nährstoffreich sein.
3. Boden vorbereiten: Lockere den Boden gründlich auf und mische Kompost oder organischen Dünger unter. Das verbessert die Bodenstruktur und versorgt die Pflanzen mit wichtigen Nährstoffen.
4. Pflanzen: Grabe Löcher, die etwas größer sind als die Wurzelballen der Jungpflanzen. Setze die Pflanzen vorsichtig in die Löcher und fülle sie mit Erde auf. Drücke die Erde leicht an und gieße die Pflanzen gründlich an.
5. Rankhilfe installieren: Bittermelonen sind Kletterpflanzen und brauchen eine Rankhilfe, um sich daran festzuhalten. Installiere ein Spalier, einen Zaun oder ein Netz in der Nähe der Pflanzen.
Die Pflege: Gießen, Düngen und Beschneiden
Die Bittermelone ist relativ pflegeleicht, aber regelmäßiges Gießen, Düngen und Beschneiden sind wichtig für eine reiche Ernte.
1. Gießen: Gieße die Pflanzen regelmäßig, besonders während trockener Perioden. Der Boden sollte immer feucht, aber nicht nass sein. Vermeide Staunässe, da dies zu Wurzelfäule führen kann. Am besten gießt du morgens, damit die Blätter tagsüber abtrocknen können.
2. Düngen: Dünge die Pflanzen alle 2-3 Wochen mit einem organischen Dünger oder Komposttee. Das versorgt sie mit wichtigen Nährstoffen und fördert das Wachstum.
3. Beschneiden: Bittermelonen können stark wuchern. Um die Fruchtbildung zu fördern, kannst du die Pflanzen regelmäßig beschneiden. Entferne Seitentriebe, die keine Blüten tragen, und kürze lange Triebe ein. Das hilft, die Energie der Pflanze auf die Fruchtbildung zu konzentrieren.
4. Schädlinge und Krankheiten: Achte auf Schädlinge wie Blattläuse oder Spinnmilben. Bei Befall kannst du die Pflanzen mit einem natürlichen Insektizid behandeln. Auch Pilzkrankheiten können auftreten, besonders bei feuchtem Wetter. Sorge für eine gute Belüftung der Pflanzen und entferne befallene Blätter.
Die Ernte: Der Lohn deiner Mühe
Die Bittermelone ist erntereif, wenn sie ihre typische Farbe erreicht hat (je nach Sorte grün, weiß oder gelb) und sich fest anfühlt.
1. Erntezeitpunkt: Die Erntezeit hängt von der Sorte und den klimatischen Bedingungen ab. In der Regel kannst du die ersten Früchte etwa 2-3 Monate nach dem Auspflanzen ernten.
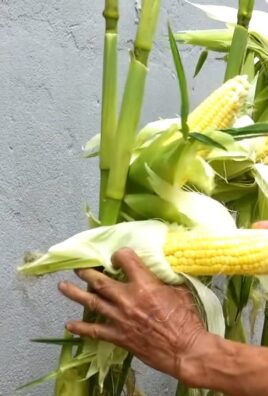
2. Ernten: Schneide die Früchte mit einer Gartenschere ab. Achte darauf, den Stiel nicht zu beschädigen.
3. Regelmäßig ernten: Ernte die Früchte regelmäßig, um die weitere Fruchtbildung anzuregen. Je mehr du erntest, desto mehr Früchte werden nachwachsen.
Zusätzliche Tipps für eine erfolgreiche Ernte:
* Mulchen: Bedecke den Boden um die Pflanzen mit Mulch (z.B. Stroh oder Rasenschnitt). Das hält den Boden feucht, unterdrückt Unkraut und schützt die Wurzeln vor extremen Temperaturen.
* Bestäubung: Bittermelonen haben männliche und weibliche Blüten. Um die Fruchtbildung zu gewährleisten, müssen die Blüten bestäubt werden. In der Regel übernehmen Bienen und andere Insekten diese Aufgabe. Wenn du jedoch wenig Insekten in deinem Garten hast, kannst du die Blüten auch von Hand bestäuben. Nimm dazu einen Pinsel und übertrage den Pollen von den männlichen auf die weiblichen Blüten.
* Sortenwahl: Es gibt viele verschiedene Bittermelonensorten. Wähle eine Sorte, die für dein Klima und deine Bedürfnisse geeignet ist. Einige Sorten sind bitterer als andere.
* Experimentieren: Gartenarbeit ist ein Lernprozess. Scheue dich nicht, zu experimentieren und neue Dinge auszuprobieren. Mit der Zeit wirst du herausfinden, was für dich und deine Bittermelonen am besten funktioniert.
Bittermelone in Töpfen anbauen: Geht das?
Ja, absolut! Wenn du keinen Garten hast, kannst du Bittermelone auch in Töpfen auf dem Balkon oder der Terrasse anbauen.
* Topfgröße: Wähle einen Topf mit einem Durchmesser von mindestens 30 cm.
* Erde: Verwende eine hochwertige Pflanzerde, die gut durchlässig ist.
* Rankhilfe: Stelle eine Rankhilfe in den Topf, damit die Pflanzen daran hochklet
Conclusion
So, there you have it! Growing bitter melon easily at home is not only achievable but also incredibly rewarding. From seed to harvest, the journey is filled with the satisfaction of nurturing your own food and enjoying the unique, slightly bitter flavor of this nutritious vegetable. We’ve walked you through the essential steps, from preparing the soil and choosing the right variety to providing the necessary support and combating common pests.
But why should you take the plunge and try this DIY trick? Because growing your own bitter melon allows you to control the entire process, ensuring that your produce is free from harmful pesticides and chemicals. You’ll have access to fresh, vine-ripened bitter melon whenever you need it, adding a healthy and flavorful ingredient to your meals. Plus, the act of gardening itself is a fantastic stress reliever and a great way to connect with nature.
Beyond the basic method, there are plenty of ways to customize your bitter melon growing experience. Consider experimenting with different trellising systems to maximize space and sunlight exposure. You could also try companion planting, pairing your bitter melon with beneficial herbs and flowers that attract pollinators and deter pests. For example, marigolds are known to repel nematodes, while basil can attract beneficial insects.
Another exciting variation is to explore different varieties of bitter melon. While the traditional green variety is the most common, you can also find white, long, and even dwarf varieties, each with its own unique flavor and texture. Don’t be afraid to experiment and discover your favorite!
Ultimately, the best way to learn is by doing. So, gather your supplies, prepare your garden, and embark on your own bitter melon growing adventure. We’re confident that you’ll be amazed by the results. And remember, even experienced gardeners encounter challenges along the way. Don’t be discouraged by setbacks; view them as learning opportunities and keep experimenting until you find what works best for you.
We encourage you to share your experiences with us and the wider gardening community. Post photos of your bitter melon plants, share your tips and tricks, and ask questions if you encounter any difficulties. Together, we can create a thriving community of home gardeners who are passionate about growing their own food. So, get out there, get your hands dirty, and start growing bitter melon easily today! The taste of homegrown success is waiting for you.
Frequently Asked Questions (FAQ)
1. What is the best time of year to plant bitter melon?
The ideal time to plant bitter melon is in late spring or early summer, after the last frost has passed and the soil has warmed up to at least 65°F (18°C). Bitter melon thrives in warm weather and requires a long growing season of at least 90-120 days. If you live in a cooler climate, you can start seeds indoors 4-6 weeks before the last expected frost and transplant them outdoors once the weather warms up.
2. How much sunlight does bitter melon need?
Bitter melon requires at least 6-8 hours of direct sunlight per day to thrive. Choose a planting location that receives plenty of sunlight throughout the day. If you’re growing bitter melon indoors, supplement with grow lights to ensure adequate light exposure. Insufficient sunlight can lead to weak growth, poor fruit production, and increased susceptibility to pests and diseases.
3. What type of soil is best for growing bitter melon?
Bitter melon prefers well-drained, fertile soil that is rich in organic matter. Amend your soil with compost, aged manure, or other organic materials before planting to improve drainage and fertility. The ideal soil pH for bitter melon is between 6.0 and 7.0. You can test your soil pH using a soil testing kit and adjust it accordingly with lime or sulfur.
4. How often should I water bitter melon?
Water bitter melon regularly, especially during hot, dry weather. Aim to keep the soil consistently moist but not waterlogged. Water deeply at the base of the plant, avoiding wetting the foliage, which can increase the risk of fungal diseases. Mulching around the base of the plant can help retain moisture and suppress weeds. Check the soil moisture regularly and adjust your watering schedule as needed based on weather conditions.
5. What kind of support system does bitter melon need?
Bitter melon is a vining plant and requires a strong support system to climb on. A trellis, fence, or arbor are all suitable options. The support system should be at least 6-8 feet tall to accommodate the plant’s growth. Train the vines to climb the support system by gently guiding them and tying them with soft twine or plant ties. Proper support will improve air circulation, reduce the risk of diseases, and make harvesting easier.
6. How do I fertilize bitter melon?
Fertilize bitter melon regularly throughout the growing season to promote healthy growth and abundant fruit production. Use a balanced fertilizer with equal amounts of nitrogen, phosphorus, and potassium (e.g., 10-10-10) or a fertilizer specifically formulated for vegetables. Apply fertilizer according to the package instructions, typically every 2-3 weeks. You can also supplement with organic fertilizers such as compost tea or fish emulsion. Avoid over-fertilizing, which can lead to excessive foliage growth and reduced fruit production.
7. What are some common pests and diseases that affect bitter melon?
Bitter melon can be susceptible to various pests and diseases, including aphids, spider mites, squash bugs, cucumber beetles, powdery mildew, and downy mildew. Monitor your plants regularly for signs of infestation or disease. Treat pests with insecticidal soap, neem oil, or other organic insecticides. Prevent diseases by providing good air circulation, avoiding overhead watering, and applying fungicides if necessary. Remove any infected leaves or plants promptly to prevent the spread of disease.
8. When and how do I harvest bitter melon?
Bitter melon is typically ready to harvest 90-120 days after planting. Harvest the fruits when they are still green and firm, before they turn yellow or orange. The size of the fruit will vary depending on the variety. Use a sharp knife or pruners to cut the fruit from the vine, leaving a short stem attached. Regular harvesting will encourage the plant to produce more fruit.
9. How do I store bitter melon?
Store bitter melon in the refrigerator for up to a week. Wrap the fruits in plastic wrap or place them in a plastic bag to prevent them from drying out. Bitter melon can also be frozen for longer storage. Blanch the fruits in boiling water for 2-3 minutes, then cool them in ice water before freezing.
10. Can I eat bitter melon seeds?
Yes, you can eat bitter melon seeds, but they are very bitter. Some people enjoy the bitter taste, while others find it unpleasant. The seeds contain cucurbitacins, which are responsible for the bitter flavor and have some medicinal properties. If you want to eat the seeds, remove them from the fruit and roast them in the oven or sauté them in a pan to reduce the bitterness.
11. Is bitter melon good for my health?
Yes, bitter melon is a very nutritious vegetable with numerous health benefits. It is rich in vitamins, minerals, and antioxidants. Bitter melon has been shown to help regulate blood sugar levels, lower cholesterol, boost the immune system, and fight cancer. It is also a good source of fiber, which promotes digestive health. Incorporating bitter melon into your diet can be a great way to improve your overall health and well-being.

Leave a Comment