
Grow Broccoli at Home? Absolutely! Imagine stepping into your backyard and harvesting fresh, vibrant broccoli heads, bursting with flavor and nutrients. Forget those bland, overpriced supermarket florets – with a few simple tricks and a little DIY spirit, you can cultivate your own thriving broccoli patch, right in your own backyard.
Home gardening, including growing your own broccoli, has a rich history. From the ancient Roman gardens to the victory gardens of World War II, people have always found solace and sustenance in cultivating their own food. Broccoli itself, a descendant of wild cabbage, has been enjoyed for centuries, prized for its health benefits and delicious taste.
But why should you embark on this broccoli-growing adventure? Well, for starters, you’ll have access to fresher, healthier produce, free from harmful pesticides and chemicals. Plus, gardening is incredibly therapeutic! It’s a fantastic way to de-stress, connect with nature, and learn new skills. And let’s be honest, there’s nothing quite as satisfying as nurturing a plant from seed to harvest. In this article, I’m going to share some easy-to-follow DIY tricks and hacks that will help you grow broccoli at home like a pro, even if you’re a complete beginner. Get ready to get your hands dirty and enjoy the fruits (or rather, vegetables!) of your labor!

Growing Broccoli at Home: A Beginner’s Guide
Hey there, fellow gardening enthusiasts! I’m so excited to share my experience with growing broccoli at home. It’s surprisingly rewarding, and nothing beats the taste of freshly harvested, homegrown broccoli. Don’t be intimidated; even if you’re a beginner, you can absolutely do this! I’ll walk you through every step, from choosing the right variety to dealing with pesky pests.
Choosing the Right Broccoli Variety
Before we get our hands dirty, let’s talk about broccoli varieties. Not all broccoli is created equal, and selecting the right one for your climate and growing conditions is crucial.
* Consider your climate: Some varieties are better suited for warmer climates, while others thrive in cooler temperatures.
* Days to maturity: This refers to the time it takes from planting to harvest. Choose a variety that fits your growing season.
* Head size: Broccoli heads can range in size from small to quite large. Consider how much broccoli you typically eat when making your selection.
* Disease resistance: Some varieties are more resistant to common broccoli diseases.
Here are a few popular and reliable broccoli varieties:
* ‘Waltham 29’: A classic, reliable variety that’s known for its good flavor and cold hardiness. It matures in about 75 days.
* ‘DiCicco’: A fast-maturing variety (around 50 days) that produces smaller main heads followed by numerous side shoots. Great for continuous harvesting!
* ‘Green Magic’: A heat-tolerant variety that’s perfect for warmer climates. It matures in about 60 days.
* ‘Calabrese’: Another popular variety that produces large, dark green heads. It matures in about 68 days.
I personally love ‘DiCicco’ because of its quick maturity and the continuous harvest of side shoots. It keeps me in broccoli for a longer period!
Starting Broccoli Seeds Indoors (Optional but Recommended)
While you can directly sow broccoli seeds into the garden, I highly recommend starting them indoors, especially if you live in an area with a short growing season. This gives your broccoli plants a head start and allows them to mature before the weather gets too hot or cold.
* When to start seeds: Start your seeds about 6-8 weeks before the last expected frost in your area.
* What you’ll need:
* Seed starting trays or small pots
* Seed starting mix (a light, well-draining mix is essential)
* Broccoli seeds
* Watering can or spray bottle
* Grow lights (optional, but highly recommended)
Step-by-Step Instructions:
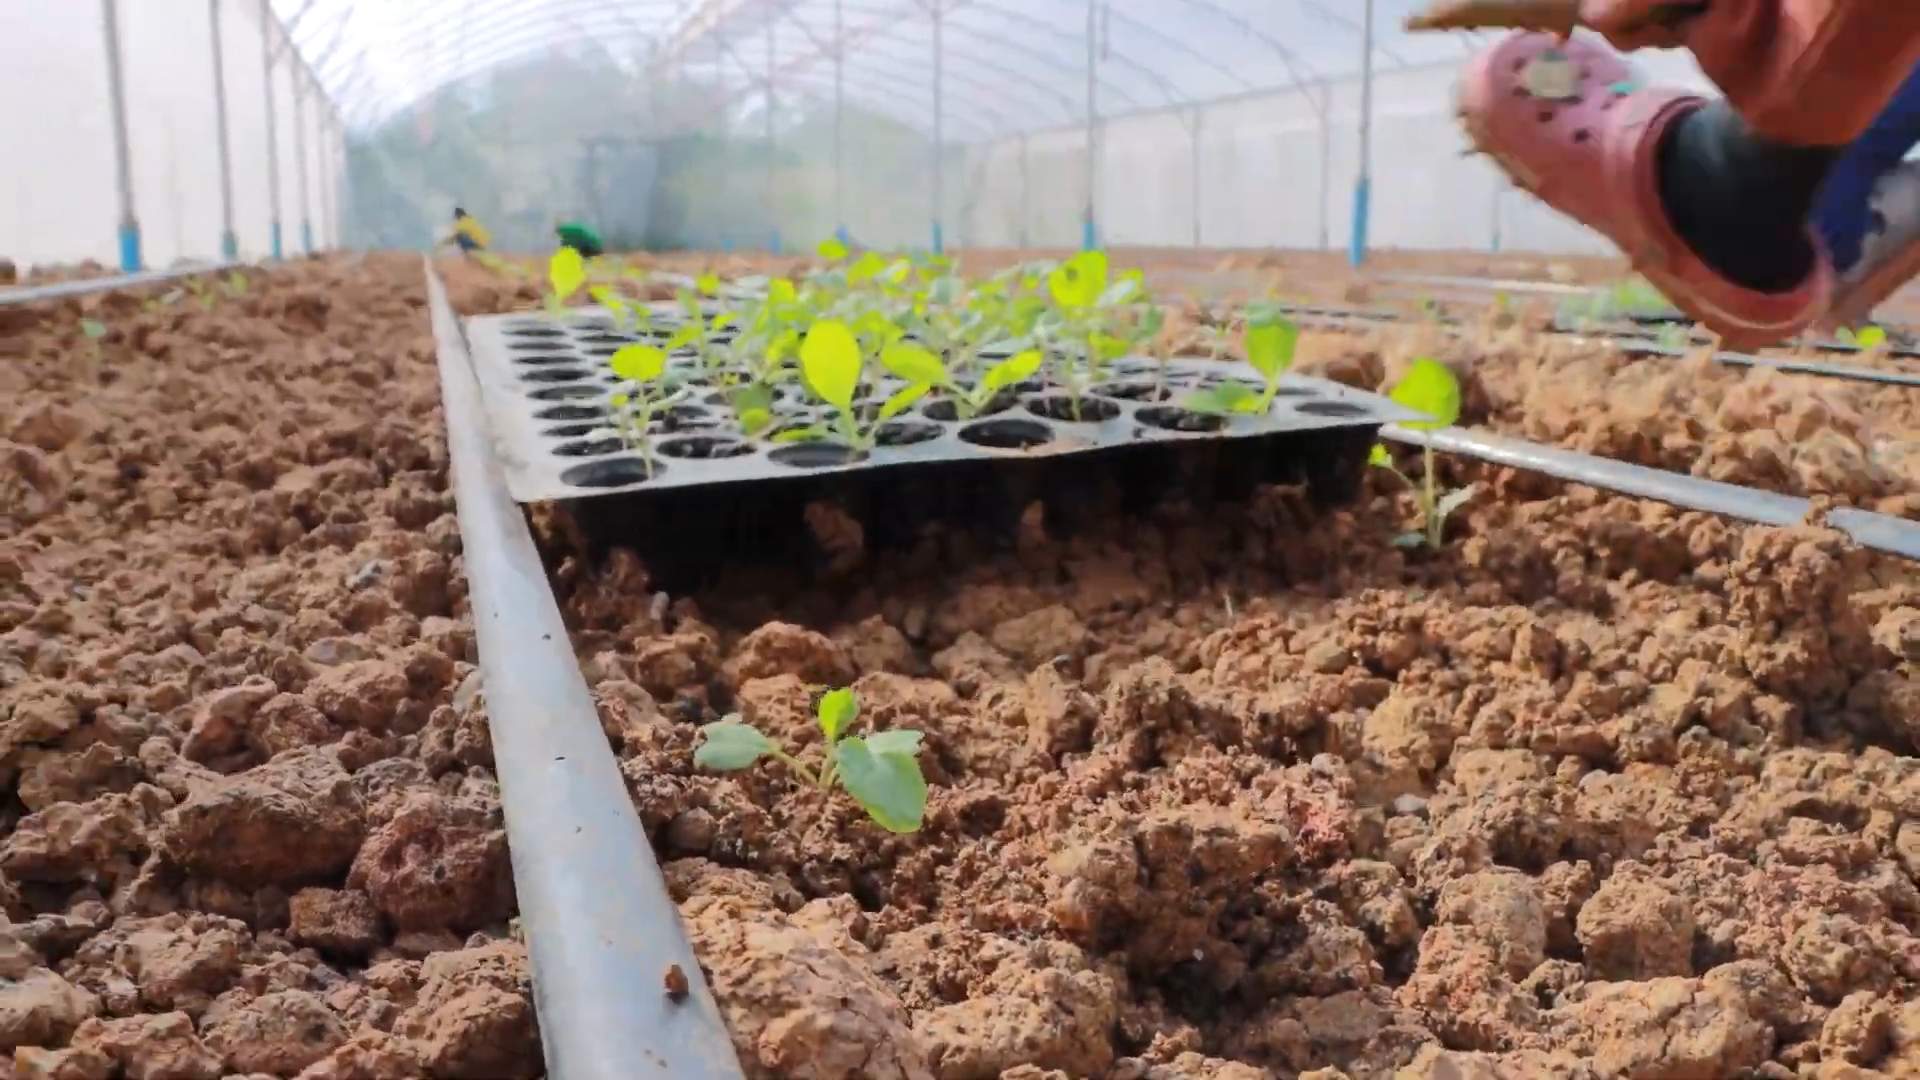
1. Prepare your seed starting trays: Fill your seed starting trays or pots with seed starting mix. Gently tap the trays to settle the mix.
2. Sow the seeds: Make a small indentation (about 1/4 inch deep) in the center of each cell or pot. Place 2-3 broccoli seeds in each indentation.
3. Cover the seeds: Gently cover the seeds with seed starting mix.
4. Water thoroughly: Water the trays or pots gently using a watering can or spray bottle. Make sure the soil is moist but not soggy.
5. Provide warmth and light: Place the trays or pots in a warm location (around 70-75°F). If you’re using grow lights, position them a few inches above the trays. If you don’t have grow lights, place the trays near a sunny window, but be aware that the seedlings may become leggy (tall and spindly) if they don’t receive enough light.
6. Keep the soil moist: Check the soil moisture daily and water as needed to keep it consistently moist.
7. Thin the seedlings: Once the seedlings have developed their first true leaves (the leaves that appear after the initial seed leaves), thin them to one seedling per cell or pot. Choose the strongest, healthiest-looking seedling and gently snip off the others at the soil line. Don’t pull them out, as this can disturb the roots of the remaining seedling.
Preparing the Garden Bed
Broccoli needs a sunny spot and well-drained soil to thrive. Before transplanting your seedlings or directly sowing seeds, it’s important to prepare the garden bed properly.
* Choose a sunny location: Broccoli needs at least 6 hours of sunlight per day.
* Test the soil: Ideally, the soil pH should be between 6.0 and 7.0. You can purchase a soil testing kit at most garden centers.
* Amend the soil: Broccoli is a heavy feeder, meaning it needs a lot of nutrients. Amend the soil with compost or well-rotted manure to improve its fertility and drainage. I usually add a generous layer of compost to my garden bed before planting.
* Remove weeds: Clear the garden bed of any weeds. Weeds compete with broccoli plants for nutrients and water.
* Loosen the soil: Use a garden fork or tiller to loosen the soil to a depth of at least 12 inches. This will allow the broccoli roots to penetrate the soil easily.
Transplanting Broccoli Seedlings or Direct Sowing
Once your seedlings are ready or you’ve decided to direct sow, it’s time to get them into the garden!
* Hardening off seedlings (if transplanting): Before transplanting your seedlings, you need to “harden them off.” This means gradually exposing them to outdoor conditions over a period of about a week. Start by placing the trays or pots outside in a sheltered location for a few hours each day, gradually increasing the amount of time they spend outdoors. This will help them acclimate to the sun, wind, and temperature changes.
* When to transplant or sow: Transplant your seedlings or direct sow seeds after the last expected frost in your area. The soil temperature should be at least 50°F.
* Spacing: Space broccoli plants 18-24 inches apart in rows that are 24-36 inches apart. This will give them enough room to grow and mature.
Step-by-Step Instructions for Transplanting:
1. Dig holes: Dig holes that are slightly larger than the root balls of your seedlings.
2. Remove seedlings from trays: Gently remove the seedlings from their trays or pots. Be careful not to damage the roots.
3. Place seedlings in holes: Place the seedlings in the holes, making sure the top of the root ball is level with the soil surface.
4. Fill in the holes: Fill in the holes with soil and gently firm the soil around the base of the plants.
5. Water thoroughly: Water the plants thoroughly after transplanting.
Step-by-Step Instructions for Direct Sowing:
1. Sow seeds: Sow seeds about 1/2 inch deep and 1 inch apart.
2. Cover the seeds: Gently cover the seeds with soil.
3. Water thoroughly: Water the area gently.
4. Thin seedlings: Once the seedlings emerge and have a few true leaves, thin them to 18-24 inches apart.
Caring for Your Broccoli Plants
Now that your broccoli plants are in the ground, it’s important to provide them with the care they need to thrive.
* Watering: Broccoli needs consistent moisture, especially during head formation. Water deeply and regularly, especially during dry periods. Aim for about 1-1.5 inches of water per week. I like to use a soaker hose to water my broccoli plants, as this delivers water directly to the roots and minimizes water loss through evaporation.
* Fertilizing: Broccoli is a heavy feeder, so it’s important to fertilize it regularly. Apply a balanced fertilizer (such as 10-10-10) every 3-4 weeks. You can also side-dress the plants with compost or well-rotted manure.
Hey there, fellow gardening enthusiasts! I’m so excited to share my experience with growing broccoli at home. It’s surprisingly rewarding, and nothing beats the taste of freshly harvested, homegrown broccoli. Don’t be intimidated; even if you’re a beginner, you can absolutely do this! I’ll walk you through every step, from choosing the right variety to dealing with pesky pests.
Choosing the Right Broccoli Variety
Before we get our hands dirty, let’s talk about broccoli varieties. Not all broccoli is created equal, and selecting the right one for your climate and growing conditions is crucial.
* Consider your climate: Some varieties are better suited for warmer climates, while others thrive in cooler temperatures.
* Days to maturity: This refers to the time it takes from planting to harvest. Choose a variety that fits your growing season.
* Head size: Broccoli heads can range in size from small to quite large. Consider how much broccoli you typically eat when making your selection.
* Disease resistance: Some varieties are more resistant to common broccoli diseases.
Here are a few popular and reliable broccoli varieties:
* ‘Waltham 29’: A classic, reliable variety that’s known for its good flavor and cold hardiness. It matures in about 75 days.
* ‘DiCicco’: A fast-maturing variety (around 50 days) that produces smaller main heads followed by numerous side shoots. Great for continuous harvesting!
* ‘Green Magic’: A heat-tolerant variety that’s perfect for warmer climates. It matures in about 60 days.
* ‘Calabrese’: Another popular variety that produces large, dark green heads. It matures in about 68 days.
I personally love ‘DiCicco’ because of its quick maturity and the continuous harvest of side shoots. It keeps me in broccoli for a longer period!
Starting Broccoli Seeds Indoors (Optional but Recommended)
While you can directly sow broccoli seeds into the garden, I highly recommend starting them indoors, especially if you live in an area with a short growing season. This gives your broccoli plants a head start and allows them to mature before the weather gets too hot or cold.
* When to start seeds: Start your seeds about 6-8 weeks before the last expected frost in your area.
* What you’ll need:
* Seed starting trays or small pots
* Seed starting mix (a light, well-draining mix is essential)
* Broccoli seeds
* Watering can or spray bottle
* Grow lights (optional, but highly recommended)
Step-by-Step Instructions:
1. Prepare your seed starting trays: Fill your seed starting trays or pots with seed starting mix. Gently tap the trays to settle the mix.
2. Sow the seeds: Make a small indentation (about 1/4 inch deep) in the center of each cell or pot. Place 2-3 broccoli seeds in each indentation.
3. Cover the seeds: Gently cover the seeds with seed starting mix.
4. Water thoroughly: Water the trays or pots gently using a watering can or spray bottle. Make sure the soil is moist but not soggy.
5. Provide warmth and light: Place the trays or pots in a warm location (around 70-75°F). If you’re using grow lights, position them a few inches above the trays. If you don’t have grow lights, place the trays near a sunny window, but be aware that the seedlings may become leggy (tall and spindly) if they don’t receive enough light.
6. Keep the soil moist: Check the soil moisture daily and water as needed to keep it consistently moist.
7. Thin the seedlings: Once the seedlings have developed their first true leaves (the leaves that appear after the initial seed leaves), thin them to one seedling per cell or pot. Choose the strongest, healthiest-looking seedling and gently snip off the others at the soil line. Don’t pull them out, as this can disturb the roots of the remaining seedling.
Preparing the Garden Bed
Broccoli needs a sunny spot and well-drained soil to thrive. Before transplanting your seedlings or directly sowing seeds, it’s important to prepare the garden bed properly.
* Choose a sunny location: Broccoli needs at least 6 hours of sunlight per day.
* Test the soil: Ideally, the soil pH should be between 6.0 and 7.0. You can purchase a soil testing kit at most garden centers.
* Amend the soil: Broccoli is a heavy feeder, meaning it needs a lot of nutrients. Amend the soil with compost or well-rotted manure to improve its fertility and drainage. I usually add a generous layer of compost to my garden bed before planting.
* Remove weeds: Clear the garden bed of any weeds. Weeds compete with broccoli plants for nutrients and water.
* Loosen the soil: Use a garden fork or tiller to loosen the soil to a depth of at least 12 inches. This will allow the broccoli roots to penetrate the soil easily.
Transplanting Broccoli Seedlings or Direct Sowing
Once your seedlings are ready or you’ve decided to direct sow, it’s time to get them into the garden!
* Hardening off seedlings (if transplanting): Before transplanting your seedlings, you need to “harden them off.” This means gradually exposing them to outdoor conditions over a period of about a week. Start by placing the trays or pots outside in a sheltered location for a few hours each day, gradually increasing the amount of time they spend outdoors. This will help them acclimate to the sun, wind, and temperature changes.
* When to transplant or sow: Transplant your seedlings or direct sow seeds after the last expected frost in your area. The soil temperature should be at least 50°F.
* Spacing: Space broccoli plants 18-24 inches apart in rows that are 24-36 inches apart. This will give them enough room to grow and mature.
Step-by-Step Instructions for Transplanting:
1. Dig holes: Dig holes that are slightly larger than the root balls of your seedlings.
2. Remove seedlings from trays: Gently remove the seedlings from their trays or pots. Be careful not to damage the roots.
3. Place seedlings in holes: Place the seedlings in the holes, making sure the top of the root ball is level with the soil surface.
4. Fill in the holes: Fill in the holes with soil and gently firm the soil around the base of the plants.
5. Water thoroughly: Water the plants thoroughly after transplanting.
Step-by-Step Instructions for Direct Sowing:
1. Sow seeds: Sow seeds about 1/2 inch deep and 1 inch apart.
2. Cover the seeds: Gently cover the seeds with soil.
3. Water thoroughly: Water the area gently.
4. Thin seedlings: Once the seedlings emerge and have a few true leaves, thin them to 18-24 inches apart.
Caring for Your Broccoli Plants
Now that your broccoli plants are in the ground, it’s important to provide them with the care they need to thrive.
* Watering: Broccoli needs consistent moisture, especially during head formation. Water deeply and regularly, especially during dry periods. Aim for about 1-1.5 inches of water per week. I like to use a soaker hose to water my broccoli plants, as this delivers water directly to the roots and minimizes water loss through evaporation.
* Fertilizing: Broccoli is a heavy feeder, so it’s important to fertilize it regularly. Apply a balanced fertilizer (such as 10-10-10) every 3-4 weeks. You can also side-dress the plants with compost or well-rotted manure.
* Weeding: Keep the garden bed free of weeds. Weeds compete with broccoli plants for nutrients and water.
* Mulching: Apply a layer of mulch around the broccoli plants to help retain moisture, suppress weeds, and regulate soil temperature. I like to use straw or wood chips as mulch.
Dealing with Pests and Diseases
Unfortunately, broccoli is susceptible to a few pests and diseases. Here are some common problems and how to deal with them:
* Cabbage worms: These green caterpillars can devour broccoli leaves. Handpick them off the plants or use Bacillus thuringiensis (Bt), a natural insecticide. I usually inspect my plants regularly and handpick any cabbage worms I find.
* Aphids: These tiny insects can suck the sap from broccoli leaves. Spray them with a strong stream of water or use insecticidal soap.
* Flea beetles: These small, jumping beetles can create small holes in broccoli leaves. Cover the plants with row covers or use insect
Conclusion
So, there you have it! Growing your own broccoli at home isn’t just a gardening project; it’s an investment in your health, your wallet, and your connection to the natural world. We’ve walked through the steps, from seed to harvest, and hopefully demystified the process along the way.
Why is this DIY trick a must-try? Because store-bought broccoli, while convenient, often lacks the vibrant flavor and nutritional punch of freshly harvested, homegrown broccoli. Think about it: that broccoli has traveled miles, sat on shelves, and lost precious vitamins in the process. When you grow your own, you’re getting peak freshness, guaranteed. Plus, you have complete control over what goes into your broccoli – no mystery pesticides or herbicides necessary!
Beyond the health benefits, there’s the sheer satisfaction of nurturing a plant from a tiny seed into a bountiful harvest. It’s a rewarding experience that connects you to the seasons and provides a tangible sense of accomplishment. And let’s not forget the cost savings! Over time, growing your own broccoli can significantly reduce your grocery bill.
But the best part? You can customize your broccoli growing experience! Want to try different varieties? Go for it! Experiment with purple sprouting broccoli for a beautiful and unique addition to your plate, or try a Romanesco broccoli for its stunning fractal patterns. You can also adjust your planting schedule to extend your harvest season, ensuring a steady supply of fresh broccoli throughout the year. Consider companion planting with herbs like rosemary or thyme to deter pests naturally and enhance the flavor of your broccoli. You can even try growing broccoli microgreens indoors for a quick and nutritious boost to your salads and sandwiches.
Don’t be intimidated by the thought of gardening. Growing broccoli at home is surprisingly straightforward, especially with the tips and tricks we’ve shared. Start small, be patient, and don’t be afraid to experiment. Even if you encounter a few challenges along the way, the reward of harvesting your own delicious, homegrown broccoli is well worth the effort.
We wholeheartedly encourage you to give this DIY trick a try. Imagine the pride you’ll feel serving a broccoli dish made entirely from your own garden. Picture the vibrant green florets, bursting with flavor and nutrients. Envision the satisfaction of knowing exactly where your food came from and how it was grown.
So, grab some seeds, prepare your soil, and get ready to embark on a rewarding gardening adventure. And most importantly, we want to hear about your experience! Share your successes, your challenges, and your tips in the comments below. Let’s build a community of home broccoli growers and inspire others to embrace the joy of homegrown goodness. What variety did you choose? What challenges did you face? What are your favorite ways to prepare your homegrown broccoli? We can’t wait to hear from you! Let’s get growing!
Frequently Asked Questions (FAQ)
Q: How much space do I need to grow broccoli?
A: Broccoli plants need about 18-24 inches of space between them to allow for proper growth and air circulation. If you’re planting in rows, space the rows about 3 feet apart. You can also grow broccoli in containers, but make sure the container is at least 12 inches in diameter and depth to accommodate the plant’s root system. Dwarf varieties are particularly well-suited for container gardening.
Q: What kind of soil is best for growing broccoli?
A: Broccoli thrives in well-drained, fertile soil that is rich in organic matter. The ideal soil pH is between 6.0 and 7.0. Before planting, amend your soil with compost or well-rotted manure to improve its fertility and drainage. You can also add a slow-release fertilizer to provide essential nutrients throughout the growing season. A soil test can help you determine the specific nutrient needs of your soil.
Q: How often should I water my broccoli plants?
A: Broccoli plants need consistent moisture, especially during hot weather. Water deeply and regularly, aiming to keep the soil consistently moist but not waterlogged. A good rule of thumb is to water when the top inch of soil feels dry to the touch. Mulching around your broccoli plants can help retain moisture and suppress weeds. Consider using a soaker hose or drip irrigation to deliver water directly to the roots.
Q: What are some common pests and diseases that affect broccoli?
A: Common pests that can affect broccoli include cabbage worms, aphids, flea beetles, and cabbage root maggots. Diseases include clubroot, black rot, and downy mildew. To prevent pest and disease problems, practice good garden hygiene, such as removing plant debris and weeds. You can also use row covers to protect your plants from pests. For specific pest and disease control measures, consult your local garden center or agricultural extension office. Organic pest control methods, such as introducing beneficial insects or using insecticidal soap, are also effective options.
Q: When is the best time to harvest broccoli?
A: Broccoli is ready to harvest when the central head is firm and the florets are tightly closed. The ideal size of the head will vary depending on the variety, but generally, you should harvest when the head is about 6-8 inches in diameter. Use a sharp knife to cut the head from the plant, leaving a few inches of stem. After harvesting the main head, the plant will often produce side shoots, which you can also harvest.
Q: Can I grow broccoli in the shade?
A: Broccoli needs at least 6 hours of sunlight per day to thrive. While it can tolerate some partial shade, especially in hot climates, it will not produce well in full shade. Choose a sunny location in your garden for best results. If you’re growing broccoli indoors, use grow lights to provide adequate light.
Q: How do I prevent broccoli from bolting (going to seed)?
A: Bolting is often caused by stress, such as hot weather or inconsistent watering. To prevent bolting, choose bolt-resistant varieties, plant at the appropriate time of year, and provide consistent moisture. Mulching can also help keep the soil cool and prevent bolting. If you notice your broccoli starting to bolt, harvest it immediately, even if the head is not fully mature.
Q: Can I freeze broccoli that I’ve grown?
A: Yes, you can freeze broccoli for later use. To freeze broccoli, blanch it in boiling water for 3-5 minutes, then immediately plunge it into ice water to stop the cooking process. Drain the broccoli thoroughly and spread it out on a baking sheet to freeze. Once frozen, transfer the broccoli to freezer bags or containers. Frozen broccoli can be stored for up to 12 months.
Q: What are some creative ways to use homegrown broccoli?
A: The possibilities are endless! You can steam, roast, grill, or stir-fry your homegrown broccoli. Add it to soups, salads, casseroles, and pasta dishes. You can also use it to make broccoli cheese soup, broccoli slaw, or broccoli fritters. Don’t forget to use the stems! They can be peeled and chopped and added to stir-fries or soups. Get creative and experiment with different recipes to find your favorite ways to enjoy your homegrown broccoli.

Leave a Comment