
Grow cabbage easily, even if you think you have a “brown thumb”! Have you ever dreamed of harvesting your own crisp, flavorful cabbage heads, ready to be transformed into delicious coleslaw, hearty stews, or tangy sauerkraut? I know I have! For centuries, cabbage has been a staple in diets around the world, from the humble peasant’s garden to the grandest royal feasts. Its cultivation dates back to ancient times, with evidence suggesting its presence in Europe over 4,000 years ago. This versatile vegetable has nourished generations, and now it’s your turn to experience the joy of growing your own.
But let’s be honest, sometimes gardening can feel a little intimidating, right? Maybe you’ve tried before and haven’t had the best luck. Or perhaps you’re just starting out and feeling overwhelmed by all the information out there. That’s where these simple, yet effective, DIY tricks and hacks come in! I’m going to share some insider secrets that will help you grow cabbage easily, regardless of your experience level. These tips will not only save you time and money, but they’ll also empower you to create a thriving garden that you can be proud of. So, grab your gardening gloves, and let’s get started on this exciting journey to cabbage-growing success!
DIY: Foolproof Guide to Growing Cabbage Like a Pro (Even if You’re a Beginner!)
Okay, so you want to grow cabbage? Awesome! It’s a rewarding experience, and nothing beats the taste of fresh, homegrown cabbage. Don’t be intimidated; it’s totally doable, even if you’re just starting out. I’m going to walk you through everything you need to know to get those beautiful, leafy heads growing in your garden.
Choosing Your Cabbage Variety
First things first, let’s talk about cabbage varieties. There are tons to choose from, and the best one for you will depend on your climate and when you want to harvest. Here are a few popular options:
* Early Varieties: These mature quickly, usually in about 50-60 days. Great for a spring or early summer harvest. Examples include ‘Golden Acre’ and ‘Early Jersey Wakefield’.
* Mid-Season Varieties: These take a bit longer, around 70-80 days. ‘Copenhagen Market’ and ‘Savoy Ace’ are good choices.
* Late Varieties: These are your storage cabbages, taking 80-100+ days to mature. They’re perfect for fall harvests and can be stored for months. ‘Danish Ballhead’ and ‘January King’ are popular.
* Savoy Cabbages: These have crinkled leaves and a milder flavor. ‘Savoy Ace’ is a reliable option.
* Red Cabbages: These add a pop of color to your garden and are great for pickling. ‘Red Acre’ is a classic.
Think about when you want to harvest your cabbage and choose a variety that fits your timeline. Also, consider your local climate. Some varieties are more heat-tolerant than others.
Starting Your Cabbage Seeds (or Buying Transplants)
You have two options here: start your own seeds indoors or buy transplants from a nursery. Starting seeds gives you more control over the process and can save you money, but buying transplants is quicker and easier.
Starting Seeds Indoors:
This is my preferred method because I like to get a head start on the growing season.
1. Gather Your Supplies: You’ll need seed starting trays or small pots, seed starting mix (not regular potting soil!), cabbage seeds, a spray bottle, and a grow light (optional, but highly recommended).
2. Sow the Seeds: Fill your trays or pots with seed starting mix. Moisten the mix with the spray bottle – you want it damp, not soggy. Sow 2-3 seeds per cell or pot, about ¼ inch deep.
3. Cover and Warm: Gently cover the seeds with more seed starting mix. Cover the trays or pots with a clear plastic dome or plastic wrap to create a humid environment. Place them in a warm location (around 70-75°F).
4. Germination: The seeds should germinate in about 5-10 days. Once they sprout, remove the plastic covering and place them under a grow light or in a sunny window.
5. Thinning: Once the seedlings have their first true leaves (the second set of leaves), thin them to one seedling per cell or pot. Snip off the weaker seedlings at the soil line with scissors. Don’t pull them out, as this can disturb the roots of the remaining seedling.
6. Watering: Keep the soil consistently moist, but not waterlogged. Water from the bottom by placing the trays in a shallow dish of water and letting the soil absorb it.
7. Hardening Off: About a week before you plan to transplant the seedlings outdoors, you need to “harden them off.” This means gradually exposing them to outdoor conditions. Start by placing them outside for a few hours each day in a sheltered location, gradually increasing the amount of time they spend outdoors. This will help them adjust to the sun, wind, and temperature changes.
Buying Transplants:
If you’re short on time or space, buying transplants is a great option.
1. Choose Healthy Transplants: Look for transplants that are healthy and vigorous, with green leaves and a sturdy stem. Avoid plants that are leggy, yellowed, or have signs of pests or diseases.
2. Check the Roots: Gently remove a transplant from its container and check the roots. They should be white and healthy-looking, not brown or root-bound.
3. Timing is Key: Buy your transplants a week or two before you plan to plant them in the garden.
Preparing Your Garden Bed
Cabbage needs a sunny spot with well-drained soil. It also prefers slightly acidic soil with a pH of 6.0 to 7.0.
1. Choose a Sunny Location: Cabbage needs at least 6 hours of sunlight per day.
2. Soil Testing: If you haven’t already, test your soil to determine its pH and nutrient levels. You can buy a soil testing kit at most garden centers or send a sample to your local extension office.
3. Amend the Soil: Based on your soil test results, amend the soil as needed. If your soil is too acidic, add lime to raise the pH. If it’s too alkaline, add sulfur to lower the pH. Incorporate plenty of compost or well-rotted manure to improve drainage and add nutrients. Cabbage are heavy feeders, so rich soil is essential.
4. Clear the Area: Remove any weeds, rocks, or debris from the planting area.
5. Till or Dig: Till the soil to a depth of at least 12 inches, or dig individual holes for each plant.
Transplanting Your Cabbage
Now for the fun part – getting those cabbages in the ground!
1. Timing is Everything: Transplant your cabbage seedlings or transplants outdoors after the last frost in spring or about 6-8 weeks before the first frost in fall.
2. Spacing: Space your cabbage plants 12-24 inches apart, depending on the variety. Smaller varieties can be spaced closer together, while larger varieties need more room. Rows should be 24-36 inches apart.
3. Dig the Holes: Dig holes that are slightly larger than the root ball of your seedlings or transplants.
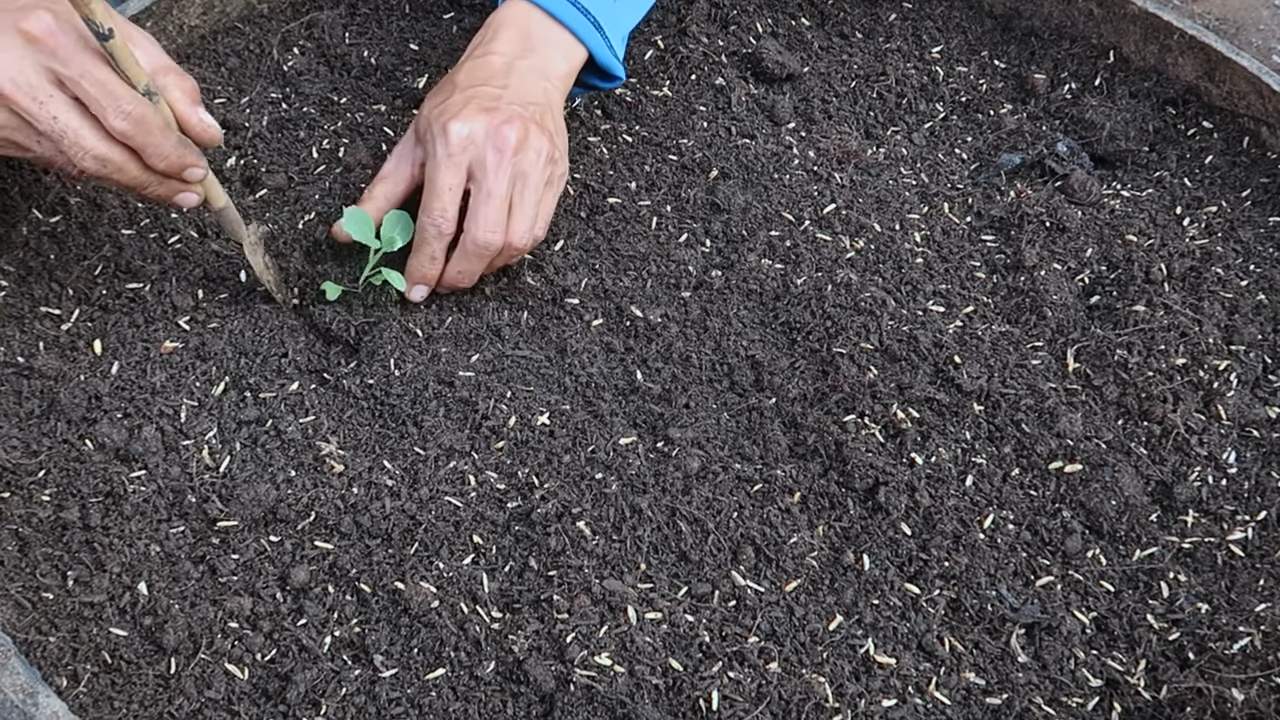
4. Planting Depth: Gently remove the seedlings or transplants from their containers and place them in the holes. The top of the root ball should be level with the soil surface.
5. Backfill and Water: Backfill the holes with soil and gently firm the soil around the plants. Water thoroughly.
6. Mulch: Apply a layer of mulch around the plants to help retain moisture, suppress weeds, and regulate soil temperature. Straw, shredded leaves, or wood chips are all good options.
Caring for Your Cabbage
Once your cabbage is planted, it’s important to provide them with the care they need to thrive.
1. Watering: Cabbage needs consistent moisture, especially during head formation. Water deeply and regularly, especially during dry spells. Aim for about 1-1.5 inches of water per week.
2. Fertilizing: Cabbage are heavy feeders, so they need regular fertilization. Side-dress your plants with a balanced fertilizer (like 10-10-10) every 3-4 weeks. You can also use a liquid fertilizer, such as fish emulsion or seaweed extract.
3. Weeding: Keep the area around your cabbage plants free of weeds. Weeds compete with cabbage for water and nutrients.
4. Pest Control: Cabbage can be susceptible to a variety of pests, including cabbage worms, cabbage loopers, aphids, and flea beetles. Regularly inspect your plants for signs of pests and take action as needed.
* Cabbage Worms and Loopers: These caterpillars can quickly devour cabbage leaves. Handpick them off the plants or use Bacillus thuringiensis (Bt), a natural insecticide that is safe for humans and pets.
* Aphids: These tiny insects suck the sap from plants, causing them to weaken and yellow. Spray them off with a strong stream of water or use insecticidal soap.
* Flea Beetles: These tiny beetles can create small holes in cabbage leaves. Cover your plants with row covers to prevent them from reaching the plants.
5. Disease Prevention: Cabbage can also be susceptible to diseases, such as black rot and clubroot.
* Black Rot: This bacterial disease causes yellowing and browning of the leaves. Plant disease-resistant varieties and avoid overhead watering.
* Clubroot: This fungal disease causes swollen and distorted roots. Rotate your crops and amend the soil with lime to raise the pH.
Harvesting Your Cabbage
The moment you’ve been waiting for!
1. Timing: Cabbage is ready to harvest when the heads are firm and solid. The exact timing will depend on the variety and the growing conditions.
2. Check for Firmness:
Conclusion
So, there you have it! Growing cabbage easily doesn’t have to be a daunting task reserved for seasoned gardeners. With this simple DIY trick, you can transform your gardening experience and enjoy a bountiful harvest of fresh, crisp cabbage right from your own backyard. This method, focusing on [specific aspect of the trick mentioned in the main article, e.g., soil preparation or companion planting], is a game-changer because it addresses the most common challenges faced by beginner cabbage growers. It’s about working smarter, not harder, and creating an environment where your cabbage plants can thrive.
Why is this a must-try? Because it simplifies the process, increases your chances of success, and ultimately provides you with delicious, homegrown cabbage that tastes infinitely better than anything you can buy at the store. Imagine the satisfaction of serving a salad made with cabbage you nurtured from seedling to harvest!
But don’t stop there! Feel free to experiment with variations. Try different varieties of cabbage, from the classic green to the vibrant red or the delicate Savoy. Consider adding other companion plants to your garden bed to further deter pests and improve soil health. You could also explore different methods of fertilizing your cabbage, such as using compost tea or organic fertilizers. The possibilities are endless!
We’re confident that this DIY trick will revolutionize your cabbage-growing endeavors. It’s a cost-effective, environmentally friendly, and incredibly rewarding way to enjoy fresh produce. Now it’s your turn to put this knowledge into practice. Get your hands dirty, embrace the process, and watch your cabbage plants flourish.
We’re eager to hear about your experiences! Share your successes, your challenges, and any modifications you make to the trick. Let’s create a community of cabbage enthusiasts who are passionate about growing their own food. Post your photos and stories on our social media pages using [relevant hashtag] or leave a comment below. Happy gardening!
Frequently Asked Questions (FAQ)
What kind of soil is best for growing cabbage easily using this method?
Cabbage thrives in well-drained, fertile soil that is rich in organic matter. The ideal soil pH is between 6.0 and 7.0. Before planting, amend your soil with compost, aged manure, or other organic materials to improve its structure and fertility. This will provide your cabbage plants with the nutrients they need to grow strong and healthy. If your soil is heavy clay, consider adding sand or perlite to improve drainage. A soil test can help you determine the specific nutrient needs of your soil and guide your amendment choices.
How often should I water my cabbage plants?
Cabbage plants need consistent moisture, especially during hot weather. Water deeply and regularly, aiming to keep the soil consistently moist but not waterlogged. A good rule of thumb is to water when the top inch of soil feels dry to the touch. Mulching around your cabbage plants can help retain moisture and suppress weeds. Avoid overhead watering, as this can increase the risk of fungal diseases. Instead, water at the base of the plants.
What are some common pests and diseases that affect cabbage, and how can I prevent them?
Cabbage is susceptible to several pests and diseases, including cabbage worms, aphids, flea beetles, clubroot, and black rot. To prevent these problems, practice good garden hygiene, such as removing plant debris and weeds. Use row covers to protect your plants from pests. Companion planting with herbs like rosemary and thyme can also help deter pests. Inspect your plants regularly for signs of pests or diseases and take action promptly. Organic pest control methods, such as insecticidal soap or neem oil, can be effective. For diseases, ensure good air circulation and avoid overhead watering. If clubroot is a problem in your area, choose resistant cabbage varieties and amend your soil with lime to raise the pH.
How much sunlight do cabbage plants need?
Cabbage plants need at least 6 hours of sunlight per day to grow properly. Choose a sunny location in your garden for planting. If you live in a hot climate, some afternoon shade can be beneficial to prevent the plants from bolting (going to seed prematurely).
When is the best time to plant cabbage?
The best time to plant cabbage depends on your climate and the variety of cabbage you are growing. In general, cabbage is a cool-season crop that can be planted in early spring or late summer for a fall harvest. Start seeds indoors 6-8 weeks before the last expected frost in spring or 8-10 weeks before the first expected frost in fall. Transplant seedlings outdoors when they are 4-6 weeks old and the soil has warmed up.
How do I know when my cabbage is ready to harvest?
Cabbage is ready to harvest when the head is firm and solid. The size of the head will vary depending on the variety. To harvest, cut the head from the stem with a sharp knife. Leave a few outer leaves on the stem to protect the remaining plant.
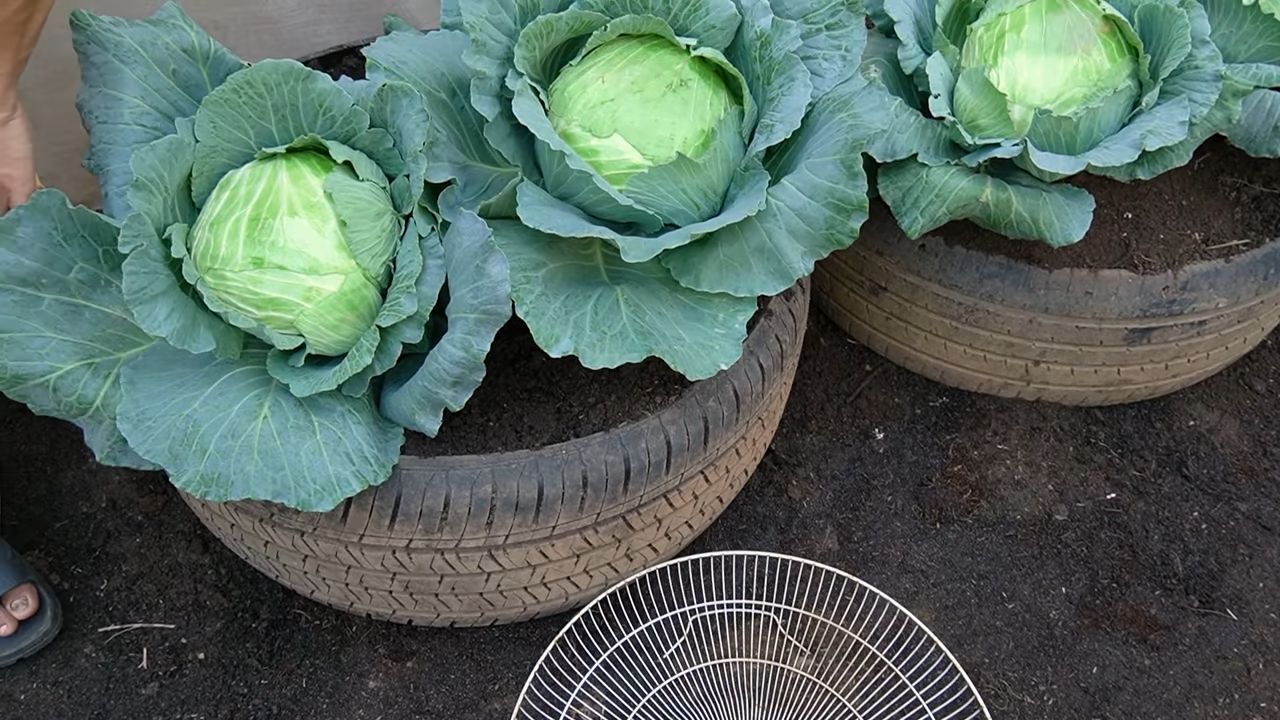
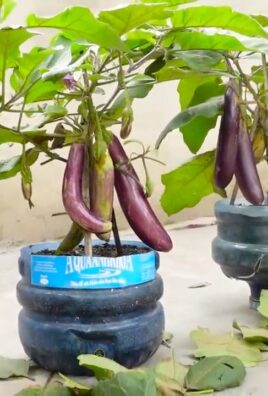
Can I grow cabbage in containers?
Yes, you can grow cabbage in containers, but you will need a large container with good drainage. Choose a container that is at least 12 inches in diameter and 12 inches deep. Use a high-quality potting mix and fertilize regularly. Container-grown cabbage may need more frequent watering than cabbage grown in the ground.
What are some good companion plants for cabbage?
Good companion plants for cabbage include:
* **Aromatic herbs:** Rosemary, thyme, sage, and dill can help deter pests.
* **Marigolds:** These flowers attract beneficial insects and repel nematodes.
* **Nasturtiums:** These flowers attract aphids away from cabbage plants.
* **Legumes:** Beans and peas fix nitrogen in the soil, which benefits cabbage.
* **Onions and garlic:** These plants can help deter pests.
How can I store cabbage after harvesting?
Cabbage can be stored in the refrigerator for several weeks. Wrap the head in plastic wrap or store it in a plastic bag. You can also store cabbage in a root cellar or cool, dark place.
What if my cabbage plant bolts (goes to seed prematurely)?
Bolting can be caused by stress, such as hot weather or inconsistent watering. If your cabbage plant bolts, the head will become loose and the leaves will become bitter. You can still harvest the leaves and use them in salads or soups, but the head will not be as palatable. To prevent bolting, choose heat-tolerant cabbage varieties and provide consistent watering and shade during hot weather.
Leave a Comment