
Grow Celery in Your Kitchen – sounds like something out of a futuristic sci-fi movie, right? But trust me, it’s totally doable, and I’m here to show you how! Forget those wilting, sad-looking celery stalks you find at the back of your fridge. Imagine fresh, crisp celery, ready to be snipped right from your kitchen counter.
For centuries, celery has been more than just a crunchy snack. Ancient civilizations, like the Romans and Greeks, used it for medicinal purposes and even as a symbol of victory! While we might not be crowning athletes with celery wreaths these days, its nutritional benefits and culinary versatility are still highly valued.
But let’s be honest, buying celery from the store can be a gamble. It’s often expensive, and sometimes it goes bad before you even get a chance to use it all. That’s where this DIY trick comes in. Learning to grow celery in your kitchen is not only a fun and rewarding project, but it’s also a fantastic way to reduce food waste, save money, and have a constant supply of fresh, organic celery at your fingertips. Plus, it’s a great conversation starter! So, are you ready to ditch the grocery store celery and embark on this exciting home gardening adventure with me? Let’s get started!
Regrow Your Own Celery in the Kitchen!
Hey everyone! Have you ever wondered if you can simply regrow celery in your kitchen? The answer is: Yes, absolutely! It’s a super easy and rewarding DIY project that is not only fun but also provides you with fresh celery for soups, salads, and snacks. And the best part? It’s a great way to reduce food waste! I’ll show you how it’s done.
What you need:
- A celery base (preferably one that is still firm and crisp)
- A glass or bowl
- Water
- A sunny spot (e.g., a windowsill)
- (Optional) Potting soil and a pot
Step-by-Step Guide:
- Prepare the celery: Cut the celery stalk about 5-7 cm (2-3 inches) from the bottom end. Make sure the base, where the roots will grow, remains intact. You can, of course, use the top part of the celery for your favorite recipes!
- Prepare the water bath: Fill your glass or bowl with about 2-3 cm (1 inch) of water. The water should be clean and at room temperature.
- Place the celery: Position the celery base, cut-side down, in the water. Make sure that only the bottom half of the base is in the water. The upper leaves should not be in the water, as they could rot.
- Find a sunny spot: Place the glass with the celery in a bright, sunny location. A windowsill is ideal. Celery needs a lot of light to grow well.
- Change the water: Change the water every 1-2 days to keep it clean and fresh. This prevents bacteria from forming and the celery from rotting.
- Be patient: Now it’s time to wait! After a few days, you should see small roots sprouting from the bottom of the base. New, small leaves will also form in the center of the base.
- Transplant (optional): Once the roots are about 5-7 cm (2-3 inches) long (this usually takes 1-2 weeks), you can transplant the celery into a pot with potting soil. This is optional, but it gives the celery more space to grow and allows it to become larger and stronger.
- Prepare the pot: Choose a pot that is at least 15 cm (6 inches) in diameter. Fill it with good potting soil.
- Plant the celery: Make a small hole in the soil and carefully place the celery base inside. Make sure the roots are well-covered.
- Water well: Water the celery well after planting.
- Care after transplanting: If you have transplanted the celery, you should continue to keep it in a sunny spot and water it regularly. The soil should always be slightly moist, but not wet. Fertilize the celery every few weeks with an organic fertilizer to promote growth.
Common Problems and Solutions:
- Celery is rotting: If the celery is rotting, it’s usually because the water wasn’t changed often enough or the celery got too much water. Cut off the rotten parts and change the water more frequently. Make sure only the bottom half of the base is in the water.
- No roots: If no roots have grown after a week, it could be because the celery isn’t getting enough light or the water is too cold. Move the celery to a sunnier spot and use room-temperature water.
- Yellow leaves: Yellow leaves can be a sign of a nutrient deficiency. Fertilize the celery with an organic fertilizer.
Tips and Tricks for Success:
- Fresh celery: Use the freshest celery base possible. The fresher the celery, the better the chances it will root.
- Patience: Be patient! It can take a few days for the roots to grow.
- Observation: Observe the celery regularly and adjust its care accordingly.
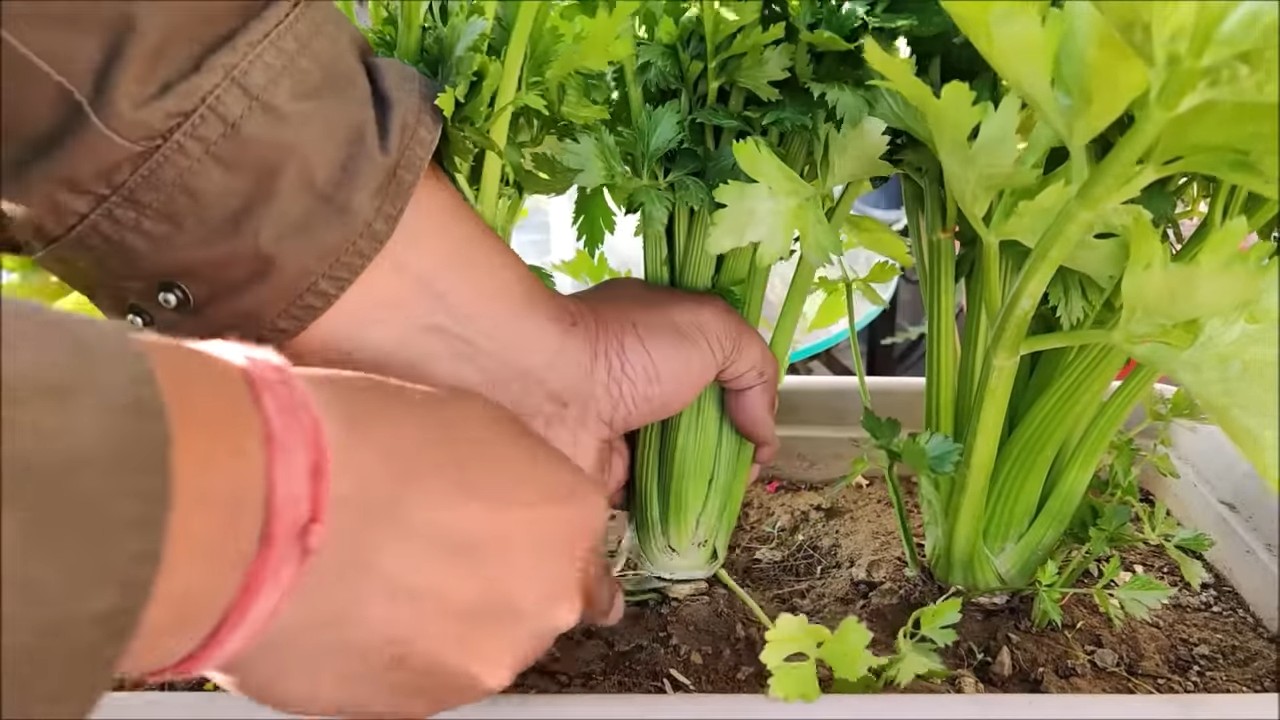
- Harvest: When the celery is large enough, you can harvest the outer stalks. Simply cut them off at the bottom. The celery will continue to grow and produce new stalks.
- Different varieties: Try different celery varieties to find out which one grows best in your kitchen.
Why Regrow Celery?
There are many good reasons to regrow celery in the kitchen:
- Sustainability: It’s a great way to reduce food waste. Instead of throwing away the base, you can simply regrow it.
- Freshness: You always have fresh celery on hand when you need it.
- Save money: You have to buy less celery.
- Fun: It’s just fun to watch something new grow.
- Learning: It’s a great way to learn about plants and their life cycle.
A Few More Ideas:
- Herb garden: Combine celery with other herbs you can regrow in the kitchen, such as basil, mint, or chives.
- Gift idea: Give a regrowing celery base to friends or family. It’s an original and sustainable gift.
- Experiment: Try different growing methods, e.g., in hydroponics.
Summary:
Regrowing celery in the kitchen is a simple and rewarding DIY project that anyone can try. With a little patience and care, you can enjoy fresh celery from your own cultivation. So, what are you waiting for? Get started and grow your own celery! It’s really child’s play and a lot of fun! I hope this guide helps you. Good luck!
Extra Tip: Planting Celery in the Garden
If your celery has grown really well in the pot and the weather cooperates (no more frost!), you can also plant it in the garden. Choose a sunny spot with well-draining soil. Be sure to water and fertilize the celery regularly. In the garden, it can grow even larger and stronger!
I hope this detailed guide has helped and inspired you to regrow your own celery in the kitchen. Happy gardening

Conclusion
So, there you have it! Growing celery in your kitchen from leftover scraps isn’t just a fun experiment; it’s a sustainable, cost-effective, and surprisingly rewarding way to add fresh, flavorful ingredients to your meals. Forget those wilted, expensive stalks from the grocery store. With a little patience and minimal effort, you can have a continuous supply of crisp, homegrown celery right at your fingertips.
This DIY trick is a must-try for several reasons. First, it drastically reduces food waste. Instead of tossing the celery base into the compost bin, you’re giving it a second life, transforming what would have been garbage into a vibrant, edible plant. Second, it saves you money. Think about how often you buy celery, only to use a few stalks and let the rest languish in the fridge. Growing your own eliminates that waste and the associated cost. Third, it’s incredibly easy. The process is simple enough for even the most novice gardener, requiring only water, sunlight, and a little bit of attention.
But the benefits extend beyond the practical. There’s a unique satisfaction in nurturing a plant from its humble beginnings. Watching those tiny roots emerge and the new stalks unfurl is a testament to the power of nature and your own green thumb. Plus, homegrown celery tastes noticeably fresher and more flavorful than store-bought varieties.
Don’t be afraid to experiment with variations! Try different types of celery, such as Pascal or Utah varieties, to see which you prefer. You can also use the celery leaves in salads, soups, or as a garnish. For a spicier twist, try adding a few drops of hot sauce to the water during the initial rooting phase. Some gardeners even report success using hydroponic systems for growing celery indoors, which can accelerate growth and yield even more impressive results.
Ready to embark on your own celery-growing adventure? We encourage you to give this DIY trick a try. It’s a simple, sustainable, and satisfying way to bring a little bit of the garden into your kitchen. And once you’ve experienced the joy of harvesting your own fresh celery, you’ll never look at a celery base the same way again.
Share your experiences with us! We’d love to hear about your successes, challenges, and any creative variations you’ve tried. Post photos of your growing celery on social media using #KitchenCelery and tag us so we can celebrate your green thumb achievements. Let’s build a community of indoor gardeners and inspire others to embrace the joy of growing their own food, starting with this simple yet impactful DIY trick to grow celery.
Frequently Asked Questions (FAQ)
How long does it take to grow celery from a base?
The initial rooting process, where you place the celery base in water, typically takes about 5-7 days. You should start to see roots emerging from the bottom and new growth appearing from the top. Once you transplant the rooted base into soil, it can take anywhere from 2-3 months to grow a full-sized celery plant ready for harvest. The exact timeframe depends on factors like sunlight, temperature, and soil quality. Be patient; growing celery takes time, but the reward of fresh, homegrown celery is well worth the wait.
What kind of soil is best for growing celery?
Celery thrives in rich, well-draining soil that is high in organic matter. A good mix would be equal parts potting soil, compost, and perlite or vermiculite. The compost provides essential nutrients, while the perlite or vermiculite ensures proper drainage, preventing the roots from becoming waterlogged. Celery also prefers a slightly acidic to neutral soil pH, ideally between 6.0 and 6.8. You can test your soil pH with a simple soil testing kit available at most garden centers.
How much sunlight does celery need?
Celery needs at least 6 hours of direct sunlight per day to grow properly. If you’re growing celery indoors, place it near a sunny window that receives plenty of natural light. If you don’t have a sufficiently sunny window, you can supplement with grow lights. LED grow lights are an energy-efficient option that can provide the necessary light spectrum for healthy celery growth. Rotate the plant regularly to ensure all sides receive adequate light.
How often should I water my celery plant?
Celery needs consistent moisture to thrive. Water your celery plant deeply whenever the top inch of soil feels dry to the touch. Avoid letting the soil dry out completely, as this can stress the plant and hinder its growth. However, be careful not to overwater, as soggy soil can lead to root rot. Ensure your pot has drainage holes to allow excess water to escape. During hot weather, you may need to water more frequently.
Can I grow celery from seed instead of using a base?
Yes, you can absolutely grow celery from seed. However, growing celery from seed is a more challenging and time-consuming process than regrowing it from a base. Celery seeds are very small and require specific conditions to germinate, including consistent moisture and warm temperatures. It’s best to start celery seeds indoors 10-12 weeks before the last expected frost. Transplant the seedlings outdoors once they have developed several true leaves and the weather has warmed up.
What are some common problems when growing celery and how can I fix them?
Some common problems when growing celery include pests like aphids and celery leaf miners, as well as diseases like celery blight and pink rot. Aphids can be controlled with insecticidal soap or neem oil. Celery leaf miners can be removed by hand or treated with Bacillus thuringiensis (Bt). To prevent celery blight and pink rot, ensure good air circulation around the plants and avoid overhead watering. If you notice signs of disease, remove the affected leaves immediately.
Can I eat the celery leaves?
Yes, absolutely! Celery leaves are often overlooked, but they are perfectly edible and packed with flavor. They can be used in salads, soups, stews, and as a garnish. Celery leaves have a stronger flavor than the stalks, so use them sparingly at first until you get used to the taste. You can also dry the leaves and use them as a seasoning.
How do I harvest celery?
You can harvest celery stalks as needed once the plant has reached a sufficient size. Simply cut the outer stalks near the base of the plant with a sharp knife. The inner stalks will continue to grow, allowing you to harvest celery over an extended period. For a full harvest, you can cut the entire plant at the base.
Is homegrown celery more nutritious than store-bought celery?
While the exact nutritional content can vary depending on factors like soil quality and growing conditions, homegrown celery is generally considered to be more nutritious than store-bought celery. This is because homegrown celery is typically harvested at its peak ripeness and consumed shortly thereafter, preserving its vitamins and minerals. Store-bought celery, on the other hand, may have been harvested weeks before it reaches the grocery store, resulting in a loss of nutrients.
How can I make my homegrown celery taste sweeter?
To encourage sweeter celery stalks, try “blanching” the plants a week or two before harvest. This involves covering the stalks with soil, cardboard, or other materials to block out sunlight. Blanching reduces the production of chlorophyll, resulting in milder, sweeter-tasting celery.


Leave a Comment