
Grow Chili Peppers in Pots and ignite your culinary adventures! Have you ever dreamed of plucking fiery peppers fresh from your own garden, ready to spice up your favorite dishes? Well, dream no more! This DIY guide unlocks the secrets to successfully cultivating these vibrant plants, even if you’re short on space or lack a sprawling backyard.
The history of chili peppers is as rich and colorful as the peppers themselves, dating back over 6,000 years in South America. From ancient civilizations using them for medicinal purposes to their global spread through trade and exploration, chili peppers have always held a special place in human culture. Now, you can become a part of that history by nurturing your own chili pepper plants.
Why should you learn to grow chili peppers in pots? Because it’s incredibly rewarding! Imagine the satisfaction of harvesting your own organic peppers, knowing exactly where they came from and how they were grown. Plus, growing in pots offers unparalleled flexibility. You can move your plants to chase the sun, protect them from frost, or simply add a pop of vibrant color to your patio or balcony. This DIY project is perfect for beginners and seasoned gardeners alike, offering a fun and accessible way to add a little spice to your life. I’m excited to share my tips and tricks to help you succeed!
Growing Chili Plants in a Pot: Your DIY Guide for a Spicy Harvest
Hey Chili Lovers! Do you want to grow your own chili plants, even if you don’t have a garden? No problem! With this DIY guide, I’ll show you how to successfully grow chili plants in pots. It’s easier than you think, and the reward—fresh, spicy chilis right from your balcony or windowsill—is priceless!
What you need: The Ingredients for Your Chili Success
Before we get started, here is a list of the things you’ll need:
- Chili seeds: Choose your favorite varieties! Whether it’s Jalapeño, Habanero, or Cayenne—the variety is huge. Look for high-quality seeds from a trusted supplier.
- Seed starting mix: This is finer and lower in nutrients than regular potting soil and is ideal for the delicate seedlings.
- Seedling pots or trays: Small pots or trays with drainage holes are perfect for starting seeds.
- Larger pots: Once the plants get bigger, they will need more space. Pots with a diameter of at least 20 cm are ideal.
- Potting soil: High-quality potting soil with good drainage is important for the growth of the plants.
- Fertilizer: A special chili fertilizer or a tomato fertilizer provides the plants with the necessary nutrients.
- Watering can or spray bottle: For watering the plants.
- Plant labels: To keep track of your different chili varieties.
- Optional: A mini-greenhouse or a clear plastic wrap to increase humidity during germination.
Phase 1: Starting the Seeds – The Foundation for Your Chili Harvest
Starting seeds is a crucial step to get healthy and strong chili plants. Here’s how to do it:
- Prepare the seedling pots: Fill the seedling pots or trays with seed starting mix. Press the soil down lightly.
- Sow the seeds: Place 1-2 seeds per pot on the soil. Cover the seeds with a thin layer of seed starting mix (approx. 0.5 cm).
- Watering: Moisten the soil carefully with a spray bottle. The soil should be damp, but not wet.
- Creating an ideal climate: Place the seedling pots in a warm, bright place. A temperature of 22-28°C is ideal for germination. You can also place the pots in a mini-greenhouse or cover them with a clear plastic wrap to increase humidity. Be sure to ventilate the wrap regularly to prevent mold.
- Patience is required: Germination can take 1-3 weeks, depending on the chili variety and temperature. Keep the soil moist during this time.
- The first leaves: As soon as the seedlings have developed their first true leaves (besides the cotyledons), you can remove the weaker plants, leaving only the strongest plant per pot.
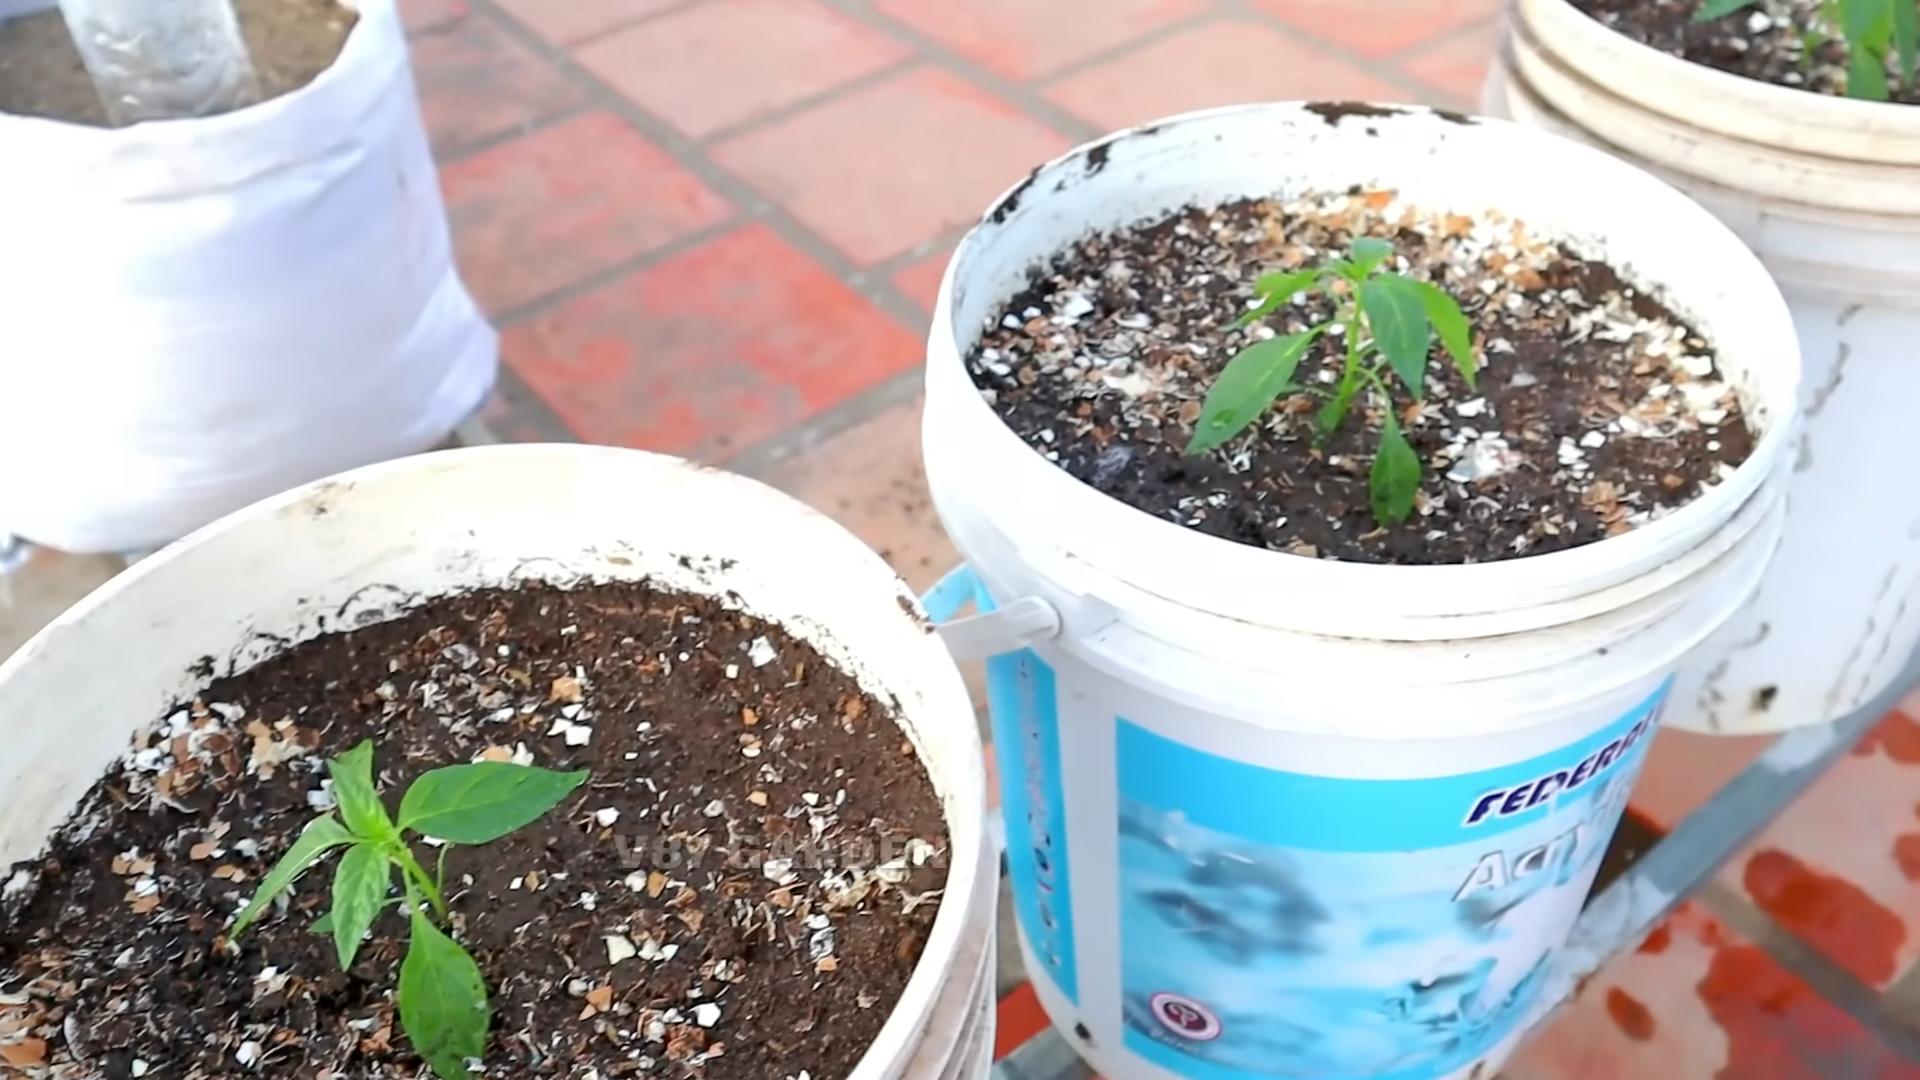
Phase 2: Pricking Out – More Space to Grow
When the chili plants are large enough, it’s time to prick them out. This means you transplant them into larger pots so they have more space to grow.
- Prepare the larger pots: Fill the larger pots with potting soil. Make sure the pots have drainage holes so excess water can run off.
- Carefully lift out: Carefully dig the chili plants out of the seedling pots. Try to damage the roots as little as possible. You can use a small spoon or a pricking fork for this.
- Planting: Place the chili plants in the larger pots. The top of the root ball should be about 1-2 cm below the rim of the pot.
- Fill and press: Fill the pots with potting soil and press the soil down lightly.
- Watering: Water the plants thoroughly.
- A new location: Place the pricked-out chili plants in a bright, warm place. Avoid direct sunlight for the first few days so the plants can get used to their new location.
Phase 3: The Care – Helping Your Chilis Thrive
Proper care is crucial for a bountiful chili harvest. Here are some tips you should follow:
- Watering: Water the chili plants regularly, but avoid waterlogging. The soil should always be slightly moist. On hot days, it may be necessary to water the plants daily. Check the soil moisture by sticking your finger about 2 cm deep into the soil. If the soil feels dry, it’s time to water.
- Fertilizing: Fertilize the chili plants regularly with a special chili fertilizer or a tomato fertilizer. Start fertilizing about 2-3 weeks after pricking out. Follow the instructions on the fertilizer packaging.
- Sunlight: Chili plants love the sun! Place them in a sunny location where they get at least 6-8 hours of sunlight per day.
- Protection from pests: Regularly check the plants for pests like aphids or spider mites. If infested, you can use natural pesticides like neem oil or a soapy water solution.
- Support: As the chili plants grow larger and bear fruit, it may be necessary to support them with stakes or trellises to prevent them from tipping over.
- Pruning suckers: Regularly remove the side shoots (suckers) in the leaf axils to encourage fruit production. This is especially important for bushy chili varieties.
- Pollination: Chili plants are self-pollinators, but you can assist pollination by gently shaking the flowers or using a paintbrush to pollinate them. This is especially important if the plants are indoors.
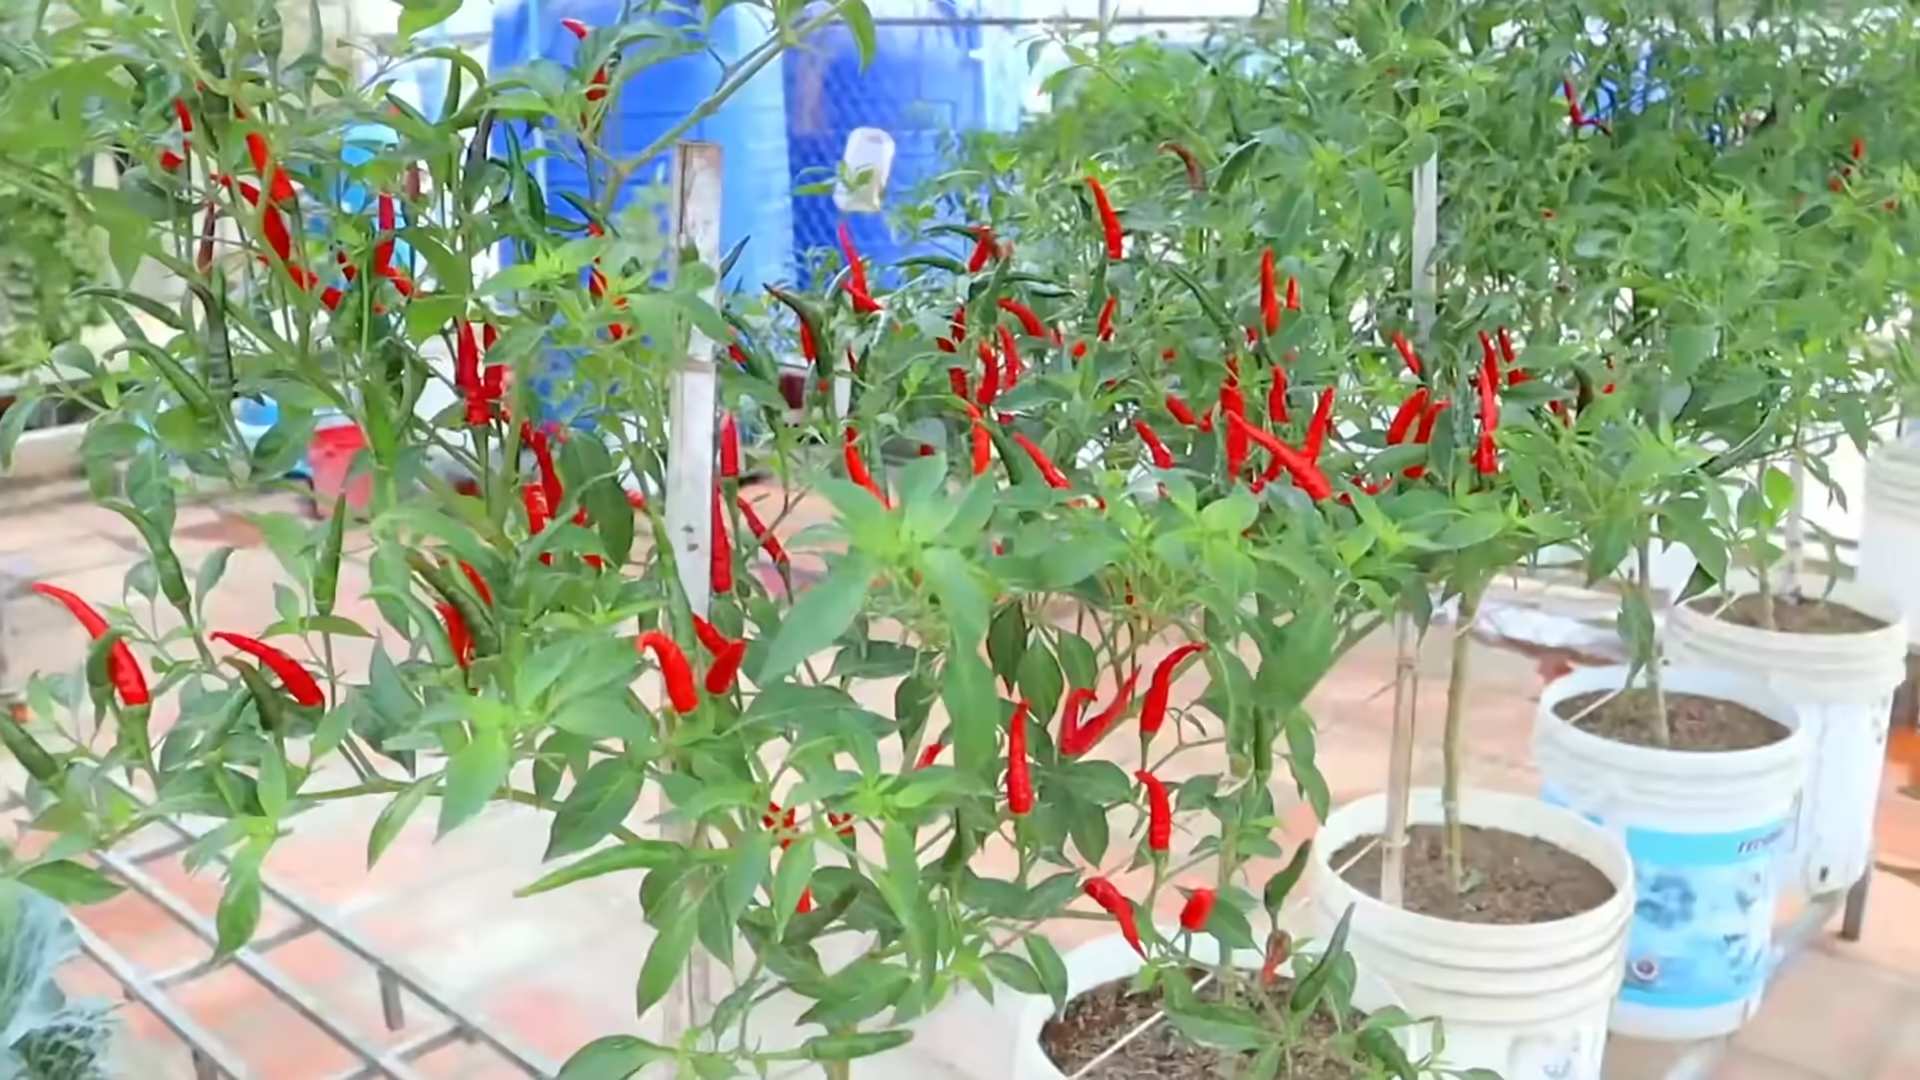
Phase 4: The Harvest – The Reward for Your Effort
Finally, the time has come! The chili fruits are ripe and ready for harvest.
- Recognizing ripeness: The color of the chili fruits changes depending on the variety when they are ripe. Look for the typical color of the respective variety. The fruits should also be firm and plump.
- Harvesting: Cut the chili fruits with scissors or a knife. Be careful not to damage the stem of the fruit.
- Use: Use the fresh chilis immediately or dry them to preserve them for longer. You can also freeze them or process them into chili oil, chili paste, or chili powder.
Additional Tips for Successful Chili Cultivation in a Pot
Good drainage: Make sure the pots have drainage holes so excess water can run off. You can also place a layer of gravel or expanded clay at the bottom of the pot to improve drainage.
The right pot size: Choose pots that are large enough for the roots to have sufficient space. A pot with a diameter of at least 20 cm is ideal.
Conclusion
So, there you have it! Growing chili peppers in pots is not only achievable, but it’s also incredibly rewarding. We’ve walked through the essential steps, from selecting the right pot and soil to nurturing your plants for a bountiful harvest. But why should you embrace this DIY project?
Firstly, growing chili peppers in pots offers unparalleled flexibility. Whether you have a sprawling garden, a tiny balcony, or just a sunny windowsill, you can cultivate these fiery delights. This adaptability makes it a must-try for anyone, regardless of their living situation. Imagine the satisfaction of plucking fresh chilies right from your own plant, ready to add a kick to your favorite dishes!
Secondly, it’s a fantastic way to control the growing environment. You can easily move your pots to chase the sun, protect them from frost, or shield them from excessive rain. This level of control allows you to optimize the conditions for your chili peppers, leading to healthier plants and a more abundant yield.
Thirdly, it’s a cost-effective and sustainable way to enjoy fresh chilies. Instead of relying on store-bought options, which can be expensive and often lack the vibrant flavor of homegrown peppers, you can cultivate your own supply. Plus, you’ll be reducing your carbon footprint by minimizing transportation and packaging.
But the benefits don’t stop there! Growing chili peppers in pots is also a therapeutic and engaging hobby. It’s a chance to connect with nature, learn about plant care, and witness the miracle of growth firsthand. There’s something incredibly satisfying about nurturing a tiny seed into a thriving plant that produces delicious and spicy peppers.
Ready to take your chili pepper growing to the next level? Consider experimenting with different varieties. From the mild poblano to the scorching habanero, there’s a chili pepper out there for every palate. You can also try companion planting, pairing your chili peppers with herbs like basil or rosemary to deter pests and enhance flavor. Another variation is to experiment with different potting mixes. Some growers swear by adding perlite or vermiculite to improve drainage, while others prefer a richer, compost-based mix. Don’t be afraid to experiment and find what works best for you.
And finally, don’t forget to share your experience! We’d love to hear about your successes, challenges, and favorite chili pepper varieties. Share your photos, tips, and recipes with us and the rest of the community. Let’s inspire each other to grow the hottest and most flavorful chili peppers possible! So, grab a pot, some soil, and a few chili pepper seeds, and get ready to embark on a spicy adventure. You won’t regret it! This DIY trick is a game changer.
Frequently Asked Questions (FAQ)
Q: What size pot is best for growing chili peppers?
A: The ideal pot size depends on the variety of chili pepper you’re growing. Generally, a pot that is at least 12 inches in diameter and 12 inches deep is a good starting point. Smaller varieties, like ornamental peppers, can thrive in smaller pots, while larger varieties, like bell peppers (which are technically chilies!), will need larger containers, perhaps 5-10 gallons. The key is to provide enough space for the roots to develop properly. If the pot is too small, the plant may become root-bound, which can stunt its growth and reduce its yield.
Q: What type of soil should I use for chili peppers in pots?
A: Chili peppers prefer well-draining soil that is rich in organic matter. A good potting mix will typically contain a blend of peat moss, perlite, and vermiculite. You can also amend your potting mix with compost or aged manure to provide additional nutrients. Avoid using garden soil in pots, as it can become compacted and poorly drained. A slightly acidic to neutral pH (around 6.0 to 7.0) is ideal for chili peppers.
Q: How often should I water my chili pepper plants in pots?
A: The watering frequency will depend on several factors, including the size of the pot, the type of soil, the weather conditions, and the stage of growth of the plant. Generally, you should water your chili pepper plants when the top inch of soil feels dry to the touch. Avoid overwatering, as this can lead to root rot. During hot, dry weather, you may need to water your plants daily. In cooler, wetter weather, you may only need to water them every few days. A good rule of thumb is to water deeply and thoroughly, allowing the excess water to drain out of the bottom of the pot.
Q: How much sunlight do chili peppers need?
A: Chili peppers need at least 6-8 hours of direct sunlight per day to thrive. If you’re growing your chili peppers indoors, you may need to supplement with artificial lighting. A south-facing window is typically the best location for indoor chili peppers. If you don’t have a south-facing window, you can use grow lights to provide the necessary light.
Q: What kind of fertilizer should I use for chili peppers?
A: Chili peppers benefit from regular fertilization, especially during the growing season. A balanced fertilizer with an NPK ratio of 10-10-10 or 14-14-14 is a good starting point. You can also use a fertilizer that is specifically formulated for tomatoes or peppers. Avoid using fertilizers that are high in nitrogen, as this can promote leafy growth at the expense of fruit production. Fertilize your chili pepper plants every 2-3 weeks, following the instructions on the fertilizer label.
Q: How do I protect my chili pepper plants from pests and diseases?
A: Chili peppers can be susceptible to a variety of pests and diseases, including aphids, spider mites, whiteflies, and fungal infections. To prevent these problems, it’s important to inspect your plants regularly and take action at the first sign of trouble. You can control many pests with insecticidal soap or neem oil. Fungal infections can be treated with fungicides. Good air circulation and proper watering practices can also help to prevent diseases. Consider companion planting with herbs like basil or marigolds, which can help to deter pests.
Q: When should I harvest my chili peppers?
A: The harvesting time will depend on the variety of chili pepper you’re growing and your personal preference. Generally, chili peppers are ready to harvest when they have reached their mature size and color. Some chili peppers will turn from green to red, yellow, or orange when they are ripe. You can also harvest chili peppers when they are green, but they will typically be less spicy. Use scissors or pruning shears to cut the peppers from the plant, leaving a small stem attached.
Q: Can I overwinter my chili pepper plants in pots?
A: Yes, you can overwinter your chili pepper plants in pots, especially if you live in a climate with cold winters. Before the first frost, bring your chili pepper plants indoors and place them in a sunny location. Reduce watering and fertilization during the winter months. You may also need to prune your plants back to encourage new growth in the spring. With proper care, your chili pepper plants can survive the winter and produce another crop of peppers the following year.
Q: My chili pepper plants are flowering but not producing fruit. What could be the problem?
A: There are several reasons why your chili pepper plants might be flowering but not producing fruit. One common cause is lack of pollination. Chili peppers are self-pollinating, but they may need some help from wind or insects to transfer pollen from the male to the female parts of the flower. You can hand-pollinate your chili pepper plants by gently shaking the flowers or using a small paintbrush to transfer pollen. Other possible causes include insufficient sunlight, extreme temperatures, and nutrient deficiencies. Make sure your plants are getting enough sunlight, water, and fertilizer.
Leave a Comment