
Grow Grape Tomatoes Home and unlock a world of fresh, flavorful goodness right in your backyard! Imagine popping juicy, sun-ripened grape tomatoes straight from the vine into your salad or snacking on them as a healthy treat. Sounds amazing, right? Well, it’s easier than you think! For centuries, home gardening has been a source of sustenance and joy, connecting us to the earth and providing us with fresh produce. From ancient Roman gardens to the victory gardens of World War II, growing your own food has always been a way to nourish ourselves and our communities.
But let’s be honest, sometimes gardening can feel a little intimidating, especially when you’re just starting out. That’s where these simple DIY tricks and hacks come in! I’m here to share my favorite tips and tricks for successfully grow grape tomatoes home, even if you have limited space or a less-than-green thumb. We’ll cover everything from choosing the right variety to preventing common pests and diseases. So, ditch the store-bought tomatoes and get ready to enjoy the sweet taste of homegrown goodness. Let’s get growing!
DIY: Growing Juicy Cherry Tomatoes Yourself – Guaranteed Success!
Hello, fellow gardeners! I just love the taste of sun-ripened cherry tomatoes, straight from the vine into my mouth. And you know what? It’s not that hard to grow these little flavor explosions yourself! I’ll show you how you can grow your own cherry tomatoes with simple tools and a little patience—whether in the garden, on the balcony, or even on a windowsill. Let’s get started!
What you need: The Materials List
Before we begin, here is a list of everything you’ll need for your cherry tomato project:
- Cherry tomato seeds: Organic seeds of a variety you particularly enjoy are best. There are countless types, from sweet yellow to aromatic red ones.
- Seed-starting mix: This soil is low in nutrients and loose, ideal for seed germination. Regular potting soil is often too rich.
- Seedling pots or trays: Small pots or trays with drainage holes are perfect for starting seeds. You can also use egg cartons or yogurt cups if you poke holes in them.
- Mini-greenhouse or plastic wrap: To keep humidity high and encourage germination.
- Spray bottle: For moistening the soil.
- Dibber or spoon: For separating the seedlings.
- Potting soil: For later transplanting into larger pots or a garden bed.
- Larger pots or a garden bed: Depending on where you want to grow your tomatoes.
- Tomato stakes or a trellis: Cherry tomatoes can grow quite tall and need support.
- Liquid fertilizer: For tomatoes, to supply the plants with enough nutrients.
- Watering can or hose: For regular watering.
- A sunny spot: Tomatoes love the sun!
Phase 1: Starting Seeds – From Seed to Plant
Starting the seeds is the first and most important step. Here we lay the foundation for a bountiful harvest.
- Prepare the starter pots: Fill the starter pots or trays with seed-starting mix. Press the soil down lightly.
- Sow the seeds: Place 2-3 seeds per pot on the soil. Cover the seeds with a thin layer of seed-starting mix (about 0.5 cm / 0.2 inches).
- Water: Gently moisten the soil with a spray bottle. The soil should be damp, but not wet.
- Mini-greenhouse effect: Place the pots in a mini-greenhouse or cover them with plastic wrap. This creates high humidity, which promotes germination.
- The right location: Place the mini-greenhouse or covered pots in a warm, bright spot. A temperature of 20-25°C (68-77°F) is ideal.
- Patience is key: The first seedlings should appear after about 7-14 days. As soon as the seeds have germinated, remove the wrap or open the mini-greenhouse to improve air circulation.
- Regular watering: Make sure the soil is always slightly moist. Avoid waterlogging.
Phase 2: Pricking Out – Giving the Seedlings More Space
Once the seedlings have developed their first true leaves (besides the initial seed leaves), it’s time for pricking out. This means we move the small plantlets into larger pots so they have more space to grow.
- Prepare the new pots: Fill larger pots (approx. 8-10 cm / 3-4 inches in diameter) with potting soil.
- Separate the seedlings: Gently loosen the soil in the starter pots. Carefully lift the seedlings out of the soil with a dibber or spoon. Try to damage the roots as little as possible.
- Plant in the new pots: Place each seedling in its own pot with potting soil. Make sure the roots are not bent. The plant can be set a little deeper than before, up to the first leaves.
- Press and water: Lightly press the soil around the plant and water it gently.
- The right location: Place the pricked-out seedlings in a bright, but not too sunny, location. Avoid direct midday sun for the first few days.
- Continue watering: Keep the soil moist, but avoid waterlogging.
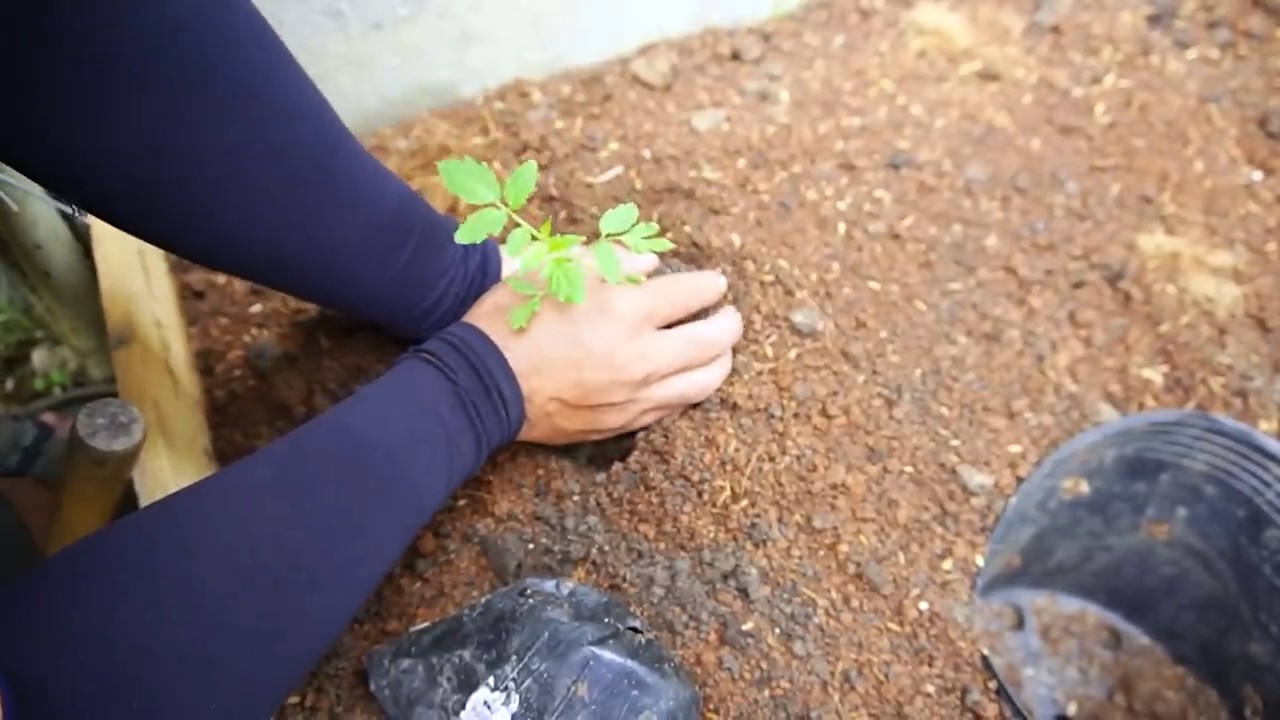
Phase 3: Planting Out – Into the Bed or Pot!
After the last frost (mid-May), the time has finally come: the little tomato plants can go outside!
- Prepare the bed or pots: If you want to plant your tomatoes in a garden bed, loosen the soil well and work in compost or organic fertilizer. For pot cultivation, choose large pots (at least 10 liters / 2.5 gallons in volume) and fill them with high-quality potting soil.
- Harden off the plants: Before you permanently plant the tomatoes outside, you should acclimate them to outdoor conditions for a few days. Place them outside during the day and bring them back in at night.
- Planting out: Dig a hole that is slightly larger than the root ball of the tomato plant. Carefully place the plant in it and fill the hole with soil. Lightly press the soil down.
- Tomato stakes or trellis: Place a tomato stake or a trellis next to the plant right when you plant it. This gives the tomatoes support from the beginning.
- Watering: Water the tomato plants thoroughly after planting.
- The right location: Choose a sunny, wind-protected spot for your tomatoes.
Phase 4: Care – So Your Tomatoes Thrive
Proper care is crucial for a bountiful harvest.
- Watering: Tomatoes need regular water, especially on hot days. It’s best to water in the morning or evening, directly at the roots, and avoid wetting the leaves.
- Fertilizing: Fertilize your tomatoes regularly with a liquid fertilizer for tomatoes. Start about 2-3 weeks after planting out and then fertilize every 1-2 weeks.
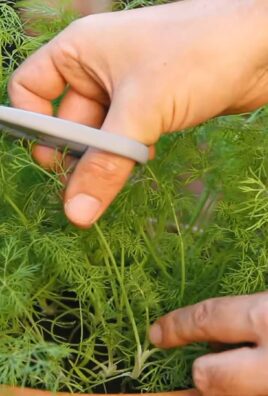
- Removing suckers: Regularly remove the side shoots (suckers) that grow in the leaf axils. This promotes the growth of the main stems and ensures better ventilation for the plant.
- Tying up: Regularly tie the tomato plants to the stake or trellis.
- Protection from diseases and pests: Watch for signs of diseases or pests. If necessary, you can use organic plant protection products.
- Mulching: A layer of mulch made of straw or grass clippings helps to keep the soil moist and suppress weeds.
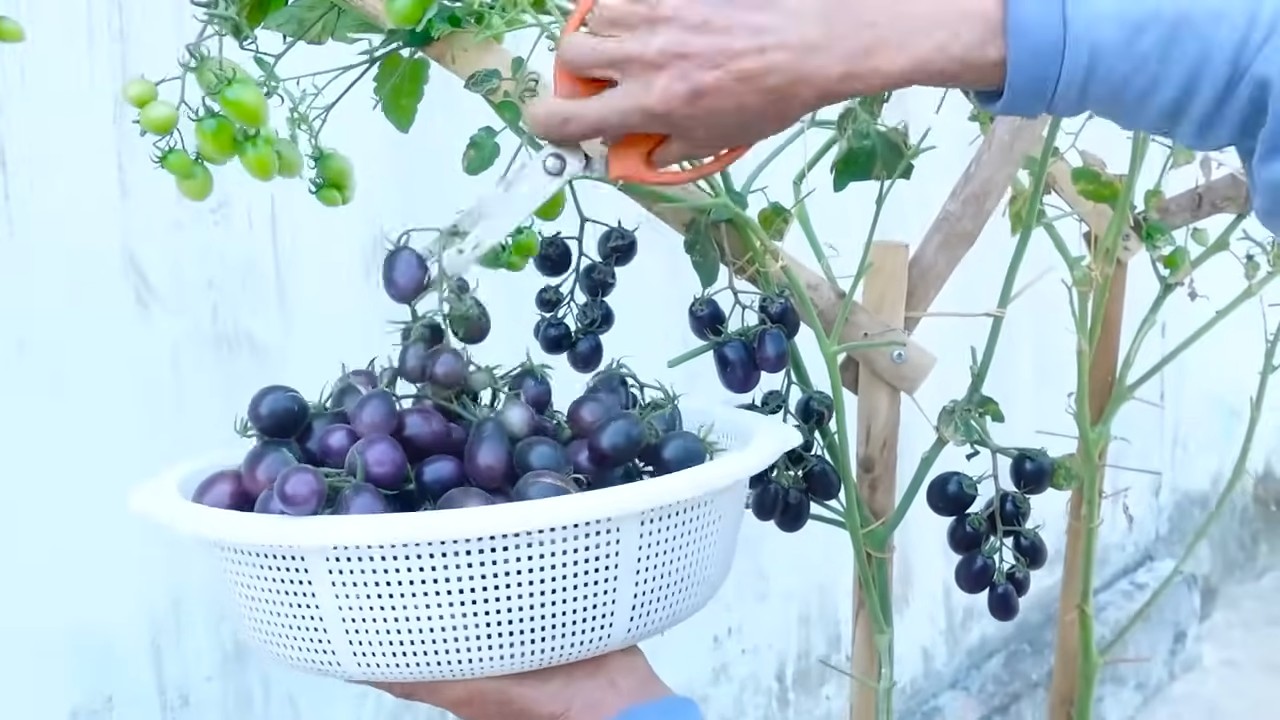
Phase 5: Harvest – The Reward for Your Effort
The time has finally come: the first cherry tomatoes are ripe!
Enjoy: Enjoy your home-grown…
Harvest time: Cherry tomatoes are ripe when they have an intense color and can be easily detached from the stem.
Harvesting: Gently pick the ripe tomatoes.
Conclusion
So, there you have it! Growing grape tomatoes at home is not only achievable, but it’s also incredibly rewarding. Forget those bland, store-bought grape tomatoes that lack any real flavor. With this simple DIY trick, you can cultivate a bounty of sweet, juicy, and intensely flavorful grape tomatoes right in your own backyard, balcony, or even on a sunny windowsill.
This isn’t just about saving money (although that’s a definite perk!). It’s about connecting with your food, understanding where it comes from, and enjoying the unparalleled taste of homegrown produce. Imagine popping these little bursts of sunshine straight from the vine into your mouth, or adding them to salads, pasta dishes, and snacks. The difference in taste is truly remarkable.
But the best part? This DIY method is incredibly adaptable. Want to experiment with different varieties? Go for it! Try growing yellow grape tomatoes for a slightly milder flavor, or even heirloom varieties for a unique and complex taste. You can also adjust the size of your container to fit your available space. If you’re short on room, a hanging basket works wonders. If you have a larger garden, consider planting your grape tomatoes directly in the ground.
And don’t be afraid to get creative with your support system. While a simple tomato cage works perfectly well, you can also use stakes, trellises, or even repurposed materials like old ladders or branches to create a visually appealing and functional support structure.
We’ve covered everything from seed starting to harvesting, providing you with all the information you need to succeed. Remember to pay attention to sunlight, watering, and fertilization, and don’t be afraid to troubleshoot if you encounter any problems along the way. Gardening is a learning process, and every mistake is an opportunity to improve.
This DIY grape tomato growing method is a game-changer for anyone who loves fresh, flavorful produce. It’s easy, affordable, and incredibly satisfying. So, what are you waiting for? Grab some seeds, get your hands dirty, and start growing your own delicious grape tomatoes today!
We’re confident that you’ll be amazed by the results. And once you’ve harvested your first batch of homegrown grape tomatoes, we want to hear all about it! Share your experiences, tips, and photos in the comments below. Let’s build a community of home gardeners and inspire others to discover the joy of growing their own food. Happy gardening!
Frequently Asked Questions (FAQ)
1. What is the best time to start growing grape tomatoes from seed?
The ideal time to start your grape tomato seeds indoors is typically 6-8 weeks before the last expected frost in your area. This allows the seedlings to develop a strong root system before being transplanted outdoors. Check your local weather forecasts and gardening resources to determine the average last frost date for your region. If you live in a warmer climate with a longer growing season, you can start your seeds earlier. Conversely, if you live in a colder climate, you may need to start them later.
2. What type of soil is best for growing grape tomatoes?
Grape tomatoes thrive in well-draining soil that is rich in organic matter. A good potting mix specifically formulated for vegetables is an excellent choice for container gardening. If you’re planting directly in the ground, amend your soil with compost, aged manure, or other organic materials to improve its fertility and drainage. The ideal soil pH for grape tomatoes is between 6.0 and 6.8. You can test your soil pH using a soil testing kit available at most garden centers.
3. How much sunlight do grape tomatoes need?
Grape tomatoes require at least 6-8 hours of direct sunlight per day to produce a bountiful harvest. Choose a location that receives plenty of sunlight throughout the day. If you’re growing your grape tomatoes indoors, place them near a sunny window or supplement with grow lights. Rotate your plants regularly to ensure that all sides receive adequate sunlight. Insufficient sunlight can lead to leggy growth, reduced fruit production, and less flavorful tomatoes.
4. How often should I water my grape tomato plants?
Water your grape tomato plants deeply and regularly, especially during hot and dry weather. Aim to keep the soil consistently moist but not waterlogged. Water at the base of the plant to avoid wetting the foliage, which can increase the risk of fungal diseases. Check the soil moisture regularly by sticking your finger into the soil. If the top inch feels dry, it’s time to water. Container-grown grape tomatoes may require more frequent watering than those planted in the ground.
5. What kind of fertilizer should I use for grape tomatoes?
Grape tomatoes benefit from regular fertilization throughout the growing season. Use a balanced fertilizer specifically formulated for tomatoes or vegetables. Look for a fertilizer with an NPK ratio (nitrogen, phosphorus, potassium) that is relatively balanced, such as 10-10-10 or 14-14-14. Follow the instructions on the fertilizer package for application rates and frequency. You can also supplement with organic fertilizers such as compost tea or fish emulsion. Avoid over-fertilizing, as this can lead to excessive foliage growth and reduced fruit production.
6. How do I prevent common grape tomato plant problems like blossom end rot?
Blossom end rot, a common problem in tomatoes, is caused by a calcium deficiency. To prevent blossom end rot, ensure that your soil is rich in calcium and that your plants receive consistent watering. You can add calcium to the soil by incorporating bone meal or crushed eggshells. Avoid allowing the soil to dry out completely, as this can hinder calcium uptake. Other common grape tomato plant problems include fungal diseases such as early blight and septoria leaf spot. To prevent these diseases, provide good air circulation around your plants, avoid overhead watering, and remove any infected leaves promptly.
7. When are grape tomatoes ready to harvest?
Grape tomatoes are typically ready to harvest about 60-70 days after transplanting. The tomatoes should be fully colored, firm to the touch, and easily detach from the vine. The exact color will depend on the variety you are growing. Taste a few tomatoes to ensure that they are ripe and flavorful before harvesting the entire plant. Harvest your grape tomatoes regularly to encourage continued fruit production.
8. Can I grow grape tomatoes in a hanging basket?
Yes, grape tomatoes are well-suited for growing in hanging baskets. Choose a compact or determinate variety that won’t grow too large and heavy. Use a well-draining potting mix and water regularly, as hanging baskets tend to dry out quickly. Provide adequate support for the vines as they grow. Hanging baskets are a great option for gardeners with limited space.
9. How do I save seeds from my grape tomatoes for next year?
Saving seeds from your grape tomatoes is a great way to ensure that you have a supply of seeds for future growing seasons. Choose ripe, healthy tomatoes from your best-performing plants. Squeeze the seeds and pulp into a jar and add a small amount of water. Allow the mixture to ferment for a few days, stirring occasionally. This process will help to remove the gelatinous coating from the seeds. After fermentation, rinse the seeds thoroughly and spread them out on a paper towel to dry completely. Store the dried seeds in an airtight container in a cool, dark, and dry place.
10. What are some creative ways to use my homegrown grape tomatoes?
The possibilities are endless! Enjoy them fresh in salads, snacks, or as a simple side dish. Roast them with herbs and garlic for a flavorful addition to pasta dishes or pizzas. Make a fresh tomato sauce or salsa. Skewer them with mozzarella balls and basil leaves for a Caprese salad. Pickle them for a tangy treat. Or simply pop them straight from the vine into your mouth for a burst of sunshine. The only limit is your imagination!

Leave a Comment