
Grow Luffa Indoors? Absolutely! Imagine harvesting your own natural sponges right from the comfort of your home. Forget those scratchy, mass-produced sponges from the store; with a little know-how, you can cultivate your own luxurious, eco-friendly luffa sponges indoors.
Luffa, also known as loofah, has a rich history, dating back centuries in Asia and Africa, where it was traditionally used for bathing, scrubbing, and even as a food source when young. The plant’s versatility has made it a staple in many cultures. But you don’t need a tropical climate to enjoy the benefits of this amazing plant.
Why should you learn to grow luffa indoors? Well, for starters, it’s incredibly rewarding to nurture a plant from seed to sponge. Plus, it’s a fantastic way to reduce your environmental footprint by creating a sustainable and biodegradable alternative to synthetic sponges. Many of us are limited by space or climate, making outdoor luffa cultivation challenging. This DIY guide will empower you to overcome those obstacles and successfully grow luffa indoors, regardless of your location. I’m excited to share my tips and tricks to help you get started on your indoor luffa-growing adventure!
Growing Luffa Indoors: From Seed to Scrub!
Okay, so you want to grow your own luffa sponges indoors? Awesome! It’s totally doable, and honestly, there’s something incredibly satisfying about scrubbing your dishes with a sponge you grew yourself. It’s a bit of a commitment, but trust me, the reward is worth it. Here’s how I do it, broken down into easy-to-follow steps.
Getting Started: Seeds, Soil, and Sunshine
Before we dive into the nitty-gritty, let’s gather our supplies. You’ll need:
* Luffa Seeds: You can find these online or at some garden centers. Make sure they’re viable!
* Seed Starting Trays or Small Pots: These will be your luffa’s first home.
* Seed Starting Mix: This is lighter and less dense than regular potting soil, which helps seedlings sprout.
* Larger Pots (at least 5 gallons): Luffas need room to grow, so think big!
* Potting Soil: Once your seedlings are ready to transplant, you’ll need a good quality potting soil.
* Grow Lights: Unless you have a *super* sunny south-facing window, grow lights are essential for indoor luffa growing.
* Trellis or Support System: Luffas are vines, so they need something to climb.
* Watering Can or Spray Bottle: For gentle watering.
* Fertilizer: A balanced fertilizer to keep your luffa plants happy and healthy.
* Heat Mat (Optional): Luffa seeds germinate best with warmth.
Step-by-Step Guide: From Seed to Sprout
1. Soaking the Seeds: Luffa seeds have a tough outer shell, so soaking them helps them germinate faster. I usually soak mine in warm water for 24-48 hours. You’ll notice they swell up a bit – that’s a good sign!
2. Planting the Seeds: Fill your seed starting trays or small pots with seed starting mix. Make a small hole (about ½ inch deep) in the center of each pot. Place one or two seeds in each hole and gently cover them with soil. Lightly water the soil.
3. Creating a Warm Environment: Luffa seeds love warmth! If you have a heat mat, place your seed starting trays on it. If not, find a warm spot in your house, like near a radiator or on top of your refrigerator.
4. Maintaining Moisture: Keep the soil consistently moist, but not soggy. I like to use a spray bottle to mist the soil regularly.
5. Waiting for Germination: Be patient! Luffa seeds can take anywhere from 7 to 21 days to germinate, depending on the temperature and conditions.
Transplanting and Setting Up Your Luffa’s Home
Once your seedlings have developed a few sets of true leaves (the leaves that look like miniature versions of the adult leaves), it’s time to transplant them into larger pots.
1. Preparing the Larger Pots: Fill your 5-gallon (or larger) pots with potting soil. Make sure the pots have drainage holes!
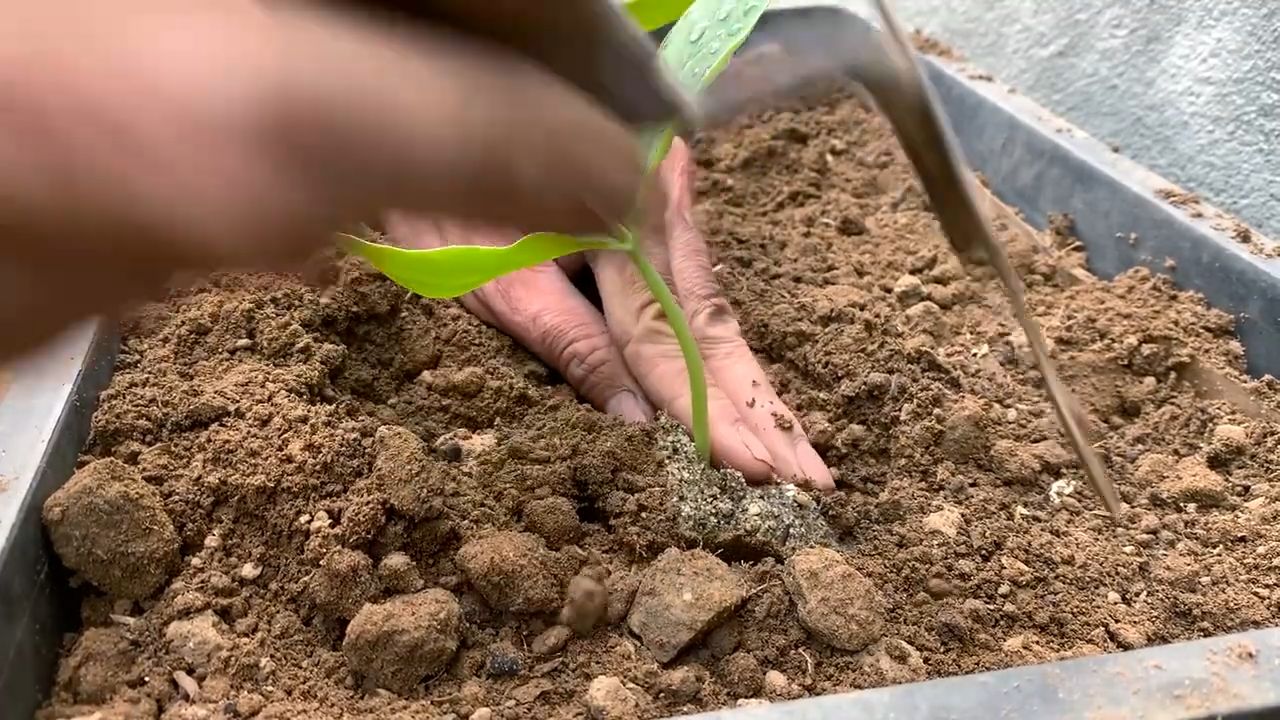
2. Carefully Removing the Seedlings: Gently remove the seedlings from their seed starting trays or small pots. Be careful not to damage the roots. I like to use a small spoon to help loosen the soil around the roots.
3. Planting the Seedlings: Make a hole in the center of each pot large enough to accommodate the seedling’s root ball. Place the seedling in the hole and gently cover the roots with soil. Water thoroughly.
4. Setting Up the Trellis: Luffas are vines, so they need something to climb. Set up a trellis or other support system near your pots. This could be a bamboo stake, a tomato cage, or even a piece of netting attached to the wall. Make sure it’s sturdy enough to support the weight of the growing vine and the developing luffas.
5. Positioning the Grow Lights: Place your grow lights above the luffa plants. The distance between the lights and the plants will depend on the type of grow lights you’re using, so follow the manufacturer’s instructions. Generally, you want the lights to be close enough to provide adequate light, but not so close that they burn the leaves.
Caring for Your Growing Luffa Vines
Now that your luffa plants are settled in their new homes, it’s time to focus on providing them with the care they need to thrive.
1. Watering: Water your luffa plants regularly, especially during hot weather. The soil should be consistently moist, but not soggy. Check the soil moisture by sticking your finger into the soil. If the top inch of soil feels dry, it’s time to water.
2. Fertilizing: Luffas are heavy feeders, so they need regular fertilization. Use a balanced fertilizer according to the manufacturer’s instructions. I usually fertilize my luffa plants every two weeks.
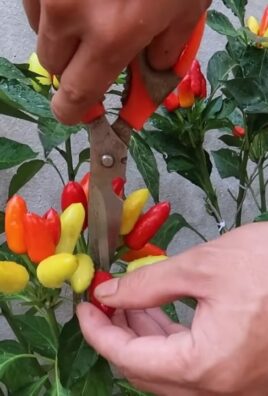
3. Pruning: Pruning can help encourage branching and fruit production. You can prune the side shoots that develop along the main vine. This will help the plant focus its energy on producing luffas.
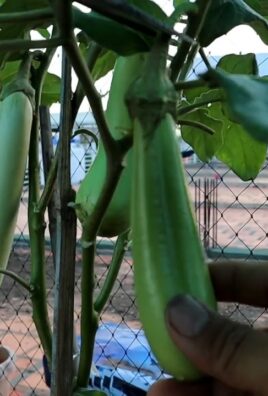
4. Pollination: Luffas have separate male and female flowers. The female flowers have a small luffa fruit behind them, while the male flowers do not. In order for the female flowers to develop into luffas, they need to be pollinated. If you’re growing your luffas indoors, you’ll need to hand-pollinate them. To do this, use a small paintbrush to transfer pollen from the male flowers to the female flowers. I usually do this in the morning, when the flowers are open.
5. Pest Control: Keep an eye out for pests, such as aphids and spider mites. If you notice any pests, you can treat them with insecticidal soap or neem oil.
Harvesting and Processing Your Luffa Sponges
This is the exciting part! After all your hard work, it’s time to harvest your luffa sponges.
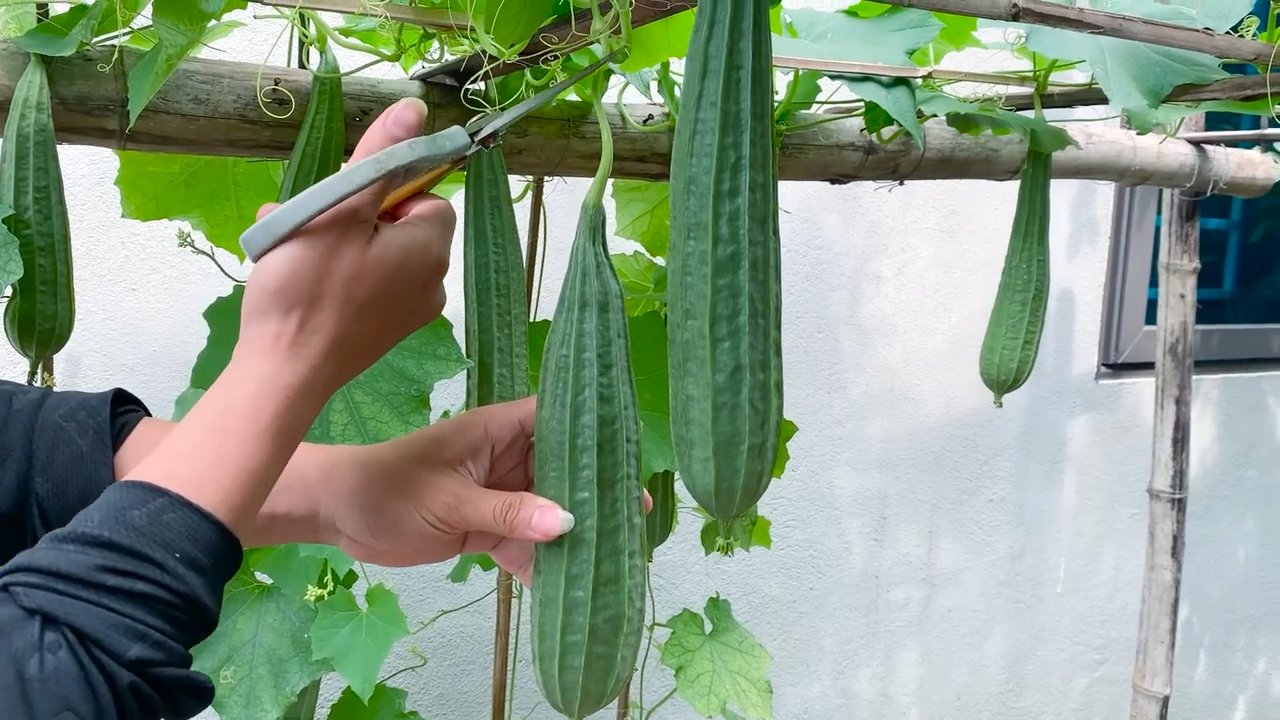
1. Knowing When to Harvest: The luffas are ready to harvest when they turn yellow or brown and the skin becomes dry and brittle. You should be able to easily squeeze the luffa and feel the fibers inside.
2. Harvesting the Luffas: Use a sharp knife or pruning shears to cut the luffas from the vine.
3. Peeling the Luffas: This can be a bit messy, but it’s essential for revealing the sponge inside. You can peel the luffas by hand, or you can soak them in water for a few days to soften the skin. Once the skin is soft, you should be able to peel it off easily.
4. Removing the Seeds: After peeling the luffas, shake out the seeds. You can save these seeds for planting next year!
5. Washing and Drying the Luffas: Wash the luffas thoroughly with soap and water to remove any remaining pulp or debris. Then, hang them up to dry in a well-ventilated area. It’s important to dry them completely to prevent mold growth.
6. Bleaching (Optional): If you want your luffa sponges to be whiter, you can soak them in a diluted bleach solution for a few minutes. Be sure to rinse them thoroughly afterwards.
Troubleshooting Tips for Indoor Luffa Growing
Even with the best care, you might encounter some challenges when growing luffas indoors. Here are a few common problems and how to solve them:
* Poor Germination: If your luffa seeds aren’t germinating, make sure they’re getting enough warmth and moisture. You can also try scarifying the seeds by gently rubbing them with sandpaper before soaking them.
* Slow Growth: If your luffa plants are growing slowly, make sure they’re getting enough light and fertilizer. You may also need to transplant them into larger pots.
* Lack of Flowers: If your luffa plants aren’t flowering, they may not be getting enough light or fertilizer. You may also need to hand-pollinate the flowers.
* Pest Infestations: If you notice pests on your luffa plants, treat them with insecticidal soap or neem oil.
* Rotting Luffas: If your luffas are rotting on the vine, it could be due to overwatering or poor ventilation. Make sure the soil is well-draining and provide good air circulation around the plants.
Growing luffa indoors takes patience and attention, but the reward of having your own homegrown sponges is totally worth it. Happy growing!
Conclusion
So, there you have it! Growing luffa indoors might seem like a challenge, but with a little planning, patience, and the right approach, you can absolutely cultivate these amazing sponges right in your own home. Forget relying solely on store-bought options – imagine the satisfaction of harvesting your own, knowing exactly where they came from and how they were grown.
This DIY approach to growing luffa offers a multitude of benefits. Not only are you reducing your reliance on commercially produced sponges (often laden with chemicals and unsustainable practices), but you’re also engaging in a rewarding and educational activity. It’s a fantastic way to connect with nature, learn about plant life cycles, and even involve children in a fun and engaging project. Plus, think of the unique and thoughtful gifts you can create with your homegrown luffa sponges!
But the benefits don’t stop there. Growing luffa indoors allows you to control the growing environment, protecting your plants from harsh weather conditions, pests, and diseases that might plague outdoor gardens. This control can lead to a higher yield and better quality sponges.
Don’t be afraid to experiment with variations! Try different soil mixes to see what works best for your luffa plants. Consider adding companion plants to your indoor garden to attract beneficial insects and improve pollination. You could even explore different training methods to maximize space and encourage healthy growth. Perhaps you’ll discover a new and improved way to grow luffa indoors that you can share with the world!
We highly encourage you to give this DIY trick a try. It’s a rewarding experience that offers both practical benefits and a deeper connection to the natural world. The process of nurturing a tiny seed into a thriving plant and ultimately harvesting your own natural sponge is incredibly fulfilling.
Once you’ve embarked on your indoor luffa growing journey, we’d love to hear about your experiences! Share your tips, tricks, and challenges in the comments below. Let’s create a community of indoor luffa growers and learn from each other. Your insights could be invaluable to someone just starting out. Remember, every successful harvest starts with a single seed and a willingness to learn. So, grab your seeds, prepare your pots, and get ready to experience the joy of growing your own luffa indoors! This is your chance to embrace a sustainable lifestyle and enjoy the fruits (or rather, the sponges) of your labor. Let’s get growing!
Frequently Asked Questions (FAQ)
What are the ideal conditions for growing luffa indoors?
Luffa plants thrive in warm, sunny environments. To successfully grow luffa indoors, you’ll need to provide them with ample sunlight, ideally 6-8 hours per day. If you don’t have a naturally sunny spot, consider using grow lights to supplement the light. The ideal temperature range is between 70-85°F (21-29°C). Consistent watering is also crucial, keeping the soil consistently moist but not waterlogged. Good air circulation is also important to prevent fungal diseases.
How much space do I need to grow luffa indoors?
Luffa vines are vigorous growers and require a significant amount of space. Even indoors, they can reach considerable lengths. You’ll need a large container, at least 10-15 gallons in size, for each plant. More importantly, you’ll need to provide a sturdy trellis or support structure for the vines to climb. This could be a store-bought trellis, a DIY structure made from bamboo or PVC pipes, or even strong ropes suspended from the ceiling. Consider the vertical space available in your home and choose a support system that allows the vines to grow upwards without overcrowding.
What type of soil is best for growing luffa indoors?
Luffa plants prefer well-draining, fertile soil. A good potting mix for luffa should be rich in organic matter and have good drainage to prevent root rot. You can create your own mix by combining equal parts of potting soil, compost, and perlite or vermiculite. The compost provides essential nutrients, while the perlite or vermiculite improves drainage and aeration. Avoid using garden soil, as it can be too heavy and may contain pests or diseases.
How often should I water my indoor luffa plants?
Watering frequency depends on several factors, including the size of the container, the temperature, and the humidity levels. Generally, you should water your luffa plants whenever the top inch of soil feels dry to the touch. Water deeply, ensuring that the water drains out of the bottom of the container. Avoid overwatering, as this can lead to root rot. During hot weather or when the plants are actively growing, you may need to water more frequently.
How do I pollinate luffa flowers indoors?
Luffa plants have separate male and female flowers. In order to produce fruit (and therefore sponges), the female flowers need to be pollinated. Outdoors, this is typically done by insects. Indoors, you’ll need to hand-pollinate the flowers. Identify the male flowers (they have a long, thin stem) and the female flowers (they have a small, immature luffa fruit behind the flower). Use a small paintbrush or cotton swab to collect pollen from the male flower and gently transfer it to the stigma of the female flower. It’s best to do this in the morning when the flowers are open.
How long does it take to grow a luffa sponge indoors?
The time it takes to grow a luffa sponge from seed to harvest can vary depending on the growing conditions, but generally, it takes around 120-150 days. The fruits are ready to harvest when they turn yellow or brown and the skin becomes dry and brittle. You should be able to easily press your fingernail into the skin.
How do I process the luffa sponge after harvesting?
Once the luffa fruit is harvested, you’ll need to process it to remove the skin and seeds. The easiest way to do this is to soak the fruit in water for a few days until the skin softens. Then, you can peel off the skin and shake out the seeds. Rinse the sponge thoroughly and allow it to dry completely in the sun. You can then cut the sponge into smaller pieces if desired.
Can I eat the young luffa fruits?
Yes, young luffa fruits are edible and can be used in a variety of dishes, similar to zucchini or cucumbers. They are best when they are small and tender, before the fibers develop. You can sauté them, add them to soups or stews, or even eat them raw in salads.
What are some common problems when growing luffa indoors and how can I prevent them?
Some common problems include powdery mildew, aphids, and spider mites. To prevent powdery mildew, ensure good air circulation and avoid overhead watering. If you spot aphids or spider mites, you can try spraying them with insecticidal soap or neem oil. Regularly inspect your plants for any signs of pests or diseases and take action promptly.
Can I save seeds from my homegrown luffa sponges to plant next year?
Yes, you can save seeds from your homegrown luffa sponges. Simply collect the seeds when you process the sponge and allow them to dry completely. Store them in an airtight container in a cool, dark place until you’re ready to plant them next year. Remember that saved seeds may not always produce plants that are identical to the parent plant, but it’s a fun way to experiment and continue your indoor luffa growing journey.

Leave a Comment