
Grow Malabar Spinach at Home and unlock a world of fresh, nutritious greens right at your fingertips! Have you ever dreamed of snipping vibrant, leafy spinach from your own garden just moments before adding it to your favorite dish? This isn’t just a dream; it’s an achievable reality with our simple, step-by-step DIY guide.
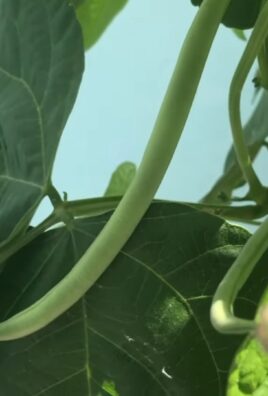
Malabar spinach, also known as Basella alba, boasts a rich history, particularly in Asian and African cuisines, where it’s been cherished for centuries for its unique flavor and health benefits. Unlike traditional spinach, Malabar spinach thrives in warmer climates, making it an excellent alternative for gardeners in hotter regions. It’s also a beautiful, vining plant that can add a touch of elegance to your garden or balcony.
Why should you learn to grow Malabar Spinach at Home? Well, for starters, you’ll have access to a constant supply of fresh, organic greens, free from harmful pesticides and chemicals. Plus, it’s incredibly rewarding to nurture a plant from seed to harvest! In this article, I’ll share my favorite DIY tricks and hacks to ensure your Malabar spinach flourishes, even if you’re a complete beginner. We’ll cover everything from seed starting to harvesting, ensuring you have all the knowledge you need to enjoy this delicious and versatile leafy green.
Malabar Spinat zu Hause anbauen: Dein umfassender DIY-Leitfaden
Hallo Gartenfreunde! Habt ihr Lust, euren eigenen Malabar Spinat anzubauen? Dieser Kletterspinat ist nicht nur super lecker, sondern auch unglaublich einfach anzubauen. Ich zeige euch, wie ihr das ganz einfach zu Hause hinbekommt!
Was ist Malabar Spinat überhaupt?
Malabar Spinat (Basella alba oder Basella rubra) ist kein echter Spinat, aber er wird oft so verwendet. Er ist ein tropischer Kletterspinat mit fleischigen Blättern und Stängeln. Er ist hitzebeständig und wächst schnell, was ihn zu einer tollen Alternative zu echtem Spinat in warmen Klimazonen macht. Die Blätter können roh in Salaten gegessen oder wie Spinat gekocht werden. Außerdem ist er reich an Vitaminen und Mineralstoffen!
Warum Malabar Spinat selbst anbauen?
* Frische Ernte: Nichts schmeckt besser als frisch geerntetes Gemüse aus dem eigenen Garten.
* Einfache Anzucht: Malabar Spinat ist relativ pflegeleicht und verzeiht Anfängerfehler.
* Platzsparend: Da er klettert, kann er auch in kleinen Gärten oder auf Balkonen angebaut werden.
* Dekorativ: Mit seinen grünen oder roten Stängeln ist er auch optisch ein Hingucker.
* Nachhaltig: Du weißt genau, was drin ist und vermeidest lange Transportwege.
Was du für den Anbau brauchst:
* Samen oder Stecklinge: Malabar Spinat kann aus Samen oder Stecklingen gezogen werden. Samen sind leichter zu bekommen, aber Stecklinge wachsen schneller.
* Anzuchttöpfe oder -schalen: Für die Voranzucht der Samen.
* Anzuchterde: Spezielle Erde für die Anzucht, die nährstoffarm und locker ist.
* Pflanztöpfe oder ein Beet: Für die ausgewachsenen Pflanzen.
* Gartenerde: Nährstoffreiche Erde für das Beet oder die Töpfe.
* Kompost oder organischer Dünger: Um die Erde anzureichern.
* Rankhilfe: Ein Spalier, Zaun oder ähnliches, an dem der Spinat hochklettern kann.
* Gießkanne oder Schlauch: Zum Bewässern der Pflanzen.
* Gartenschere: Zum Ernten und Beschneiden.
* (Optional) Gewächshaus oder Frühbeet: Für die Voranzucht in kälteren Regionen.
Anleitung: Malabar Spinat Schritt für Schritt anbauen
Phase 1: Die Vorbereitung
1. Samen vorbereiten (optional): Malabar Spinatsamen haben eine harte Schale. Um die Keimung zu beschleunigen, kannst du sie vor dem Aussäen 24 Stunden in lauwarmem Wasser einweichen. Das hilft, die Schale aufzuweichen.
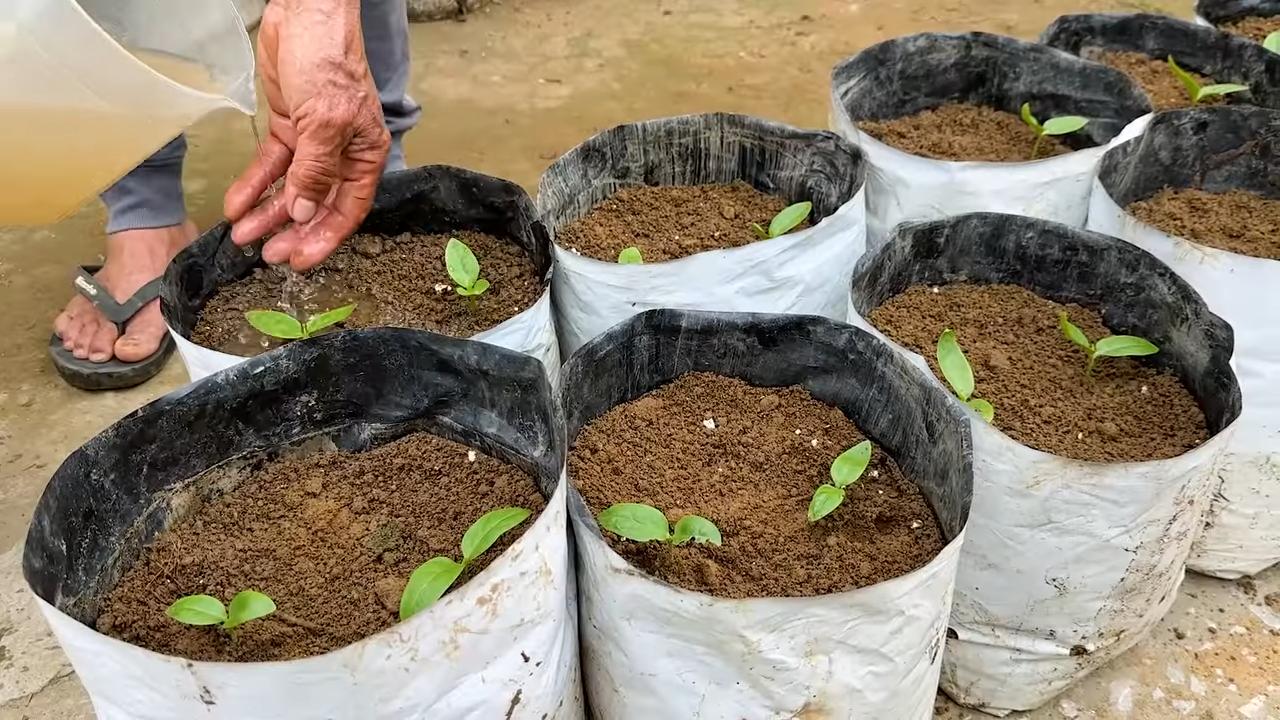
2. Anzuchttöpfe vorbereiten: Fülle die Anzuchttöpfe oder -schalen mit Anzuchterde. Drücke die Erde leicht an.
3. Samen aussäen: Lege in jeden Topf 2-3 Samen. Bedecke die Samen mit einer dünnen Schicht Erde (ca. 0,5 cm).
4. Bewässern: Befeuchte die Erde vorsichtig mit einer Sprühflasche oder Gießkanne. Die Erde sollte feucht, aber nicht nass sein.
5. Standort wählen: Stelle die Anzuchttöpfe an einen warmen und hellen Ort. Ein Gewächshaus oder Frühbeet ist ideal, aber ein sonniges Fensterbrett tut es auch. Die ideale Keimtemperatur liegt zwischen 20 und 25 Grad Celsius.
6. Geduld haben: Die Keimung kann 1-3 Wochen dauern. Halte die Erde während dieser Zeit feucht.
Phase 2: Die Umpflanzung
1. Pflanzen vorbereiten: Sobald die Sämlinge 2-3 echte Blätter haben (neben den Keimblättern), sind sie bereit zum Umpflanzen.
2. Standort wählen: Wähle einen sonnigen bis halbschattigen Standort für deine Malabar Spinatpflanzen. Der Boden sollte gut durchlässig und nährstoffreich sein.
3. Boden vorbereiten: Lockere den Boden im Beet oder in den Pflanztöpfen auf. Mische Kompost oder organischen Dünger unter die Erde, um sie anzureichern.
4. Pflanzen umsetzen: Grabe ein Loch, das groß genug für den Wurzelballen ist. Nimm die Sämlinge vorsichtig aus den Anzuchttöpfen und setze sie in die Löcher. Achte darauf, die Wurzeln nicht zu beschädigen.
5. Abstand halten: Pflanze die Sämlinge in einem Abstand von etwa 30-45 cm zueinander.
6. Angießen: Gieße die Pflanzen nach dem Umpflanzen gründlich an.
7. Rankhilfe installieren: Stelle eine Rankhilfe (Spalier, Zaun, etc.) in der Nähe der Pflanzen auf. Der Malabar Spinat wird daran hochklettern.
Phase 3: Die Pflege
1. Bewässerung: Gieße die Pflanzen regelmäßig, besonders während trockener Perioden. Der Boden sollte immer leicht feucht sein, aber nicht nass.
2. Düngung: Dünge die Pflanzen alle 2-3 Wochen mit einem organischen Dünger oder Komposttee. Das fördert das Wachstum und die Ernte.
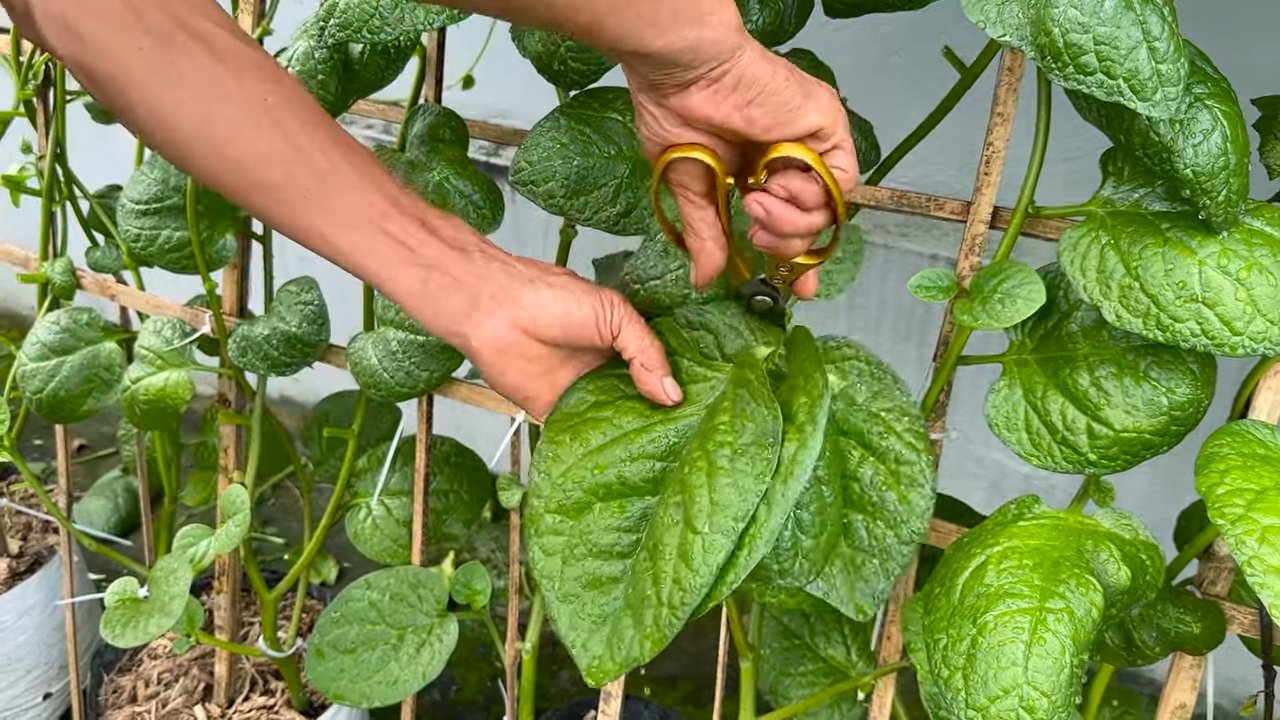
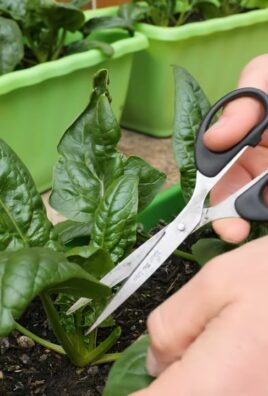
3. Beschneidung: Schneide die Pflanzen regelmäßig zurück, um das Wachstum zu fördern und die Ernte zu erleichtern. Du kannst die abgeschnittenen Triebe einfach essen oder als Stecklinge verwenden.
4. Unkrautbekämpfung: Entferne regelmäßig Unkraut, um die Pflanzen vor Konkurrenz zu schützen.
5. Schutz vor Schädlingen: Malabar Spinat ist relativ resistent gegen Schädlinge. Gelegentlich können Blattläuse auftreten. Diese kannst du mit einem Wasserstrahl oder einer milden Seifenlösung bekämpfen.
Phase 4: Die Ernte
1. Erntezeitpunkt: Du kannst mit der Ernte beginnen, sobald die Pflanzen ausreichend Blätter gebildet haben. Das ist in der Regel etwa 6-8 Wochen nach dem Umpflanzen der Fall.
2. Erntemethode: Pflücke die Blätter und Triebe nach Bedarf. Du kannst die Pflanze auch komplett zurückschneiden, um eine neue Wachstumsphase anzuregen.
3. Lagerung: Frischer Malabar Spinat hält sich im Kühlschrank etwa 3-5 Tage. Du kannst ihn auch einfrieren oder trocknen, um ihn länger haltbar zu machen.
Zusätzliche Tipps und Tricks
* Stecklingsvermehrung: Malabar Spinat lässt sich leicht durch Stecklinge vermehren. Schneide einfach einen Trieb ab und stecke ihn in feuchte Erde. Er wird schnell Wurzeln schlagen.
* Winterhärte: Malabar Spinat ist nicht winterhart. In kälteren Regionen musst du ihn entweder im Haus überwintern oder jedes Jahr neu anbauen.
* Blüte: Wenn der Malabar Spinat blüht, kann das die Blattproduktion reduzieren. Entferne die Blüten, um das Wachstum der Blätter zu fördern.
* Sortenwahl: Es gibt verschiedene Sorten von Malabar Spinat, die sich in der Farbe der Stängel und Blätter unterscheiden. Wähle die Sorte, die dir am besten gefällt.
* Kombination mit anderen Pflanzen: Malabar Spinat verträgt sich gut mit anderen Gemüsesorten wie Tomaten, Paprika und Auberginen.
Häufige Probleme und Lösungen
* Gelbe Blätter: Gelbe Blätter können ein Zeichen für Nährstoffmangel sein. Dünge die Pflanzen mit einem organischen Dünger.
* Schleimige Blätter: Schleimige Blätter können durch zu viel Feuchtigkeit verursacht werden. Achte darauf, dass der Boden gut durchlässig ist und die Pflanzen nicht zu dicht stehen.
* Blattläuse: Blattläuse können mit einem Wasserstrahl oder einer milden Seifenlösung bekämpft werden.
Ich hoffe, dieser Leitfaden hilft dir dabei, deinen eigenen Malabar Spinat erfolgreich anzubauen. Viel Spaß beim Gärtnern und guten Appetit!
Conclusion
So, there you have it! Growing Malabar Spinach at home is not only achievable but also incredibly rewarding. Forget those wilted, overpriced greens at the supermarket. Imagine stepping into your backyard or onto your balcony and harvesting fresh, vibrant, and nutritious Malabar Spinach whenever you need it. This DIY project is a game-changer for anyone who values fresh, homegrown produce and wants to add a unique and healthy leafy green to their diet.
Why is this a must-try? Because it’s more than just growing a plant; it’s about connecting with your food source, reducing your carbon footprint, and enjoying the unparalleled flavor of freshly picked vegetables. Malabar Spinach is a nutritional powerhouse, packed with vitamins, minerals, and antioxidants. Plus, its climbing habit makes it a beautiful and space-saving addition to any garden, big or small.
But the best part? The possibilities are endless! Experiment with different trellising methods – a simple bamboo stake, a repurposed tomato cage, or even a decorative archway. Try growing Malabar Spinach in containers of varying sizes to see what works best for your space. And don’t be afraid to get creative with your recipes! Add it to stir-fries, soups, salads, or even use it as a wrap for your favorite fillings.
Consider these variations to personalize your Malabar Spinach growing experience:
* Vertical Gardening: Maximize space by training your Malabar Spinach to climb up a wall or fence. This not only looks stunning but also keeps the leaves off the ground, reducing the risk of pests and diseases.
* Companion Planting: Plant Malabar Spinach alongside beneficial companions like basil, marigolds, or nasturtiums to deter pests and attract pollinators.
* Seed Saving: Once your Malabar Spinach plant matures, collect the seeds to ensure you have a continuous supply for future seasons. This is a sustainable and cost-effective way to keep your garden thriving.
* Hydroponics: For those with limited space or a desire to experiment, Malabar Spinach can also be grown hydroponically. This method allows for precise control over nutrients and water, resulting in faster growth and higher yields.
We wholeheartedly encourage you to embark on this exciting gardening adventure. Growing Malabar Spinach at home is easier than you think, and the rewards are immeasurable. From the satisfaction of nurturing a plant from seed to the delicious and nutritious meals you’ll create, this is a project that will bring joy and health to your life.
Don’t just take our word for it – give it a try! We’re confident that you’ll be amazed by the results. And once you’ve experienced the magic of homegrown Malabar Spinach, we want to hear all about it! Share your photos, tips, and recipes with us in the comments below. Let’s create a community of Malabar Spinach enthusiasts and inspire others to discover the joys of gardening. Happy growing!
Frequently Asked Questions (FAQ)
What exactly is Malabar Spinach, and why should I grow it?
Malabar Spinach (Basella alba or Basella rubra) isn’t a true spinach, but a heat-tolerant vine that thrives in warm climates where traditional spinach struggles. It offers a similar flavor profile to spinach, with a slightly peppery note, and is packed with vitamins A and C, iron, and calcium. Growing it yourself ensures you have access to fresh, organic greens, saves money, and reduces your reliance on store-bought produce. Plus, its beautiful climbing habit adds visual interest to your garden.
How do I start growing Malabar Spinach from seed?
Starting from seed is a common and rewarding method. First, soak the seeds in warm water for 24 hours to soften the hard outer shell and improve germination rates. Then, sow the seeds about ½ inch deep in seed-starting trays or small pots filled with well-draining potting mix. Keep the soil consistently moist and warm (around 70-80°F). Germination typically takes 1-3 weeks. Once the seedlings have developed a few sets of true leaves, they can be transplanted into larger pots or directly into the garden.
What are the ideal growing conditions for Malabar Spinach?
Malabar Spinach thrives in warm, sunny locations with well-draining soil. It prefers at least 6 hours of direct sunlight per day. The soil should be rich in organic matter and slightly acidic to neutral (pH 6.0-7.0). Provide a trellis or other support structure for the vines to climb on. Consistent watering is essential, especially during hot, dry periods. Mulching around the base of the plant helps retain moisture and suppress weeds.
How often should I water and fertilize my Malabar Spinach?
Water your Malabar Spinach regularly, especially during hot weather. The soil should be consistently moist but not waterlogged. Check the soil moisture by sticking your finger about an inch deep – if it feels dry, it’s time to water. Fertilize every 2-3 weeks with a balanced organic fertilizer or compost tea. Avoid over-fertilizing, as this can lead to excessive foliage growth at the expense of flavor.
What are some common pests and diseases that affect Malabar Spinach, and how can I prevent them?
Malabar Spinach is generally resistant to pests and diseases, but aphids, spider mites, and snails can occasionally be a problem. To prevent infestations, inspect your plants regularly and remove any pests by hand or with a strong spray of water. Encourage beneficial insects like ladybugs and lacewings to your garden to help control pest populations. Good air circulation and proper watering practices can help prevent fungal diseases. If necessary, use an organic insecticide or fungicide as a last resort.
When and how should I harvest Malabar Spinach?
You can start harvesting Malabar Spinach leaves as soon as the plant is established and has produced enough foliage. Simply snip off the leaves and tender stems as needed. Regular harvesting encourages the plant to produce more leaves. The younger leaves are more tender and flavorful than the older ones. Avoid harvesting more than one-third of the plant at a time to allow it to continue growing vigorously.
Can I grow Malabar Spinach in containers?
Yes, Malabar Spinach grows well in containers, making it a great option for those with limited space. Choose a large container (at least 12 inches in diameter) with good drainage holes. Fill the container with a high-quality potting mix and provide a trellis or other support structure for the vines to climb on. Water and fertilize regularly, and place the container in a sunny location.
How do I save seeds from my Malabar Spinach plant?
To save seeds, allow some of the flowers to mature and form berries. The berries will turn dark purple or black when they are ripe. Harvest the berries and remove the seeds from the pulp. Rinse the seeds thoroughly and allow them to dry completely before storing them in an airtight container in a cool, dark place.
Is Malabar Spinach safe to eat raw?
While Malabar Spinach can be eaten raw, it’s generally recommended to cook it lightly. Raw Malabar Spinach can have a slightly slimy texture, which some people find unappealing. Cooking it briefly, such as in a stir-fry or soup, helps to reduce the sliminess and enhance the flavor.
What are some delicious ways to use Malabar Spinach in cooking?
Malabar Spinach is a versatile leafy green that can be used in a variety of dishes. It can be added to stir-fries, soups, stews, salads, and omelets. It can also be used as a wrap for fillings like rice, vegetables, or meat. Its slightly peppery flavor pairs well with garlic, ginger, soy sauce, and sesame oil. Experiment with different recipes and find your favorite ways to enjoy this nutritious and delicious vegetable.

Leave a Comment