
Grow Radishes at Home? Absolutely! Imagine plucking crisp, peppery radishes straight from your own backyard, adding a vibrant crunch to your salads and snacks. It’s easier than you think, and this DIY guide is your ticket to radish-growing success, even if you’ve never gardened before.
Radishes have a surprisingly rich history, dating back to ancient times. They were cultivated in Egypt before the pyramids were built and were even a staple food in ancient Greece and Rome. These little root vegetables have nourished civilizations for centuries, and now, you can easily bring that tradition to your own table.
Why should you learn to grow radishes at home? Well, for starters, store-bought radishes often lack the fresh, zesty flavor of homegrown ones. Plus, growing your own food is incredibly rewarding! It connects you to nature, reduces your carbon footprint, and gives you control over what you eat. In this article, I’ll share simple, effective DIY tricks and hacks to help you cultivate a thriving radish patch, no matter your space or experience level. Get ready to enjoy the satisfaction of harvesting your own delicious radishes – let’s get started!
Grow Radishes at Home: From Seed to Salad in Weeks!
Hey there, fellow gardening enthusiasts! I’m so excited to share my secrets for growing radishes at home. These little peppery gems are incredibly easy to cultivate, even if you’re a complete beginner. Plus, they mature super quickly, so you’ll be enjoying fresh, homegrown radishes in just a few weeks. Let’s get started!
What You’ll Need
Before we dive into the nitty-gritty, let’s gather our supplies. Here’s a list of everything you’ll need to successfully grow radishes at home:
- Radish Seeds: Choose your favorite variety! I personally love ‘Cherry Belle’ for its classic flavor and quick growth, but ‘French Breakfast’ and ‘Watermelon Radish’ are also fantastic options.
- Potting Soil: A well-draining potting mix is essential. You can buy a pre-made mix or create your own by combining equal parts compost, peat moss (or coconut coir), and perlite.
- Container (Optional): If you’re growing radishes in containers, make sure they’re at least 6 inches deep. Radishes need room to develop their roots.
- Gardening Tools: A small trowel, a watering can or hose with a gentle spray nozzle, and a pair of gardening gloves will come in handy.
- Fertilizer (Optional): A balanced, water-soluble fertilizer can give your radishes a boost, but it’s not strictly necessary.
- Sunlight: Radishes need at least 6 hours of sunlight per day.
Choosing the Right Location
Radishes are pretty adaptable, but they do have some preferences when it comes to location. Here’s what to keep in mind:
- Sunlight: As I mentioned earlier, radishes need at least 6 hours of sunlight per day. Choose a spot in your garden or on your balcony that gets plenty of sunshine.
- Soil: Radishes prefer loose, well-draining soil. If your soil is heavy clay, amend it with compost or other organic matter to improve drainage.
- Temperature: Radishes are cool-season crops, so they grow best in temperatures between 50°F and 65°F (10°C and 18°C). You can plant them in early spring or late summer for a fall harvest.
Step-by-Step Planting Guide
Alright, let’s get our hands dirty! Here’s a detailed guide to planting radish seeds:
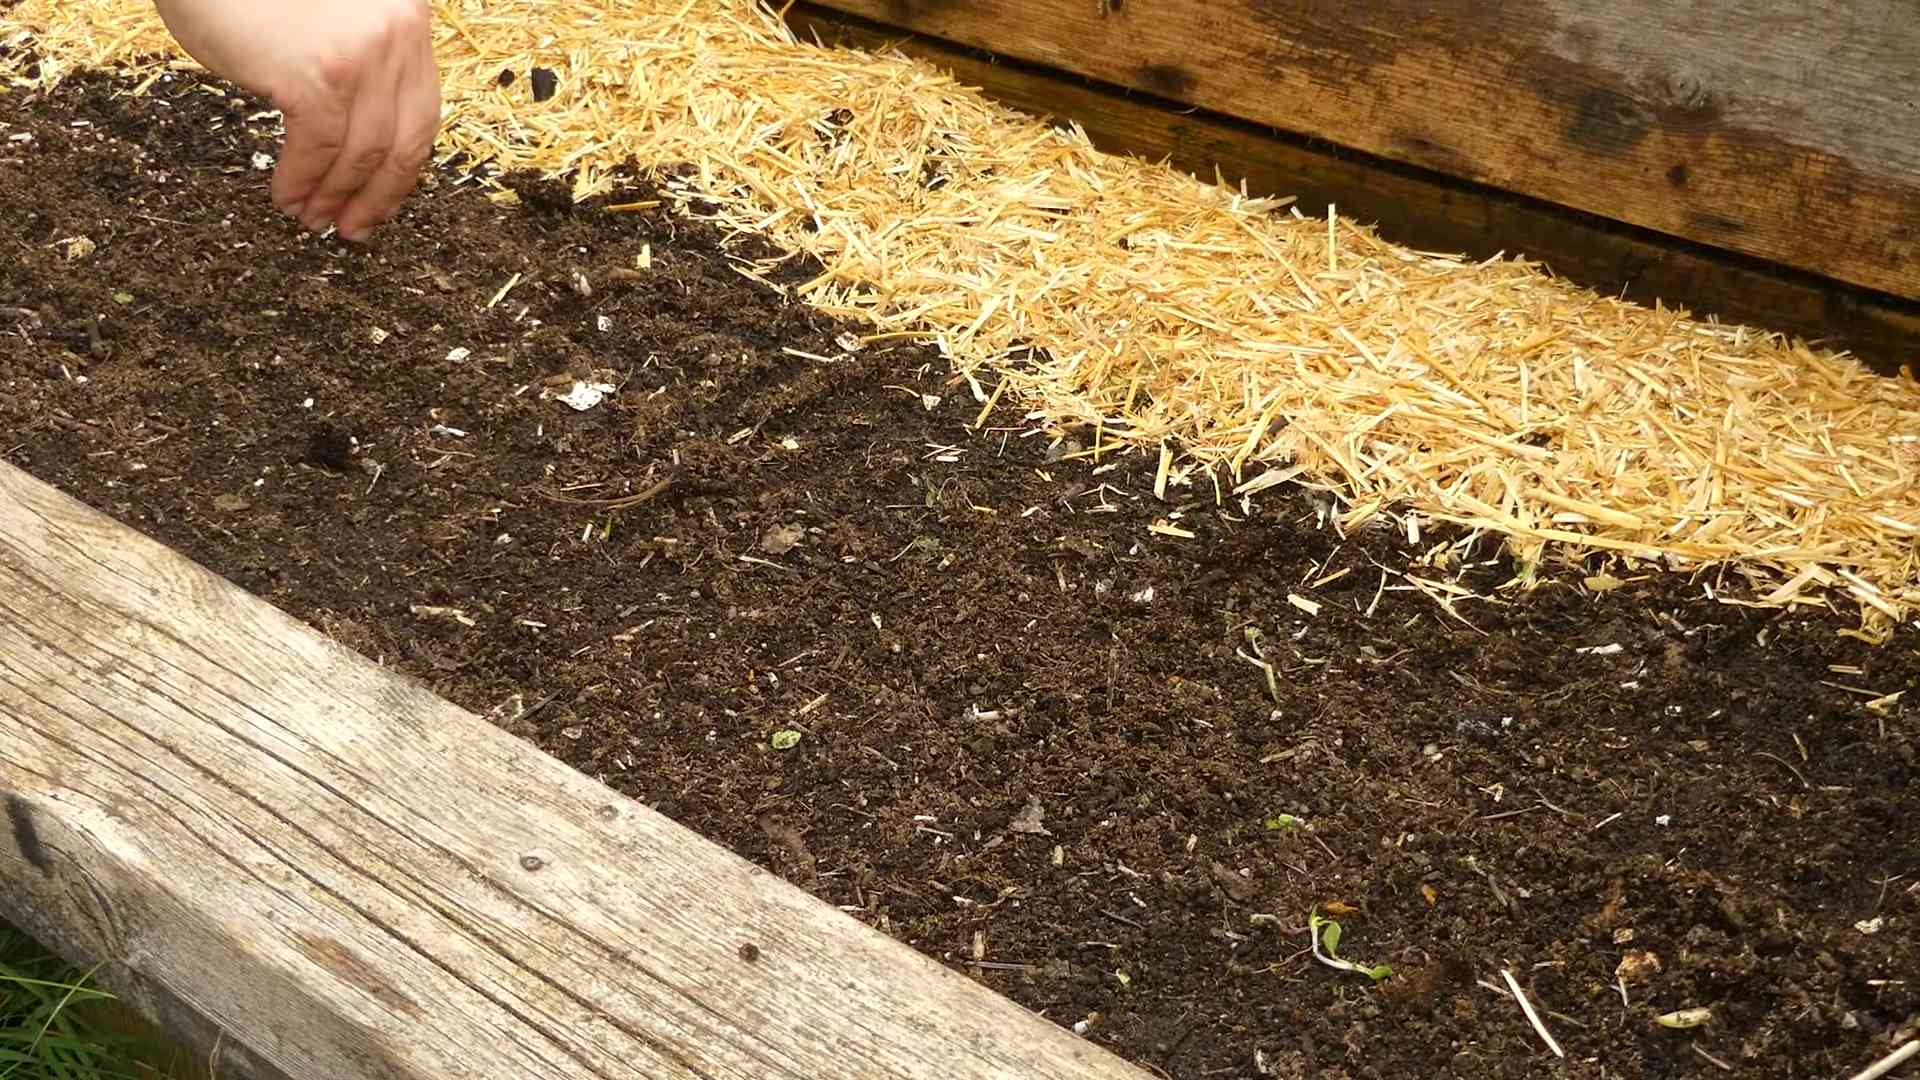
- Prepare the Soil: Whether you’re planting in the ground or in a container, start by preparing the soil. Loosen the soil with a trowel and remove any rocks or debris. If you’re using a container, fill it with potting mix, leaving about an inch of space at the top.
- Sow the Seeds: Radish seeds are small, so you don’t need to plant them too deep. Sow the seeds about ½ inch deep and 1 inch apart. If you’re planting in rows, space the rows about 6 inches apart. I like to use my finger to make small indentations in the soil, drop in the seeds, and then gently cover them with soil.
- Water Gently: After planting, water the soil gently with a watering can or hose. Be careful not to wash away the seeds. The soil should be moist but not soggy.
- Thin Seedlings (If Necessary): Once the seedlings emerge (usually within 3-7 days), you may need to thin them out. If the seedlings are too close together, they’ll compete for resources and won’t develop properly. Thin the seedlings so that they’re about 1 inch apart. I know it can be hard to pull out those tiny plants, but it’s essential for healthy radish growth!
Caring for Your Radishes
Now that your radishes are planted, it’s time to give them some TLC. Here’s what you need to do to keep them happy and healthy:
- Water Regularly: Radishes need consistent moisture to grow quickly and develop a crisp texture. Water them regularly, especially during dry spells. The soil should be moist but not waterlogged. I usually water my radishes every other day, but you may need to adjust the frequency depending on the weather.
- Fertilize (Optional): If you want to give your radishes a boost, you can fertilize them with a balanced, water-soluble fertilizer. Follow the instructions on the fertilizer package. I usually fertilize my radishes about once a week.
- Weed Regularly: Weeds can compete with radishes for resources, so it’s important to keep your garden bed or container weed-free. Pull weeds by hand or use a hoe to cultivate the soil.
- Protect from Pests: Radishes are generally pest-resistant, but they can be susceptible to flea beetles and root maggots. Flea beetles are small, jumping insects that can damage the leaves of radishes. Root maggots are fly larvae that feed on the roots of radishes. To protect your radishes from pests, you can cover them with row covers or use insecticidal soap.
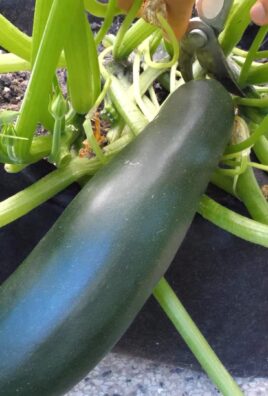
Harvesting Your Radishes
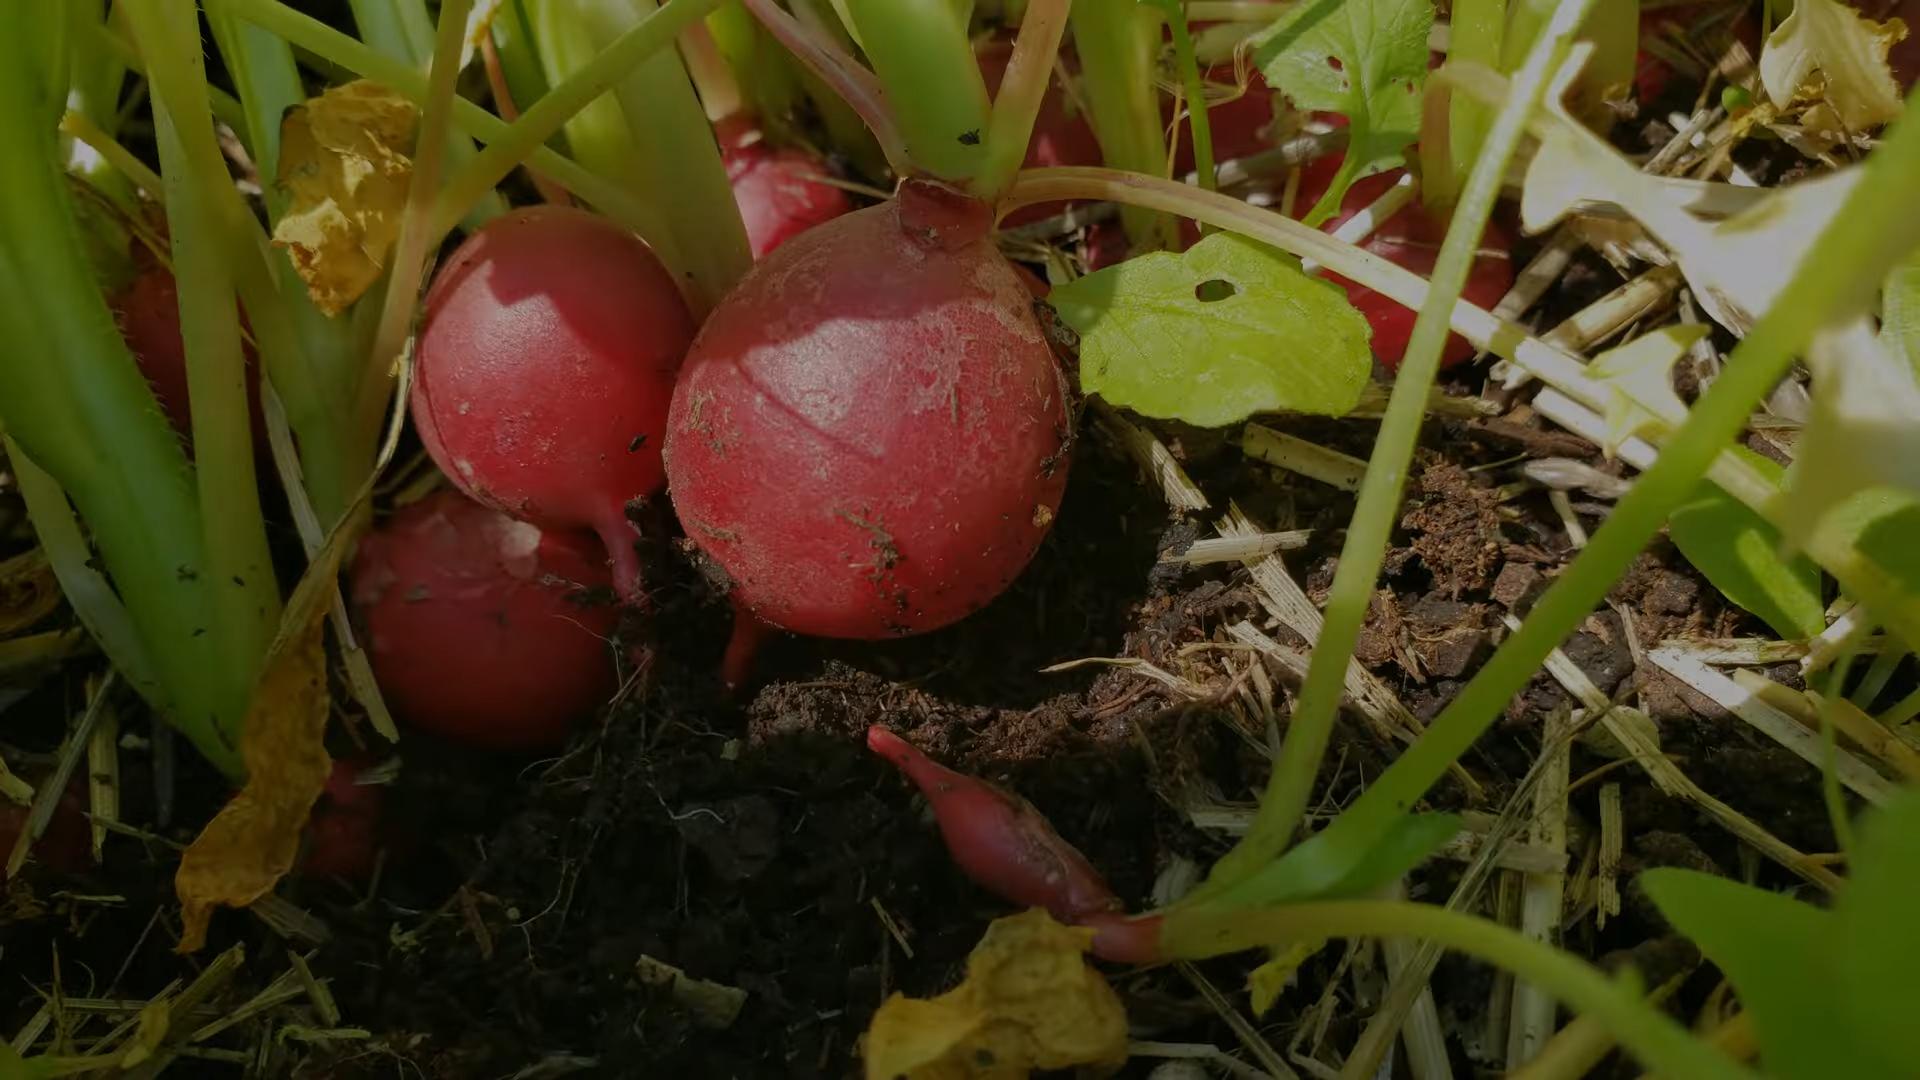
The best part of growing radishes is, of course, harvesting them! Radishes mature quickly, so you’ll be enjoying fresh, homegrown radishes in just a few weeks.
- When to Harvest: Radishes are ready to harvest when they reach the size of a marble or a golf ball, depending on the variety. Check the seed packet for specific harvesting instructions. I usually start harvesting my radishes about 3-4 weeks after planting.
- How to Harvest: To harvest radishes, gently pull them from the soil. If the soil is dry, you may need to loosen it with a trowel first. Be careful not to damage the roots of the surrounding plants.
- Storage: After harvesting, wash the radishes and trim off the tops. Store them in a plastic bag in the refrigerator. Radishes will keep for about a week.
Troubleshooting Common Problems
Even with the best care, you may encounter some problems when growing radishes. Here are some common issues and how to fix them:
- Radishes are too small: This can be caused by overcrowding, lack of sunlight, or poor soil. Thin the seedlings, move the plants to a sunnier location, and amend the soil with compost.
- Radishes are cracked: This is usually caused by inconsistent watering. Water the radishes regularly and deeply, especially during dry spells.
- Radishes are pithy: This means the radishes are hollow and spongy. It’s usually caused by growing radishes in hot weather. Plant radishes in early spring or late summer to avoid this problem.
- Radishes are bitter: This can be caused by growing radishes in hot weather or by harvesting them too late. Plant radishes in early spring or late summer and harvest them when they’re young and tender.
Enjoying Your Homegrown Radishes
Now that you’ve harvested your radishes, it’s time to enjoy them! Radishes are delicious raw, cooked, or pickled. Here are some of my favorite ways to eat them:
- Raw: Slice radishes thinly and add them to salads, sandwiches, or tacos. You can also eat them whole with a sprinkle of salt.
- Cooked: Roast radishes with olive oil and herbs for a simple and delicious side dish. You can also add them to soups, stews, or stir-fries.
- Pickled: Pickle radishes in vinegar, sugar, and spices for a tangy and refreshing treat.
Extra Tips for Radish Success
Here are a few extra tips to help you grow the best radishes ever:
- Succession Planting: Plant a new batch of radish seeds every 2-3 weeks for a continuous harvest.
- Companion Planting: Plant radishes with carrots, lettuce, or spinach. These plants can help protect radishes from pests and improve soil health.
- Don’t Forget the Greens: Radish greens are edible and nutritious! Add them to salads, soups, or stir-fries.
I hope this guide has inspired you to grow your own radishes at home. It’s a rewarding and delicious experience that anyone can enjoy. Happy gardening!
Conclusion
So, there you have it! Growing radishes at home is not only incredibly simple, but it’s also a remarkably rewarding experience. Forget those bland, store-bought radishes that lack that peppery zing. With just a few simple steps and minimal effort, you can cultivate a vibrant crop of crisp, flavorful radishes right in your own backyard, balcony, or even on a sunny windowsill.
Why is this DIY trick a must-try? Because it puts you in control. You get to choose the variety of radish you want to grow, ensuring it perfectly suits your taste. You control the growing conditions, guaranteeing the freshest, most organic radishes possible. And, perhaps most importantly, you experience the sheer joy of nurturing something from seed to table. There’s a unique satisfaction in harvesting your own food, a connection to nature that’s often missing in our modern lives. Plus, fresh radishes are a nutritional powerhouse, packed with vitamins, minerals, and fiber.
Looking for variations? Absolutely! Experiment with different radish varieties. ‘Cherry Belle’ is a classic choice for its bright red color and mild flavor. ‘French Breakfast’ radishes are elongated and have a slightly sweeter taste. For a spicier kick, try ‘Black Spanish’ radishes. You can also try succession planting, sowing new seeds every couple of weeks, to ensure a continuous harvest throughout the growing season. Consider companion planting too! Radishes are known to deter pests from other vegetables, making them excellent neighbors for carrots, lettuce, and cucumbers. Plant them together for a healthier and more productive garden. Another fun variation is growing radishes in containers of different sizes and materials. See which ones yield the best results in your specific environment. You can even grow them indoors under grow lights during the colder months for a year-round supply of fresh radishes.
We wholeheartedly encourage you to give this DIY trick a try. It’s an easy, affordable, and incredibly satisfying way to add fresh, healthy produce to your diet. Imagine the crisp, peppery bite of a homegrown radish in your next salad, or as a crunchy addition to your favorite tacos. The possibilities are endless!
Don’t be intimidated if you’ve never gardened before. Growing radishes at home is a perfect starting point for beginners. The fast growth rate provides quick results, which can be incredibly motivating. And even if you encounter a few challenges along the way, remember that gardening is a learning process. Every mistake is an opportunity to improve your skills and knowledge.
So, grab some seeds, prepare your soil, and get ready to experience the joy of growing your own radishes. We’re confident that you’ll be amazed at how easy and rewarding it is. And once you’ve harvested your first crop, we’d love to hear about your experience! Share your photos, tips, and stories in the comments below. Let’s build a community of radish-growing enthusiasts and inspire others to embrace the joys of homegrown food. Happy gardening!
Frequently Asked Questions (FAQ)
What is the best time of year to plant radishes?
Radishes are cool-season crops, meaning they thrive in cooler temperatures. The best time to plant them is in early spring or late summer/early fall. In the spring, plant as soon as the soil can be worked. For a fall harvest, sow seeds about 4-6 weeks before the first expected frost. Avoid planting during the hottest months of summer, as the heat can cause the radishes to become tough and bitter.
How much sunlight do radishes need?
Radishes need at least 6 hours of sunlight per day to grow properly. If you’re growing them indoors, make sure to place them near a sunny window or use grow lights to supplement the natural light. Insufficient sunlight can result in leggy growth and smaller radishes.
What kind of soil is best for growing radishes?
Radishes prefer loose, well-drained soil that is rich in organic matter. Amend heavy clay soil with compost or other organic materials to improve drainage and aeration. A slightly acidic to neutral soil pH (around 6.0 to 7.0) is ideal. Avoid soils that are compacted or rocky, as these can hinder root development.
How often should I water my radishes?
Radishes need consistent moisture to grow quickly and develop crisp, tender roots. Water deeply whenever the top inch of soil feels dry to the touch. Avoid overwatering, as this can lead to root rot. A good rule of thumb is to water every 2-3 days, depending on the weather conditions. Mulching around the plants can help retain moisture and suppress weeds.
How long does it take for radishes to grow?
One of the best things about growing radishes is their fast growth rate. Most varieties mature in just 3-4 weeks from planting. This makes them a great option for impatient gardeners or those who want quick results. Keep an eye on your radishes and harvest them as soon as they reach the desired size.
How do I know when my radishes are ready to harvest?
The best way to determine if your radishes are ready to harvest is to check their size. Most varieties are ready when the roots are about 1 inch in diameter. You can also gently brush away some of the soil around the base of the plant to get a better look at the root. If the radishes are too small, they will be bland. If they are too large, they may become tough and bitter.
Why are my radishes cracking?
Cracking in radishes is often caused by inconsistent watering. If the soil dries out and then is suddenly flooded with water, the radishes can grow too quickly, causing the skin to crack. To prevent cracking, water your radishes regularly and consistently, especially during hot, dry weather. Mulching can also help maintain consistent soil moisture.
Why are my radishes so spicy?
The spiciness of radishes is influenced by several factors, including the variety, growing conditions, and maturity. Hot weather and dry soil can increase the spiciness of radishes. Harvesting radishes when they are young and tender can help reduce their spiciness. Some varieties, such as ‘Black Spanish,’ are naturally spicier than others.
Can I eat the radish greens?
Yes, radish greens are edible and nutritious! They have a peppery flavor similar to the roots. You can use them in salads, soups, stir-fries, or as a garnish. Make sure to wash the greens thoroughly before eating them. Choose young, tender greens for the best flavor and texture.
How do I store radishes after harvesting?
To store radishes, remove the greens and wash the roots thoroughly. Place the radishes in a plastic bag or container with a damp paper towel and store them in the refrigerator. They should keep for about 1-2 weeks. The greens can be stored separately in a plastic bag in the refrigerator for a few days.
What are some common pests and diseases that affect radishes?
Radishes are generally pest-resistant, but they can be susceptible to flea beetles, root maggots, and aphids. Flea beetles can be controlled with row covers or insecticidal soap. Root maggots can be prevented by rotating crops and using diatomaceous earth. Aphids can be washed off with a strong stream of water or treated with insecticidal soap. Diseases that can affect radishes include damping-off and white rust. Damping-off can be prevented by using well-drained soil and avoiding overwatering. White rust can be treated with a fungicide.
Can I grow radishes in containers?
Yes, radishes are well-suited for container gardening. Choose a container that is at least 6 inches deep and has drainage holes. Use a good-quality potting mix and water regularly. Place the container in a sunny location. Container-grown radishes may need to be fertilized more frequently than those grown in the ground.
Are there any companion plants that benefit radishes?
Yes, radishes are excellent companion plants for many other vegetables. They are known to deter pests from carrots, lettuce, cucumbers, and tomatoes. They also help to loosen the soil, making it easier for other plants to grow. Good companion plants for radishes include beans, peas, and nasturtiums.
How do I prevent my radishes from bolting (going to seed)?
Bolting is when a plant prematurely produces a flower stalk and seeds, often due to stress. To prevent radishes from bolting, avoid planting them during hot weather, water them regularly, and harvest them as soon as they are ready. Providing shade during the hottest part of the day can also help prevent bolting.
Leave a Comment