
Grow Snack Peppers
I’ve always loved the vibrant colors and sweet heat of snack peppers, but buying them from the store can get expensive. That’s why I’m so excited to share my favorite grow snack peppers tips and tricks with you! This isn’t just about saving money; it’s about connecting with nature, enjoying the freshest possible peppers, and experiencing the immense satisfaction of nurturing a plant from seed to harvest. Growing your own food has a rich history, dating back to the earliest civilizations. From ancient Mesopotamian gardens to the victory gardens of World War II, cultivating our own sustenance has always been a source of pride and resilience.
In today’s fast-paced world, we often forget the simple joys of tending to a plant and watching it thrive. But growing your own snack peppers offers a fantastic opportunity to reconnect with the earth and enjoy a rewarding hobby. Whether you have a sprawling backyard or just a sunny windowsill, you can successfully cultivate these delightful peppers. This article is packed with easy-to-follow DIY techniques, from seed starting to pest control, ensuring even beginners can achieve a bountiful harvest. You’ll learn how to choose the right pepper variety, create the perfect growing environment, and troubleshoot common problems.
Why Grow Your Own?
Beyond the delicious, homegrown flavor, growing your own snack peppers offers numerous benefits. You’ll have complete control over the growing process, ensuring your peppers are free from pesticides and other harmful chemicals. Plus, there’s nothing quite like biting into a pepper you’ve nurtured from a tiny seed! So, let’s dive in and discover the secrets to successfully grow snack peppers in your own space.
Growing Snack Peppers: A DIY Guide to a Spicy Harvest
I love snack peppers! They’re so versatile, and nothing beats the flavor of a pepper you’ve grown yourself. This guide will walk you through everything you need to know to successfully grow your own delicious snack peppers, from seed to harvest.
Phase 1: Planning and Preparation
- Choose your pepper variety: Research different snack pepper varieties. Consider factors like heat level (mild, medium, hot), plant size (bushy or vining), and days to maturity. I recommend starting with a relatively easy-to-grow variety for your first attempt. There are tons of great options available online and at your local garden center.
- Source your seeds or seedlings: You can purchase pepper seeds online or at a garden center. Alternatively, you can save seeds from peppers you’ve already eaten (make sure they are from an open-pollinated variety, not a hybrid). Seedlings are also a great option, especially for beginners, as they give you a head start.
- Select your growing location: Peppers need at least six to eight hours of direct sunlight per day. Choose a sunny spot in your garden or on your patio. Consider the wind exposure too – a sheltered location is ideal.
- Prepare your soil: Peppers thrive in well-drained, fertile soil. Amend your soil with compost or other organic matter to improve drainage and nutrient content. A soil test can help determine if you need to add any specific nutrients.
- Gather your supplies: You’ll need pots or seed trays (if starting from seed), potting mix (if starting indoors), gardening gloves, a watering can, and possibly some plant supports (stakes or cages) depending on the variety you choose.
Phase 2: Starting Seeds (If Applicable)
- Fill your seed trays or pots: Use a high-quality seed-starting mix, ensuring the containers are well-drained. Don’t overfill – leave about half an inch of space from the top.
- Sow your seeds: Plant the seeds about ¼ inch deep and about 1 inch apart. Gently cover with soil and water thoroughly but gently, avoiding washing away the seeds.
- Provide warmth and humidity: Place the seed trays or pots in a warm location (ideally 70-80°F) with good light. You can use a heat mat to boost germination. Cover the trays with plastic wrap to maintain humidity, but remember to vent daily to prevent mold.
- Maintain consistent moisture: Keep the soil consistently moist but not soggy. Water when the top inch of soil feels dry to the touch.
- Thin seedlings: Once the seedlings have developed their first true leaves (the leaves that appear after the cotyledons), thin them out, leaving the strongest seedling in each cell or pot. This gives each plant enough space to grow.
- Harden off seedlings: Before transplanting outdoors, gradually acclimate your seedlings to outdoor conditions. Start by placing them outside for a few hours each day, gradually increasing the time over a week or two.
Phase 3: Transplanting and Ongoing Care
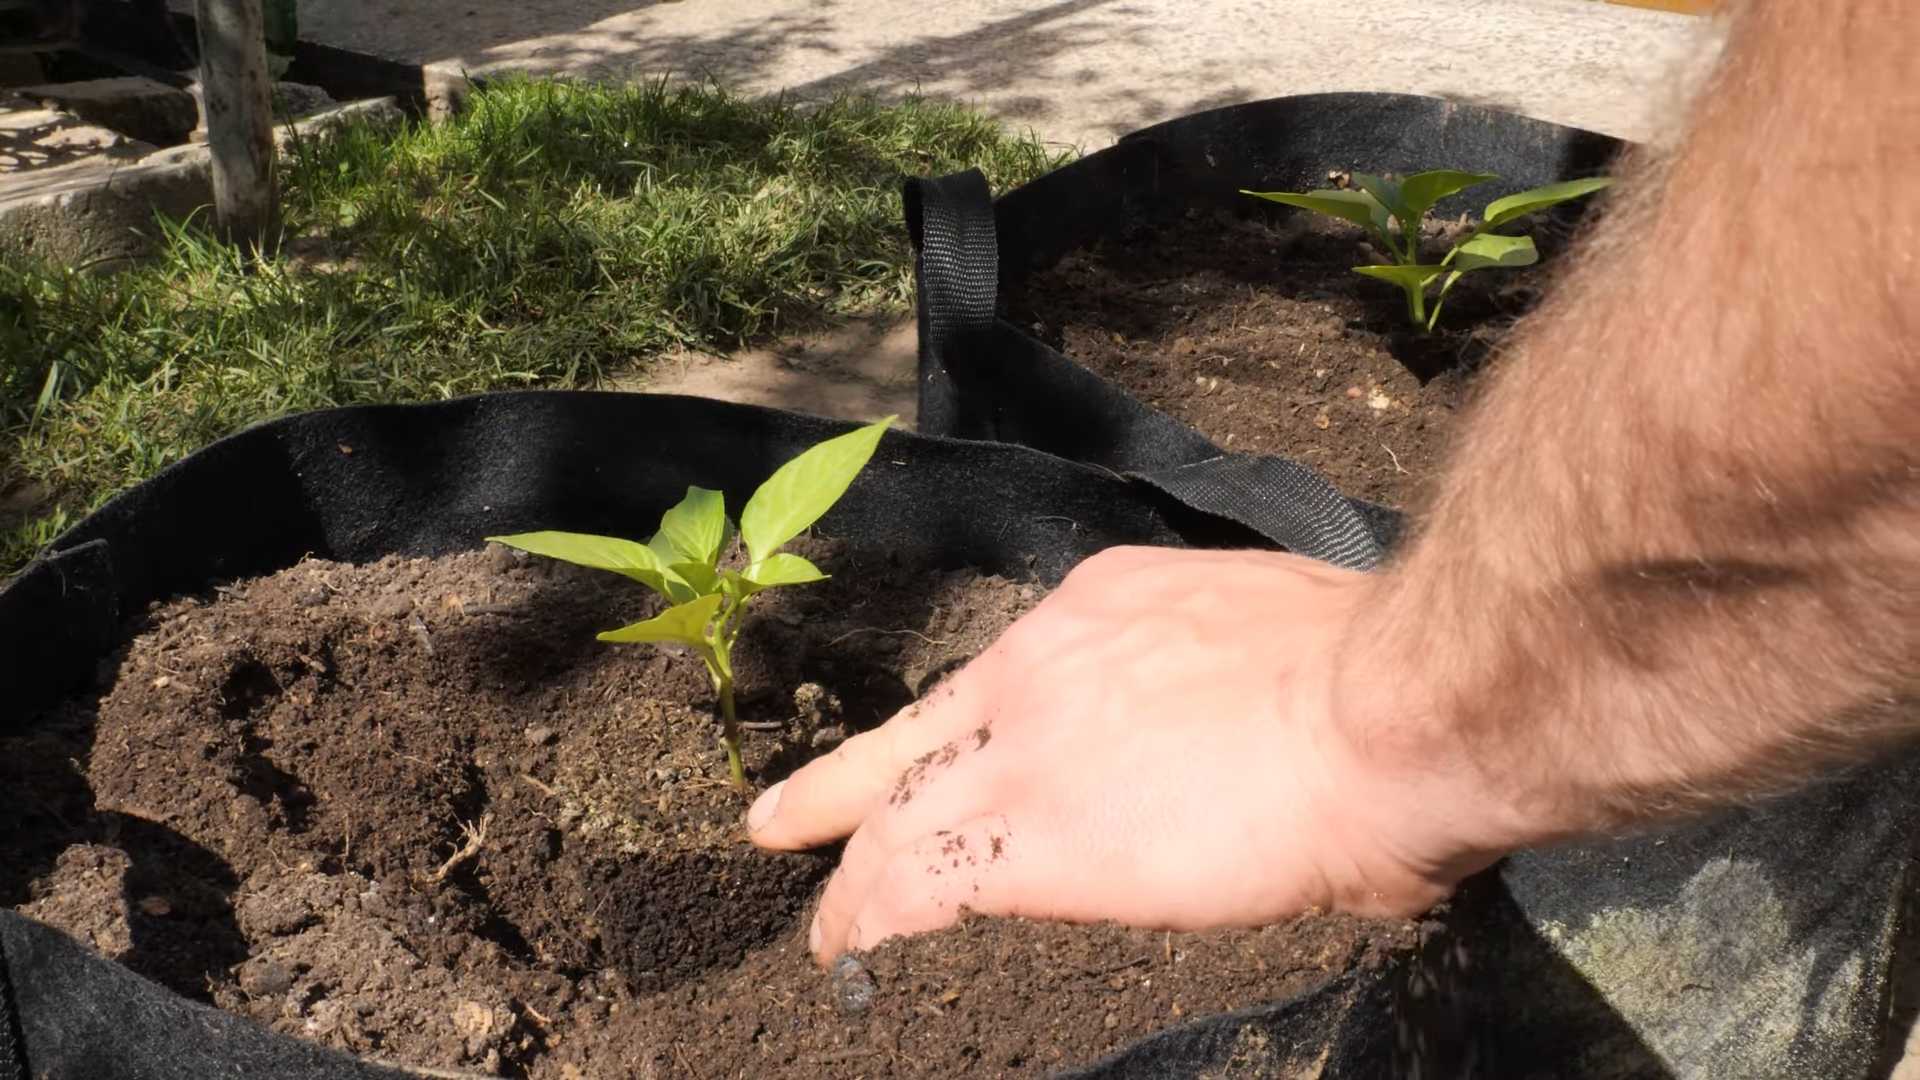
- Prepare the planting holes: Dig holes slightly larger than the root ball of your seedlings or the size of your starter pots. Space them according to the mature size of your pepper plants – check the seed packet or plant tag for spacing recommendations.
- Transplant your peppers: Carefully remove the seedlings from their containers, being careful not to damage the roots. Plant them in the prepared holes, ensuring the top of the root ball is level with the soil surface. Gently fill in the holes with soil and firm it around the base of the plants.
- Water deeply: Water thoroughly after transplanting to help settle the soil and encourage root growth.
- Mulch around the plants: Apply a layer of mulch (straw, shredded leaves, or wood chips) around the plants to help retain moisture, suppress weeds, and regulate soil temperature.
- Water regularly: Peppers need consistent moisture, especially during hot and dry periods. Water deeply and regularly, aiming to keep the soil consistently moist but not waterlogged. The frequency will depend on your climate and soil type.
- Fertilize as needed: Feed your pepper plants with a balanced fertilizer every few weeks, following the instructions on the fertilizer package. Over-fertilizing can be harmful, so it’s better to err on the side of caution.
- Support your plants (if necessary): Some pepper varieties, especially taller ones, may need support to prevent them from flopping over. Use stakes or cages to provide support as needed.
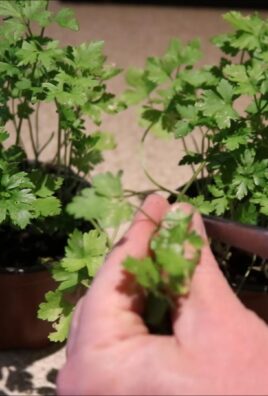
- Monitor for pests and diseases: Regularly inspect your plants for signs of pests or diseases. Address any problems promptly using appropriate organic pest control methods.
Phase 4: Harvesting and Enjoying Your Peppers
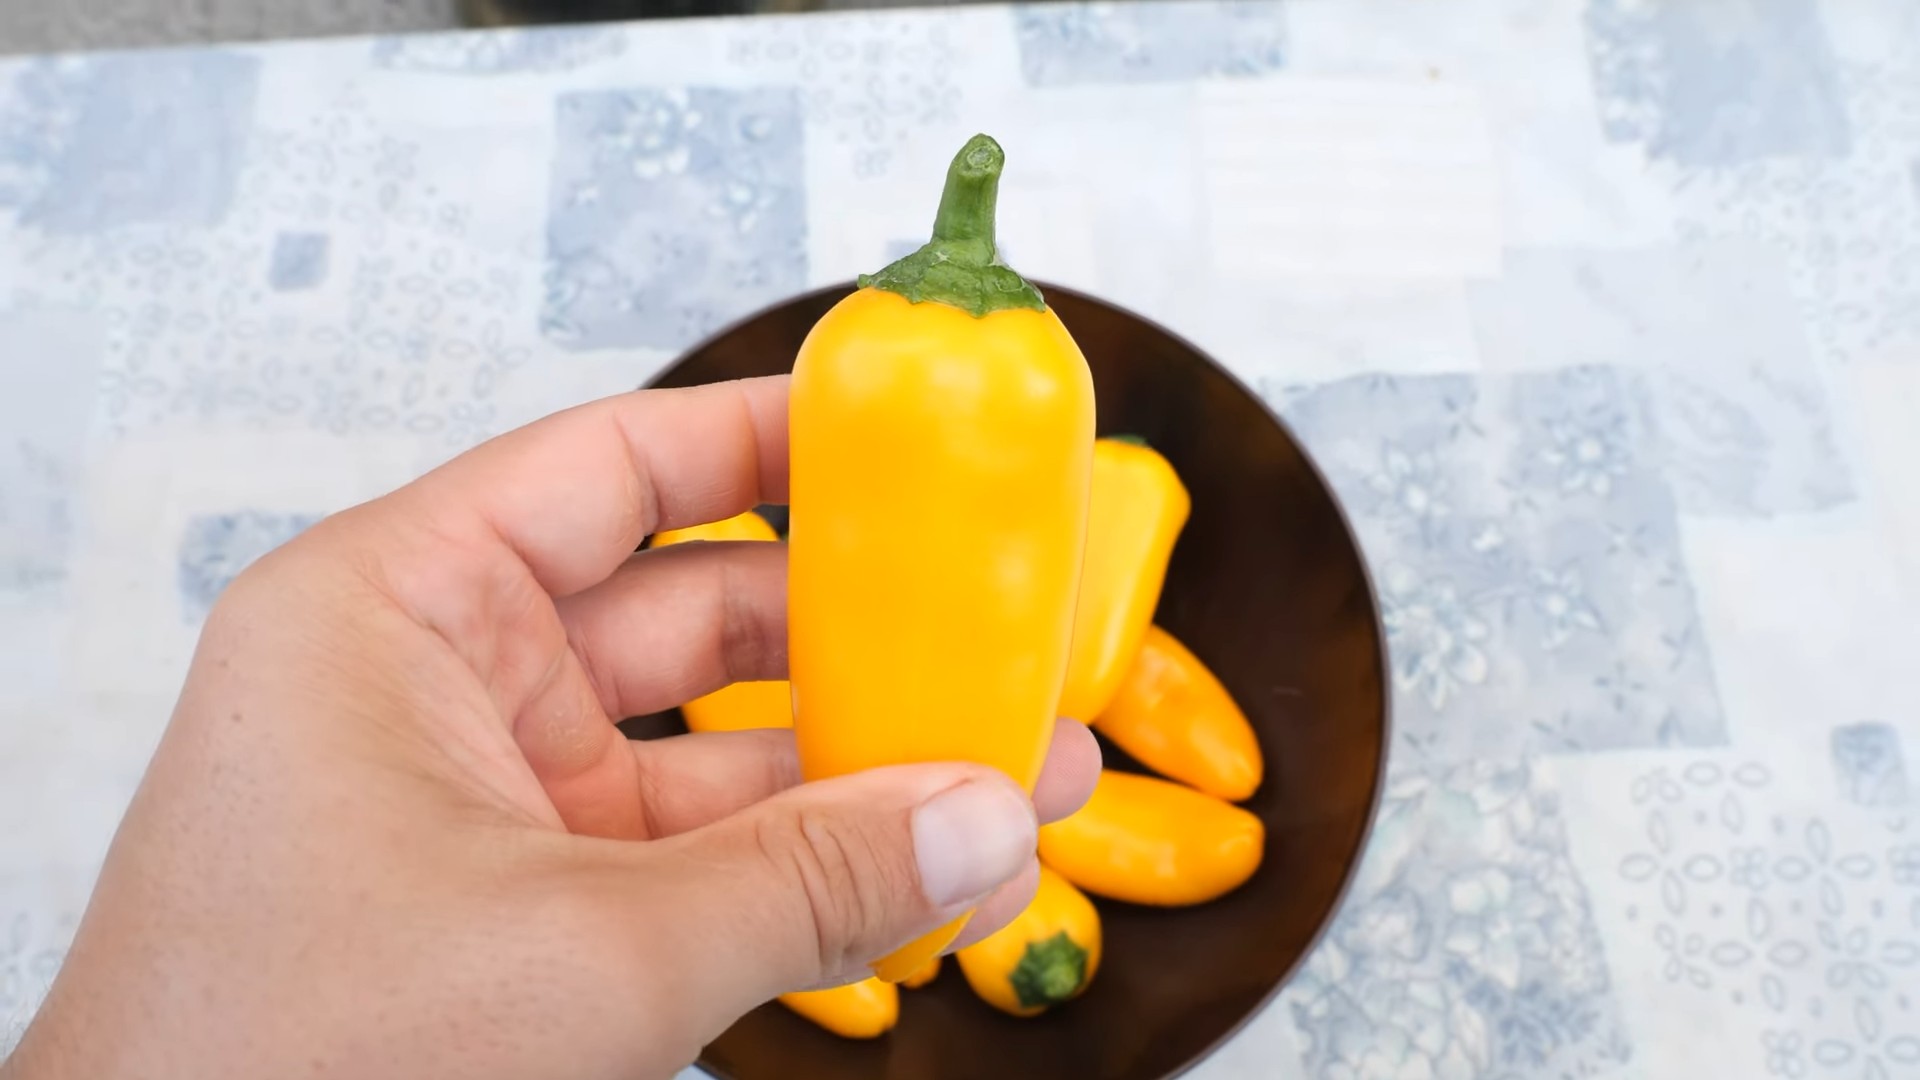
- Harvest at the right time: The best time to harvest snack peppers is when they have reached their mature size and color. The color will vary depending on the variety you’ve chosen. Check the seed packet or plant tag for specific harvesting instructions.
- Harvest carefully: Use sharp scissors or pruning shears to cut the peppers from the plant, leaving a short stem attached. This helps prevent damage to the plant and encourages further fruit production.
- Enjoy your harvest: Use your freshly harvested peppers in salads, salsas, stir-fries, or any other dish you enjoy. You can also preserve your peppers by pickling, freezing, or drying them.
Troubleshooting Tips:
- Yellowing leaves: This could indicate nutrient deficiencies, overwatering, or underwatering. Adjust your watering and fertilization practices accordingly.
- Blossom drop: This can be caused by temperature fluctuations, inconsistent watering, or nutrient deficiencies. Ensure consistent watering and a stable temperature range.
- Pest infestations: Common pepper pests include aphids, spider mites, and whiteflies. Use appropriate organic pest control methods to address infestations.
Remember to have fun and enjoy the process! Growing your own snack peppers is a rewarding experience.
Conclusion
So there you have it – a simple, effective, and rewarding method for growing your own snack peppers! This DIY approach to growing snack peppers offers a unique blend of convenience, cost-effectiveness, and the undeniable satisfaction of nurturing your own plants from seed to harvest. Forget expensive grocery store peppers; you’ll be amazed at the flavor and freshness of homegrown peppers. This method is perfect for beginners and seasoned gardeners alike, offering a manageable project with significant rewards. The ability to control the growing environment, choose your preferred pepper varieties, and enjoy the freshest peppers possible makes this DIY trick a must-try for anyone with even a small space.
Beyond the basic method outlined, there are numerous ways to customize your snack pepper growing experience. Experiment with different pepper varieties – from sweet bell peppers to fiery habaneros – to discover your favorites. Consider using different containers, such as larger pots or even repurposed buckets, to accommodate larger plants or multiple pepper plants. You can also explore different growing mediums, such as coco coir or a well-balanced potting mix, to optimize your plants’ growth. For those with limited sunlight, consider supplementing with grow lights to ensure adequate light exposure, especially during the colder months. Adding a layer of mulch around the base of your plants can help retain moisture and suppress weeds, simplifying your gardening routine.
The beauty of this DIY approach lies in its adaptability. Whether you have a sunny balcony, a spacious backyard, or just a windowsill, you can successfully grow your own snack peppers. The process is incredibly rewarding, offering a connection to nature and a sense of accomplishment that store-bought peppers simply can’t match. Imagine the pride of presenting your homegrown peppers in a vibrant salad or adding a burst of fresh flavor to your favorite dishes. This is more than just growing peppers; it’s about cultivating a deeper appreciation for the food you consume and the environment you inhabit.
We strongly encourage you to try this DIY method and experience the joy of growing your own snack peppers. Share your experiences, tips, and photos with us – we’d love to see your thriving pepper plants and hear about your culinary creations featuring your homegrown bounty. Join our community of home gardeners and let’s inspire each other to grow more of our own food. Don’t hesitate to experiment and adapt this method to suit your specific needs and preferences. The possibilities are endless, and the rewards are truly delicious!
Frequently Asked Questions
What type of peppers are best for beginners?
For beginners, we recommend starting with sweet bell peppers or milder varieties like banana peppers. These are generally easier to grow and more forgiving of minor mistakes. Once you gain experience, you can explore spicier varieties.
How much sunlight do snack peppers need?
Snack peppers thrive in full sun, meaning at least 6-8 hours of direct sunlight per day. If you have limited sunlight, consider supplementing with grow lights to ensure healthy growth.
What kind of soil or growing medium should I use?
A well-draining potting mix specifically formulated for vegetables is ideal. Ensure the mix is rich in organic matter to provide essential nutrients for your pepper plants. Avoid using garden soil directly, as it may contain diseases or pests.
How often should I water my snack peppers?
Water your pepper plants regularly, keeping the soil consistently moist but not waterlogged. The frequency will depend on factors like weather conditions, pot size, and the type of growing medium. Check the soil moisture before watering; it’s better to slightly underwater than overwater.
What are the common problems encountered when growing snack peppers?
Common problems include blossom-end rot (due to inconsistent watering), pest infestations (aphids, whiteflies), and fungal diseases. Regularly inspect your plants for signs of problems and address them promptly. Using organic pest control methods and ensuring good air circulation can help prevent many issues.
Can I grow snack peppers indoors?
Yes, you can definitely grow snack peppers indoors, provided you have a sunny location (south-facing window is ideal) and potentially supplemental grow lights. Choose compact pepper varieties for indoor growing to manage space effectively.
When can I expect to harvest my snack peppers?
Harvest time depends on the pepper variety and growing conditions. Generally, you can expect to harvest your first peppers 60-80 days after planting seeds, but some varieties may take longer. Harvest peppers when they reach their mature size and color.
What should I do with my harvested snack peppers?
The possibilities are endless! Enjoy them fresh in salads, salsas, stir-fries, or as a delicious addition to your favorite dishes. You can also preserve them by pickling, freezing, or drying them for later use.
Can I reuse the same containers and soil for growing snack peppers next year?
It’s best to use fresh potting mix each year to prevent the buildup of diseases and pests. Thoroughly clean and sterilize your containers before reusing them to eliminate any potential contaminants.
Where can I find more information on growing snack peppers?
Numerous online resources, gardening books, and local gardening clubs can provide additional information and support for your snack pepper growing journey. Don’t hesitate to seek advice from experienced gardeners.
Leave a Comment