
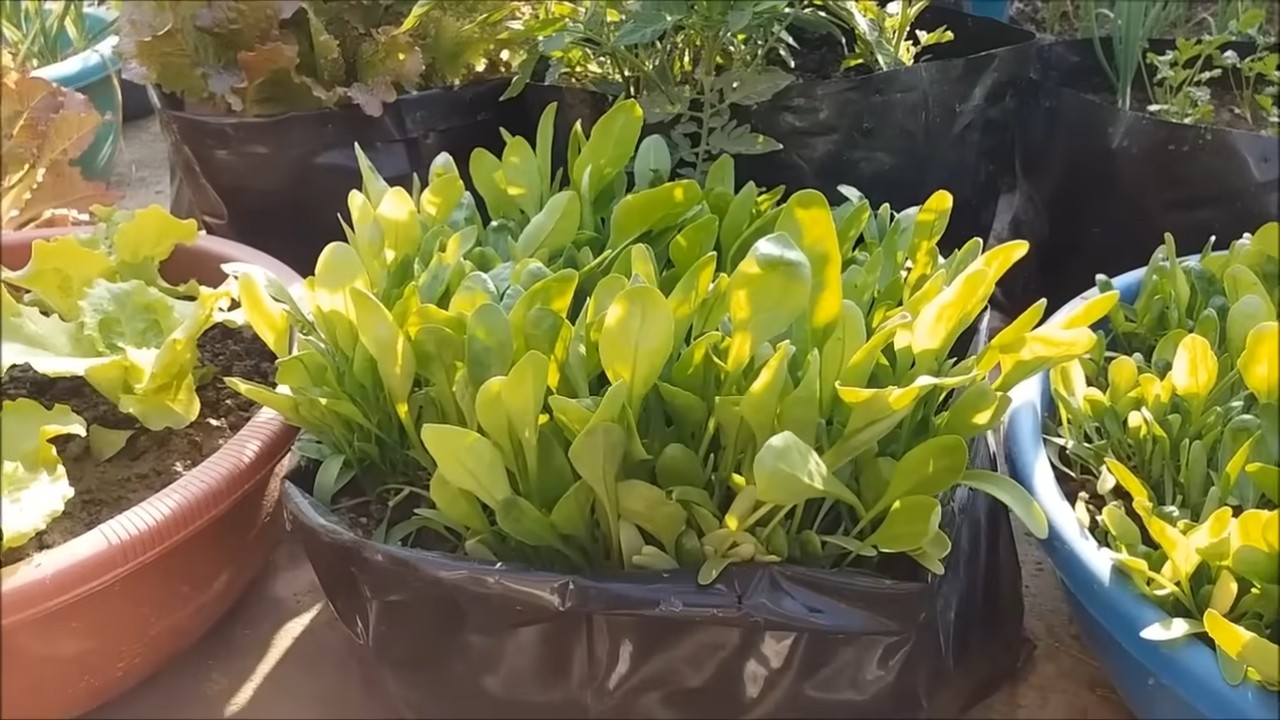
Grow Spinach Indoors? Absolutely! Imagine fresh, vibrant spinach gracing your salads, smoothies, and sautés, all year round, without ever stepping foot outside. Forget those limp, pre-packaged greens from the grocery store – we’re talking about crisp, nutrient-packed spinach grown right in your own home!
For centuries, cultivating edible plants indoors has been a practice rooted in necessity and ingenuity. From ancient Roman orangeries to Victorian-era conservatories, people have sought ways to bring the bounty of the garden inside. Today, with space at a premium and a growing desire for fresh, sustainable food, indoor gardening is experiencing a major resurgence.
But why should you learn to grow spinach indoors? Well, think about it: no more battling unpredictable weather, pesky garden pests, or limited growing seasons. Plus, you’ll have complete control over the growing environment, ensuring your spinach is free from harmful pesticides and herbicides. I know, I know, it sounds too good to be true, but trust me, with a few simple tricks and DIY hacks, you can easily transform a sunny windowsill or spare corner into a thriving indoor spinach garden. I’m here to guide you through every step, from choosing the right container to harvesting your delicious, homegrown spinach. Let’s get started!
Grow Your Own Spinach Indoors: A Beginner’s Guide
Hey there, fellow plant enthusiasts! Are you craving fresh, vibrant spinach but don’t have the outdoor space or the right climate? No problem! I’m going to walk you through the surprisingly simple process of growing spinach indoors. Trust me, there’s nothing quite like snipping off a handful of homegrown spinach for your salad or smoothie. Let’s get started!
Choosing the Right Spinach Variety
First things first, not all spinach varieties are created equal when it comes to indoor growing. Some thrive better in containers and under artificial light. Here are a few of my favorites:
* Baby’s Leaf Hybrid: This is a classic choice. It’s fast-growing, produces tender leaves, and is relatively compact, making it perfect for containers.
* Bloomsdale Long Standing: This variety is known for its heat tolerance, which can be beneficial if your indoor environment gets a little warm. It also has a good resistance to bolting (going to seed prematurely).
* Tyee Hybrid: Another great option for indoor growing. It’s disease-resistant and produces high yields of smooth, dark green leaves.
Gathering Your Supplies
Before we dive into the planting process, let’s make sure you have everything you need. Here’s a checklist:
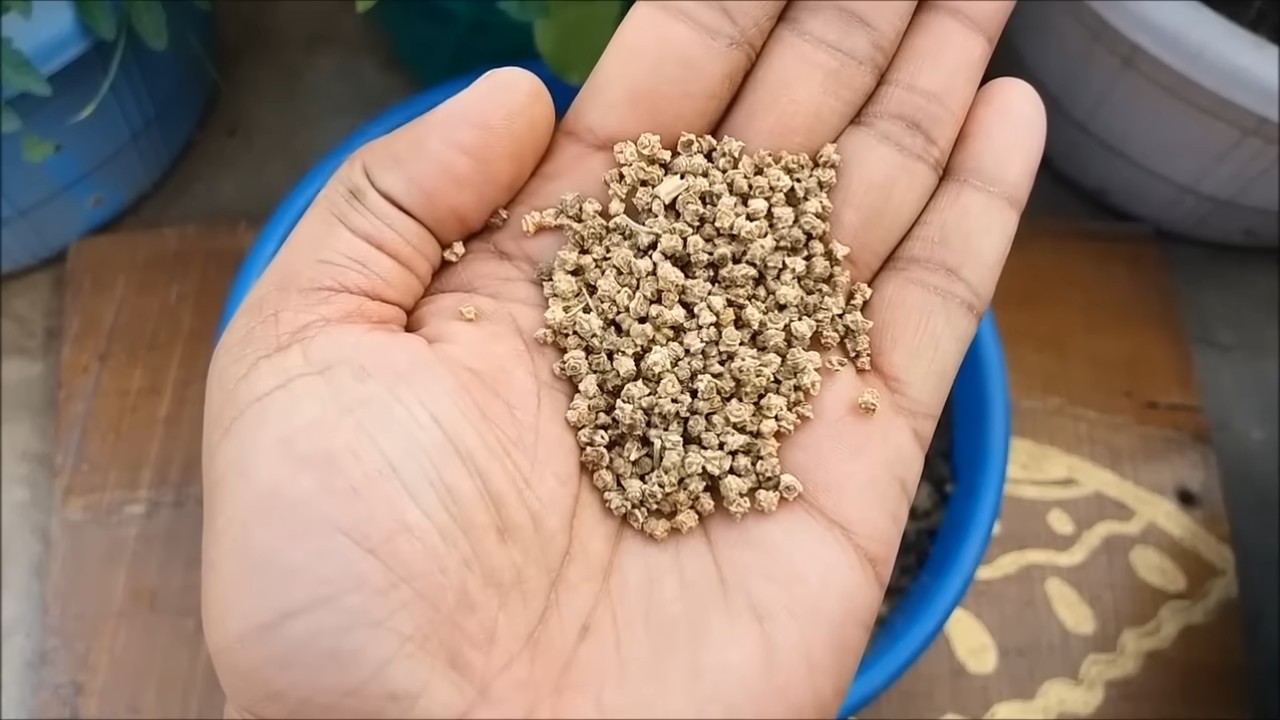
* Spinach Seeds: Choose your preferred variety from the list above or experiment with others!
* Containers: You’ll need containers that are at least 6 inches deep and wide. I prefer using rectangular containers or even window boxes, as they allow for more spinach plants to grow in a smaller space. Make sure they have drainage holes!
* Potting Mix: Use a high-quality potting mix that’s well-draining. Avoid using garden soil, as it can compact and hinder drainage in containers.
* Grow Lights (Optional but Recommended): While spinach can technically grow near a sunny window, grow lights will significantly improve your yields and the overall health of your plants. I recommend LED grow lights, as they’re energy-efficient and don’t produce excessive heat.
* Watering Can or Spray Bottle: For gentle watering.
* Fertilizer (Optional): A balanced liquid fertilizer can help boost growth, but it’s not essential.
* Seed Starting Tray (Optional): If you prefer to start your seeds indoors before transplanting them to larger containers.
Planting Your Spinach Seeds
Now for the fun part! Let’s get those seeds in the soil.
1. Prepare Your Containers: Fill your containers with potting mix, leaving about an inch of space at the top. Gently pat down the soil to create a firm surface.
2. Sow the Seeds: Sprinkle the spinach seeds evenly over the surface of the soil. Aim for about 1 inch of space between seeds. You can also create shallow furrows (about 1/4 inch deep) and sow the seeds in rows.
3. Cover the Seeds: Lightly cover the seeds with a thin layer of potting mix.
4. Water Gently: Use a watering can or spray bottle to gently moisten the soil. Be careful not to overwater, as this can cause the seeds to rot.
5. Provide Light: If you’re using grow lights, position them about 6-12 inches above the soil surface. If you’re relying on natural light, place your containers near a sunny window that receives at least 4-6 hours of direct sunlight per day.
6. Maintain Moisture: Keep the soil consistently moist but not soggy. Check the soil moisture daily and water when the top inch feels dry to the touch.
Germination and Early Growth
Patience is key! Spinach seeds typically germinate within 5-10 days.
1. Monitor Germination: Keep an eye on your containers for signs of germination. Once the seedlings emerge, make sure they’re receiving adequate light.
2. Thin Seedlings (If Necessary): If your seedlings are too crowded, thin them out to allow for proper growth. Aim for about 2-3 inches of space between plants. You can gently snip off the extra seedlings at the base with scissors.
3. Adjust Grow Lights: As your spinach plants grow, you may need to adjust the height of your grow lights to ensure they’re providing adequate light.
4. Water Regularly: Continue to water your spinach plants regularly, keeping the soil consistently moist.
5. Fertilize (Optional): If you choose to fertilize, start about 2-3 weeks after germination. Use a balanced liquid fertilizer diluted to half strength. Follow the instructions on the fertilizer label.
Caring for Your Indoor Spinach Plants
Once your spinach plants are established, it’s important to provide them with the right care to ensure they thrive.
1. Light: Spinach needs plenty of light to grow well. If you’re using grow lights, aim for 12-14 hours of light per day. If you’re relying on natural light, supplement with grow lights if necessary, especially during the winter months.
2. Watering: Water your spinach plants regularly, keeping the soil consistently moist but not soggy. Overwatering can lead to root rot, so be sure to allow the top inch of soil to dry out slightly between waterings.
3. Temperature: Spinach prefers cooler temperatures, ideally between 60-70°F (15-21°C). Avoid placing your plants near heat sources, such as radiators or vents.
4. Humidity: Spinach prefers moderate humidity levels. If your indoor environment is dry, you can increase humidity by misting your plants regularly or placing a tray of water near them.
5. Air Circulation: Good air circulation is important for preventing fungal diseases. Make sure your plants have adequate space between them and consider using a small fan to circulate the air.
6. Pest Control: Keep an eye out for common pests, such as aphids and spider mites. If you notice any pests, you can try spraying your plants with insecticidal soap or neem oil.
Harvesting Your Spinach
The best part! You can start harvesting your spinach leaves as soon as they’re large enough to eat, typically about 4-6 weeks after planting.
1. Harvesting Method: There are two main ways to harvest spinach:
* Cut-and-Come-Again: This method involves harvesting only the outer leaves, allowing the inner leaves to continue growing. This will provide you with a continuous supply of spinach over a longer period of time.
* Whole Plant Harvest: This method involves harvesting the entire plant at once. This is a good option if you need a large quantity of spinach or if your plants are starting to bolt.
2. Harvesting Technique: Use scissors or a sharp knife to cut the leaves or the entire plant at the base.
3. Storage: Freshly harvested spinach can be stored in the refrigerator for up to a week. Wrap the leaves in a damp paper towel and place them in a plastic bag or container.
Troubleshooting Common Problems
Even with the best care, you may encounter some challenges when growing spinach indoors. Here are some common problems and how to address them:
* Yellowing Leaves: This can be caused by overwatering, underwatering, nutrient deficiencies, or lack of light. Adjust your watering schedule, fertilize your plants, and ensure they’re receiving adequate light.
* Leggy Growth: This is usually caused by insufficient light. Move your plants to a brighter location or supplement with grow lights.
* Bolting (Premature Flowering): This can be caused by high temperatures or stress. Keep your plants cool and well-watered. Choose bolt-resistant varieties.
* Pest Infestations: Regularly inspect your plants for pests and take action promptly if you notice any.
Extending Your Harvest
Want to keep the spinach coming? Here are a few tips:
* Succession Planting: Sow new seeds every 2-3 weeks to ensure a continuous supply of spinach.
* Cool Temperatures: Spinach thrives in cooler temperatures, so try to keep your indoor environment as cool as possible.
* Proper Lighting: Adequate light is essential for healthy growth and preventing bolting.
Enjoying Your Homegrown Spinach
Now that you’ve successfully grown your own spinach indoors, it’s time to enjoy the fruits (or rather, the leaves!) of your labor. Here are a few ideas:
* Salads: Add fresh spinach to your favorite salads for a boost of nutrients and flavor.
* Smoothies: Blend spinach into your smoothies for a healthy and delicious green drink.
* Sautéed Spinach: Sauté spinach with garlic and olive oil for a simple and flavorful side dish.
* Spinach Dip: Use your homegrown spinach to make a creamy and delicious spinach dip.
* Omelets and Frittatas: Add spinach to your omelets and frittatas for
Conclusion
So, there you have it! Growing spinach indoors is not only achievable, but it’s also a rewarding and surprisingly simple process. Forget those limp, pre-packaged greens from the grocery store. Imagine stepping into your kitchen and harvesting fresh, vibrant spinach leaves whenever you need them. The difference in taste and texture is truly remarkable. This DIY trick is a must-try for anyone who values fresh, healthy ingredients and enjoys a touch of green in their home.
Why is this method so compelling? First, it gives you complete control over the growing environment. You can regulate temperature, light, and humidity, ensuring optimal conditions for your spinach to thrive. Second, it’s incredibly convenient. No more last-minute trips to the store when you realize you’re out of spinach. Third, it’s sustainable. You’re reducing your carbon footprint by growing your own food and minimizing reliance on commercially produced greens. Finally, it’s just plain fun! There’s something deeply satisfying about nurturing a plant from seed to harvest.
But the possibilities don’t stop there. Feel free to experiment with different varieties of spinach. Some, like ‘Bloomsdale Long Standing,’ are known for their robust flavor, while others, like ‘Baby’s Leaf Hybrid,’ are prized for their tender leaves. You can also try growing other leafy greens alongside your spinach, such as lettuce or kale, to create a mini indoor salad garden. Consider using different types of containers, from traditional pots to vertical planters, to maximize space and add visual interest.
For those looking to take their indoor gardening to the next level, consider investing in a grow light. While a sunny windowsill can work, a grow light will provide consistent and reliable light, especially during the darker winter months. You can also experiment with different soil mixes to find what works best for your spinach. A well-draining potting mix amended with compost is generally a good starting point.
Don’t be intimidated if you’ve never grown anything before. Growing spinach indoors is a great way to start. It’s a forgiving plant that doesn’t require a lot of fuss. With a little bit of attention and care, you’ll be enjoying fresh, homegrown spinach in no time.
We wholeheartedly encourage you to give this DIY trick a try. We are confident that you will be delighted with the results. Once you’ve harvested your first batch of homegrown spinach, we’d love to hear about your experience. Share your photos, tips, and tricks in the comments below. Let’s create a community of indoor spinach growers and inspire others to embrace the joy of homegrown food! Let us know what worked for you, what challenges you faced, and any creative variations you came up with. Your feedback will help others succeed and make this guide even better. Happy growing!
Frequently Asked Questions (FAQ)
What is the best time of year to start growing spinach indoors?
You can start growing spinach indoors at any time of year! Because you’re controlling the environment, you’re not limited by seasonal changes. However, keep in mind that spinach prefers cooler temperatures, so you might need to provide extra ventilation or cooling during the summer months. Starting in the fall or winter can be ideal, as the cooler temperatures will naturally favor spinach growth.
How much light does indoor spinach need?
Spinach needs at least 6 hours of light per day. A sunny windowsill facing south or west can work, but a grow light is highly recommended for consistent and reliable light, especially during the winter. If you’re using a grow light, position it a few inches above the plants and adjust as they grow. Look for LED grow lights, as they are energy-efficient and produce less heat.
What kind of soil should I use for growing spinach indoors?
Use a well-draining potting mix amended with compost. Spinach prefers soil that is rich in organic matter. You can also add perlite or vermiculite to improve drainage. Avoid using garden soil, as it can be too heavy and may contain pests or diseases. A good mix would be equal parts potting mix, compost, and perlite.
How often should I water my indoor spinach?
Water your spinach when the top inch of soil feels dry to the touch. Avoid overwatering, as this can lead to root rot. Water thoroughly until water drains out of the bottom of the pot. Check the soil moisture regularly, especially during hot or dry weather.
What temperature is best for growing spinach indoors?
Spinach prefers cooler temperatures, ideally between 60°F and 70°F (15°C and 21°C). Avoid exposing your spinach to temperatures above 75°F (24°C), as this can cause it to bolt (go to seed). If you’re growing spinach in a warm room, provide extra ventilation or cooling.
How long does it take for spinach to grow indoors?
Spinach typically takes about 4 to 6 weeks to mature indoors. You can start harvesting leaves when they are about 4 to 6 inches long. Harvest the outer leaves first, allowing the inner leaves to continue growing.
What are some common problems when growing spinach indoors?
Some common problems include aphids, spider mites, and fungal diseases. Inspect your plants regularly for pests and diseases. If you find any, treat them promptly with an appropriate insecticide or fungicide. Good air circulation can help prevent fungal diseases. Overwatering can also lead to problems, so be sure to water only when the soil is dry to the touch.
Can I grow spinach from seed indoors?
Yes, you can easily grow spinach from seed indoors. Sow the seeds about 1/2 inch deep in the soil. Keep the soil moist but not soggy. The seeds should germinate in about 5 to 10 days. Once the seedlings have a few true leaves, thin them out so that they are spaced about 2 to 3 inches apart.
How do I harvest spinach leaves?
Harvest spinach leaves by snipping them off with scissors or pinching them off with your fingers. Harvest the outer leaves first, allowing the inner leaves to continue growing. You can harvest spinach multiple times from the same plant.
Can I grow spinach in a container?
Yes, spinach grows well in containers. Choose a container that is at least 6 inches deep and has drainage holes. Fill the container with a well-draining potting mix amended with compost. Space the plants about 2 to 3 inches apart.
What are some good companion plants for spinach?
Good companion plants for spinach include radishes, lettuce, and strawberries. These plants can help to deter pests and improve the growth of spinach. Avoid planting spinach near fennel, as it can inhibit its growth.
How do I prevent spinach from bolting (going to seed)?
Bolting is when a plant prematurely flowers and produces seeds, often making the leaves bitter. To prevent spinach from bolting, keep it cool and well-watered. Avoid exposing it to temperatures above 75°F (24°C). Harvest the leaves regularly to encourage continued growth.
Is it necessary to fertilize indoor spinach?
Yes, fertilizing indoor spinach can help it grow stronger and produce more leaves. Use a balanced liquid fertilizer diluted to half strength. Fertilize every 2 to 3 weeks. Avoid over-fertilizing, as this can burn the roots.
How do I deal with pests on my indoor spinach?
If you find pests on your indoor spinach, such as aphids or spider mites, you can try washing them off with a strong stream of water. You can also use insecticidal soap or neem oil. Be sure to follow the instructions on the product label.
Can I eat the spinach stems?
Yes, you can eat the spinach stems, especially when they are young and tender. They have a similar flavor to the leaves. However, as the plant matures, the stems can become tougher and more fibrous.


Leave a Comment