
Grow Spinach Small Space – sounds impossible, right? Not anymore! I’m here to let you in on some amazing secrets to cultivating your own vibrant spinach patch, even if you’re working with a tiny balcony, a cramped patio, or just a sunny windowsill. Forget those sad, pre-packaged greens from the grocery store; imagine fresh, crisp spinach leaves just steps away from your kitchen, ready to be tossed into salads, smoothies, or sautéed to perfection.
Spinach has a rich history, dating back over 2,000 years to ancient Persia. It gradually spread across the globe, becoming a staple in cuisines worldwide. Beyond its culinary uses, spinach is packed with nutrients, making it a powerhouse of health benefits. But let’s be honest, buying organic spinach can be expensive, and sometimes the quality just isn’t there. That’s where the magic of DIY gardening comes in!
In today’s world, where space is a premium and healthy eating is a priority, learning how to grow spinach small space is more relevant than ever. I’ll share simple, effective DIY tricks and hacks that will empower you to create your own thriving spinach garden, regardless of your limited space. Get ready to ditch the store-bought greens and embrace the joy of harvesting your own delicious, nutritious spinach – it’s easier than you think!

Growing Spinach in Small Spaces: A DIY Vertical Garden Guide
Hey there, fellow gardening enthusiasts! Do you dream of fresh, leafy greens but lack the sprawling garden space? Don’t worry; I’ve got you covered! I’m going to walk you through creating a super-efficient, space-saving vertical garden perfect for growing spinach, even if you only have a balcony, patio, or small yard. This project is budget-friendly, customizable, and incredibly rewarding. Let’s get started!
What You’ll Need: The Essentials
Before we dive into the construction, let’s gather all the necessary materials. This will save you time and frustration later on.
* **A sturdy frame:** You can repurpose an old wooden pallet, a metal shelving unit, or even build one from scratch using lumber. The size will depend on how much spinach you want to grow and the space you have available. I’m using a repurposed pallet for this guide.
* **Gardening fabric or burlap:** This will line the pockets and prevent soil from spilling out. Make sure it’s breathable to allow for drainage.
* **Heavy-duty staples or nails:** For securing the fabric to the frame. A staple gun is your best friend here!
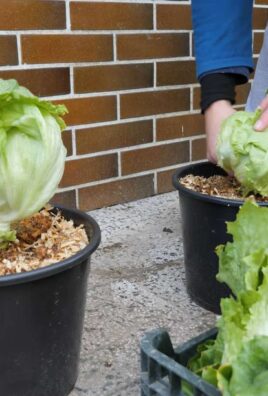
* **Potting soil:** Choose a high-quality potting mix that’s well-draining and rich in nutrients. Spinach loves fertile soil!
* **Spinach seeds or seedlings:** Select your favorite spinach variety. I personally love ‘Baby’s Leaf’ for its tender leaves and quick growth.
* **Measuring tape:** For accurate measurements and even spacing.
* **Scissors or a utility knife:** For cutting the fabric.
* **Gloves:** To protect your hands from dirt and splinters.
* **Watering can or hose:** For keeping your spinach hydrated.
* **Optional: Wood sealant or paint:** To protect your wooden frame from the elements.
Building Your Vertical Spinach Garden: Step-by-Step
Alright, let’s get our hands dirty! Follow these steps to create your own vertical spinach paradise.
1. **Prepare the Frame:**
* If you’re using a pallet, inspect it carefully for any loose nails or splinters. Remove them or hammer them down.
* If you’re building a frame from scratch, cut the lumber to your desired dimensions and assemble it using screws or nails.
* If you’re using a metal shelving unit, ensure it’s stable and can support the weight of the soil and plants.
* Important: If you’re using a wooden frame, consider applying a wood sealant or paint to protect it from moisture and extend its lifespan. Let it dry completely before proceeding.
2. **Measure and Cut the Fabric:**
* Measure the width and depth of each section where you want to create a planting pocket.
* Add extra inches to each measurement to allow for folding and stapling. I usually add about 6 inches to the width and 8 inches to the depth.
* Cut the fabric into rectangular pieces according to your measurements. You’ll need one piece for each pocket.
* For example, if your pocket needs to be 12 inches wide and 8 inches deep, you’ll cut a piece of fabric that’s 18 inches wide and 16 inches deep.
3. **Create the Pockets:**
* Fold the top edge of the fabric piece down by about 2-3 inches and staple it to the frame. This creates a clean, finished edge and provides extra strength.
* Fold the bottom edge of the fabric piece up to create the pocket. The depth of the fold will determine the depth of your pocket.
* Staple the sides of the folded fabric to the frame, creating a secure pocket. Make sure the staples are close together to prevent soil from leaking out.
* Repeat this process for each pocket, spacing them evenly down the frame. I usually leave about 8-10 inches between pockets to allow for adequate sunlight and airflow.
* Pro Tip: Overlap the fabric slightly at the sides of each pocket to create a more secure seal.
4. **Reinforce the Pockets (Optional):**
* For added durability, you can reinforce the pockets by adding an extra layer of fabric or using a heavier-duty fabric.
* You can also use metal brackets or corner braces to support the pockets, especially if you’re planning to grow a lot of spinach.
5. **Fill the Pockets with Potting Soil:**
* Now comes the fun part! Carefully fill each pocket with potting soil, leaving about an inch of space at the top.
* Gently pat down the soil to remove any air pockets.
* Important: Don’t overfill the pockets, as this can make them too heavy and cause them to sag.
6. **Plant Your Spinach Seeds or Seedlings:**
* If you’re starting from seeds, sow them according to the instructions on the seed packet. I usually plant about 3-4 seeds per pocket.
* If you’re using seedlings, gently remove them from their containers and plant them in the pockets, spacing them a few inches apart.
* Water the soil thoroughly after planting.
7. **Position Your Vertical Garden:**
* Choose a location that receives at least 4-6 hours of sunlight per day. Spinach thrives in sunny spots, but it can also tolerate partial shade.
* Make sure the location is protected from strong winds, which can damage the plants.
* If you’re placing the garden on a balcony or patio, ensure it’s level and stable.
* Pro Tip: Consider placing a tray or container underneath the garden to catch any excess water.
Caring for Your Vertical Spinach Garden: The Nitty-Gritty
Now that your vertical garden is up and running, it’s time to learn how to care for your spinach plants. Here’s what you need to know:
1. **Watering:**
* Spinach needs consistent moisture to thrive. Water the plants regularly, especially during hot, dry weather.
* Check the soil moisture by sticking your finger into the soil. If it feels dry to the touch, it’s time to water.
* Water deeply, ensuring that the water reaches the roots.
* Avoid overwatering, as this can lead to root rot.
* Pro Tip: Water in the morning to allow the leaves to dry before nightfall, which can help prevent fungal diseases.
2. **Fertilizing:**
* Spinach is a heavy feeder, so it needs regular fertilization to produce abundant leaves.
* Use a balanced fertilizer that’s specifically formulated for leafy greens.
* Follow the instructions on the fertilizer label for application rates.
* I like to use a liquid fertilizer diluted in water and apply it every 2-3 weeks.
* Organic Option: You can also use compost tea or worm castings to fertilize your spinach plants.
3. **Pest Control:**
* Keep an eye out for common spinach pests, such as aphids, slugs, and snails.
* Inspect your plants regularly and remove any pests by hand.
* You can also use organic pest control methods, such as insecticidal soap or neem oil.
* Prevention is Key: Encourage beneficial insects, such as ladybugs and lacewings, to visit your garden by planting flowers that attract them.
4. **Harvesting:**
* You can start harvesting spinach leaves as soon as they’re large enough to eat.
* Simply snip off the outer leaves with scissors or a knife, leaving the inner leaves to continue growing.
* Harvest regularly to encourage new growth.
* Harvesting Tip: Harvest in the morning when the leaves are crisp and fresh.
5. **Succession Planting:**
* To ensure a continuous supply of spinach, sow new seeds every few weeks. This is called succession planting.
* You can also plant different varieties of spinach that mature at different times.
Troubleshooting: Common Issues and Solutions
Even with the best care, you might encounter some challenges along the way. Here are some common issues and how to address them:
* **Yellowing Leaves:** This could be a sign of nutrient deficiency, overwatering, or underwatering. Check the soil moisture and fertilize if necessary.
* **Stunted Growth:** This could be caused by poor soil, lack of sunlight, or pest infestation. Improve the soil, move the garden to a sunnier location, and control pests.
* **Bolting (Premature Flowering):** Spinach tends to bolt in hot weather. Provide shade during the hottest part of the day and harvest regularly to delay bolting.
* **Fungal Diseases:** These can be caused by excessive moisture and poor air circulation. Water in the morning, provide good air circulation, and use a fungicide if necessary.
Customizing Your Vertical Garden: Let Your Creativity Shine!

Conclusion
So, there you have it! Growing spinach in a small space isn’t just a pipe dream; it’s an achievable reality with a little ingenuity and the right approach. We’ve walked through the steps, highlighted the benefits, and hopefully, inspired you to transform that balcony, patio, or even a sunny windowsill into a thriving mini-spinach farm.
Why is this DIY trick a must-try? Because it empowers you to enjoy fresh, nutrient-packed spinach without the need for a sprawling garden. Imagine the satisfaction of harvesting your own greens for salads, smoothies, or a quick sauté, knowing exactly where they came from and what went into their cultivation. It’s about reclaiming control over your food source, reducing your carbon footprint, and adding a touch of green to your urban landscape. Plus, let’s be honest, there’s something incredibly rewarding about nurturing a plant from seed to harvest.
But don’t stop there! Feel free to experiment with different spinach varieties. Try baby spinach for tender leaves, or explore savoy spinach for a slightly heartier texture. Consider companion planting – basil, chamomile, and marigolds are known to deter pests and enhance the growth of spinach. You can also adjust the container size and growing medium to suit your specific space and preferences. For instance, if you’re short on horizontal space, consider a vertical garden or hanging baskets. If you live in a particularly hot climate, provide extra shade during the hottest part of the day to prevent bolting.
The key to successful small-space spinach growing is observation and adaptation. Pay attention to your plants, monitor their growth, and adjust your watering and fertilizing schedule as needed. Don’t be afraid to experiment and learn from your mistakes. Every gardener, regardless of experience level, faces challenges. The important thing is to persevere and enjoy the process.
We truly believe that anyone can successfully grow spinach in a small space with the right knowledge and a little bit of effort. It’s a sustainable, rewarding, and delicious way to connect with nature, even in the heart of the city.
So, what are you waiting for? Grab some seeds, find a container, and get your hands dirty! We’re confident that you’ll be amazed at how easy and fulfilling it is to grow your own spinach.
And most importantly, we want to hear about your experiences! Share your tips, tricks, and triumphs in the comments below. Let us know what worked for you, what challenges you faced, and what delicious recipes you created with your homegrown spinach. Together, we can build a community of small-space gardeners and inspire others to embrace the joy of growing their own food. Let’s cultivate a greener, healthier future, one spinach leaf at a time!
Frequently Asked Questions (FAQ)
What is the best type of spinach to grow in a small space?
While many spinach varieties can thrive in containers, some are better suited for small spaces than others. Baby spinach varieties, such as ‘Baby’s Leaf Hybrid’ or ‘Space Spinach,’ are excellent choices because they mature quickly and produce smaller, more manageable leaves. These varieties are also less prone to bolting (going to seed prematurely) in warm weather. Other good options include ‘Tyee’ and ‘Olympia,’ which are known for their disease resistance and compact growth habits. Ultimately, the best type of spinach for you will depend on your personal preferences and local climate. Experiment with a few different varieties to see which ones perform best in your specific growing conditions.
How much sunlight does spinach need when grown in a container?
Spinach thrives in full sun, which means at least 6 hours of direct sunlight per day. However, in hotter climates, providing some afternoon shade can prevent the leaves from wilting or bolting. If you’re growing spinach indoors, place it near a sunny window or supplement with grow lights. Insufficient sunlight can result in leggy growth and reduced yields. Observe your plants closely and adjust their position as needed to ensure they receive adequate sunlight. If you notice the leaves becoming pale or yellow, it’s a sign that they may not be getting enough light.
What type of soil is best for growing spinach in containers?
Spinach prefers well-draining, fertile soil with a pH between 6.5 and 7.0. A good potting mix for containers should consist of a blend of peat moss, perlite, and vermiculite. You can also add compost or other organic matter to improve drainage and nutrient content. Avoid using garden soil in containers, as it can become compacted and hinder root growth. Before planting, amend the soil with a slow-release fertilizer to provide essential nutrients throughout the growing season. Regularly monitor the soil moisture and pH levels to ensure optimal growing conditions.
How often should I water spinach grown in containers?
Spinach requires consistent moisture to thrive, but it’s important to avoid overwatering, which can lead to root rot. Water your spinach plants when the top inch of soil feels dry to the touch. Water deeply, ensuring that the entire root ball is moistened. During hot weather, you may need to water more frequently. Check the soil moisture daily and adjust your watering schedule accordingly. Avoid watering the leaves directly, as this can increase the risk of fungal diseases. Instead, water at the base of the plant.
How do I prevent spinach from bolting (going to seed prematurely)?
Bolting is a common problem when growing spinach, especially in warm weather. To prevent bolting, choose bolt-resistant varieties, provide afternoon shade, and keep the soil consistently moist. Harvest the leaves regularly, as this can also help to delay bolting. If you notice flower stalks forming, pinch them off immediately to encourage continued leaf production. In hot climates, consider growing spinach during the cooler months of spring and fall.
What are some common pests and diseases that affect spinach, and how can I control them?
Spinach can be susceptible to various pests and diseases, including aphids, leaf miners, and downy mildew. To prevent pest and disease problems, choose disease-resistant varieties, practice good sanitation, and monitor your plants regularly. If you notice any signs of infestation or disease, take action immediately. Aphids can be controlled with insecticidal soap or neem oil. Leaf miners can be removed by hand or treated with spinosad. Downy mildew can be prevented by providing good air circulation and avoiding overhead watering. If necessary, use a fungicide to control the disease.
How do I harvest spinach leaves from a container garden?
You can begin harvesting spinach leaves when they are about 4-6 inches long. Harvest the outer leaves first, leaving the inner leaves to continue growing. Use scissors or a sharp knife to cut the leaves at the base of the plant. Avoid pulling the leaves, as this can damage the roots. Harvest regularly to encourage continued leaf production and prevent bolting. Freshly harvested spinach leaves can be stored in the refrigerator for up to a week.
Can I grow spinach indoors in a small space?
Yes, you can successfully grow spinach indoors in a small space, provided you have adequate lighting and proper growing conditions. Place your spinach plants near a sunny window that receives at least 6 hours of direct sunlight per day. If you don’t have enough natural light, supplement with grow lights. Use a well-draining potting mix and water regularly, keeping the soil consistently moist. Monitor the temperature and humidity levels, and provide good air circulation. With a little care and attention, you can enjoy fresh, homegrown spinach even in the smallest of indoor spaces.


Leave a Comment