
Grow Strawflowers From Seed and unlock a world of everlasting beauty right in your own backyard! Have you ever dreamt of having a garden bursting with vibrant, papery blooms that you can enjoy fresh and dried? Well, dream no more! This DIY guide will walk you through every step of cultivating these charming flowers from tiny seeds to stunning, long-lasting displays.
Strawflowers, also known as everlasting flowers, have a rich history, gracing gardens and homes for centuries. Their unique ability to retain their color and shape when dried has made them a symbol of enduring beauty and remembrance. In Victorian times, they were often incorporated into floral arrangements to convey messages of lasting affection.
But why should *you* learn to grow strawflowers from seed? In today’s fast-paced world, finding moments of tranquility and connection with nature is more important than ever. Starting your own strawflower garden is not only a rewarding hobby, but it’s also a fantastic way to add a touch of personalized charm to your home decor. Plus, imagine the satisfaction of gifting bouquets of your own homegrown, everlasting flowers to friends and family! This DIY project is perfect for beginners and seasoned gardeners alike, offering a simple and cost-effective way to brighten your life with these delightful blooms. Let’s get started!
Grow Your Own Everlasting Bouquet: A DIY Guide to Strawflowers From Seed
Hey there, fellow flower enthusiast! Ever dreamt of having a garden bursting with vibrant blooms that you can actually dry and enjoy year-round? Well, let me introduce you to strawflowers! These beauties are not only stunning in the garden but also incredibly easy to dry, making them perfect for everlasting bouquets, wreaths, and all sorts of crafty projects. I’m going to walk you through everything you need to know to grow strawflowers from seed, from starting them indoors to harvesting your gorgeous, papery blooms.
Getting Started: What You’ll Need
Before we dive in, let’s gather our supplies. Here’s a checklist of everything you’ll need to successfully grow strawflowers from seed:
* **Strawflower Seeds:** Obviously! You can find these at most garden centers or online. Look for a mix of colors for a truly spectacular display.
* **Seed Starting Trays or Pots:** I prefer seed starting trays with individual cells, but small pots work just as well.
* **Seed Starting Mix:** This is crucial! Don’t use regular potting soil, as it can be too heavy for delicate seedlings. Seed starting mix is light and airy, providing the perfect environment for germination.
* **Spray Bottle:** For gently watering your seedlings.
* **Heat Mat (Optional):** Strawflower seeds germinate best with a little warmth. A heat mat can significantly improve your germination rate.
* **Grow Lights (Optional):** If you don’t have a sunny windowsill, grow lights will ensure your seedlings get enough light to grow strong and healthy.
* **Plant Labels:** Trust me, you’ll want to label your seedlings! It’s easy to forget what you planted where.
* **Small Trowel or Spoon:** For transplanting seedlings.
* **Gardening Gloves:** To keep your hands clean.
* **Well-Draining Potting Soil:** For transplanting your seedlings into larger pots or directly into the garden.
* **Garden Clippers or Scissors:** For harvesting your strawflowers.
* **Twine or String:** For bundling your strawflowers for drying.
Phase 1: Starting Strawflower Seeds Indoors
Strawflowers have a long growing season, so starting them indoors is the best way to get a head start, especially if you live in a cooler climate. I usually start my seeds about 6-8 weeks before the last expected frost.
1. **Prepare Your Seed Starting Trays:** Fill your seed starting trays or pots with seed starting mix. Gently press down the soil to create a firm, even surface.
2. **Sow the Seeds:** Strawflower seeds are quite small, so be careful not to sow them too thickly. I usually place 2-3 seeds in each cell or pot. Gently press the seeds into the soil, but don’t bury them too deep. They need light to germinate. A light dusting of vermiculite over the seeds can help retain moisture.
3. **Water Gently:** Use your spray bottle to thoroughly moisten the soil. Be careful not to overwater, as this can lead to damping off, a fungal disease that can kill seedlings.
4. **Provide Warmth:** Place your seed starting trays on a heat mat, if you’re using one. This will help speed up germination. If you don’t have a heat mat, place the trays in a warm location, such as on top of your refrigerator.
5. **Provide Light:** Place your seed starting trays under grow lights or on a sunny windowsill. If using a windowsill, rotate the trays regularly to ensure even growth. Seedlings need about 14-16 hours of light per day.
6. **Maintain Moisture:** Keep the soil consistently moist, but not soggy. Check the soil daily and water as needed with your spray bottle.
7. **Wait for Germination:** Strawflower seeds typically germinate in 7-14 days. Be patient!
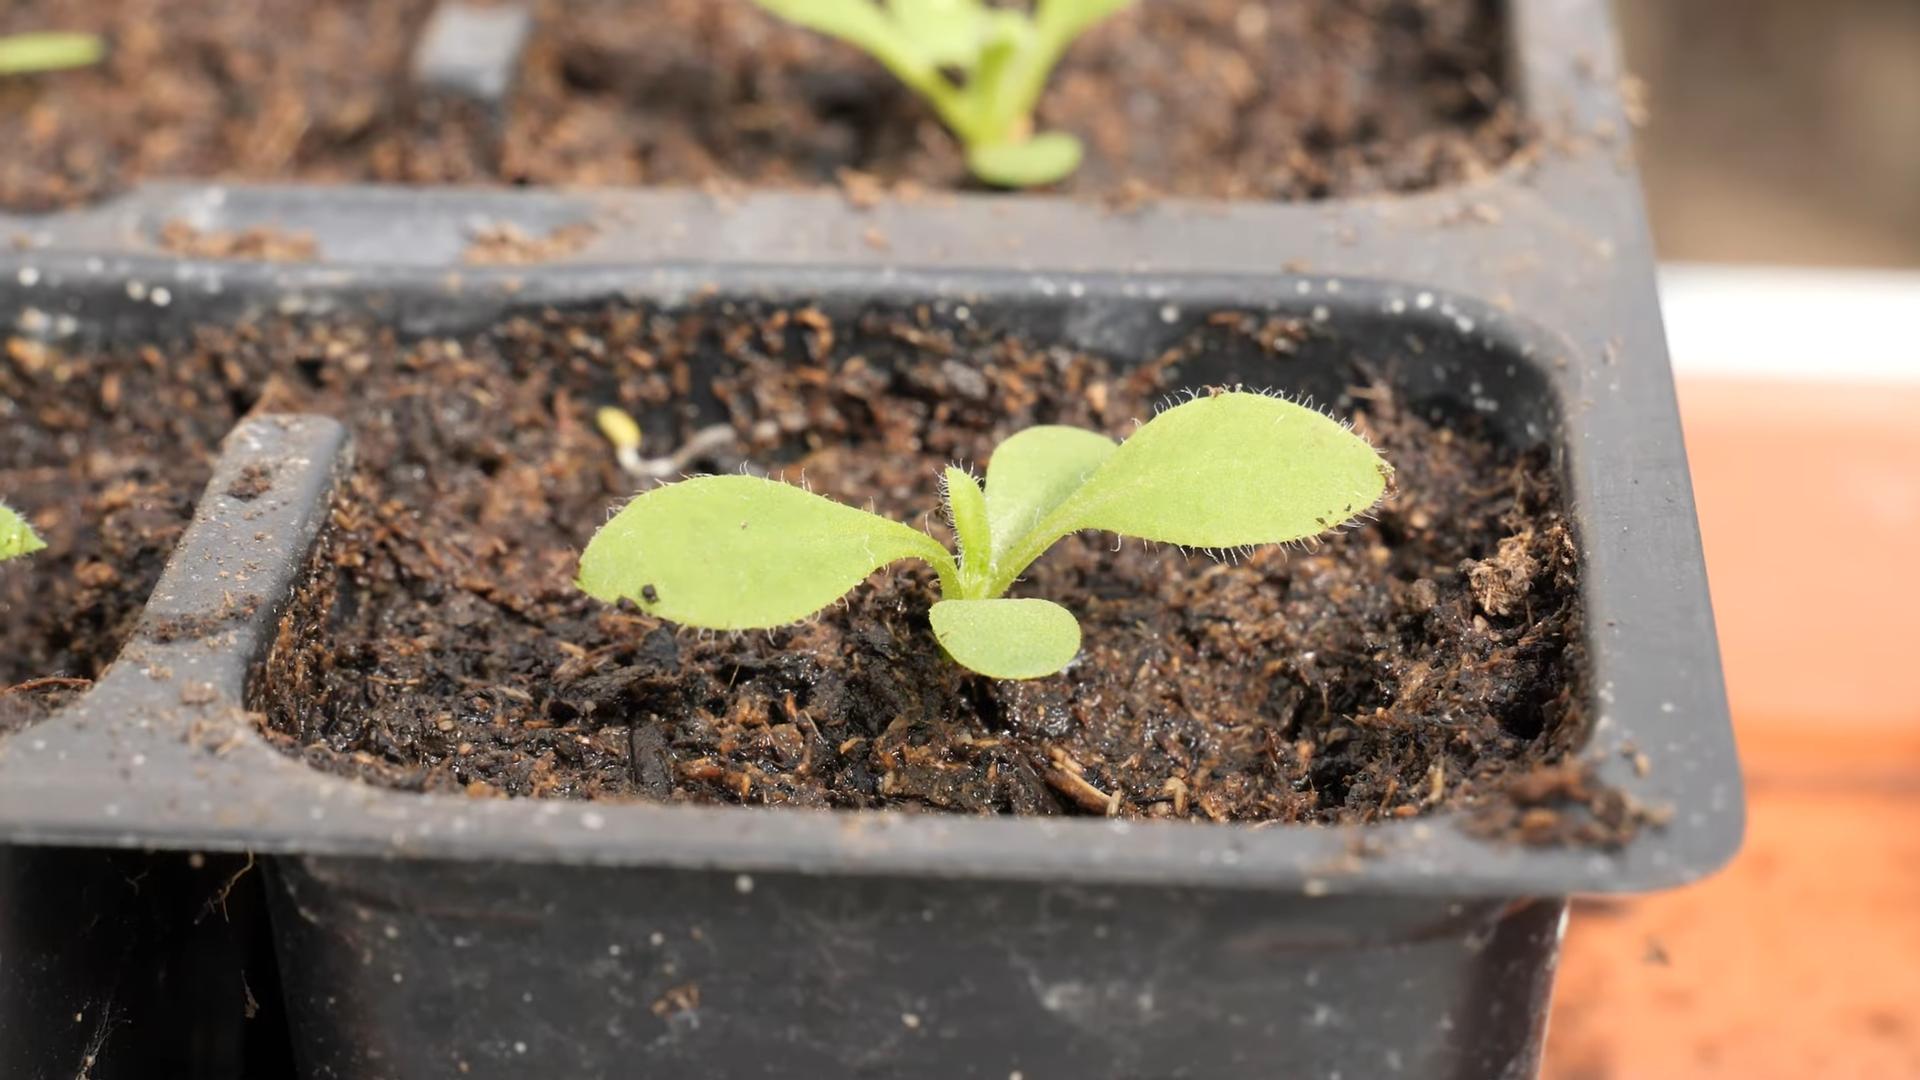
8. **Thin Seedlings (If Necessary):** Once your seedlings have emerged and have a couple of sets of true leaves (the leaves that look like miniature versions of the adult plant’s leaves), thin them out so that only one strong seedling remains in each cell or pot. Use small scissors to snip off the weaker seedlings at the soil line.
Phase 2: Transplanting Seedlings
Once your seedlings have developed a strong root system and are about 2-3 inches tall, it’s time to transplant them into larger pots or directly into the garden.
1. **Harden Off Seedlings:** Before transplanting your seedlings outdoors, you’ll need to harden them off. This process gradually acclimates them to the outdoor environment, preventing shock. Start by placing your seedlings outdoors in a sheltered location for a few hours each day, gradually increasing the amount of time they spend outside over the course of a week. Protect them from direct sunlight and strong winds.
2. **Prepare the Planting Site:** Choose a sunny location in your garden with well-draining soil. Strawflowers need at least 6 hours of sunlight per day. Amend the soil with compost or other organic matter to improve drainage and fertility.
3. **Transplant Seedlings:** Gently remove the seedlings from their trays or pots. Be careful not to damage the roots. Dig a hole that is slightly larger than the root ball. Place the seedling in the hole and backfill with soil. Gently firm the soil around the base of the plant. Space the plants about 12-18 inches apart.
4. **Water Thoroughly:** Water the newly transplanted seedlings thoroughly.
5. **Mulch (Optional):** Apply a layer of mulch around the base of the plants to help retain moisture and suppress weeds.
Phase 3: Caring for Your Strawflowers
Strawflowers are relatively low-maintenance plants, but here are a few tips to keep them happy and healthy:
1. **Watering:** Water your strawflowers regularly, especially during dry spells. Avoid overhead watering, as this can promote fungal diseases. Water at the base of the plants.
2. **Fertilizing:** Fertilize your strawflowers every few weeks with a balanced fertilizer. Follow the instructions on the fertilizer package.
3. **Deadheading:** Deadhead spent flowers regularly to encourage more blooms. Simply snip off the faded flowers just below the flower head.
4. **Pest and Disease Control:** Strawflowers are generally pest and disease resistant, but keep an eye out for aphids, spider mites, and powdery mildew. Treat any infestations or diseases promptly with appropriate organic controls.
5. **Support (Optional):** Taller varieties of strawflowers may need staking to prevent them from flopping over.
Phase 4: Harvesting and Drying Strawflowers
The best part! Harvesting and drying your strawflowers is easy and rewarding.
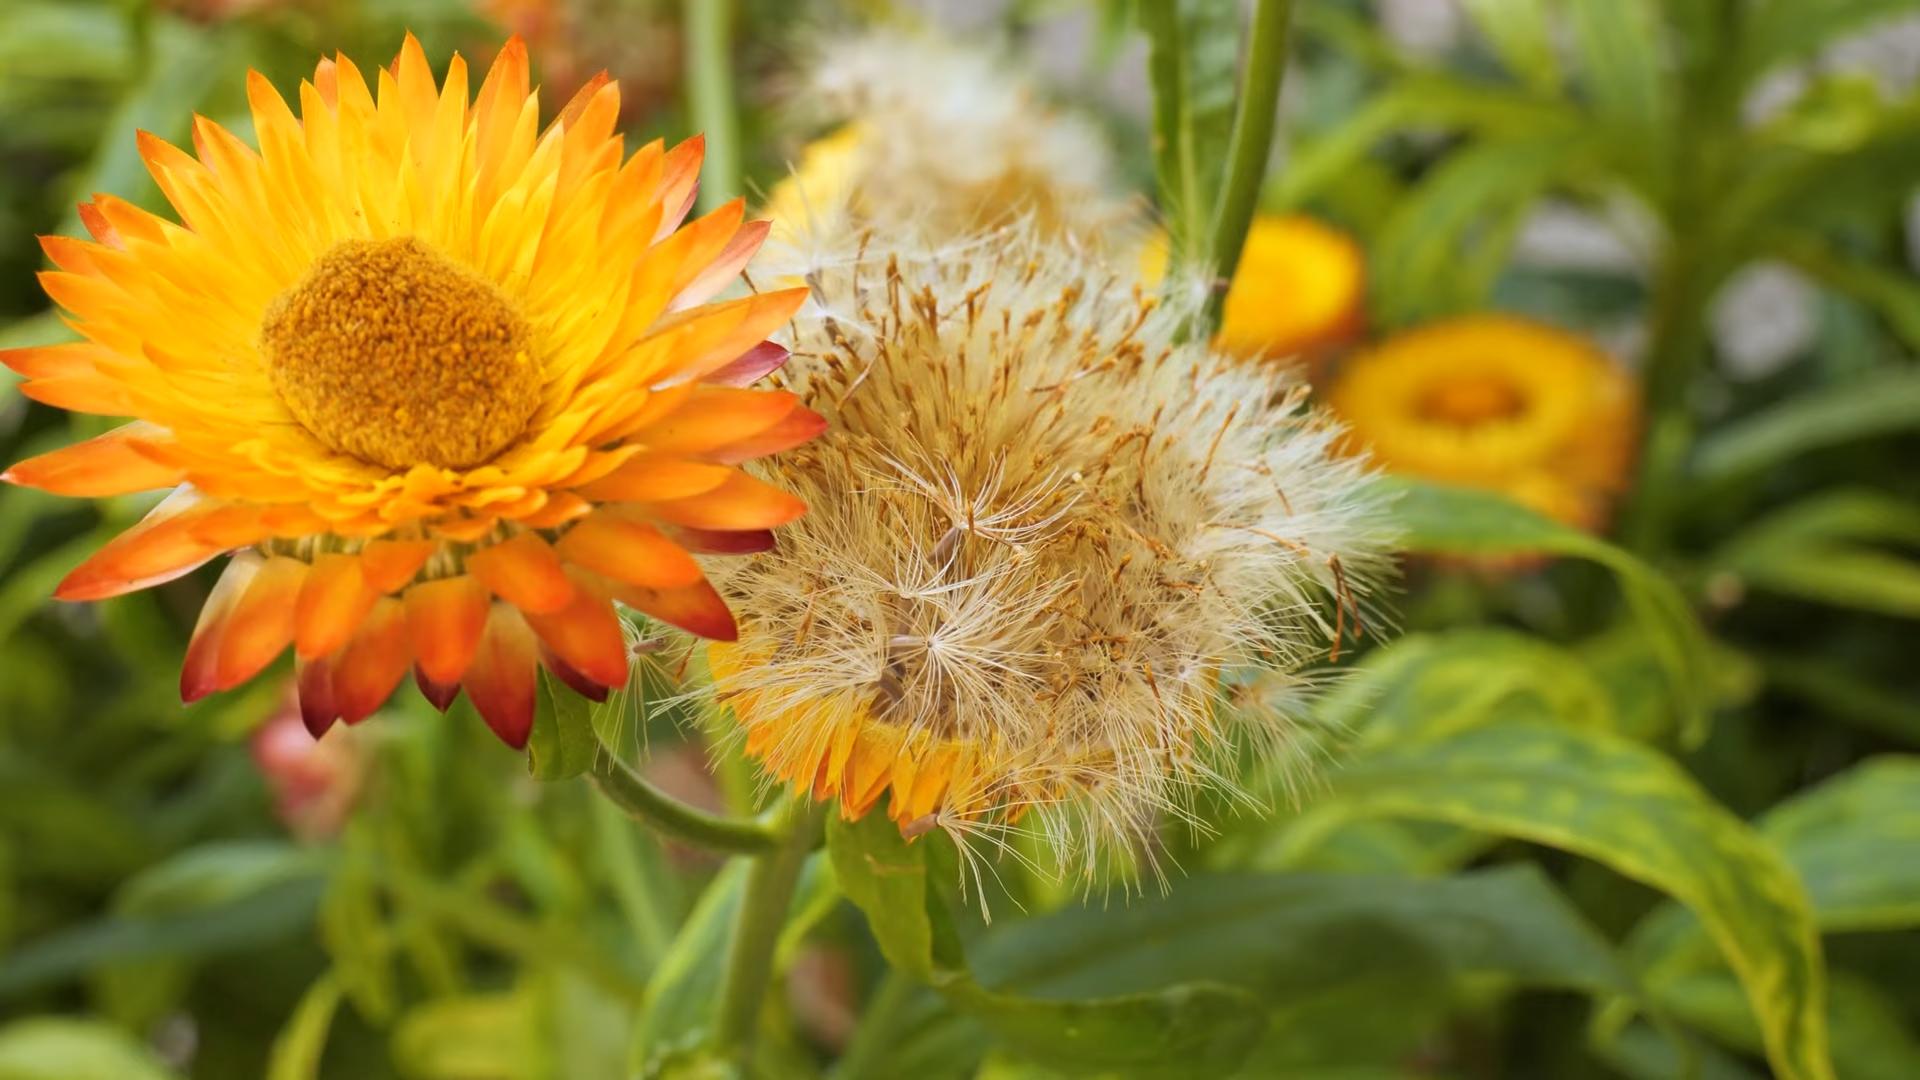
1. **Harvest at the Right Time:** Harvest your strawflowers when the outer petals have opened but the center is still closed. This will ensure that the flowers retain their shape and color when dried.
2. **Cut the Stems:** Use garden clippers or scissors to cut the stems as long as possible. Remove any leaves from the stems.
3. **Bundle the Flowers:** Gather the flowers into small bundles of 5-10 stems. Secure the bundles with twine or string.
4. **Hang to Dry:** Hang the bundles upside down in a cool, dark, and well-ventilated place. A garage, shed, or attic works well.
5. **Allow to Dry Completely:** It will take about 2-4 weeks for the strawflowers to dry completely. They are dry when the petals feel papery and crisp.
6. **Store Dried Flowers:** Once the flowers are dry, you can store them in a cool, dry place in an airtight container.
And that’s it! You’ve successfully grown and dried your own strawflowers. Now you can enjoy their beauty for months to come in your home decor, crafts, and gifts. I hope you found this guide helpful. Happy gardening!
Conclusion
So, there you have it! Growing strawflowers from seed isn’t just a gardening project; it’s an investment in a vibrant, long-lasting display of color that will brighten your home and garden for months to come. We’ve walked through the entire process, from selecting the right seeds and preparing your soil to nurturing those tiny seedlings and finally harvesting your stunning blooms.
Why is this DIY trick a must-try? Because it offers a level of satisfaction that store-bought flowers simply can’t match. There’s something truly special about watching a tiny seed transform into a beautiful, everlasting flower, knowing that you played an integral role in its creation. Plus, growing your own strawflowers gives you complete control over the colors and varieties you cultivate. You can tailor your garden to perfectly match your personal style and décor.
Beyond the sheer joy of gardening, growing strawflowers from seed is also incredibly economical. A single packet of seeds can yield dozens, even hundreds, of blooms, far surpassing the cost of purchasing dried strawflowers from a florist or craft store. And let’s not forget the environmental benefits! By growing your own flowers, you’re reducing your carbon footprint associated with transportation and packaging.
Ready to take your strawflower game to the next level? Consider experimenting with different growing mediums. While we’ve recommended a standard seed-starting mix, you could try incorporating coco coir or perlite to improve drainage and aeration. Another fun variation is to create a strawflower “rainbow” by planting a mix of different colored seeds in the same container. Imagine the explosion of color when they all bloom! You can also try succession planting, sowing seeds every few weeks to ensure a continuous supply of blooms throughout the growing season. For those with limited space, strawflowers thrive in containers, making them perfect for balconies and patios. Just be sure to choose a pot that’s large enough to accommodate their root system.
The possibilities are endless when you embark on this rewarding journey of growing strawflowers from seed. Don’t be afraid to experiment, learn from your mistakes, and most importantly, have fun! We’re confident that you’ll be amazed by the results.
We wholeheartedly encourage you to give this DIY trick a try. It’s a rewarding, cost-effective, and environmentally friendly way to add beauty and joy to your life. Once you’ve harvested your first batch of stunning strawflowers, we’d love to hear about your experience! Share your photos, tips, and tricks with us in the comments below. Let’s create a community of strawflower enthusiasts and inspire others to discover the magic of growing their own everlasting blooms. We can’t wait to see what you create! Remember, the key to success is patience, persistence, and a little bit of love. Happy gardening!
FAQ
What are the best varieties of strawflowers to grow from seed?
There are many fantastic strawflower varieties to choose from, each offering its unique charm. Some popular choices include ‘Monstrosum’ (known for its large, showy blooms), ‘Bright Bikini’ (a mix of vibrant colors), and ‘Copper Red’ (for a warm, autumnal hue). Consider your personal preferences and the overall aesthetic you’re aiming for when selecting your seeds. Also, check the seed packet for information on plant height and spread to ensure they’ll fit well in your garden space. Don’t be afraid to try a few different varieties to see which ones thrive best in your local climate and soil conditions.
How long does it take for strawflowers to germinate from seed?
Generally, strawflower seeds will germinate within 7-21 days, provided they have adequate moisture and warmth. However, germination times can vary depending on factors such as seed quality, soil temperature, and humidity levels. To speed up the process, you can pre-soak the seeds in water for 24 hours before planting. This helps to soften the seed coat and encourage germination. Maintaining a consistent soil temperature of around 70-75°F (21-24°C) is also crucial. Using a heat mat can be beneficial, especially in cooler climates.
What is the best way to prevent damping-off in strawflower seedlings?
Damping-off is a fungal disease that can quickly decimate young seedlings. To prevent it, start with sterile seed-starting mix and ensure good air circulation around your seedlings. Avoid overwatering, as damp conditions promote fungal growth. You can also sprinkle a thin layer of horticultural charcoal on the soil surface to help absorb excess moisture. If you notice any signs of damping-off (such as wilting or browning stems), immediately remove the affected seedlings to prevent the disease from spreading. Consider using a fungicide specifically formulated for seedlings as a preventative measure.
How often should I water my strawflower seedlings?
Water your strawflower seedlings regularly, but avoid overwatering. The soil should be consistently moist but not soggy. Check the soil moisture level daily by sticking your finger into the soil. If the top inch feels dry, it’s time to water. When watering, use a gentle spray or watering can to avoid disturbing the delicate seedlings. As the seedlings grow larger, you can gradually reduce the frequency of watering, allowing the soil to dry out slightly between waterings.
When should I transplant my strawflower seedlings outdoors?
Transplant your strawflower seedlings outdoors after the last frost has passed and the soil has warmed up. Harden off the seedlings by gradually exposing them to outdoor conditions for a week or two before transplanting. Start by placing them in a sheltered location for a few hours each day, gradually increasing the amount of time they spend outdoors. Choose a sunny location with well-drained soil for transplanting. Space the seedlings about 12-18 inches apart to allow for adequate growth.
How do I dry strawflowers for long-lasting arrangements?
The best time to harvest strawflowers for drying is when the petals are just beginning to open. Cut the stems long, leaving several inches for easy handling. Remove the leaves from the stems and bundle the flowers together with twine or rubber bands. Hang the bundles upside down in a dark, dry, and well-ventilated place. Avoid direct sunlight, as it can fade the colors of the flowers. It typically takes 2-4 weeks for the flowers to dry completely. Once dried, they will retain their shape and color for months, even years, making them perfect for everlasting arrangements.
Can I grow strawflowers in containers?
Yes, strawflowers thrive in containers, making them a great option for gardeners with limited space. Choose a pot that is at least 12 inches in diameter to accommodate their root system. Use a well-draining potting mix and ensure the container has drainage holes. Water regularly and fertilize every few weeks with a balanced fertilizer. Place the container in a sunny location, receiving at least 6 hours of direct sunlight per day.
Are strawflowers deer resistant?
Strawflowers are generally considered to be deer resistant, although deer may occasionally nibble on them, especially if other food sources are scarce. To further deter deer, you can try planting strawflowers near other deer-resistant plants, such as lavender or rosemary. You can also use deer repellent sprays or fencing to protect your strawflowers.
What are some common pests and diseases that affect strawflowers?
Strawflowers are relatively pest and disease resistant, but they can occasionally be affected by aphids, spider mites, or powdery mildew. Aphids and spider mites can be controlled with insecticidal soap or neem oil. Powdery mildew can be prevented by ensuring good air circulation and avoiding overhead watering. If powdery mildew does occur, treat it with a fungicide specifically formulated for powdery mildew. Regularly inspect your plants for any signs of pests or diseases and take action promptly to prevent them from spreading.
Leave a Comment