
Grow Swiss Chard Indoors? Absolutely! Imagine fresh, vibrant Swiss chard gracing your plate, even when the snow is falling outside. Forget those sad, wilted greens from the grocery store – with a few simple tricks, you can cultivate your own personal Swiss chard oasis right in your home.
For centuries, leafy greens like Swiss chard have been a staple in diets around the world, prized for their nutritional value and versatility. From hearty soups in the Swiss Alps (hence the name!) to vibrant salads in the Mediterranean, this leafy vegetable has nourished generations. But what if you don’t have a sprawling garden or the perfect outdoor climate? That’s where the magic of indoor gardening comes in!
I know what you’re thinking: “Indoor gardening sounds complicated!” But trust me, it doesn’t have to be. This DIY guide is packed with easy-to-follow tips and tricks to help you successfully grow Swiss Chard Indoors, regardless of your experience level. We’ll cover everything from choosing the right container and soil to providing the perfect amount of light and water. Say goodbye to expensive, store-bought chard and hello to a bountiful harvest of your own. Let’s get growing!
Growing Swiss Chard Indoors: A Beginner’s Guide
Hey there, fellow plant enthusiasts! Ever thought about growing your own vibrant, nutritious Swiss chard right inside your home? It’s easier than you might think, and trust me, the satisfaction of harvesting your own greens is totally worth it. I’ve been growing Swiss chard indoors for a while now, and I’m excited to share my tips and tricks with you. Let’s get started!
What You’ll Need
Before we dive into the nitty-gritty, let’s gather our supplies. Here’s a checklist of everything you’ll need to successfully grow Swiss chard indoors:
* Swiss Chard Seeds: Choose your favorite variety! Rainbow chard is a popular choice for its colorful stems, but any variety will work.
* Containers: You’ll need pots or containers that are at least 6-8 inches deep. Good drainage is crucial, so make sure they have drainage holes.
* Potting Mix: Use a high-quality, well-draining potting mix. Avoid using garden soil, as it can compact and hinder drainage.
* Grow Lights (Optional but Recommended): While Swiss chard can tolerate some shade, it thrives with plenty of light. If you don’t have a sunny windowsill, grow lights are a great investment.
* Watering Can or Spray Bottle: For gentle and even watering.
* Fertilizer: A balanced liquid fertilizer will help your chard grow strong and healthy.
* Seed Starting Tray (Optional): If you prefer to start your seeds indoors before transplanting.
Phase 1: Starting Your Seeds
You have two options here: you can either sow your seeds directly into the containers where they’ll grow, or you can start them in a seed starting tray and transplant them later. I personally prefer starting them in a tray because it gives me more control over the germination process.
Option 1: Direct Sowing
1. Prepare Your Containers: Fill your containers with potting mix, leaving about an inch of space at the top. Gently pat down the soil.
2. Sow the Seeds: Sow the seeds about ½ inch deep and 1-2 inches apart. You can sow a few seeds per container and thin them out later if needed.
3. Water Gently: Water the soil gently until it’s moist but not soggy.
4. Provide Warmth: Swiss chard seeds germinate best in temperatures between 60-70°F (15-21°C). You can place your containers in a warm spot or use a heat mat to speed up germination.
5. Wait for Germination: Germination typically takes 5-10 days. Keep the soil consistently moist during this time.
Option 2: Starting in a Seed Starting Tray
1. Fill the Tray: Fill the seed starting tray with potting mix.
2. Sow the Seeds: Sow one or two seeds per cell, about ½ inch deep.
3. Water Gently: Water the tray gently until the soil is moist.
4. Provide Warmth: Place the tray in a warm spot or use a heat mat.
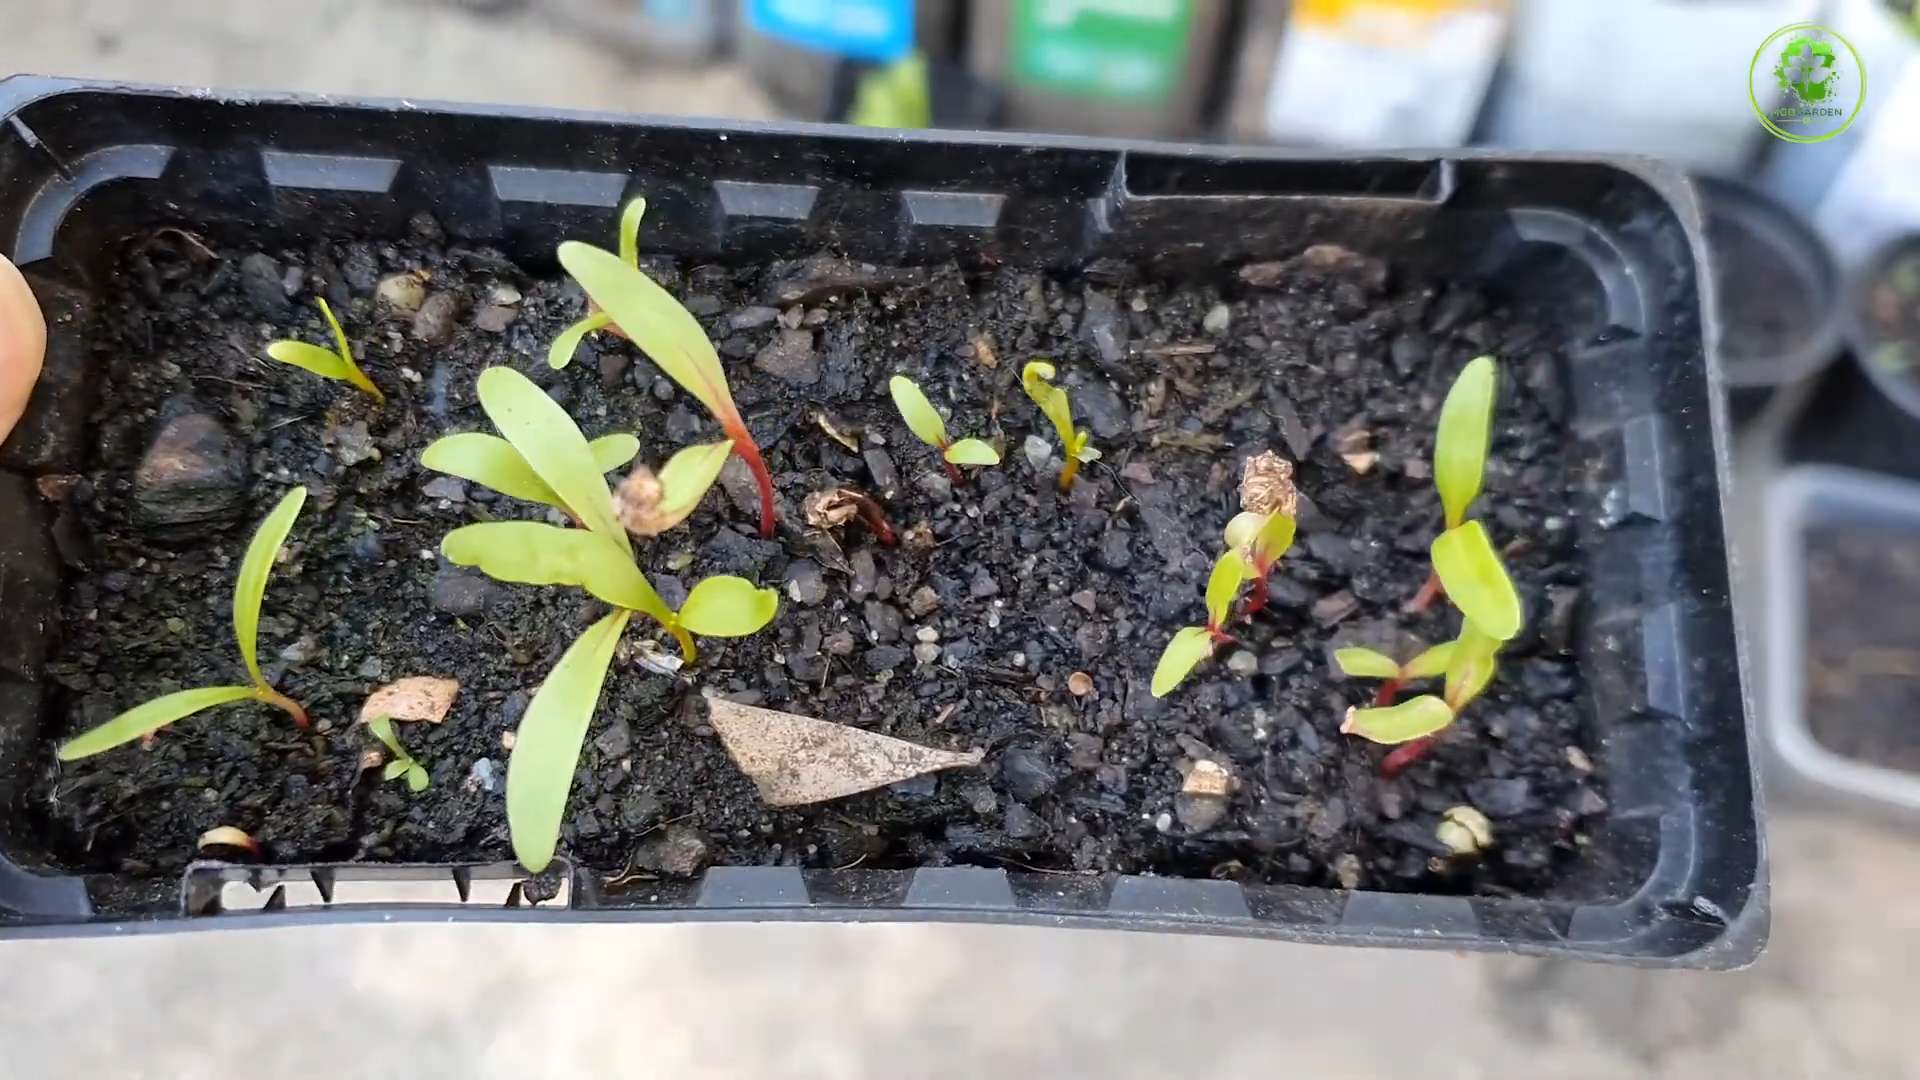
5. Wait for Germination: Keep the soil consistently moist. Once the seedlings emerge, provide them with plenty of light.
6. Transplant the Seedlings: Once the seedlings have a few sets of true leaves (the leaves that appear after the initial seed leaves), they’re ready to be transplanted into their permanent containers. Gently remove the seedlings from the tray and plant them in the containers, spacing them about 6-8 inches apart.
Phase 2: Caring for Your Swiss Chard
Once your Swiss chard seedlings are established, it’s time to focus on providing them with the care they need to thrive.
1. Light: Swiss chard needs at least 6 hours of sunlight per day. If you don’t have a sunny windowsill, use grow lights. Position the lights about 6-12 inches above the plants. I use LED grow lights, and they work great!
2. Watering: Water your Swiss chard regularly, keeping the soil consistently moist but not soggy. Avoid overwatering, as this can lead to root rot. Check the soil moisture by sticking your finger into the soil. If the top inch feels dry, it’s time to water.
3. Fertilizing: Feed your Swiss chard with a balanced liquid fertilizer every 2-3 weeks. Follow the instructions on the fertilizer label. I like to use a fertilizer that’s specifically formulated for leafy greens.
4. Temperature: Swiss chard prefers temperatures between 60-75°F (15-24°C). Avoid exposing your plants to extreme temperatures.
5. Air Circulation: Good air circulation is important to prevent fungal diseases. Make sure your plants have enough space between them, and consider using a small fan to improve air circulation.
6. Pest Control: Keep an eye out for pests like aphids and spider mites. If you spot any pests, you can try washing them off with a strong stream of water or using an insecticidal soap. I’ve found that neem oil is also effective for controlling pests.
Phase 3: Harvesting Your Swiss Chard
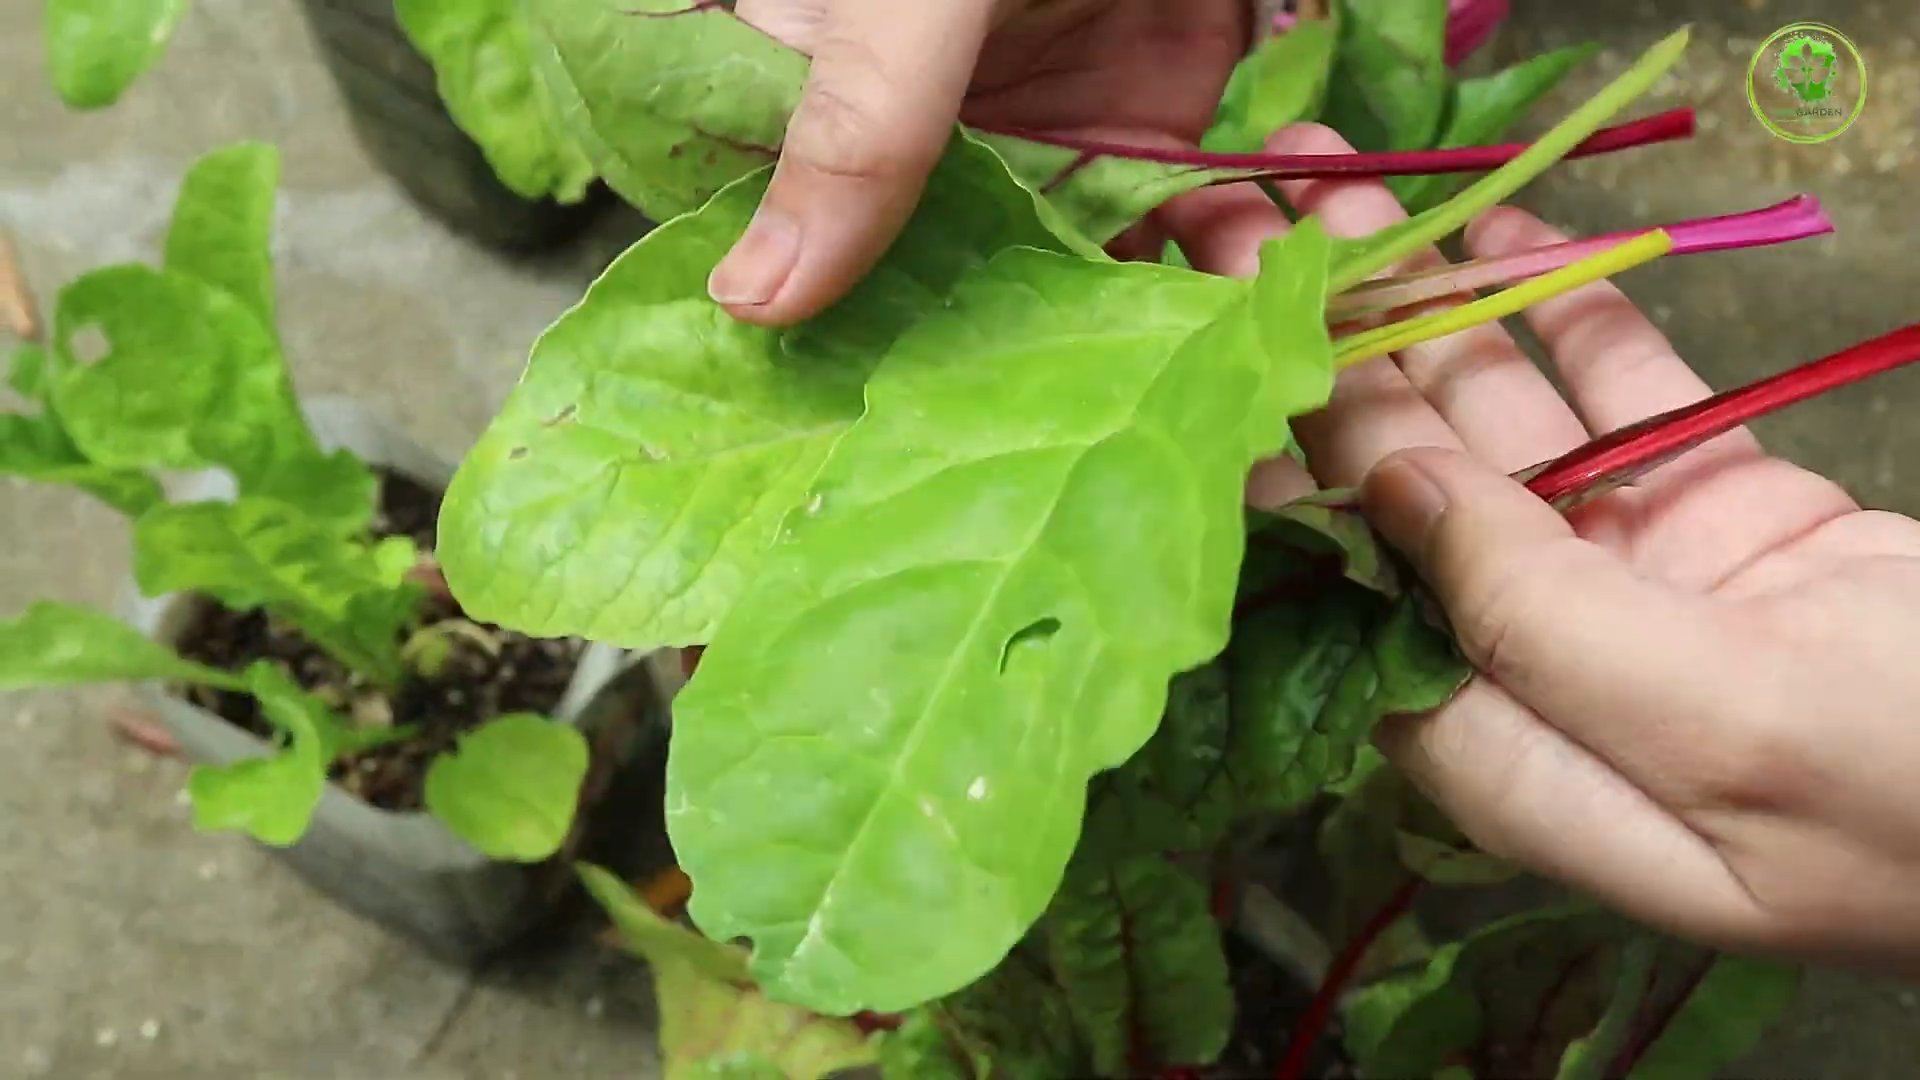
The best part of growing your own Swiss chard is, of course, harvesting it! You can start harvesting the outer leaves when they are about 6 inches long.
1. Harvesting Technique: Use a sharp knife or scissors to cut the outer leaves near the base of the plant. Leave the inner leaves intact so they can continue to grow.
2. Regular Harvesting: Regular harvesting encourages the plant to produce more leaves.
3. Storage: Freshly harvested Swiss chard can be stored in the refrigerator for up to a week. Wrap the leaves in a damp paper towel and place them in a plastic bag.
Troubleshooting
Even with the best care, you might encounter some problems while growing Swiss chard indoors. Here are some common issues and how to address them:
* Yellowing Leaves: This could be a sign of overwatering, underwatering, or nutrient deficiency. Check the soil moisture and adjust your watering accordingly. If the soil is dry, water more frequently. If the soil is soggy, water less frequently. You may also need to fertilize your plants.
* Leggy Growth: This is usually caused by insufficient light. Make sure your plants are getting enough sunlight or grow light.
* Pests: As mentioned earlier, keep an eye out for pests and take action promptly.
* Fungal Diseases: Good air circulation and proper watering can help prevent fungal diseases. If you notice any signs of fungal disease, such as powdery mildew, you can try using a fungicide.
Tips for Success
Here are a few extra tips to help you succeed in growing Swiss chard indoors:
* Choose the Right Variety: Some varieties of Swiss chard are better suited for indoor growing than others. Look for varieties that are compact and disease-resistant.
* Use High-Quality Potting Mix: A good potting mix will provide your plants with the nutrients they need to grow.
* Provide Adequate Light: Light is essential for healthy growth. If you don’t have enough natural light, use grow lights.
* Water Regularly: Keep the soil consistently moist but not soggy.
* Fertilize Regularly: Feed your plants with a balanced liquid fertilizer every 2-3 weeks.
* Harvest Regularly: Regular harvesting encourages the plant to produce more leaves.
* Be Patient: Growing plants takes time and patience. Don’t get discouraged if you don’t see results immediately.
Choosing the Right Swiss Chard Variety
While any Swiss chard variety can technically be grown indoors, some are better suited for container gardening than others. Here are a few of my favorites:
* ‘Bright Lights’: This variety is known for its colorful stems, which come in shades of red, yellow, orange, and white. It’s also relatively compact, making it a good choice for indoor growing.
* ‘Fordhook Giant’: This variety produces large, dark green leaves with thick, white stems. It’s a reliable and productive variety.
* ‘Lucullus’: This variety has crinkled, light green leaves and a mild flavor. It’s a good choice for salads and other fresh dishes.
* ‘Ruby Red’: As the name suggests, this variety has vibrant red stems and dark green leaves. It’s a beautiful and flavorful variety.
Maximizing Your Harvest
Want to get the most out of your indoor Swiss chard garden? Here are a few tips to maximize your harvest:
* Succession Planting: Sow new seeds every few weeks to ensure a continuous supply of fresh chard.
* Cut-and-Come-Again Harvesting: Harvest the outer leaves regularly, leaving the inner leaves to continue growing. This will encourage
Conclusion
So, there you have it! Growing Swiss chard indoors is not only achievable, but it’s also a remarkably rewarding experience. Imagine having a constant supply of fresh, vibrant greens right at your fingertips, ready to be added to salads, stir-fries, or even enjoyed as a simple, sauteed side dish. Forget those wilted, overpriced bunches at the grocery store; with a little effort and this simple DIY trick, you can cultivate your own thriving Swiss chard garden, regardless of the season or your outdoor space limitations.
Why is this a must-try? Because it empowers you to take control of your food source, ensuring you have access to healthy, organic produce. It’s also incredibly satisfying to nurture a plant from seed to harvest, witnessing the miracle of growth firsthand. Plus, it’s a fantastic way to add a touch of green to your indoor environment, creating a more vibrant and welcoming space.
But the beauty of this DIY trick lies in its adaptability. Feel free to experiment with different varieties of Swiss chard. ‘Bright Lights’ is a popular choice for its colorful stems, adding a visual pop to your indoor garden. You can also try ‘Fordhook Giant’ for its large, dark green leaves, or ‘Ruby Red’ for its striking red stalks. Don’t be afraid to adjust the lighting and watering schedule based on your specific environment and the needs of your plants. Consider using a self-watering system to simplify the watering process, especially if you tend to forget. You can also add companion plants like basil or chives to your indoor garden to deter pests and enhance the flavor of your Swiss chard.
And speaking of flavor, consider how you’ll use your homegrown Swiss chard. Will it be a staple in your morning smoothies? A key ingredient in your favorite quiche recipe? Or perhaps a simple side dish, sauteed with garlic and olive oil? The possibilities are endless!
We wholeheartedly encourage you to give this DIY trick a try. It’s a simple, cost-effective, and incredibly rewarding way to enjoy fresh, homegrown Swiss chard year-round. Once you’ve experienced the joy of harvesting your own greens, you’ll never look at store-bought Swiss chard the same way again.
Don’t just take our word for it, though. We want to hear about your experiences! Share your photos, tips, and challenges in the comments below. Let’s create a community of indoor Swiss chard growers, supporting each other and learning from each other’s successes (and occasional setbacks!). Your insights could be invaluable to someone just starting out. So, grab your seeds, potting mix, and grow lights, and get ready to embark on a delicious and rewarding journey of growing Swiss chard indoors. We can’t wait to see what you create!
Frequently Asked Questions (FAQ)
What kind of soil is best for growing Swiss chard indoors?
A well-draining potting mix is crucial for growing healthy Swiss chard indoors. Avoid using garden soil, as it can become compacted and doesn’t provide adequate drainage in containers. Look for a potting mix specifically formulated for vegetables or herbs. A mix containing peat moss, perlite, and vermiculite is generally a good choice. You can also amend your potting mix with compost to provide additional nutrients. Ensure the pH level of the soil is between 6.0 and 7.0 for optimal growth.
How much light does Swiss chard need indoors?
Swiss chard thrives in bright light, requiring at least 6 hours of direct sunlight per day. If you don’t have a sunny window, you’ll need to supplement with artificial grow lights. Fluorescent or LED grow lights are excellent options. Position the lights a few inches above the plants and adjust as they grow. A timer can be used to ensure consistent light exposure. Insufficient light can lead to leggy growth and reduced yields.
How often should I water my indoor Swiss chard?
Water your Swiss chard regularly, keeping the soil consistently moist but not waterlogged. Check the soil moisture by sticking your finger about an inch deep. If it feels dry, it’s time to water. Avoid overwatering, as this can lead to root rot. Ensure your containers have drainage holes to allow excess water to escape. During warmer months, you may need to water more frequently.
How do I fertilize my indoor Swiss chard?
Swiss chard is a heavy feeder and benefits from regular fertilization. Use a balanced liquid fertilizer diluted to half strength every two to three weeks. Look for a fertilizer with an NPK ratio (nitrogen, phosphorus, potassium) of around 10-10-10 or 5-5-5. You can also use organic fertilizers like compost tea or fish emulsion. Avoid over-fertilizing, as this can burn the roots.
What are some common pests and diseases that affect indoor Swiss chard?
Common pests that can affect indoor Swiss chard include aphids, spider mites, and whiteflies. Regularly inspect your plants for signs of infestation. You can control these pests by spraying them with insecticidal soap or neem oil. Diseases like powdery mildew can also affect Swiss chard. Ensure good air circulation around your plants to prevent fungal diseases. Remove any infected leaves promptly.
When can I harvest my indoor Swiss chard?
You can start harvesting Swiss chard leaves when they are about 6 inches long. Harvest the outer leaves first, leaving the inner leaves to continue growing. This cut-and-come-again method allows you to harvest continuously for several weeks. Avoid harvesting more than one-third of the plant at a time.
Can I grow Swiss chard from seed indoors?
Yes, you can easily grow Swiss chard from seed indoors. Start seeds in small pots or seed trays filled with potting mix. Keep the soil moist and warm. Seeds typically germinate within 7-14 days. Once the seedlings have developed a few true leaves, you can transplant them into larger containers.
What size container is needed for growing Swiss chard indoors?
Choose a container that is at least 8-12 inches deep and wide for each Swiss chard plant. This will provide enough space for the roots to grow. Ensure the container has drainage holes to prevent waterlogging.
How do I prevent my Swiss chard from bolting (going to seed)?
Bolting is often triggered by high temperatures or stress. To prevent bolting, keep your Swiss chard plants well-watered and fertilized. Provide adequate shade during the hottest part of the day. Choose bolt-resistant varieties if you live in a warm climate.
Can I grow Swiss chard indoors year-round?
Yes, with proper care and lighting, you can grow Swiss chard indoors year-round. Provide adequate light, water, and nutrients, and protect your plants from extreme temperatures.


Leave a Comment