
Grow Water Spinach Quickly and effortlessly? Absolutely! Imagine harvesting fresh, vibrant water spinach (also known as Ong Choy) right from your backyard, ready to add a delicious and nutritious crunch to your next stir-fry. Forget those wilted, overpriced bunches at the grocery store – with a few simple tricks, you can become a water spinach-growing pro in no time.
Water spinach, a staple in Southeast Asian cuisine, boasts a rich history. For centuries, it has been cultivated for its tender leaves and hollow stems, packed with vitamins and minerals. Beyond its culinary appeal, growing your own water spinach connects you to a tradition that spans generations and cultures. It’s more than just a vegetable; it’s a taste of history!
Why should you learn to grow water spinach quickly? Well, for starters, it’s incredibly rewarding! Plus, it’s a fantastic way to ensure you have access to fresh, organic produce. In today’s world, where healthy eating is a priority, knowing exactly where your food comes from is invaluable. This DIY guide will equip you with the knowledge and simple hacks to cultivate a thriving water spinach patch, even if you’re a complete beginner. I’m excited to share these tips with you, so let’s get started and transform your garden into a water spinach haven!

Grow Water Spinach (Kangkong) Like a Pro: A DIY Guide
Hey there, fellow gardening enthusiasts! Ever craved fresh, crunchy water spinach (also known as kangkong or ong choy) straight from your backyard? Well, you’re in luck! I’m going to walk you through a super easy DIY method to grow your own water spinach quickly and abundantly. Trust me, it’s way simpler than you think, and the reward of harvesting your own delicious greens is totally worth it.
What You’ll Need
Before we dive in, let’s gather our supplies. Here’s a checklist of everything you’ll need to get started:
* Water Spinach Seeds or Cuttings: You can find these at most Asian grocery stores or online. Seeds are a great option, but cuttings can give you a head start.
* A Container: A large bucket, plastic tub, or even a repurposed storage container will work perfectly. Just make sure it’s at least 12 inches deep.
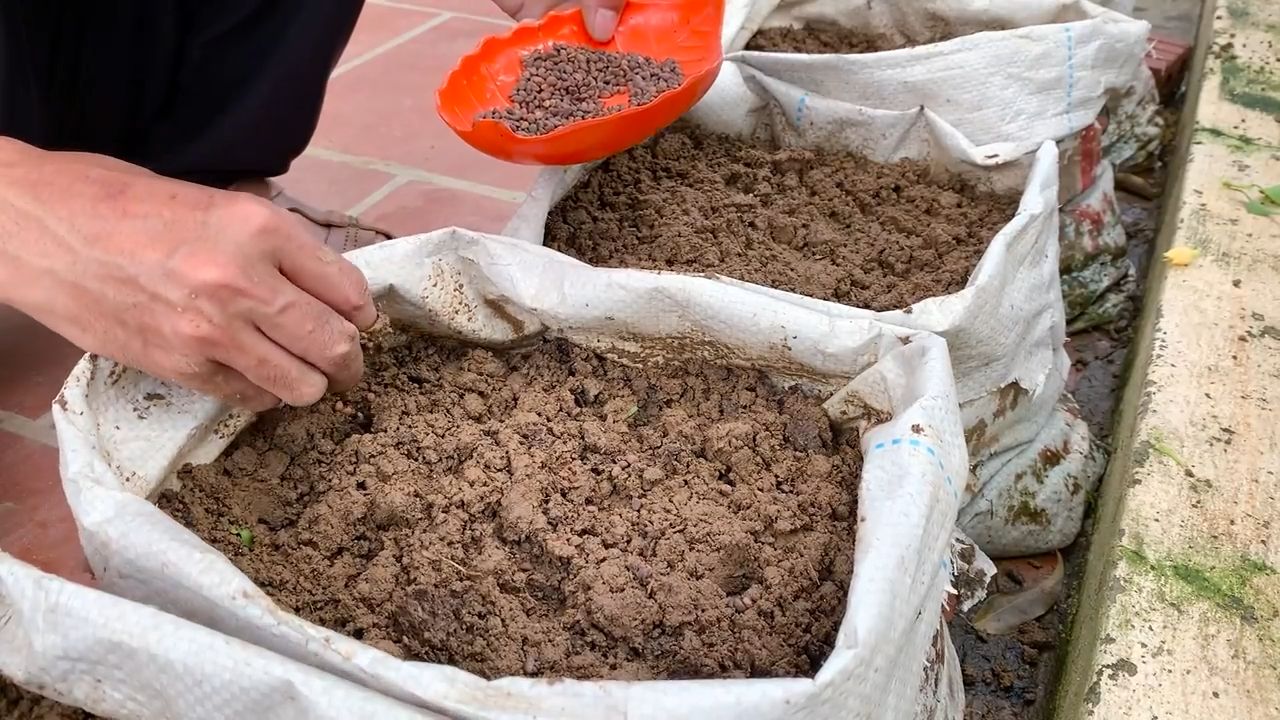
* Soil: A good quality potting mix is ideal. You can also use a mix of garden soil, compost, and well-rotted manure for extra nutrients.
* Water: Obviously! Water spinach loves water, so make sure you have a reliable source.
* Sunlight: Water spinach thrives in full sun, so choose a spot that gets at least 6 hours of direct sunlight per day.
* Optional:
* Slow-release fertilizer: This will give your plants a boost of nutrients.
* Aquarium pump and air stone: For oxygenating the water if you’re growing hydroponically.
* Netting or mesh: To protect your plants from pests.
Choosing Your Growing Method: Soil vs. Water
There are two main ways to grow water spinach: in soil or in water (hydroponically). Both methods are relatively easy, but they have slightly different requirements.
* Soil Method: This is the more traditional approach. You’ll plant your seeds or cuttings directly into the soil and keep it consistently moist.
* Water Method (Hydroponics): This method involves growing your water spinach in water, with or without a growing medium like perlite or gravel. It’s a bit more hands-on, but it can result in faster growth.
I’ll cover both methods in detail below, so you can choose the one that best suits your needs and preferences.
Growing Water Spinach in Soil: A Step-by-Step Guide
This method is perfect for beginners and requires minimal equipment.
1. Prepare Your Container:
* If your container doesn’t have drainage holes, drill a few at the bottom to prevent waterlogging.
* Line the bottom of the container with a layer of gravel or pebbles to improve drainage.
2. Fill the Container with Soil:
* Fill the container with your chosen soil mix, leaving about 2 inches of space at the top.
* Water the soil thoroughly until it’s evenly moist but not soggy.
3. Sow the Seeds or Plant the Cuttings:
* From Seeds: Sprinkle the seeds evenly over the surface of the soil. Cover them with a thin layer of soil (about 1/4 inch). Gently water the soil again.
* From Cuttings: Take cuttings that are about 6-8 inches long. Remove the leaves from the bottom 2 inches of the cutting. Insert the cuttings into the soil, spacing them about 4-6 inches apart. Make sure at least 2 nodes (where the leaves were removed) are buried in the soil.
4. Water Regularly:
* Water spinach needs consistently moist soil. Water the plants daily, or more often if the soil dries out quickly.
* Avoid overwatering, which can lead to root rot. The soil should be moist, not soggy.
5. Provide Sunlight:
* Place the container in a location that receives at least 6 hours of direct sunlight per day.
* If you don’t have a sunny spot, you can supplement with grow lights.
6. Fertilize (Optional):
* If you’re using a slow-release fertilizer, mix it into the soil before planting.
* Alternatively, you can fertilize every 2-3 weeks with a liquid fertilizer diluted to half strength.
7. Monitor for Pests and Diseases:
* Keep an eye out for common garden pests like aphids, spider mites, and caterpillars.
* Treat any infestations promptly with insecticidal soap or neem oil.
* Ensure good air circulation to prevent fungal diseases.
8. Harvest Your Water Spinach:
* You can start harvesting your water spinach about 4-6 weeks after planting.
* Cut the stems about 2 inches above the soil line. The plants will regrow, allowing you to harvest multiple times.
* Harvest regularly to encourage new growth.
Growing Water Spinach in Water (Hydroponics): A Step-by-Step Guide
This method is a bit more advanced, but it can result in faster growth and higher yields.
1. Prepare Your Container:
* Choose a container that is watertight and at least 12 inches deep.
* If you’re using a container without drainage holes, you’ll need to be extra careful not to overfill it.
2. Add Water and Nutrients:
* Fill the container with water, leaving about 2 inches of space at the top.
* Add a hydroponic nutrient solution according to the manufacturer’s instructions.
* The nutrient solution provides the plants with the essential minerals they need to grow.
3. Provide Support for the Plants:
* Water spinach needs something to anchor its roots to. You can use a variety of materials, such as:
* Perlite or gravel: Fill the bottom of the container with a layer of perlite or gravel.
* Net pots: Suspend net pots filled with perlite or gravel over the water.
* Floating rafts: Create a floating raft out of styrofoam or plastic and cut holes in it to hold the plants.
4. Plant the Cuttings:
* Take cuttings that are about 6-8 inches long. Remove the leaves from the bottom 2 inches of the cutting.
* Insert the cuttings into the growing medium, making sure the roots are submerged in the water.
* Space the cuttings about 4-6 inches apart.
5. Oxygenate the Water (Optional but Recommended):
* Water spinach needs oxygen to thrive. You can oxygenate the water by using an aquarium pump and air stone.
* Place the air stone at the bottom of the container and turn on the pump.
* The air bubbles will help to oxygenate the water and prevent the roots from rotting.
6. Provide Sunlight:
* Place the container in a location that receives at least 6 hours of direct sunlight per day.
* If you don’t have a sunny spot, you can supplement with grow lights.
7. Monitor the Water Level and Nutrient Solution:
* Check the water level regularly and add more water as needed.
* Change the nutrient solution every 2-3 weeks to prevent the buildup of salts and other impurities.
8. Monitor for Pests and Diseases:
* Keep an eye out for common garden pests like aphids, spider mites, and caterpillars.
* Treat any infestations promptly with insecticidal soap or neem oil.
* Ensure good air circulation to prevent fungal diseases.
9. Harvest Your Water Spinach:
* You can start harvesting your water spinach about 3-4 weeks after planting.
* Cut the stems about 2 inches above the water line. The plants will regrow, allowing you to harvest multiple times.
* Harvest regularly to encourage new growth.
Tips for Success
Here are a few extra tips to help you grow the best water spinach possible:
* Choose the Right Variety: Some varieties of water spinach are better suited for certain climates than others. Do some research to find a variety that will thrive in your area.
* Start with Healthy Seeds or Cuttings: Make sure your seeds are fresh and viable, or that your cuttings are taken from healthy, vigorous plants.
* Provide Adequate Sunlight: Water spinach needs plenty of sunlight to grow properly. If you don’t have a sunny spot, consider using grow lights.
* Keep the Soil or Water Moist: Water spinach loves water, so make sure the soil or water is consistently moist.
* Fertilize Regularly: Water spinach is a heavy feeder, so fertilize regularly to provide it with the nutrients it needs.
* Protect Your Plants from Pests and Diseases: Keep an eye out for pests and diseases and treat
Conclusion
So, there you have it! Growing water spinach quickly at home is not only achievable but also incredibly rewarding. This simple DIY trick transforms your kitchen scraps into a thriving source of fresh, nutritious greens, ready to elevate your meals. Forget expensive grocery store trips for wilted, pre-packaged vegetables. With minimal effort and readily available resources, you can cultivate a continuous supply of crisp, vibrant water spinach right in your own space.
Why is this a must-try? Because it’s sustainable, cost-effective, and undeniably satisfying. You’re reducing food waste, saving money, and gaining access to a superfood packed with vitamins and minerals. Plus, there’s something truly special about nurturing your own food from seed (or in this case, stem!) to table.
But the fun doesn’t stop there! Feel free to experiment with different growing mediums. While water works wonders, you can also try a nutrient-rich soil mix for potentially even faster growth and enhanced flavor. Consider adding a diluted liquid fertilizer to the water every couple of weeks to give your water spinach an extra boost. You can also play around with the amount of sunlight your plants receive. While water spinach thrives in bright light, you might find that a slightly shaded spot prevents the leaves from becoming too tough.
Another exciting variation is to explore different varieties of water spinach. Some varieties have broader leaves, while others have a more delicate, slender appearance. Experimenting with different types will allow you to discover your personal favorite in terms of taste and texture.
Don’t be intimidated if you’ve never grown anything before. This DIY trick is incredibly forgiving and perfect for beginners. The key is to provide consistent moisture, adequate light, and a little bit of patience. You’ll be amazed at how quickly your water spinach takes off!
We wholeheartedly encourage you to give this DIY trick a try. It’s a fantastic way to connect with nature, reduce your environmental impact, and enjoy the delicious benefits of homegrown produce. And most importantly, we want to hear about your experience! Share your photos, tips, and variations in the comments below. Let’s create a community of water spinach enthusiasts and inspire others to embrace the joy of growing their own food. Let us know what worked for you, what challenges you faced, and any creative solutions you came up with. Together, we can unlock the full potential of this amazing plant and transform our kitchens into thriving urban gardens. So, grab some water spinach stems, get your hands dirty (or rather, wet!), and embark on this exciting culinary adventure. You won’t regret it! This method to grow water spinach quickly is a game changer.
Frequently Asked Questions (FAQ)
What exactly is water spinach, and why should I grow it?
Water spinach, also known as ong choy or kangkong, is a semi-aquatic leafy green vegetable popular in Southeast Asian cuisine. It’s incredibly nutritious, packed with vitamins A and C, iron, and antioxidants. Growing it yourself ensures you have access to fresh, pesticide-free greens whenever you need them. Plus, it’s a sustainable way to reduce food waste and save money on groceries.
How long does it take to grow water spinach using this DIY trick?
One of the best things about this method is its speed. You can typically see significant growth within a week, and you can start harvesting leaves in as little as two to three weeks, depending on the environmental conditions and the health of the initial cuttings. Remember that consistent moisture and adequate light are crucial for optimal growth.
What kind of water should I use?
Tap water is generally fine, but letting it sit out for a day or two to allow chlorine to dissipate is beneficial. You can also use filtered water or rainwater. Avoid using water that is heavily chlorinated or contains high levels of minerals, as this can inhibit growth.
How much sunlight does water spinach need?
Water spinach thrives in bright, indirect sunlight. Aim for at least 6 hours of sunlight per day. If you’re growing it indoors, place it near a sunny window or use a grow light. Be careful not to expose it to direct, intense sunlight for extended periods, as this can scorch the leaves.
Can I grow water spinach indoors year-round?
Yes, you can absolutely grow water spinach indoors year-round, especially if you provide adequate light and maintain a consistent temperature. A grow light can be particularly helpful during the winter months when natural sunlight is limited.
How often should I change the water?
Change the water every 2-3 days to prevent algae growth and ensure the water remains fresh and oxygenated. This is especially important in warmer climates. When you change the water, gently rinse the roots to remove any debris.
How do I harvest water spinach?
You can harvest water spinach by snipping off the stems and leaves as needed. Avoid cutting the entire plant at once, as this will prevent it from regrowing. Instead, harvest the outer leaves and stems, allowing the inner ones to continue growing.
What if my water spinach starts to turn yellow?
Yellowing leaves can indicate a few things: lack of nutrients, insufficient light, or overwatering. Try adding a diluted liquid fertilizer to the water, moving the plant to a brighter location, or ensuring the water is changed regularly.
Can I grow water spinach from seeds instead of cuttings?
Yes, you can grow water spinach from seeds. However, growing from cuttings is generally faster and easier. If you choose to grow from seeds, soak them in water for 24 hours before planting them in a moist potting mix.
Is water spinach safe to eat?
Yes, water spinach is generally safe to eat when grown in clean water and free from pesticides. However, it’s important to wash it thoroughly before consumption to remove any dirt or debris.
What are some ways to cook with water spinach?
Water spinach is incredibly versatile and can be used in a variety of dishes. It’s commonly stir-fried with garlic and chili, added to soups and stews, or used in salads. Its mild, slightly sweet flavor pairs well with a variety of sauces and seasonings.
My water spinach is growing, but the leaves are small. What can I do?
Small leaves can indicate a lack of nutrients or insufficient light. Try adding a diluted liquid fertilizer to the water and ensuring the plant receives adequate sunlight.
Can I use this method to grow other vegetables?
While this method is particularly well-suited for water spinach, you can experiment with growing other leafy greens from cuttings, such as lettuce or basil. However, the results may vary.
What if I encounter pests?
Pests are less common when growing water spinach in water, but if you do encounter any, try rinsing the plant thoroughly with water or using a mild insecticidal soap.
How do I know when to stop harvesting and start a new batch?
Eventually, your water spinach plant will become less productive. When the growth slows down significantly or the leaves become tough, it’s time to start a new batch from fresh cuttings. This ensures you always have a supply of tender, flavorful greens.


Leave a Comment