
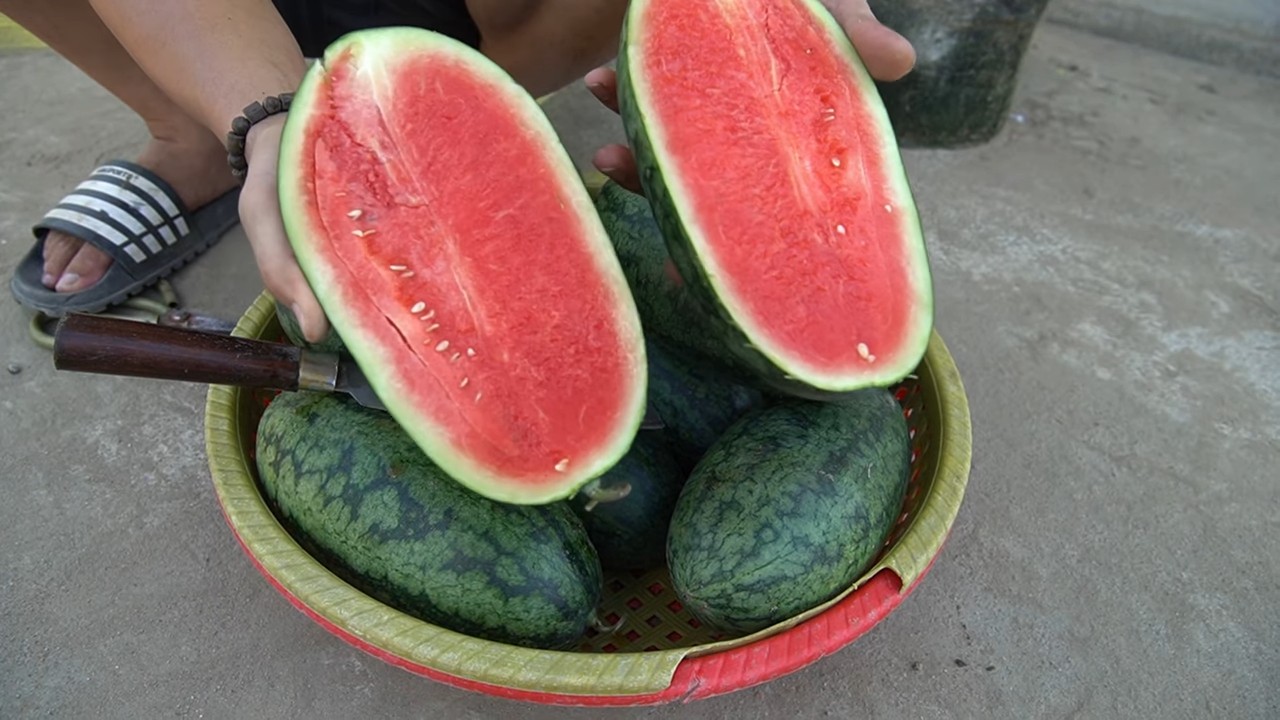
Grow Watermelons in Containers? Absolutely! Imagine sinking your teeth into a juicy, homegrown watermelon, bursting with flavor, all thanks to your own green thumb – and a container! Forget sprawling fields; you can cultivate these summer delights even with limited space. For centuries, watermelons have symbolized abundance and refreshment, gracing tables from ancient Egypt to modern-day picnics. Their vibrant colors and sweet taste evoke memories of sunny days and carefree moments.
But let’s be honest, the thought of growing watermelons often conjures images of vast farms, not cozy balconies. That’s where this DIY guide comes in! Many people believe growing watermelons is only for those with acres of land, but I’m here to tell you that’s simply not true. This article will unlock the secrets to successfully grow watermelons in containers, providing you with step-by-step instructions, expert tips, and troubleshooting advice.
Why do you need this DIY trick? Because everyone deserves the joy of harvesting their own fresh produce! Plus, growing your own food is a fantastic way to connect with nature, reduce your carbon footprint, and enjoy healthier, tastier meals. So, ditch the store-bought melons and get ready to embark on a rewarding gardening adventure. Let’s transform your patio, balcony, or even a sunny corner into a watermelon oasis!
Wassermelonen im Topf ziehen: So klappt’s!
Hey Leute! Habt ihr auch so einen kleinen Garten oder nur einen Balkon, aber trotzdem Lust auf selbstgezogene Wassermelonen? Dann seid ihr hier genau richtig! Ich zeige euch, wie ihr diese süßen Riesen auch in Töpfen erfolgreich anbauen könnt. Es ist einfacher als ihr denkt, versprochen!
Was ihr braucht: Die Vorbereitung
Bevor wir loslegen, brauchen wir natürlich das richtige Equipment. Hier ist eine Liste mit allem, was ihr für euer Wassermelonen-Topf-Projekt benötigt:
* Einen großen Topf: Das ist das A und O! Wassermelonen brauchen Platz, also wählt einen Topf mit mindestens 60 Litern Fassungsvermögen. Je größer, desto besser! Achtet darauf, dass der Topf Drainagelöcher hat, damit das Wasser gut ablaufen kann.
* Hochwertige Erde: Normale Gartenerde ist oft zu schwer. Mischt euch eine luftige, nährstoffreiche Erde aus Kompost, Blumenerde und etwas Sand. Das sorgt für eine gute Drainage und ausreichend Nährstoffe.
* Wassermelonensamen oder Jungpflanzen: Ihr könnt entweder Samen aussäen oder direkt Jungpflanzen kaufen. Bei Samen habt ihr mehr Auswahl, Jungpflanzen sind schneller erntereif. Achtet beim Kauf auf robuste Sorten, die für den Anbau im Topf geeignet sind. Beliebte Sorten sind z.B. “Sugar Baby” oder “Bush Sugar Baby”.
* Dünger: Wassermelonen sind Starkzehrer und brauchen regelmäßige Düngergaben. Am besten eignet sich ein organischer Dünger, der speziell für Gemüse geeignet ist.
* Rankhilfe: Auch wenn es “Bush” Sorten gibt, die kompakter wachsen, brauchen Wassermelonen oft eine Rankhilfe, um ihre Triebe zu stützen. Ein Rankgitter oder ein stabiler Stab sind ideal.
* Gießkanne oder Gartenschlauch: Zum regelmäßigen Gießen.
* Mulchmaterial: Stroh oder Holzhackschnitzel helfen, die Feuchtigkeit im Boden zu halten und Unkraut zu unterdrücken.
* Geduld und Liebe: Das Wichtigste überhaupt!
Aussaat oder Pflanzung: Der Start
Jetzt geht’s ans Eingemachte! Wir kümmern uns um den Start eurer Wassermelonen.
Aussaat (wenn ihr mit Samen startet):
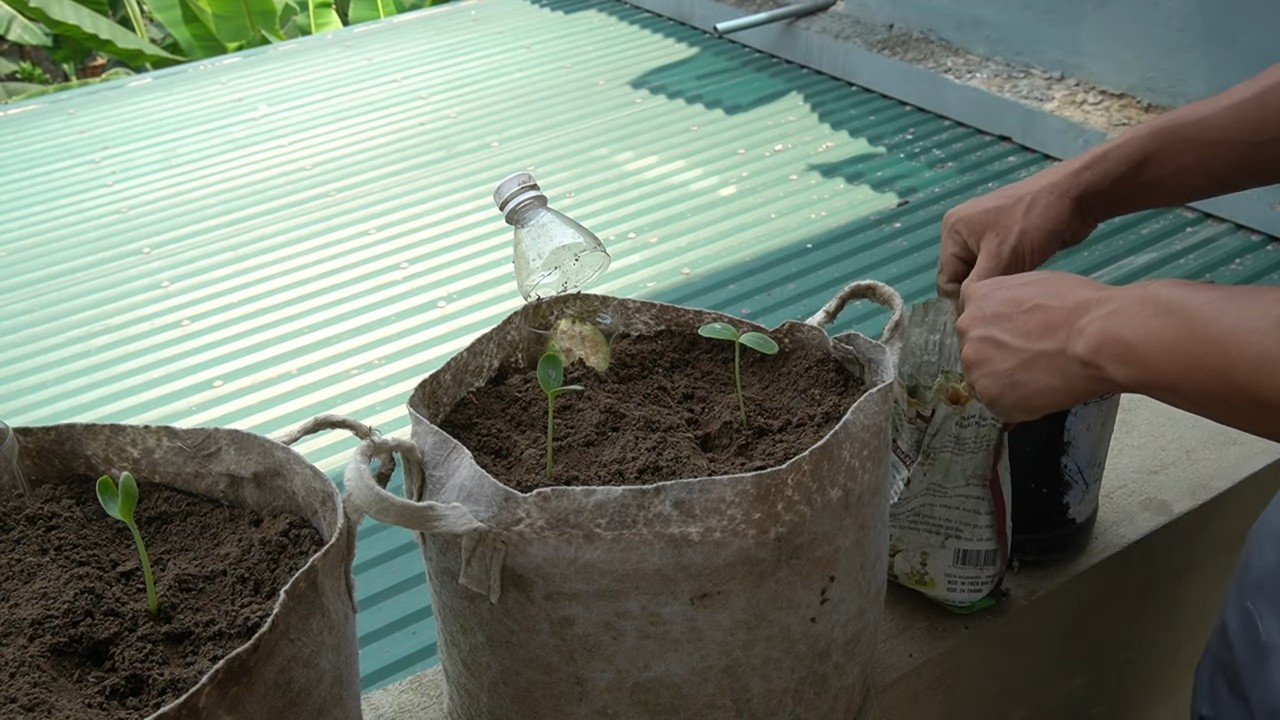
1. Vorkultur starten: Am besten zieht ihr die Wassermelonen im Haus vor. Das gibt ihnen einen Vorsprung. Füllt kleine Anzuchttöpfe mit Anzuchterde.
2. Samen säen: Legt 2-3 Samen pro Topf etwa 2-3 cm tief in die Erde.
3. Gießen und warm stellen: Gießt die Erde vorsichtig an und stellt die Töpfe an einen warmen, hellen Ort (z.B. auf eine Fensterbank). Die ideale Keimtemperatur liegt bei 25-30°C.
4. Feucht halten: Haltet die Erde gleichmäßig feucht, aber nicht nass.
5. Pikieren: Sobald die Keimlinge 2-3 Blätter haben, könnt ihr sie in größere Töpfe pikieren. Wählt nur die stärksten Pflanzen aus.
Pflanzung (wenn ihr Jungpflanzen kauft):
1. Topf vorbereiten: Füllt den großen Topf mit eurer vorbereiteten Erde. Lasst oben ein paar Zentimeter Platz.
2. Pflanze einsetzen: Nehmt die Jungpflanze vorsichtig aus dem Anzuchttopf und setzt sie in die Mitte des großen Topfes. Achtet darauf, die Wurzeln nicht zu beschädigen.
3. Angießen: Gießt die Pflanze gründlich an.
4. Rankhilfe anbringen: Steckt die Rankhilfe in den Topf, damit die Pflanze daran hochklettern kann.
Pflege: Das A und O für eine reiche Ernte
Die richtige Pflege ist entscheidend, damit eure Wassermelonen prächtig gedeihen.
1. Gießen: Wassermelonen brauchen viel Wasser, besonders während der Fruchtbildung. Gießt regelmäßig und gründlich, am besten morgens oder abends. Vermeidet Staunässe!
2. Düngen: Düngt eure Wassermelonen alle 2-3 Wochen mit einem organischen Gemüsedünger. Achtet auf die Dosierungsanleitung.
3. Sonnenschein: Wassermelonen lieben die Sonne! Stellt den Topf an einen sonnigen, warmen Ort. Mindestens 6-8 Stunden Sonne pro Tag sind ideal.
4. Ausgeizen: Entfernt regelmäßig Seitentriebe, die keine Blüten tragen. Das fördert die Fruchtbildung an den Haupttrieben.
5. Bestäubung: Wassermelonen sind auf Bestäubung angewiesen. Wenn ihr keine Bienen oder Hummeln im Garten habt, könnt ihr die Blüten auch selbst bestäuben. Nehmt dazu einen weichen Pinsel und übertragt den Pollen von den männlichen auf die weiblichen Blüten. Die weiblichen Blüten erkennt ihr an dem kleinen Fruchtansatz direkt unter der Blüte.
6. Fruchtstütze: Wenn die Früchte größer werden, kann es sinnvoll sein, sie mit einer Stütze zu versehen, damit sie nicht abbrechen. Ihr könnt z.B. ein Netz oder einen alten Strumpf verwenden.
7. Mulchen: Bringt eine Schicht Mulchmaterial um die Pflanze herum aus. Das hält die Feuchtigkeit im Boden und unterdrückt Unkraut.
Ernte: Der Lohn der Mühe
Endlich ist es soweit! Die Erntezeit ist gekommen. Aber wie erkennt man, ob eine Wassermelone reif ist?
1. Klopftest: Klopft leicht gegen die Wassermelone. Wenn sie hohl klingt, ist sie reif.
2. Bauchblatt: Das Bauchblatt (die Stelle, an der die Wassermelone auf dem Boden liegt) sollte gelblich verfärbt sein.
3. Stiel: Der Stiel sollte trocken und leicht eingerollt sein.
4. Drucktest: Die Schale sollte sich leicht eindrücken lassen.
Wenn alle diese Kriterien zutreffen, könnt ihr eure Wassermelone ernten! Schneidet den Stiel mit einem scharfen Messer ab.
Zusätzliche Tipps und Tricks
* Sortenwahl: Wählt Sorten, die für den Anbau im Topf geeignet sind. “Sugar Baby” oder “Bush Sugar Baby” sind gute Optionen.
* Schädlinge: Achtet auf Schädlinge wie Blattläuse oder Spinnmilben. Bei Befall könnt ihr natürliche Schädlingsbekämpfungsmittel einsetzen.
* Krankheiten: Wassermelonen können anfällig für Pilzkrankheiten sein. Achtet auf eine gute Belüftung und vermeidet Staunässe.
* Überwinterung: Wassermelonen sind einjährig und können nicht überwintert werden.
Häufige Fehler und wie man sie vermeidet
* Zu kleiner Topf: Wassermelonen brauchen viel Platz für ihre Wurzeln. Ein zu kleiner Topf führt zu kümmerlichem Wachstum und geringer Ernte.
* Falsche Erde: Normale Gartenerde ist oft zu schwer und verdichtet sich schnell. Verwendet eine luftige, nährstoffreiche Erde.
* Zu wenig Wasser: Wassermelonen brauchen viel Wasser, besonders während der Fruchtbildung. Gießt regelmäßig und gründlich.
* Zu wenig Dünger: Wassermelonen sind Starkzehrer und brauchen regelmäßige Düngergaben.
* Zu wenig Sonne: Wassermelonen lieben die Sonne! Stellt den Topf an einen sonnigen, warmen Ort.
Fazit
Wassermelonen im Topf zu ziehen ist zwar etwas aufwendiger als im Garten, aber es ist definitiv machbar und lohnt sich! Mit der richtigen Vorbereitung, Pflege und etwas Geduld könnt ihr euch schon bald über eure eigenen, selbstgezogenen Wassermelonen freuen. Ich hoffe, meine Anleitung hat euch geholfen und inspiriert. Viel Spaß beim Gärtnern! Und vergesst nicht, mir von euren Erfolgen zu erzählen! Ich bin gespannt auf eure Erfahrungen!
Conclusion
So, there you have it! Growing watermelons in containers might seem like a daunting task, reserved for sprawling farms and experienced gardeners. But with the right approach, a little patience, and this simple DIY trick, you can absolutely cultivate these juicy summer delights right on your patio, balcony, or even a sunny windowsill. This method isn’t just about convenience; it’s about maximizing your yield in limited spaces and enjoying the unparalleled satisfaction of harvesting your own homegrown watermelons.
Why is this DIY trick a must-try? Because it empowers you to take control of your watermelon’s environment. Container gardening allows you to provide the perfect soil mix, optimal watering, and protection from pests and diseases that might plague in-ground plants. You can move your container to chase the sun, shield it from harsh weather, and ensure your watermelon receives the precise care it needs to thrive. Plus, let’s be honest, there’s something incredibly rewarding about nurturing a watermelon from seed to fruit in a pot – it’s a testament to your gardening skills and a conversation starter for anyone who visits your home.
But the beauty of this method lies in its adaptability. Feel free to experiment with different watermelon varieties. Bush varieties like ‘Bush Sugar Baby’ or ‘Golden Midget’ are particularly well-suited for containers, but don’t be afraid to try smaller-fruited vine varieties if you have the space for a trellis. Consider adding companion plants like marigolds or basil to your container to deter pests and attract pollinators. You can also adjust the soil mix to suit your specific climate and growing conditions. For example, if you live in a hot, dry area, adding more water-retentive materials like coco coir or vermiculite to your soil mix can help prevent your watermelon from drying out.
And speaking of soil, remember that proper drainage is crucial. Ensure your container has adequate drainage holes to prevent waterlogging, which can lead to root rot. You can also add a layer of gravel or pebbles at the bottom of the container to improve drainage.
Don’t forget the importance of consistent fertilization. Watermelons are heavy feeders, so regular applications of a balanced fertilizer are essential for healthy growth and abundant fruit production. Look for a fertilizer that is specifically formulated for fruiting plants, and follow the instructions on the label carefully.
Ultimately, the key to success with growing watermelons in containers is observation and adaptation. Pay close attention to your plant’s needs, and adjust your care routine accordingly. If you notice yellowing leaves, it could be a sign of nutrient deficiency or overwatering. If you see pests, take action immediately to prevent them from spreading.
So, what are you waiting for? Grab a container, some seeds, and get ready to embark on a rewarding gardening adventure. We encourage you to try this DIY trick and experience the joy of harvesting your own homegrown watermelons. And most importantly, don’t forget to share your experiences with us! We’d love to hear about your successes, challenges, and any variations you’ve tried. Share your photos, tips, and stories in the comments below – let’s build a community of container watermelon growers! This **DIY watermelon growing** method is sure to bring you joy.
Frequently Asked Questions (FAQ)
What is the best size container for growing watermelons?
The ideal container size for growing watermelons is at least 20 gallons, but larger is always better. A 25-30 gallon container will provide ample space for the roots to grow and support the developing fruit. The bigger the container, the more soil volume you have, which translates to better water retention and nutrient availability. Smaller containers can work for dwarf or bush varieties, but you’ll need to be extra diligent with watering and fertilizing.
What type of soil should I use for container watermelons?
Use a well-draining potting mix that is rich in organic matter. Avoid using garden soil, as it can become compacted in containers and hinder drainage. A good mix would include equal parts of compost, peat moss (or coco coir), and perlite or vermiculite. The compost provides nutrients, the peat moss (or coco coir) retains moisture, and the perlite or vermiculite improves drainage and aeration. You can also add a slow-release fertilizer to the mix to provide a steady supply of nutrients throughout the growing season.
How often should I water my container watermelon?
Watermelons need consistent moisture, especially during hot weather and fruit development. Water deeply whenever the top inch of soil feels dry to the touch. This could be daily or even twice a day during peak summer heat. Avoid overwatering, as this can lead to root rot. Ensure your container has adequate drainage holes to prevent water from pooling at the bottom. A good way to check is to stick your finger about two inches into the soil. If it feels dry, it’s time to water.
How much sunlight do watermelons need?
Watermelons need at least 6-8 hours of direct sunlight per day to thrive. Choose a location that receives full sun for most of the day. If you live in a particularly hot climate, you may need to provide some afternoon shade to prevent the leaves from scorching. If you’re growing your watermelon indoors, supplement with grow lights to ensure it gets enough light.
How do I pollinate my watermelon flowers?
Watermelons have separate male and female flowers. The female flowers have a small swelling at the base, which will eventually become the fruit. If you don’t see bees or other pollinators visiting your plants, you may need to hand-pollinate the flowers. To do this, use a small paintbrush to transfer pollen from the male flower to the female flower. The best time to hand-pollinate is in the morning, when the flowers are fully open.
When should I fertilize my container watermelon?
Start fertilizing your watermelon seedlings a few weeks after they emerge. Use a balanced fertilizer (e.g., 10-10-10) diluted to half strength. Once the plant starts to flower, switch to a fertilizer that is higher in phosphorus and potassium (e.g., 5-10-10) to promote fruit development. Fertilize every 2-3 weeks throughout the growing season. You can also supplement with liquid seaweed or fish emulsion for an extra boost of nutrients.
How do I know when my watermelon is ripe?
There are several signs that indicate a watermelon is ripe. The tendril closest to the fruit should be brown and dry. The spot where the watermelon rests on the ground (the “ground spot”) should be yellow or cream-colored. The watermelon should also sound hollow when you thump it. Ripe watermelons also tend to lose their glossy sheen and become slightly duller in appearance.
Can I grow multiple watermelons in one container?
While it’s possible to grow multiple watermelons in a large container, it’s generally best to stick to one plant per container, especially for larger varieties. Multiple plants will compete for resources, which can result in smaller fruit and reduced yields. If you’re growing smaller bush varieties, you might be able to get away with two plants per container, but be sure to provide ample space and nutrients.
How do I protect my container watermelon from pests and diseases?
Regularly inspect your plants for signs of pests or diseases. Common pests that affect watermelons include aphids, squash bugs, and vine borers. You can control these pests with insecticidal soap, neem oil, or by hand-picking them off the plants. Common diseases include powdery mildew and fungal leaf spots. Prevent these diseases by providing good air circulation, avoiding overhead watering, and applying a fungicide if necessary.
What are some good watermelon varieties for container gardening?
Some good watermelon varieties for container gardening include ‘Bush Sugar Baby’, ‘Golden Midget’, ‘Tiger Baby’, and ‘Yellow Doll’. These varieties are smaller and more compact than traditional watermelon varieties, making them well-suited for growing in containers. They also tend to mature earlier, which is an advantage in shorter growing seasons.

Leave a Comment