
Growing Asparagus for Nonstop Harvest might seem like a dream reserved for seasoned gardeners, but trust me, it’s totally achievable, even if you’re just starting out! Imagine stepping into your backyard and harvesting fresh, tender asparagus spears, ready to be steamed, grilled, or tossed into a delicious spring frittata. Sounds amazing, right?
Asparagus has a rich history, dating back to ancient Greece and Rome, where it was prized for its medicinal properties and culinary delights. The Romans even developed sophisticated cultivation techniques to ensure a steady supply of this delectable vegetable. Today, we can tap into that legacy and bring the joy of fresh asparagus to our own tables.
But why bother with growing asparagus for nonstop harvest yourself? Well, store-bought asparagus can be expensive and often lacks the vibrant flavor of freshly picked spears. Plus, there’s something incredibly satisfying about nurturing a plant from its humble beginnings to a bountiful harvest. This DIY guide will provide you with the essential tricks and hacks to establish a thriving asparagus patch that will reward you with years of delicious, homegrown goodness. I’m excited to share my tips and tricks to help you achieve a bountiful harvest!

Growing Asparagus for a Nonstop Harvest: My Foolproof Guide
Okay, so you want to grow asparagus? Excellent choice! Freshly harvested asparagus is a culinary delight, and trust me, once you taste homegrown, you’ll never go back to the store-bought stuff. It’s a bit of a commitment upfront, but the payoff is years of delicious spears. I’m going to walk you through everything I’ve learned about growing asparagus for a truly bountiful and almost nonstop harvest.
Choosing the Right Asparagus Variety
Before you even think about digging, you need to pick the right asparagus variety. This is crucial for success! Different varieties have different strengths, weaknesses, and yields. Here are a few of my favorites:
* Jersey Knight: This is a male hybrid, which means it produces very few seeds. Why is that good? Because the plant puts all its energy into spear production, not seed production. It’s also disease-resistant and produces high yields. This is generally considered a top choice for beginners.
* Jersey Giant: Similar to Jersey Knight, but the spears tend to be a bit thicker. It’s also a male hybrid and disease-resistant.
* Purple Passion: If you want something a little different, this variety produces beautiful purple spears that turn green when cooked. It’s sweeter and more tender than green varieties.
* Millennium: This is a newer variety that’s known for its cold hardiness and disease resistance. It’s a good choice if you live in a colder climate.
Important Note: I highly recommend buying asparagus crowns (one-year-old plants) rather than starting from seed. It will save you a lot of time and effort, and you’ll get a harvest much sooner.
Preparing the Asparagus Bed: Location, Location, Location!
Asparagus is a perennial, meaning it will come back year after year. So, you need to choose a location carefully. This is a long-term investment, so do it right the first time!
* Sunlight: Asparagus needs at least 6-8 hours of direct sunlight per day. The more sun, the better the yield.
* Soil: Asparagus prefers well-drained soil that is rich in organic matter. It doesn’t like to sit in soggy soil. A slightly sandy loam is ideal.
* Space: Asparagus plants can get quite large, so you’ll need to give them plenty of space. Allow at least 18 inches between plants and 4-5 feet between rows.
* Avoid Shady Areas: Don’t plant near trees or buildings that will cast shade on your asparagus bed.
* Consider Drainage: If your soil is heavy clay, amend it with plenty of compost and other organic matter to improve drainage. You might even consider building a raised bed.
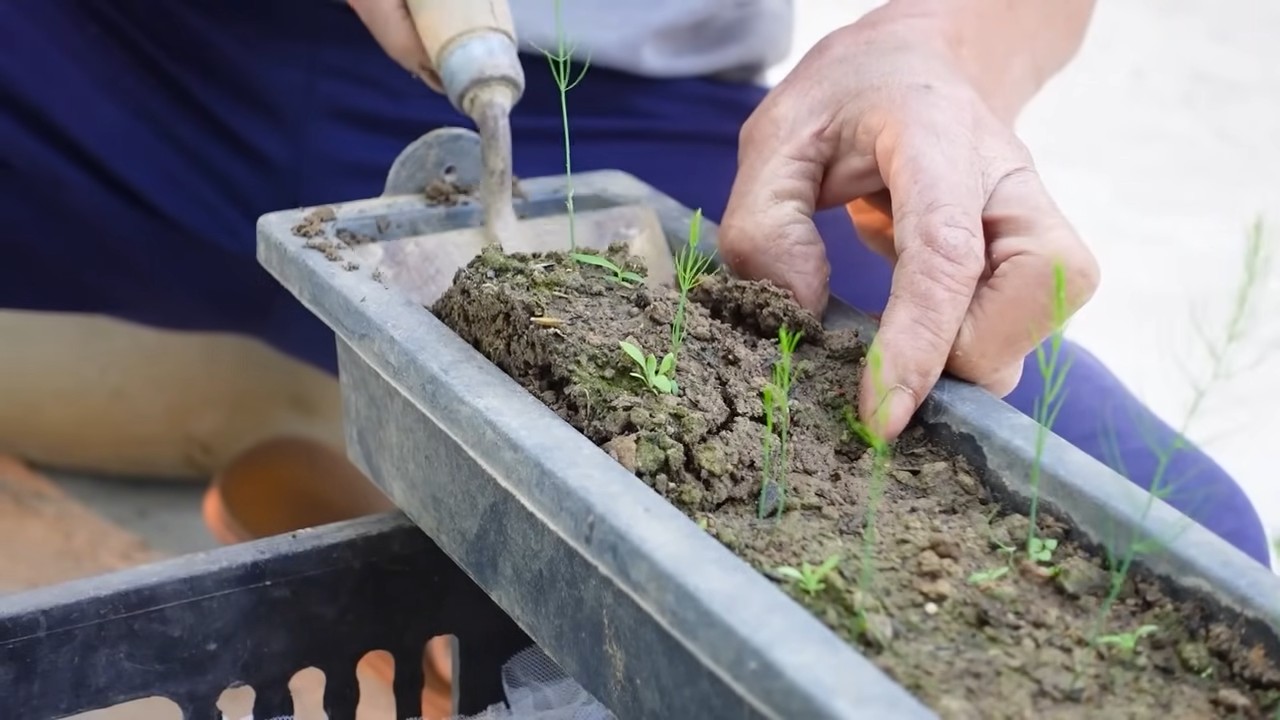
Step-by-Step Planting Guide
Okay, now for the fun part: planting! Here’s how I plant my asparagus crowns:
1. Prepare the Soil: This is the most important step! Dig a trench that is about 12 inches wide and 6-8 inches deep. Amend the soil in the trench with plenty of compost, well-rotted manure, or other organic matter. I like to add a slow-release fertilizer specifically formulated for vegetables at this stage.
2. Create a Ridge: In the bottom of the trench, create a small ridge of soil down the center. This is where you’ll place the asparagus crowns.
3. Position the Crowns: Place the asparagus crowns on the ridge, spacing them about 18 inches apart. Gently spread out the roots around the ridge.
4. Cover the Crowns: Cover the crowns with about 2-3 inches of soil. Water thoroughly.
5. Gradually Fill the Trench: As the asparagus spears emerge, gradually fill in the trench with soil. This will encourage the plants to develop a strong root system. Continue filling the trench until it is level with the surrounding soil.
6. Mulch: Apply a layer of mulch around the plants to help retain moisture, suppress weeds, and regulate soil temperature. I like to use straw, wood chips, or shredded leaves.
Caring for Your Asparagus Patch: The Key to a Nonstop Harvest
Once your asparagus is planted, it’s important to provide proper care to ensure a healthy and productive patch.
* Watering: Asparagus needs consistent moisture, especially during the growing season. Water deeply whenever the soil feels dry to the touch.
* Fertilizing: Fertilize your asparagus plants in early spring and again after the harvest season. Use a balanced fertilizer or a fertilizer specifically formulated for vegetables. I also like to side-dress with compost throughout the growing season.
* Weeding: Keep your asparagus bed free of weeds. Weeds compete with the asparagus for nutrients and water. Hand-pull weeds regularly or use a hoe to cultivate the soil. Be careful not to damage the asparagus crowns.
* Pest and Disease Control: Asparagus is relatively pest-resistant, but it can be susceptible to asparagus beetles and crown rot. Inspect your plants regularly for signs of pests or disease. If you find any problems, take action immediately. For asparagus beetles, you can hand-pick them off the plants or use an insecticidal soap. For crown rot, improve drainage and avoid overwatering.
* Fern Management: After the harvest season, allow the asparagus ferns to grow and mature. These ferns will provide energy for the plants to store in their roots for the following year’s harvest. In late fall or early winter, after the ferns have turned brown, cut them back to the ground.
The Patience Game: When to Harvest
This is the hardest part! You need to be patient. Don’t harvest any spears during the first year after planting. This allows the plants to establish a strong root system. In the second year, you can harvest a few spears for a short period (about 2-3 weeks). In the third year and beyond, you can harvest for a longer period (6-8 weeks).
* Harvesting Technique: To harvest asparagus, snap off the spears at ground level. The spears should be about 6-8 inches tall and about as thick as your finger.
* Harvesting Frequency: Harvest asparagus every day or every other day during the harvest season. The more you harvest, the more the plants will produce.
* Stop Harvesting: Stop harvesting when the spears become thin and spindly. This indicates that the plants are starting to run out of energy. Allow the remaining spears to grow into ferns.
Extending the Harvest Season: My Secret Weapon
Okay, here’s my secret to extending the asparagus harvest season:
* Succession Planting: Plant different varieties of asparagus that mature at different times. For example, you could plant an early-maturing variety like Jersey Knight and a late-maturing variety like Millennium.
* Cold Frames or Row Covers: Use cold frames or row covers to protect your asparagus plants from frost in early spring. This will allow you to start harvesting earlier.
* Mulching: Apply a thick layer of mulch around your asparagus plants in the fall. This will help to insulate the soil and protect the crowns from cold temperatures.
* Watering: Water your asparagus plants regularly throughout the growing season. This will help to keep them healthy and productive.
* Fertilizing: Fertilize your asparagus plants in early spring and again after the harvest season. This will provide them with the nutrients they need to produce a bountiful harvest.
Dealing with Common Asparagus Problems
Even with the best care, you might encounter some problems with your asparagus patch. Here are a few common issues and how to deal with them:
* Asparagus Beetles: These small, colorful beetles can damage asparagus spears and ferns. Hand-pick them off the plants or use an insecticidal soap.
* Crown Rot: This fungal disease can cause the asparagus crowns to rot. Improve drainage and avoid overwatering.
* Fusarium Wilt: This fungal disease can cause the asparagus plants to wilt and die. Plant disease-resistant varieties and avoid planting in soil that has previously been used to grow tomatoes, potatoes, or peppers.
* Weeds: Weeds can compete with asparagus for nutrients and water. Hand-pull weeds regularly or use a hoe to cultivate the soil. Be careful not to damage the asparagus crowns.
Preserving Your Asparagus Harvest
So, you’ve got a bumper crop of asparagus. What do you do with it all? Here are a few ways to preserve your harvest:
* Refrigerating: Store asparagus in the refrigerator for up to a week. Wrap the spears in a damp paper towel and place them in a plastic bag.
* Freezing: Blanch asparagus for 2-3 minutes, then plunge it into ice water. Drain well and freeze in freezer bags.
* Pickling: Pickle asparagus for a tangy and delicious treat. There are many recipes available online.
* Canning:
Conclusion
So, there you have it – the secret to a truly bountiful asparagus harvest, year after year! This isn’t just about planting asparagus; it’s about understanding its needs and implementing a few simple, yet crucial, techniques to maximize its potential. We’ve walked you through the process, from selecting the right crowns to nurturing them with proper soil preparation, watering, and fertilization. But the real magic lies in the harvesting strategy – the key to unlocking that nonstop supply of delicious, tender spears.
Why is this DIY asparagus growing trick a must-try? Because it transforms asparagus from a once-a-year treat into a continuous source of fresh, homegrown goodness. Imagine stepping into your garden and harvesting enough asparagus for a side dish, a frittata, or even a creamy asparagus soup, whenever the craving strikes. No more relying on expensive, often less-than-fresh, store-bought asparagus. This method empowers you to control the quality and quantity of your harvest, ensuring you always have the best asparagus at your fingertips.
Beyond the basic method, there are several exciting variations you can explore. Consider companion planting to further enhance your asparagus patch. Herbs like basil, parsley, and marigolds can deter pests and attract beneficial insects. You could also experiment with different asparagus varieties to find your personal favorite. ‘Jersey Knight’ is known for its high yields and disease resistance, while ‘Purple Passion’ offers a unique color and slightly sweeter flavor. Don’t be afraid to get creative with your soil amendments, too. Adding compost tea or fish emulsion can provide an extra boost of nutrients.
The key takeaway is that growing asparagus for a nonstop harvest is achievable with a little knowledge and effort. It’s an investment that pays off handsomely in terms of flavor, freshness, and the sheer satisfaction of growing your own food. This method allows you to enjoy the fruits (or rather, spears) of your labor for years to come.
We wholeheartedly encourage you to give this DIY trick a try. Start small, perhaps with just a few crowns, and gradually expand your patch as you gain experience. The rewards are well worth the effort. And most importantly, we want to hear about your experiences! Share your successes, your challenges, and any tips or variations you discover along the way. Let’s build a community of asparagus enthusiasts, all enjoying the benefits of a truly nonstop harvest. Share your photos and stories on social media using #NonstopAsparagusHarvest and let us know how this guide has helped you achieve your asparagus growing goals. Happy gardening!
Frequently Asked Questions (FAQ)
What type of soil is best for growing asparagus?
Asparagus thrives in well-drained, sandy loam soil with a pH between 6.5 and 7.5. Good drainage is crucial, as asparagus roots can rot in soggy conditions. Before planting, amend your soil with plenty of organic matter, such as compost or well-rotted manure, to improve drainage and fertility. A soil test is highly recommended to determine your soil’s pH and nutrient levels. If your soil is heavy clay, consider building raised beds to improve drainage.
How long does it take for asparagus to mature and produce a harvest?
Asparagus typically takes two to three years to mature and produce a significant harvest. In the first year, focus on establishing strong roots and allowing the ferns to grow tall and bushy. Resist the urge to harvest any spears during this time. In the second year, you can harvest a few spears for a short period (about two weeks). By the third year, your asparagus patch should be ready for a full harvest, lasting six to eight weeks. Patience is key when growing asparagus, but the wait is well worth it.
How often should I water my asparagus plants?
Asparagus needs consistent moisture, especially during the growing season. Water deeply once or twice a week, depending on the weather and soil conditions. Aim to keep the soil consistently moist but not waterlogged. Mulching around the plants can help retain moisture and suppress weeds. During dry spells, increase the frequency of watering. Avoid overhead watering, as this can promote fungal diseases. Drip irrigation is an excellent option for delivering water directly to the roots.
What is the best fertilizer for asparagus?
Asparagus benefits from regular fertilization to support its vigorous growth. In early spring, before the spears emerge, apply a balanced fertilizer, such as 10-10-10, according to the package instructions. You can also side-dress with compost or well-rotted manure. After the harvest season, fertilize again to help the plants replenish their energy reserves for the following year. Avoid over-fertilizing, as this can lead to excessive fern growth at the expense of spear production. Organic fertilizers, such as bone meal and blood meal, are also excellent choices.
How do I control weeds in my asparagus patch?
Weeds can compete with asparagus for nutrients and water, so it’s important to keep your patch weed-free. Hand-pulling weeds is the most effective method, especially when they are small. Mulching around the plants can also help suppress weed growth. Avoid using herbicides, as they can damage the asparagus plants. Regularly cultivate the soil around the plants to disrupt weed seedlings. Be careful not to damage the asparagus crowns when cultivating.
What are some common pests and diseases that affect asparagus?
Asparagus beetles are a common pest that can damage the spears and ferns. Hand-picking the beetles and their larvae is an effective control method. You can also use insecticidal soap or neem oil. Asparagus rust is a fungal disease that can cause orange pustules on the ferns. Ensure good air circulation around the plants and avoid overhead watering to prevent rust. If rust occurs, remove and destroy the affected ferns. Crown rot is another disease that can affect asparagus, especially in poorly drained soil. Improve drainage and avoid overwatering to prevent crown rot.
How do I know when to stop harvesting asparagus spears?
The harvesting period typically lasts six to eight weeks. As the season progresses, the spears will become thinner and more spindly. This is a sign that the plants are starting to put their energy into fern growth. Stop harvesting when the spear production declines significantly or when the ferns start to emerge from the spears. Allowing the ferns to grow will help the plants replenish their energy reserves for the following year.
Can I grow asparagus in containers?
Yes, you can grow asparagus in containers, but it requires a large container (at least 18 inches in diameter and depth) and well-drained potting mix. Choose a sunny location and water regularly. Container-grown asparagus may not produce as many spears as plants grown in the ground, but it’s a good option for gardeners with limited space. Be sure to fertilize regularly, as nutrients can leach out of the container more quickly.
What do I do with the asparagus ferns after the harvest season?
After the harvest season, allow the asparagus ferns to grow tall and bushy. They will photosynthesize and store energy in the roots for the following year’s harvest. In late fall or early winter, after the ferns have turned brown and died back, cut them down to the ground. This will help prevent diseases and pests from overwintering in the patch. You can also add a layer of compost or mulch to protect the crowns from the cold.
How can I ensure a nonstop asparagus harvest year after year?
The key to a nonstop asparagus harvest is proper care and maintenance. This includes selecting the right crowns, preparing the soil properly, watering and fertilizing regularly, controlling weeds and pests, and allowing the ferns to grow after the harvest season. By following these tips, you can enjoy a bountiful harvest of fresh, homegrown asparagus for many years to come. Remember, consistent care is the foundation for a truly **nonstop asparagus harvest**.
Leave a Comment