
Growing Bok Choy for Beginners: Your journey to fresh, homegrown greens starts here! Have you ever dreamt of stepping into your backyard and harvesting crisp, delicious Bok Choy for your stir-fries or salads? It’s easier than you think, and this DIY guide is your secret weapon. Forget those wilted, overpriced vegetables at the grocery store; we’re about to unlock the secrets to cultivating your own thriving Bok Choy patch, even if you’re a complete newbie.
Bok Choy, also known as Pak Choi, boasts a rich history deeply rooted in Chinese cuisine, dating back over 5,000 years. It’s not just a tasty vegetable; it’s a cultural staple! For centuries, it has been cherished for its nutritional value and versatility in countless dishes. Now, you can bring this ancient tradition to your own home.
In today’s world, where we’re increasingly conscious of what we eat and where it comes from, growing Bok Choy for beginners offers a fantastic way to connect with nature, reduce your carbon footprint, and enjoy the unparalleled flavor of freshly harvested produce. Plus, let’s be honest, there’s something incredibly satisfying about nurturing a plant from seed to table. This DIY guide will provide you with simple, step-by-step instructions, insider tips, and troubleshooting advice to ensure your Bok Choy growing experience is a resounding success. Get ready to roll up your sleeves and embark on this exciting gardening adventure with me!
Growing Bok Choy: A Beginner’s Guide to Delicious Homegrown Greens
Hey there, fellow gardening enthusiasts! I’m so excited you’re thinking about growing bok choy. It’s a fantastic vegetable – packed with nutrients, easy to grow, and incredibly versatile in the kitchen. I remember when I first started, I was a little intimidated, but trust me, with a few simple steps, you’ll be harvesting your own delicious bok choy in no time. Let’s dive in!
Choosing Your Bok Choy Variety
First things first, let’s talk about varieties. There are a few different types of bok choy you can choose from, each with its own unique characteristics.
* Standard Bok Choy: This is the most common type, with large, dark green leaves and thick, white stalks. It’s a reliable grower and has a mild, slightly sweet flavor.
* Baby Bok Choy: As the name suggests, this is a smaller version of the standard bok choy. It’s more tender and has a slightly more delicate flavor. I personally love using baby bok choy in stir-fries.
* Shanghai Bok Choy: This variety has light green leaves and pale green stalks. It’s known for its mild flavor and crisp texture.
* Purple Bok Choy: For a bit of visual interest, try growing purple bok choy! It has beautiful purple leaves that add a pop of color to your garden and your plate.
I recommend starting with standard or baby bok choy if you’re a beginner. They’re generally easier to grow and more readily available.
Preparing Your Garden Bed
Bok choy thrives in well-drained, fertile soil. Here’s how I prepare my garden bed:
* Sunlight: Bok choy needs at least 4-6 hours of sunlight per day. Choose a spot in your garden that gets plenty of sunshine.
* Soil: The ideal soil for bok choy is rich in organic matter and has a pH between 6.0 and 7.5.
* Amendments: Before planting, amend your soil with compost or well-rotted manure. This will improve drainage, add nutrients, and help retain moisture. I usually add a generous layer of compost – about 2-3 inches – and mix it in thoroughly.
* Drainage: Make sure your soil drains well. Bok choy doesn’t like to sit in soggy soil, which can lead to root rot. If your soil is heavy clay, consider adding some sand or perlite to improve drainage.
Planting Bok Choy
You can start bok choy from seeds or transplants. I’ve done both, and I find that starting from seeds is just as easy and often more rewarding.
* Starting from Seeds:
* Timing: Bok choy is a cool-season crop, so the best time to plant it is in early spring or late summer. In the spring, plant your seeds 2-4 weeks before the last expected frost. In the late summer, plant them 6-8 weeks before the first expected frost.
* Sowing: Sow seeds directly into your prepared garden bed, about 1/4 to 1/2 inch deep and 1-2 inches apart.
* Watering: Gently water the soil after planting. Keep the soil consistently moist until the seeds germinate, which usually takes about 5-7 days.
* Thinning: Once the seedlings emerge and have a few true leaves, thin them to about 6-8 inches apart for standard bok choy and 4-6 inches apart for baby bok choy. This will give them enough room to grow.
* Starting from Transplants:
* Timing: You can purchase bok choy transplants from your local garden center. Plant them at the same time you would sow seeds – in early spring or late summer.
* Planting: Dig a hole that’s slightly larger than the root ball of the transplant. Gently remove the transplant from its container and place it in the hole. Backfill with soil and water thoroughly.
* Spacing: Space transplants 6-8 inches apart for standard bok choy and 4-6 inches apart for baby bok choy.
Caring for Your Bok Choy
Once your bok choy is planted, it’s important to provide it with the right care to ensure a healthy and bountiful harvest.
* Watering: Bok choy needs consistent moisture, especially during hot, dry weather. Water deeply whenever the top inch of soil feels dry. I usually water my bok choy every 2-3 days, but this will depend on the weather and soil conditions.
* Fertilizing: Bok choy is a heavy feeder, so it benefits from regular fertilization. I like to use a balanced organic fertilizer, such as fish emulsion or compost tea, every 2-3 weeks. Follow the instructions on the fertilizer label.
* Weeding: Keep your garden bed free of weeds, which can compete with your bok choy for nutrients and water. Hand-pull weeds regularly or use a hoe to cultivate the soil.
* Pest Control: Bok choy can be susceptible to a few common pests, such as aphids, cabbage worms, and flea beetles.
* Aphids: These tiny insects suck the sap from plants, causing them to become weak and stunted. You can control aphids by spraying them with a strong stream of water or by using insecticidal soap.
* Cabbage Worms: These green caterpillars feed on the leaves of bok choy, leaving behind holes. You can control cabbage worms by hand-picking them off the plants or by using Bacillus thuringiensis (Bt), a natural insecticide.
* Flea Beetles: These small, jumping beetles chew tiny holes in the leaves of bok choy. You can control flea beetles by covering your plants with row covers or by using insecticidal soap.
* Bolting: Bolting is when a plant prematurely flowers and goes to seed. This can happen when bok choy is exposed to hot weather or stress. To prevent bolting, try to plant your bok choy at the right time of year and provide it with consistent moisture and nutrients. If your bok choy does start to bolt, you can still harvest the leaves, but they may be a bit more bitter.
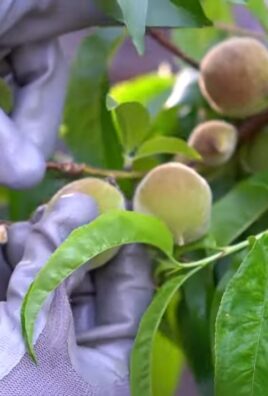
Harvesting Bok Choy
Harvest time is the most rewarding part! You can harvest bok choy at any stage of growth, depending on your preference.
* Baby Bok Choy: You can harvest baby bok choy when it’s about 4-6 inches tall. Simply cut the entire plant at the base.
* Standard Bok Choy: You can harvest standard bok choy when it’s about 12-18 inches tall. You can either cut the entire plant at the base or harvest individual leaves as needed. If you harvest individual leaves, start with the outer leaves and work your way inward.
* Harvesting Tips:
* Harvest bok choy in the morning, when the leaves are crisp and fresh.
* Use a sharp knife or scissors to cut the plants.
* Wash the bok choy thoroughly before using it.
Using Your Homegrown Bok Choy
Now for the fun part – cooking with your homegrown bok choy! Bok choy is incredibly versatile and can be used in a variety of dishes.
* Stir-fries: Bok choy is a classic ingredient in stir-fries. Simply chop it up and add it to your favorite stir-fry recipe.
* Soups: Bok choy adds a delicious flavor and texture to soups. Add it to your favorite soup recipe during the last few minutes of cooking.
* Salads: Baby bok choy can be used in salads. Its tender leaves and mild flavor make it a great addition to any salad.
* Steaming: Steamed bok choy is a simple and healthy side dish. Steam it for a few minutes until it’s tender-crisp.
* Grilling: Grilled bok choy is a delicious and smoky side dish. Brush it with olive oil and grill it over medium heat until it’s tender.
I personally love using my homegrown bok choy in stir-fries with garlic, ginger, and soy sauce. It’s a quick, easy, and healthy meal that’s packed with flavor.
Troubleshooting
Even with the best care, you might encounter a few challenges when growing bok choy. Here are some common problems and how to address them:
* Yellowing Leaves: This can be caused by a variety of factors, including nutrient deficiencies, overwatering, or underwatering. Make sure your soil is well-drained and that you’re providing your bok choy with consistent moisture and nutrients.
* Holes in Leaves: This is usually caused by pests, such as cabbage worms or flea beetles. Inspect your plants regularly and take action to control pests as needed.
* Bolting: As mentioned earlier
Conclusion
So, there you have it! Growing your own bok choy, even as a complete beginner, is not only achievable but incredibly rewarding. We’ve walked you through the entire process, from selecting the right seeds to harvesting your crisp, delicious leaves. But why should you bother with this DIY endeavor?
First and foremost, the taste. Store-bought bok choy simply can’t compare to the vibrant, fresh flavor of homegrown. Imagine stir-fries bursting with flavor, salads with a satisfying crunch, and soups elevated by the subtle sweetness of your own harvest. Beyond the taste, you’re also gaining control over the quality of your food. You know exactly what went into growing your bok choy – no harmful pesticides or questionable practices. This is especially important for those seeking organic and sustainable food options.
Furthermore, growing bok choy is a fantastic way to connect with nature and learn about the growing process. It’s a therapeutic activity that can reduce stress and provide a sense of accomplishment. Watching your tiny seeds sprout and mature into leafy greens is a truly satisfying experience. Plus, it’s a great way to get kids involved in gardening and teach them about where their food comes from.
But the benefits don’t stop there. Growing your own bok choy can also save you money. While the initial investment in seeds and supplies might seem like a cost, you’ll quickly recoup that expense with the abundance of bok choy you’ll be harvesting. And let’s not forget the environmental impact. By growing your own food, you’re reducing your carbon footprint by eliminating the need for transportation and packaging.
Now, let’s talk about variations. While we’ve focused on the basic method, there are plenty of ways to customize your bok choy growing experience. Consider trying different varieties of bok choy, such as Shanghai bok choy or baby bok choy, each with its own unique flavor and texture. You can also experiment with companion planting, pairing your bok choy with other vegetables and herbs that can help deter pests and improve growth. For example, planting marigolds nearby can help repel aphids, while planting dill can attract beneficial insects.
If you’re short on space, don’t let that deter you. Bok choy grows beautifully in containers, making it perfect for balconies, patios, or even windowsills. Just be sure to choose a pot that’s at least 6 inches deep and wide, and use a well-draining potting mix.
Growing bok choy is a journey, and we encourage you to embark on it. Don’t be afraid to experiment, learn from your mistakes, and most importantly, have fun! We’re confident that you’ll be amazed at how easy and rewarding it is to grow your own delicious and nutritious bok choy.
So, grab your seeds, get your hands dirty, and start growing! We can’t wait to hear about your experiences. Share your photos, tips, and questions in the comments below. Let’s build a community of bok choy enthusiasts and inspire others to grow their own food. Happy gardening!
Frequently Asked Questions (FAQ)
What is the best time of year to plant bok choy?
Bok choy is a cool-season crop, meaning it thrives in cooler temperatures. The best time to plant bok choy is in early spring or late summer/early fall. In spring, plant as soon as the soil can be worked, typically 4-6 weeks before the last expected frost. For a fall harvest, plant 6-8 weeks before the first expected frost. Avoid planting during the hottest months of summer, as the heat can cause the bok choy to bolt (go to seed prematurely), resulting in bitter-tasting leaves. If you live in a region with mild winters, you may be able to grow bok choy throughout the winter months.
How much sunlight does bok choy need?
Bok choy prefers partial shade, especially during the warmer months. While it can tolerate full sun, the leaves may become scorched or wilted in intense heat. Aim for at least 4-6 hours of sunlight per day. If you’re growing bok choy in a container, you can easily move it to a shadier location during the hottest part of the day. If you’re growing it in the ground, consider planting it near taller plants that can provide some shade.
What kind of soil is best for growing bok choy?
Bok choy prefers well-draining, fertile soil that is rich in organic matter. The ideal soil pH is between 6.0 and 7.5. Before planting, amend the soil with compost or well-rotted manure to improve drainage and fertility. You can also add a slow-release fertilizer to provide essential nutrients. If you’re growing bok choy in a container, use a high-quality potting mix that is specifically formulated for vegetables. Avoid using garden soil in containers, as it can become compacted and prevent proper drainage.
How often should I water bok choy?
Bok choy needs consistent moisture to thrive. Water deeply and regularly, especially during dry periods. Aim to keep the soil consistently moist but not waterlogged. Overwatering can lead to root rot, while underwatering can cause the leaves to wilt and become bitter. Check the soil moisture regularly by sticking your finger into the soil. If the top inch of soil feels dry, it’s time to water. When watering, water at the base of the plant to avoid wetting the leaves, which can increase the risk of fungal diseases.
What are some common pests and diseases that affect bok choy?
Bok choy is susceptible to several common pests and diseases, including aphids, cabbage worms, flea beetles, and downy mildew. Aphids are small, sap-sucking insects that can cause the leaves to become distorted and yellowed. Cabbage worms are the larvae of cabbage butterflies and moths, and they can chew large holes in the leaves. Flea beetles are tiny, jumping insects that can create small holes in the leaves. Downy mildew is a fungal disease that can cause yellow spots on the leaves.
To prevent pests and diseases, practice good garden hygiene. Remove any dead or diseased leaves promptly, and keep the area around your bok choy plants free of weeds. You can also use insecticidal soap or neem oil to control aphids, cabbage worms, and flea beetles. For downy mildew, ensure good air circulation around your plants and avoid overhead watering. If you notice any signs of pests or diseases, take action immediately to prevent them from spreading.
How do I harvest bok choy?
Bok choy can be harvested at any stage of growth, depending on your preference. Baby bok choy can be harvested when the leaves are about 4-6 inches long, while mature bok choy can be harvested when the heads are about 12-18 inches tall. To harvest, simply cut the entire head of bok choy at the base of the plant with a sharp knife. You can also harvest individual leaves as needed, starting with the outer leaves. After harvesting, wash the bok choy thoroughly and store it in the refrigerator for up to a week.
Can I grow bok choy indoors?
Yes, you can grow bok choy indoors, especially if you have a sunny windowsill or grow lights. Choose a container that is at least 6 inches deep and wide, and use a well-draining potting mix. Provide at least 6 hours of light per day, either from natural sunlight or grow lights. Water regularly, keeping the soil consistently moist but not waterlogged. Fertilize every 2-3 weeks with a balanced liquid fertilizer. Indoor-grown bok choy may not grow as large as outdoor-grown bok choy, but it can still provide a delicious and nutritious harvest.
How can I prevent bok choy from bolting?
Bolting, or premature flowering, can occur when bok choy is exposed to stress, such as high temperatures or inconsistent watering. To prevent bolting, plant bok choy at the appropriate time of year (early spring or late summer/early fall), provide consistent moisture, and protect the plants from extreme heat. You can also choose bolt-resistant varieties of bok choy. If your bok choy does start to bolt, you can still harvest the leaves, but they may become bitter-tasting.
What are some good companion plants for bok choy?
Companion planting can help improve the growth and health of your bok choy plants. Some good companion plants for bok choy include:
* Marigolds: Repel aphids and other pests.
* Dill: Attracts beneficial insects that prey on pests.
* Garlic: Repels pests and helps prevent fungal diseases.
* Onions: Repel pests and improve soil health.
* Lettuce: Provides ground cover and helps retain moisture.
* Spinach: Provides ground cover and helps retain moisture.
Avoid planting bok choy near members of the brassica family, such as broccoli, cabbage, and cauliflower, as they can attract the same pests and diseases.
Leave a Comment