
Growing Brussels Sprouts Planters might seem daunting, but trust me, it’s a rewarding journey that brings fresh, homegrown goodness right to your doorstep! Have you ever imagined plucking perfectly formed Brussels sprouts from your own patio, ready to roast or sauté? This DIY guide will transform that dream into a delicious reality, even if you’re short on space.
For centuries, Brussels sprouts have been a staple in European cuisine, particularly in Belgium (hence the name!). They were cultivated as early as the 13th century, and their popularity has only grown since then. But let’s be honest, store-bought Brussels sprouts can sometimes be a bit… underwhelming. That’s where the magic of DIY comes in!
Why bother with growing Brussels Sprouts Planters yourself? Well, for starters, you’ll have access to the freshest, most flavorful sprouts imaginable. Plus, you’ll know exactly what’s gone into them – no mystery pesticides or long-distance travel. More importantly, this DIY project is incredibly satisfying. There’s something truly special about nurturing a plant from seedling to harvest, and the taste of success (literally!) is unbeatable. So, let’s dive in and unlock the secrets to successful Brussels sprout gardening in containers!

Growing Brussels Sprouts in Containers: A DIY Guide
Hey there, fellow gardeners! I’m so excited to share my experience with growing Brussels sprouts in containers. It’s totally doable, even if you don’t have a huge backyard. I’ve found it’s a fantastic way to enjoy fresh, homegrown sprouts right on my patio. Let’s dive into how you can do it too!
Choosing the Right Container and Soil
First things first, you need to set the stage for success. This means picking the perfect pot and soil.
* Container Size: Brussels sprouts need room to grow, so don’t skimp on the container size. I recommend a pot that’s at least 12 inches in diameter and 12 inches deep. Bigger is generally better, as it gives the roots plenty of space to spread out. A 5-gallon bucket or larger works great.
* Material: The material of the container isn’t super critical, but I prefer plastic or resin pots because they retain moisture better than terracotta, which can dry out quickly. Make sure your chosen container has drainage holes! Brussels sprouts hate sitting in soggy soil.
* Soil: Forget using garden soil straight from the ground. It’s often too heavy and doesn’t drain well in containers. Instead, opt for a high-quality potting mix. I like to use a mix that’s specifically formulated for vegetables, or you can create your own by combining equal parts of:
* Peat moss or coconut coir (for moisture retention)
* Compost (for nutrients)
* Perlite or vermiculite (for drainage)
Planting Your Brussels Sprouts
Now for the fun part – getting those little sprouts started!
1. Starting from Seed (Optional): You can start Brussels sprouts from seed indoors about 6-8 weeks before the last expected frost. Sow the seeds about ½ inch deep in seed-starting trays filled with seed-starting mix. Keep the soil moist and warm (around 70-75°F). Once the seedlings have a few sets of true leaves, you can transplant them into individual pots.
2. Buying Transplants (Recommended for Beginners): Honestly, buying transplants from a local nursery is the easiest way to go, especially if you’re new to growing Brussels sprouts. Look for healthy-looking plants with sturdy stems and no signs of pests or diseases.
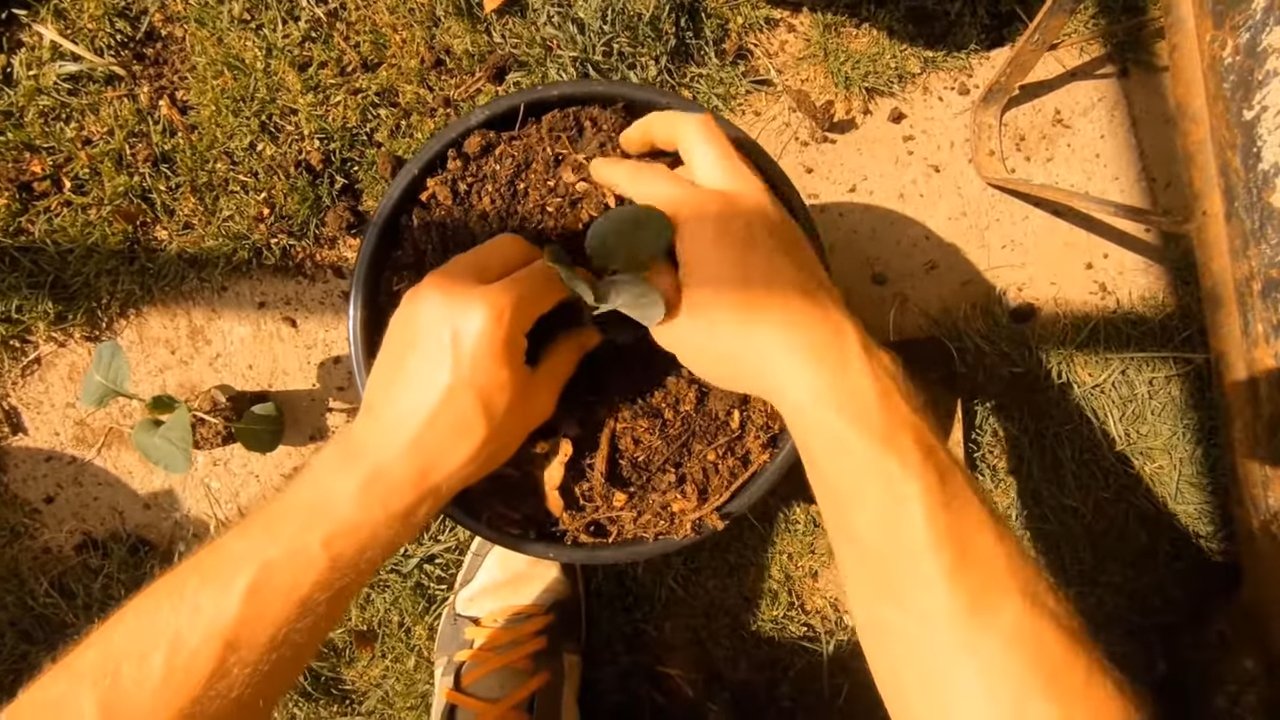
3. Planting the Transplants:
* Fill your container with the potting mix, leaving a few inches of space at the top.
* Gently remove the transplant from its nursery pot. Loosen the roots a bit if they’re tightly packed.
* Dig a hole in the potting mix that’s large enough to accommodate the root ball.
* Place the transplant in the hole, making sure the top of the root ball is level with the soil surface.
* Fill in around the transplant with potting mix and gently firm the soil.
* Water thoroughly to settle the soil.
Caring for Your Brussels Sprouts
Brussels sprouts need consistent care to thrive. Here’s what I’ve learned:
1. Watering: Brussels sprouts need consistent moisture, especially when they’re actively growing. Water deeply whenever the top inch of soil feels dry to the touch. Avoid overwatering, as this can lead to root rot. I usually water every 2-3 days, but it depends on the weather.
2. Sunlight: Brussels sprouts need at least 6 hours of sunlight per day. Place your container in a sunny spot where it will receive plenty of direct sunlight. If you don’t have a sunny spot, you can supplement with grow lights.
3. Fertilizing: Brussels sprouts are heavy feeders, so they need regular fertilization. I like to use a balanced liquid fertilizer (like a 10-10-10) every 2-3 weeks. You can also amend the soil with compost or aged manure at planting time.
4. Pest Control: Keep an eye out for common pests like aphids, cabbage worms, and flea beetles. I’ve found that hand-picking pests off the plants is often the most effective method. You can also use insecticidal soap or neem oil to control pests.
5. Supporting the Plants: As Brussels sprouts grow, they can become quite tall and top-heavy, especially when the sprouts start to develop. You may need to provide support to prevent the plants from falling over. I use bamboo stakes and twine to support my plants.
6. Removing Yellowing Leaves: As the plant grows, the lower leaves will naturally start to yellow and die. Remove these leaves to improve air circulation and prevent disease.
Harvesting Your Brussels Sprouts
The moment we’ve all been waiting for! Harvesting those delicious sprouts.
1. Timing: Brussels sprouts are typically ready to harvest in the fall, after a few light frosts. The cold weather actually improves their flavor, making them sweeter and less bitter.
2. How to Harvest: Start harvesting the sprouts from the bottom of the plant first. They should be firm, green, and about 1-2 inches in diameter. To harvest, simply twist the sprout off the stem.
3. Continued Harvest: You can continue to harvest sprouts from the bottom up as they mature. The plant will continue to produce sprouts for several weeks, or even months, depending on the weather.
4. Topping the Plant (Optional): About a month before your expected first frost, you can top the plant by cutting off the top few inches of the stem. This will encourage the remaining sprouts to mature more quickly.
Troubleshooting
Even with the best care, you might encounter some problems. Here are a few common issues and how to deal with them:
* Yellowing Leaves: This can be caused by overwatering, underwatering, nutrient deficiencies, or pests. Check the soil moisture and adjust your watering accordingly. Fertilize regularly and inspect the plants for pests.
* Sprouts Not Forming: This can be caused by insufficient sunlight, poor soil, or lack of fertilization. Make sure your plants are getting at least 6 hours of sunlight per day, and fertilize regularly.
* Pest Infestations: As mentioned earlier, keep an eye out for common pests and take action to control them.
* Bolting: Bolting (premature flowering) can occur if the plants are exposed to extreme temperature fluctuations. Try to protect your plants from extreme heat or cold.
Extra Tips for Success
Here are a few extra tips that I’ve learned along the way:
* Choose the Right Variety: Some Brussels sprout varieties are better suited for container growing than others. Look for compact or dwarf varieties.
* Rotate Your Crops: Don’t plant Brussels sprouts in the same container year after year. Rotate your crops to prevent soilborne diseases.
* Mulch: Add a layer of mulch around the base of the plants to help retain moisture and suppress weeds.
* Protect from Frost: If you live in an area with harsh winters, you may need to protect your plants from frost. You can cover them with a blanket or move them to a sheltered location.
* Enjoy the Process: Growing your own Brussels sprouts can be a rewarding experience. Don’t be afraid to experiment and learn from your mistakes.
I hope this guide has been helpful! Growing Brussels sprouts in containers is a fun and rewarding project. With a little bit of care and attention, you can enjoy fresh, homegrown sprouts all season long. Happy gardening!
Conclusion
So, there you have it! Growing Brussels sprouts in planters isn’t just a whimsical gardening experiment; it’s a practical, space-saving, and rewarding way to enjoy fresh, homegrown vegetables, even if you’re limited to a balcony, patio, or small yard. We’ve walked through the essential steps, from selecting the right container and soil to nurturing your plants and protecting them from pests. The beauty of this method lies in its adaptability. You’re not confined to a traditional garden plot; you have the freedom to move your Brussels sprouts around to chase the sun, shelter them from harsh weather, or simply enjoy their presence wherever you please.
But why is this DIY trick a must-try? Beyond the convenience and space-saving aspects, growing your own Brussels sprouts offers a level of control and satisfaction that you simply can’t get from store-bought produce. You know exactly what goes into your plants – no mystery chemicals or pesticides, just good old-fashioned care and attention. Plus, the taste of freshly harvested Brussels sprouts is undeniably superior. They’re sweeter, more tender, and bursting with flavor, a far cry from the often-bitter sprouts you find in supermarkets.
Consider these variations to personalize your Brussels sprouts growing experience. Experiment with different Brussels sprouts varieties. ‘Long Island Improved’ is a classic choice, but ‘Redarling’ offers a beautiful reddish-purple hue, and ‘Jade Cross’ is known for its disease resistance. You can also try companion planting. Marigolds can help deter pests, while herbs like rosemary and thyme can enhance the flavor of your sprouts and attract beneficial insects. Think about adding a trellis or support system as your plants grow taller, especially if you’re growing a larger variety. This will help prevent them from toppling over and ensure they receive adequate sunlight.
Don’t be afraid to get creative with your container choices, either. While a large pot is ideal, you can also use repurposed containers like old buckets, tubs, or even grow bags. Just make sure they have adequate drainage. And remember, consistent watering and fertilization are key to success. Keep a close eye on your plants and adjust your watering schedule based on the weather and soil conditions. A balanced fertilizer, applied every few weeks, will provide the nutrients your Brussels sprouts need to thrive.
Ultimately, the best way to learn is by doing. So, grab a planter, some soil, and a few Brussels sprouts seedlings, and give this DIY trick a try. You might be surprised at how easy and rewarding it is to grow your own delicious, healthy vegetables. We are confident that you will enjoy the process of **growing Brussels sprouts** in your own backyard.
We’re eager to hear about your experiences! Share your photos, tips, and challenges in the comments below. Let’s build a community of Brussels sprouts enthusiasts and learn from each other. Happy gardening!
Frequently Asked Questions (FAQ)
1. What is the best size planter for growing Brussels sprouts?
The ideal planter size for Brussels sprouts is at least 12 inches in diameter and 12 inches deep, but larger is generally better. A 15-20 gallon container is a good starting point. Brussels sprouts need ample space for their roots to develop, and a larger container will also help retain moisture and nutrients. If you’re planning to grow multiple plants in one container, increase the size accordingly, allowing at least 18 inches between plants. Remember, crowded plants will compete for resources and may not produce as well.
2. What type of soil should I use for Brussels sprouts in planters?
Brussels sprouts thrive in well-draining, nutrient-rich soil. A good potting mix specifically formulated for vegetables is a great option. You can also create your own mix by combining equal parts of compost, peat moss (or coconut coir), and perlite or vermiculite. Compost provides essential nutrients, peat moss (or coconut coir) helps retain moisture, and perlite or vermiculite improves drainage. Avoid using garden soil in containers, as it can become compacted and doesn’t drain well. The ideal pH for Brussels sprouts is between 6.0 and 7.5.
3. How often should I water my Brussels sprouts plants in planters?
Watering frequency depends on several factors, including the weather, the size of your planter, and the type of soil you’re using. Generally, you should water your Brussels sprouts plants when the top inch of soil feels dry to the touch. Water deeply, until water drains out of the bottom of the container. Avoid overwatering, as this can lead to root rot. During hot, dry weather, you may need to water daily. In cooler, wetter weather, you may only need to water every few days. Check the soil moisture regularly to determine the best watering schedule for your plants.
4. How much sunlight do Brussels sprouts need?
Brussels sprouts require at least 6 hours of direct sunlight per day to thrive. Choose a location for your planter that receives plenty of sunlight. If you live in a particularly hot climate, some afternoon shade may be beneficial to prevent the plants from overheating. If you don’t have a sunny spot, you can supplement with grow lights.
5. What are some common pests and diseases that affect Brussels sprouts, and how can I prevent them?
Common pests that affect Brussels sprouts include aphids, cabbage worms, and flea beetles. Diseases include clubroot and blackleg. To prevent pests, you can use row covers to protect your plants, handpick pests off the plants, or use insecticidal soap or neem oil. To prevent diseases, choose disease-resistant varieties, practice crop rotation, and ensure good drainage. Regularly inspect your plants for signs of pests or diseases and take action promptly.
6. When and how should I harvest my Brussels sprouts?
Brussels sprouts are typically ready to harvest 90-100 days after planting. The sprouts should be firm, green, and about 1-2 inches in diameter. Start harvesting from the bottom of the plant upwards, as the lower sprouts mature first. To harvest, simply twist or cut the sprouts off the stem. You can harvest over several weeks as the sprouts mature. The flavor of Brussels sprouts improves after a light frost.
7. Can I grow Brussels sprouts in containers indoors?
While it’s possible to grow Brussels sprouts indoors, it can be challenging. They require a lot of light, so you’ll need to supplement with strong grow lights. You’ll also need to ensure good air circulation and maintain a consistent temperature. Growing Brussels sprouts outdoors in containers is generally easier and more successful.
8. What fertilizer should I use for Brussels sprouts in planters?
Brussels sprouts are heavy feeders and require regular fertilization. Use a balanced fertilizer with an NPK ratio of 10-10-10 or 14-14-14. Apply the fertilizer according to the package directions, typically every 2-3 weeks. You can also supplement with compost tea or fish emulsion. Avoid over-fertilizing, as this can lead to excessive foliage growth and fewer sprouts.
9. How do I prevent my Brussels sprouts from tasting bitter?
Several factors can contribute to bitter-tasting Brussels sprouts. Overwatering, underwatering, and lack of nutrients can all affect the flavor. Harvesting after a light frost can help sweeten the sprouts. Also, choose varieties that are known for their sweeter flavor.
10. Can I grow Brussels sprouts in the same container year after year?
It’s generally not recommended to grow Brussels sprouts in the same container year after year, as this can deplete the soil of nutrients and increase the risk of disease. If you do reuse a container, be sure to replace the soil with fresh potting mix. Practicing crop rotation is also important to prevent soilborne diseases.
Leave a Comment