
Growing cantaloupe in containers might sound like a challenge reserved for seasoned gardeners, but trust me, it’s totally achievable, even if you’re a beginner like I once was! Have you ever dreamed of biting into a juicy, sun-ripened cantaloupe that you nurtured from seed to fruit, right on your own patio or balcony? Well, stop dreaming and start doing! This DIY guide is packed with simple tricks and hacks that will transform your container gardening game and have you harvesting sweet, fragrant cantaloupes in no time.
Cantaloupes, with their sweet, orange flesh, have been enjoyed for centuries. Originating in Africa and India, they eventually made their way to Europe and the Americas, becoming a symbol of summer abundance and delicious refreshment. But let’s be honest, not everyone has the sprawling garden space needed for traditional cantaloupe cultivation. That’s where container gardening comes in!
In today’s fast-paced world, many of us are living in apartments or smaller homes with limited outdoor space. But that doesn’t mean we have to miss out on the joy of growing our own food. Growing cantaloupe in containers allows you to enjoy fresh, homegrown produce, even if you only have a small balcony or patio. Plus, it’s a fantastic way to connect with nature, reduce your carbon footprint, and impress your friends with your green thumb! So, let’s dive in and discover the secrets to successful container cantaloupe gardening!

Wassermelonen-Anbau im Topf: So gelingt’s!
Ich liebe Wassermelonen! Und was gibt es Besseres, als sie selbst anzubauen? Wenn du keinen großen Garten hast, ist das kein Problem. Wassermelonen lassen sich nämlich auch super im Topf ziehen. Ich zeige dir, wie’s geht!
Was du brauchst:
* Samen: Wähle eine kleinfrüchtige Sorte, die für den Anbau im Topf geeignet ist. Beliebte Sorten sind ‘Sugar Baby’, ‘Bush Sugar Baby’ oder ‘Tiger Baby’.
* Großer Topf: Der Topf sollte mindestens 50 Liter Fassungsvermögen haben, besser noch größer. Wassermelonen brauchen Platz für ihre Wurzeln.
* Hochwertige Erde: Verwende eine gut durchlässige, nährstoffreiche Erde. Ich mische gerne Blumenerde mit Kompost und etwas Sand.
* Rankhilfe: Wassermelonenpflanzen ranken gerne. Eine Rankhilfe, wie ein Rankgitter oder ein Obelisk, hilft ihnen dabei.
* Dünger: Ein Langzeitdünger oder ein Flüssigdünger für Gemüse ist ideal.
* Gießkanne oder Schlauch: Zum regelmäßigen Gießen.
* Mulch: Mulch hilft, die Feuchtigkeit im Boden zu halten und Unkraut zu unterdrücken.
* Sonniger Standort: Wassermelonen brauchen viel Sonne, mindestens 6-8 Stunden pro Tag.
Aussaat und Vorbereitung:
1. Samen vorquellen: Um die Keimung zu beschleunigen, kannst du die Samen vor der Aussaat für 24 Stunden in lauwarmes Wasser legen. Das weicht die Samenschale auf und erleichtert das Keimen.
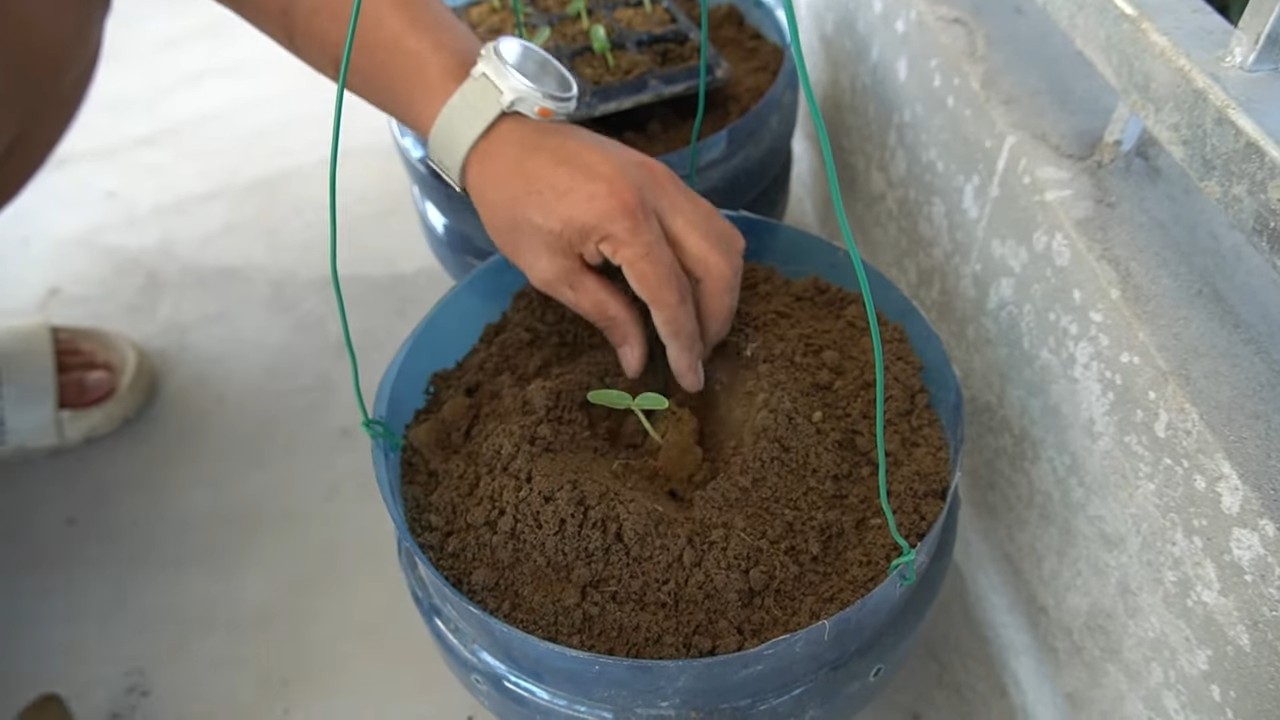
2. Aussaat im Haus (optional): Du kannst die Samen ab April im Haus vorziehen. Fülle kleine Töpfe mit Anzuchterde und lege pro Topf 2-3 Samen etwa 1-2 cm tief hinein. Halte die Erde feucht und stelle die Töpfe an einen warmen, hellen Ort. Die Keimung dauert in der Regel 7-14 Tage.
3. Direktsaat im Topf (ab Mitte Mai): Sobald keine Frostgefahr mehr besteht (Mitte Mai), kannst du die Samen auch direkt in den großen Topf säen. Lege 3-4 Samen pro Topf etwa 2-3 cm tief in die Erde.
4. Standort vorbereiten: Wähle einen sonnigen Standort für den Topf. Stelle sicher, dass der Topf gut erreichbar ist, damit du die Pflanze regelmäßig gießen und düngen kannst.
5. Topf vorbereiten: Fülle den Topf mit der vorbereiteten Erde. Lasse oben etwa 5 cm Platz.
Pflanzung und Pflege:
1. Pikieren (falls vorgezogen): Wenn die Sämlinge im Haus vorgezogen wurden und 2-3 Blätter haben, kannst du sie pikieren. Das bedeutet, du setzt die stärksten Sämlinge einzeln in den großen Topf. Achte darauf, die Wurzeln nicht zu beschädigen.
2. Vereinzeln (falls direkt gesät): Wenn mehrere Samen gekeimt sind, vereinzele die Pflanzen, sodass nur die stärkste Pflanze im Topf bleibt.
3. Rankhilfe anbringen: Stecke die Rankhilfe in den Topf, bevor die Pflanze zu groß wird. Die Wassermelone wird sich daran festhalten und nach oben wachsen.
4. Gießen: Gieße die Pflanze regelmäßig, besonders während der Blütezeit und Fruchtbildung. Die Erde sollte immer leicht feucht sein, aber nicht nass. Vermeide es, die Blätter zu gießen, um Pilzkrankheiten vorzubeugen. Am besten gießt du morgens, damit die Blätter über den Tag abtrocknen können.
5. Düngen: Dünge die Pflanze regelmäßig mit einem Langzeitdünger oder einem Flüssigdünger für Gemüse. Beginne mit dem Düngen etwa 2-3 Wochen nach dem Auspflanzen oder Vereinzeln. Befolge die Anweisungen auf der Düngerpackung.
6. Mulchen: Bedecke die Erde mit einer Schicht Mulch, um die Feuchtigkeit zu halten und Unkraut zu unterdrücken. Stroh, Holzhackschnitzel oder Rasenschnitt eignen sich gut als Mulchmaterial.
7. Ausgeizen (optional): Einige Gärtner empfehlen, die Seitentriebe der Wassermelonenpflanze auszugeizen, um die Fruchtbildung zu fördern. Ich persönlich mache das nicht immer, aber es kann helfen, die Pflanze kompakter zu halten und die Energie auf die Hauptfrüchte zu konzentrieren. Wenn du ausgeizen möchtest, entferne die Seitentriebe, die aus den Blattachseln wachsen.
8. Bestäubung: Wassermelonen sind auf die Bestäubung durch Bienen und andere Insekten angewiesen. Wenn du wenig Insekten in deinem Garten hast, kannst du die Blüten auch von Hand bestäuben. Nimm dazu einen Pinsel und übertrage den Pollen von den männlichen Blüten (dünner Stiel) auf die weiblichen Blüten (mit kleinem Fruchtansatz).
9. Früchte stützen (optional): Wenn die Früchte größer werden, kann es sinnvoll sein, sie mit einem Netz oder einer Hängematte zu stützen, um zu verhindern, dass sie abbrechen.
Ernte:
1. Reife erkennen: Die Reife der Wassermelone erkennst du an verschiedenen Faktoren:
* Die Schale verliert ihren Glanz und wird matter.
* Die Stelle, an der die Wassermelone auf dem Boden liegt, wird gelblich.
* Wenn du auf die Wassermelone klopfst, sollte sie hohl klingen.
* Die Ranke, die direkt an der Frucht sitzt, wird trocken und braun.
2. Ernten: Schneide die Wassermelone mit einem scharfen Messer oder einer Gartenschere vom Stiel ab. Lasse dabei einen kleinen Stielansatz an der Frucht.
Häufige Probleme und Lösungen:
* Blattläuse: Blattläuse können die Blätter der Wassermelonenpflanze befallen. Spritze die Pflanze mit einem Wasserstrahl ab oder verwende ein biologisches Insektizid.
* Echter Mehltau: Echter Mehltau ist eine Pilzkrankheit, die sich durch einen weißen, mehlartigen Belag auf den Blättern äußert. Sorge für eine gute Belüftung und vermeide es, die Blätter zu gießen. Bei starkem Befall kannst du ein Fungizid verwenden.
* Fruchtansatzprobleme: Wenn die Wassermelone keine Früchte bildet, kann das an mangelnder Bestäubung liegen. Bestäube die Blüten von Hand oder locke Insekten in deinen Garten.
* Sonnenbrand: Bei sehr starker Sonneneinstrahlung können die Früchte Sonnenbrand bekommen. Schütze die Früchte mit einem Tuch oder einer Plane.
Zusätzliche Tipps:
* Wähle den richtigen Topf: Ein dunkler Topf kann sich in der Sonne stark aufheizen. Verwende lieber einen hellen Topf oder stelle den dunklen Topf in den Schatten.
* Gieße richtig: Gieße die Wassermelone lieber seltener, aber dafür gründlich. Vermeide Staunässe.
* Schnecken: Schnecken lieben Wassermelonenpflanzen. Schütze die Pflanzen mit Schneckenkorn oder Schneckenzäunen.
* Sortenwahl: Informiere dich vor dem Kauf über die verschiedenen Wassermelonensorten und wähle eine Sorte, die für den Anbau im Topf geeignet ist.
* Geduld: Wassermelonen brauchen Zeit, um zu reifen. Hab Geduld und lass dich nicht entmutigen, wenn es nicht sofort klappt.
Ich hoffe, diese Anleitung hilft dir dabei, deine eigenen Wassermelonen im Topf anzubauen. Es ist wirklich ein tolles Gefühl, die Früchte seiner Arbeit zu ernten und eine selbst angebaute Wassermelone zu genießen! Viel Erfolg!
Conclusion
So, there you have it! Growing cantaloupe in containers might seem daunting at first, but with the right approach, it’s an incredibly rewarding experience. We’ve walked through the essential steps, from selecting the perfect container and soil to providing the necessary support and care. The beauty of this DIY trick lies in its accessibility. Even if you lack a sprawling garden, you can still enjoy the sweet, juicy flavor of homegrown cantaloupe.
Why is this a must-try? Because it puts the power of fresh, organic produce directly into your hands. Store-bought cantaloupe simply can’t compare to the vibrant taste of a melon ripened under your own care. Plus, you have complete control over the growing process, ensuring that your cantaloupe is free from harmful pesticides and chemicals. It’s a healthier, tastier, and more sustainable way to enjoy this summer favorite.
But the fun doesn’t stop there! Feel free to experiment with different cantaloupe varieties. ‘Sugar Cube’ and ‘Minnesota Midget’ are excellent choices for smaller containers, while ‘Athena’ offers a classic cantaloupe flavor. You can also try companion planting. Marigolds, for example, can help deter pests, while basil can enhance the flavor of your cantaloupe. Consider adding a trellis or other support system to maximize space and encourage healthy vine growth.
Don’t be afraid to get creative with your container gardening setup. Use repurposed materials like old buckets or wooden crates to add a rustic touch to your garden. You can even create a vertical garden to maximize space and add visual interest. The possibilities are endless!
Ultimately, growing cantaloupe in containers is about more than just producing delicious fruit. It’s about connecting with nature, learning new skills, and enjoying the satisfaction of nurturing something from seed to harvest. It’s a therapeutic and rewarding experience that can bring joy to your life.
We wholeheartedly encourage you to give this DIY trick a try. It’s easier than you might think, and the results are well worth the effort. Once you’ve tasted your first homegrown cantaloupe, you’ll be hooked!
And most importantly, we want to hear about your experience! Share your photos, tips, and challenges in the comments below. Let’s create a community of container cantaloupe growers and learn from each other. Together, we can make this DIY trick even more successful and accessible to everyone. Happy gardening!
Frequently Asked Questions (FAQ)
1. What is the best size container for growing cantaloupe?
The ideal container size for growing cantaloupe is at least 15-20 gallons. This provides enough space for the roots to develop properly and supports the vigorous growth of the vine. A larger container is always better, as it allows for better water retention and nutrient availability. Make sure the container has adequate drainage holes to prevent waterlogging, which can lead to root rot. Using a fabric pot can also be beneficial as it allows for better aeration of the roots.
2. What type of soil should I use for growing cantaloupe in containers?
Cantaloupe thrives in well-draining, nutrient-rich soil. A good potting mix specifically formulated for vegetables is an excellent choice. You can also create your own mix by combining equal parts of compost, peat moss (or coconut coir), and perlite or vermiculite. Compost provides essential nutrients, peat moss (or coconut coir) helps retain moisture, and perlite or vermiculite improves drainage. Avoid using garden soil, as it can be too heavy and compact, hindering root growth.
3. How often should I water my container cantaloupe?
Watering frequency depends on several factors, including the weather, the size of the container, and the stage of growth. Generally, you should water your cantaloupe deeply whenever the top inch of soil feels dry to the touch. During hot, dry weather, you may need to water daily. Avoid overwatering, as this can lead to root rot. Use a watering can or hose with a gentle spray to avoid damaging the delicate vines and leaves. Mulching around the base of the plant can help retain moisture and reduce the need for frequent watering.
4. How much sunlight does container cantaloupe need?
Cantaloupe requires at least 6-8 hours of direct sunlight per day to thrive. Choose a location that receives plenty of sunlight throughout the day. If you live in a particularly hot climate, you may need to provide some afternoon shade to prevent the leaves from scorching. If you don’t have a sunny spot, you can supplement with grow lights.
5. How do I support the cantaloupe vine in a container?
Cantaloupe vines can grow quite long and heavy, so providing support is essential. A trellis, stake, or cage can help support the vine and prevent the fruit from touching the ground. This reduces the risk of rot and pest damage. You can also use slings made from pantyhose or netting to support the developing melons, especially as they get larger and heavier.
6. When and how should I fertilize my container cantaloupe?
Cantaloupe is a heavy feeder, so regular fertilization is important. Start fertilizing about two weeks after transplanting the seedlings into the container. Use a balanced fertilizer (e.g., 10-10-10) diluted to half strength. Fertilize every two to three weeks throughout the growing season. Once the fruit starts to develop, switch to a fertilizer higher in phosphorus and potassium to promote fruit production. Avoid over-fertilizing, as this can lead to excessive foliage growth at the expense of fruit development.
7. How do I know when my cantaloupe is ripe?
Determining when a cantaloupe is ripe can be tricky, but there are a few key indicators. The most reliable sign is the development of a crack around the stem where it attaches to the melon. The skin color will also change from green to a tan or yellowish hue. The melon should also have a sweet, fragrant aroma. Gently press on the blossom end (opposite the stem end); it should feel slightly soft and yield to pressure. If the melon comes off the vine easily with a gentle tug, it’s ripe and ready to harvest.
8. What are some common pests and diseases that affect container cantaloupe?
Common pests that can affect container cantaloupe include aphids, squash bugs, and vine borers. Aphids can be controlled with insecticidal soap or neem oil. Squash bugs can be handpicked or trapped under boards placed near the plants. Vine borers can be difficult to control, but preventative measures such as wrapping the base of the stem with foil can help. Common diseases include powdery mildew and fusarium wilt. Powdery mildew can be treated with fungicides or by improving air circulation around the plants. Fusarium wilt is a soilborne disease that can be prevented by using disease-resistant varieties and practicing crop rotation.
9. Can I grow cantaloupe from seed directly in the container?
While it’s possible to grow cantaloupe from seed directly in the container, it’s generally recommended to start seeds indoors 4-6 weeks before the last expected frost. This gives the seedlings a head start and increases their chances of survival. Direct sowing can be done, but germination rates may be lower, and the plants may take longer to mature.
10. What are some tips for maximizing cantaloupe yield in containers?
To maximize cantaloupe yield in containers, ensure that the plants receive adequate sunlight, water, and nutrients. Prune the vines to encourage fruit production. Remove any suckers (small shoots that grow from the base of the plant) and limit the number of fruits per vine to 2-3. This will allow the plant to focus its energy on developing fewer, larger, and sweeter melons. Hand-pollinate the flowers if necessary, especially if you’re growing cantaloupe indoors or in an area with limited bee activity.

Leave a Comment