
Growing Carrots from Seeds can seem daunting, but trust me, it’s one of the most rewarding experiences a home gardener can have! Imagine pulling vibrant, sweet carrots straight from your own backyard – fresher and tastier than anything you’ll find at the grocery store. I’m here to tell you that with a few simple tricks and a little patience, you can absolutely achieve a bountiful carrot harvest.
Carrots have a rich history, dating back thousands of years. Originally cultivated for their aromatic leaves and seeds, the sweet, orange root we know and love today is a relatively recent development. Throughout history, carrots have been prized for their nutritional value and medicinal properties, and they continue to be a staple in cuisines around the world.
But why bother growing carrots from seeds yourself? Well, for starters, you get to choose from a wider variety of carrot types than you’ll typically find in stores – from colorful heirlooms to uniquely shaped novelties. More importantly, you have complete control over the growing process, ensuring your carrots are free from harmful pesticides and herbicides. Plus, let’s be honest, there’s just something incredibly satisfying about nurturing a tiny seed into a delicious, homegrown vegetable. This DIY guide will equip you with all the knowledge and techniques you need to successfully grow your own carrots, even if you’re a complete beginner. So, grab your gardening gloves, and let’s get started!
Growing Carrots from Seeds: A Beginner’s Guide to Sweet Success
Hey there, fellow gardening enthusiasts! I’m so excited to share my experience and guide you through the rewarding journey of growing your own carrots from seeds. There’s nothing quite like the taste of a freshly harvested, homegrown carrot, and trust me, it’s easier than you might think! Let’s dive in and get our hands dirty!
Choosing the Right Carrot Variety
Before we even think about planting, let’s talk carrots! There are so many different varieties, each with its own unique characteristics. Choosing the right one for your climate and soil is crucial for success. Here are a few popular options:
* Nantes: These are classic, cylindrical carrots with a sweet flavor and smooth skin. They’re relatively short and mature quickly, making them a great choice for beginners.
* Danvers: These are longer, tapered carrots with a slightly stronger flavor. They’re known for their good storage capabilities.
* Chantenay: These are short, thick carrots that are well-suited for heavy or rocky soils. They have a robust flavor and are great for juicing.
* Imperator: These are the long, slender carrots you often see in supermarkets. They require loose, well-drained soil to grow properly.
* Round Carrots (Parisian): These are small, round carrots that are perfect for containers or gardens with shallow soil. They’re also a fun option for kids!
Consider your local climate and soil conditions when making your choice. Check seed packets for specific recommendations and days to maturity. I personally love Nantes varieties for their sweetness and ease of growth.
Preparing the Soil: The Foundation for Success
Carrots need loose, well-drained soil to thrive. Rocky or compacted soil will result in stunted, misshapen carrots. This is probably the most important step, so don’t skip it!
* Soil Testing: Ideally, you should test your soil to determine its pH and nutrient levels. Carrots prefer a slightly acidic soil with a pH between 6.0 and 6.8.
* Amending the Soil: If your soil is heavy clay or sandy, you’ll need to amend it with organic matter. Compost, well-rotted manure, or peat moss are all excellent choices.
* Removing Rocks and Debris: This is crucial! Remove any rocks, stones, or other debris that could obstruct the growth of your carrots. Even small pebbles can cause them to fork or split.
* Tilling or Digging: Loosen the soil to a depth of at least 12 inches. This will allow the carrot roots to grow freely. I like to use a garden fork to gently turn the soil and break up any clumps.
* Creating Raised Beds (Optional): If you have heavy clay soil or poor drainage, consider creating raised beds. This will improve drainage and provide a better growing environment for your carrots.
Planting the Seeds: Getting Started
Carrot seeds are tiny, so planting them can be a bit tricky. But don’t worry, I’ve got some tips to help you succeed!
* Timing is Key: Carrots are a cool-season crop, so they’re best planted in early spring or late summer. Check your local frost dates to determine the best time to plant in your area. I usually aim to plant about 2-3 weeks before the last expected frost in spring, and again about 8-10 weeks before the first expected frost in fall.
* Creating Furrows: Use a hoe or your finger to create shallow furrows in the soil, about 1/4 to 1/2 inch deep. Space the furrows about 2-3 inches apart.
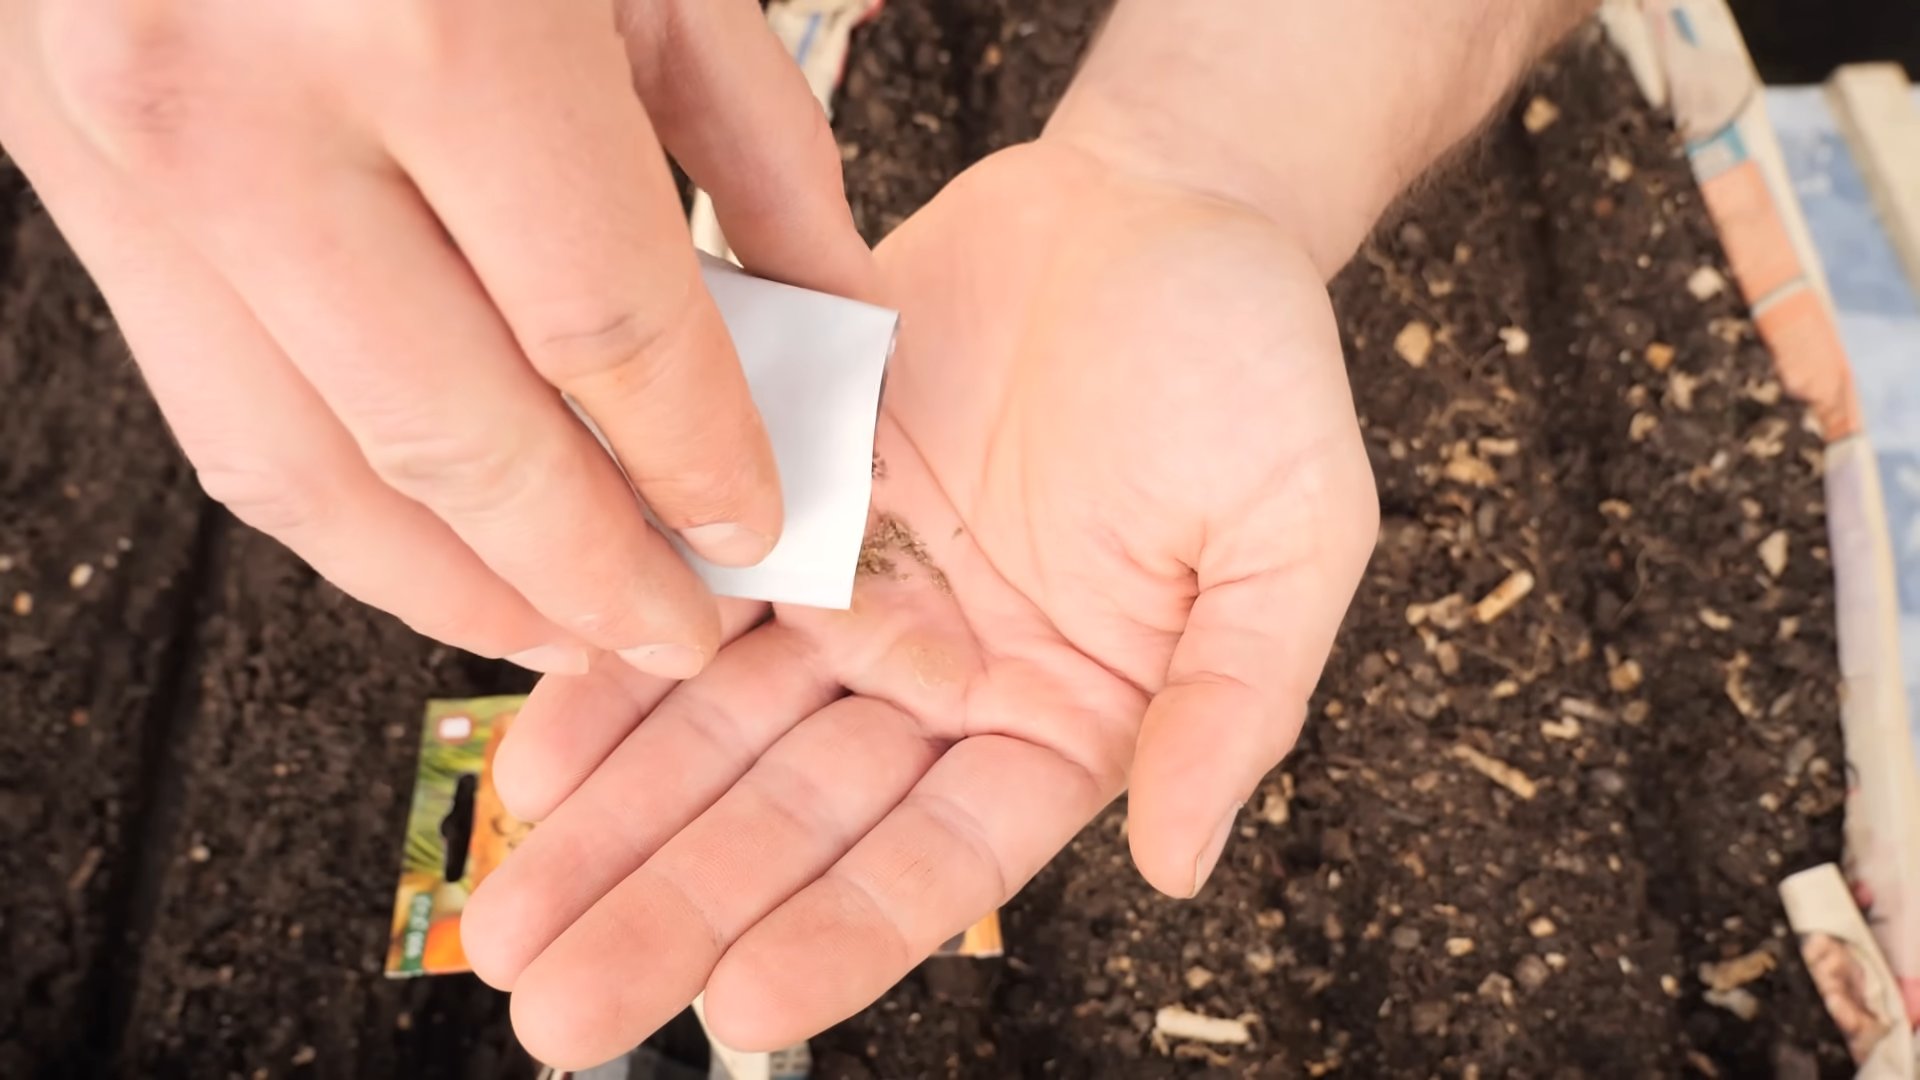
* Sowing the Seeds: Carrot seeds are notoriously small and difficult to handle. To make sowing easier, you can mix the seeds with sand or coffee grounds. This will help you space them out more evenly. Aim to sow the seeds about 1/2 inch apart. Don’t worry if you sow them too thickly; you can always thin them later.
* Covering the Seeds: Gently cover the seeds with a thin layer of soil.
* Watering: Water the soil thoroughly but gently, using a watering can or a hose with a gentle spray nozzle. Keep the soil consistently moist until the seeds germinate.
Caring for Your Carrots: Nurturing Growth
Once your carrot seeds have germinated, it’s important to provide them with the care they need to thrive.
* Thinning: This is crucial for preventing overcrowding and ensuring that your carrots have enough space to grow. When the seedlings are about 2 inches tall, thin them to about 1-2 inches apart. When they are about 4 inches tall, thin them again to about 3-4 inches apart. You can use small scissors to snip the seedlings at the soil line, or gently pull them out.
* Watering: Carrots need consistent moisture to grow properly. Water them regularly, especially during dry spells. Aim to keep the soil consistently moist, but not waterlogged.
* Weeding: Weeds can compete with carrots for nutrients and water, so it’s important to keep your garden bed weed-free. Gently hand-pull any weeds that appear. Be careful not to disturb the carrot roots.
* Fertilizing: Carrots are not heavy feeders, but they will benefit from a light feeding of fertilizer. Use a balanced fertilizer or a fertilizer specifically formulated for root vegetables. Follow the instructions on the fertilizer package. I like to use a liquid seaweed fertilizer diluted in water, applied every few weeks.
* Mulching: Applying a layer of mulch around your carrots can help to retain moisture, suppress weeds, and regulate soil temperature. Straw, hay, or wood chips are all good choices.
Dealing with Pests and Diseases
While carrots are relatively easy to grow, they can be susceptible to certain pests and diseases.
* Carrot Rust Fly: This is a common pest that can damage carrot roots. The larvae of the carrot rust fly tunnel into the roots, causing them to become discolored and distorted. To prevent carrot rust fly, cover your carrots with a row cover or insect netting. You can also try companion planting with onions or garlic, which are said to repel the flies.
* Nematodes: These microscopic worms can attack carrot roots, causing them to become stunted and deformed. To prevent nematodes, practice crop rotation and amend your soil with organic matter.
* Leaf Blight: This fungal disease can cause brown spots to appear on carrot leaves. To prevent leaf blight, provide good air circulation and avoid overhead watering. If you see signs of leaf blight, remove the affected leaves and spray the plants with a fungicide.
Harvesting Your Carrots: The Sweet Reward
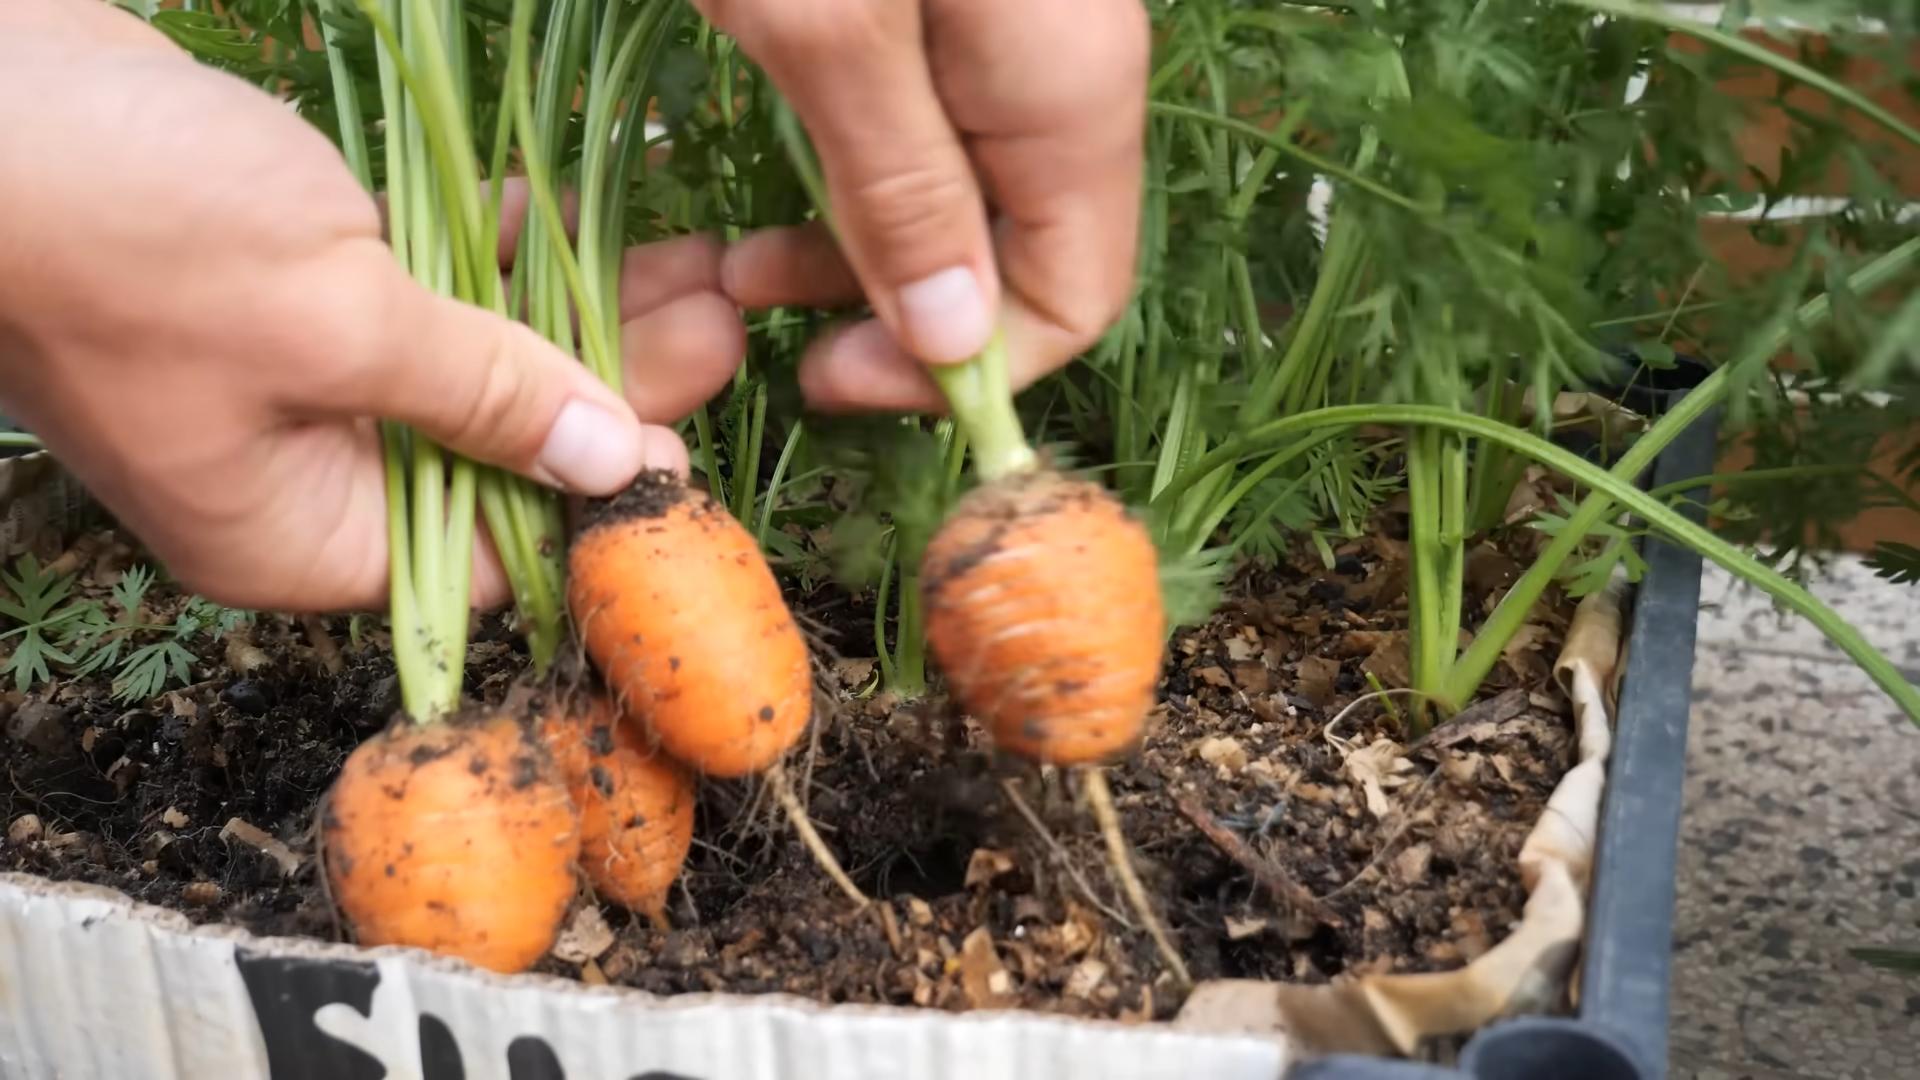
The moment you’ve been waiting for! Harvesting your own homegrown carrots is incredibly satisfying.
* When to Harvest: Carrots are typically ready to harvest when they reach the size specified on the seed packet. You can also gently brush away the soil around the base of the carrot to check its size.
* How to Harvest: Gently loosen the soil around the carrot with a garden fork or trowel. Then, grasp the carrot by the base of the leaves and pull it straight up. If the carrot is difficult to pull, you may need to loosen the soil further.
* Storing Your Carrots: To store your carrots, remove the tops and gently brush off any excess soil. Store them in a cool, dark, and humid place, such as a refrigerator or a root cellar. You can also store them in a container filled with moist sand or sawdust.
Troubleshooting Common Problems
Even with the best care, you may encounter some problems when growing carrots. Here are a few common issues and how to address them:
* Forked or Split Carrots: This is usually caused by rocky or compacted soil. Make sure to remove any rocks and debris from the soil before planting, and amend the soil with organic matter.
* Stunted Growth: This can be caused by poor soil, lack of nutrients, or pests. Make sure to prepare the soil properly, fertilize regularly, and check for pests.
* Bitter Taste: This can be caused by hot weather or inconsistent watering. Carrots prefer cool weather and consistent moisture. Try to plant them in early spring or late summer, and water them regularly.
Enjoying Your Harvest: From Garden to Table
Now that you’ve harvested your delicious homegrown carrots, it’s time to enjoy them! Carrots can be eaten raw, cooked, or juiced. They’re a versatile vegetable that can be used in a variety of dishes.
* Raw: Enjoy them as a healthy snack, dipped in hummus or ranch dressing.
* Roasted: Toss them with olive oil, herbs, and spices, and roast them in the oven until tender.
* Steamed: Steam them until tender-crisp and serve with butter and herbs.
* Soups and Stews: Add them to your favorite soups and stews for added flavor and nutrition.
*
Conclusion
So, there you have it! Growing carrots from seeds might seem daunting at first, but with a little patience and these simple steps, you’ll be harvesting your own sweet and crunchy carrots in no time. This DIY approach isn’t just about saving money; it’s about connecting with your food, understanding the growing process, and enjoying the unparalleled flavor of homegrown produce. Forget those bland, store-bought carrots – the vibrant color and intense sweetness of a carrot you’ve nurtured from a tiny seed are simply unmatched.
Why is this DIY trick a must-try? Because it empowers you to control every aspect of your carrot’s journey, from the soil it grows in to the variety you choose. You can select heirloom seeds for unique colors and flavors, or opt for disease-resistant varieties suited to your specific climate. Plus, there’s an immense satisfaction in watching those tiny seeds sprout and develop into delicious, healthy vegetables.
Looking for variations? Consider companion planting! Marigolds can deter nematodes, while rosemary can repel the carrot rust fly. Experiment with different carrot varieties like Nantes (classic cylindrical shape), Chantenay (shorter and wider, great for heavy soils), or Danvers (tapered and sweet). You can even try growing round carrots like Parisian for a fun and unique twist. Another variation is to try succession planting. Sow seeds every few weeks to ensure a continuous harvest throughout the growing season. This prevents you from being overwhelmed with carrots all at once and extends your enjoyment of fresh, homegrown produce.
Don’t be afraid to get your hands dirty and experiment. Growing carrots from seeds is a rewarding experience that brings you closer to nature and provides you with delicious, healthy food. We encourage you to give this DIY trick a try. You might be surprised at how easy and enjoyable it is.
And most importantly, we want to hear about your experience! Share your tips, tricks, and triumphs in the comments below. Let us know what varieties you’ve tried, what challenges you’ve faced, and what delicious dishes you’ve created with your homegrown carrots. Your feedback will help other gardeners learn and grow, and together, we can cultivate a community of thriving carrot growers. So, grab your seeds, prepare your soil, and get ready to enjoy the sweet taste of success with your very own DIY carrot growing adventure!
Frequently Asked Questions (FAQ)
What is the best time of year to plant carrot seeds?
The best time to plant carrot seeds depends on your climate. In general, carrots are a cool-season crop, so they thrive in spring and fall. For a spring crop, sow seeds 2-3 weeks before the last expected frost. For a fall crop, sow seeds 10-12 weeks before the first expected frost. In warmer climates, you can often grow carrots throughout the winter. Check your local frost dates and adjust your planting schedule accordingly. Remember that soil temperature is also crucial; aim for a soil temperature between 55°F and 75°F (13°C and 24°C) for optimal germination.
How deep should I plant carrot seeds?
Carrot seeds are very small and should be planted shallowly. Sow them about ¼ to ½ inch (0.6 to 1.3 cm) deep. Gently cover the seeds with fine soil or vermiculite and water thoroughly. Avoid planting them too deep, as this can hinder germination.
What kind of soil is best for growing carrots?
Carrots need loose, well-drained soil to grow properly. Rocky or compacted soil can lead to misshapen or stunted carrots. Amend your soil with compost or well-rotted manure to improve drainage and fertility. Avoid using fresh manure, as it can cause forking. The ideal soil pH for carrots is between 6.0 and 6.8. If your soil is heavy clay, consider growing carrots in raised beds or containers.
How often should I water my carrot seedlings?
Keep the soil consistently moist, especially during germination. Water gently to avoid washing away the seeds. Once the seedlings emerge, water deeply but less frequently, allowing the soil to dry out slightly between waterings. Overwatering can lead to root rot. A good rule of thumb is to water when the top inch of soil feels dry to the touch.
Why are my carrots forking or splitting?
Forking or splitting carrots can be caused by several factors, including rocky soil, compacted soil, or inconsistent watering. Remove any rocks or debris from the soil before planting. Amend the soil with compost to improve drainage and prevent compaction. Ensure consistent watering, especially during dry periods. Also, avoid over-fertilizing with nitrogen, as this can also contribute to forking.
How long does it take for carrots to germinate?
Carrot seeds can be slow to germinate, typically taking 14-21 days. Keep the soil consistently moist during this time. You can speed up germination by soaking the seeds in water for 24 hours before planting. Covering the planting area with a piece of burlap or cardboard can also help retain moisture.
When should I thin my carrot seedlings?
Thinning is essential for giving carrots enough space to grow. Once the seedlings are a few inches tall, thin them to about 1-2 inches (2.5-5 cm) apart. When the carrots are slightly larger, thin them again to about 3-4 inches (7.5-10 cm) apart. Use scissors to snip off the unwanted seedlings at the soil line to avoid disturbing the roots of the remaining plants.
What are some common pests and diseases that affect carrots?
Common pests that affect carrots include carrot rust flies, aphids, and nematodes. Carrot rust flies lay their eggs near the base of the plants, and the larvae tunnel into the roots, causing damage. Aphids can suck the sap from the leaves, weakening the plants. Nematodes are microscopic worms that can damage the roots. Common diseases include leaf blight and root rot. Practice crop rotation, use disease-resistant varieties, and control pests with organic methods to prevent problems.
How do I know when my carrots are ready to harvest?
Carrots are typically ready to harvest 60-80 days after planting, depending on the variety. Check the seed packet for specific maturity dates. You can also gauge ripeness by the size of the carrot tops. When the tops are about 1/2 to 3/4 inch in diameter at the soil line, the carrots are usually ready to harvest. Gently loosen the soil around the carrots and pull them up by the tops.
Can I grow carrots in containers?
Yes, carrots can be grown successfully in containers. Choose a container that is at least 12 inches (30 cm) deep to accommodate the length of the roots. Use a well-draining potting mix and water regularly. Container-grown carrots may need more frequent watering than those grown in the ground. Shorter, rounder varieties like Parisian are particularly well-suited for container gardening.
How do I store harvested carrots?
To store carrots, remove the tops and gently brush off any excess soil. Store them in a cool, dark, and humid place, such as the refrigerator or a root cellar. You can wrap them in a damp paper towel or store them in a plastic bag with a few holes for ventilation. Carrots can typically be stored for several weeks or even months under the right conditions.

Leave a Comment