
Growing carrots indoors might sound like a whimsical dream, conjuring images of miniature farms nestled in your living room. But trust me, it’s not only possible, it’s incredibly rewarding! Forget those bland, store-bought carrots; imagine plucking sweet, crisp, and vibrant orange beauties straight from your indoor garden.
For centuries, humans have cultivated food indoors, from ancient Roman greenhouses to the modern-day vertical farms. While the scale might differ, the underlying principle remains the same: bringing the bounty of nature closer to home. In our increasingly urbanized world, the desire to connect with nature and grow our own food has only intensified.
That’s where this DIY guide comes in. Maybe you lack a sprawling backyard, or perhaps the local critters keep nibbling on your outdoor crops. Whatever the reason, growing carrots indoors offers a fantastic solution. I’m going to share some simple yet effective tricks and hacks that will transform your windowsill or spare room into a thriving carrot patch. Get ready to ditch the grocery store carrots and embrace the joy of homegrown goodness!

Growing Carrots Indoors: Your DIY Guide for a Bountiful Harvest!
Hey garden friends! Are you tired of the dreary winter and long for fresh vegetables? Then I have just the thing for you: growing carrots indoors! Yes, you heard that right. With a few tips and tricks, you can enjoy crisp, homegrown carrots in your own four walls. And the best part? It’s not as hard as you might think. Let’s get started!
What You’ll Need: The Materials List
Before we start gardening, we’ll naturally need the right equipment. Here is a list of everything you’ll need for your indoor carrot project:
- Carrot seeds: It’s best to choose a variety that is suitable for growing in pots. Short, round varieties like ‘Paris Market’ or ‘Thumbelina’ are ideal.
- Large pots or containers: Carrots need space! The pots should be at least 20-30 cm (8-12 inches) deep to give the roots enough room to grow.
- High-quality potting soil: Loose, well-draining soil is the key to healthy carrots. You can buy special vegetable soil or mix potting soil with sand and compost.
- Sand: Sand helps keep the soil loose and improves drainage.
- Compost: Compost is a natural fertilizer that provides your carrots with important nutrients.
- Spray bottle: For moistening the soil.
- Watering can: For watering the plants.
- Grow light (optional): If you don’t have enough sunlight, a grow light can help promote growth.
- Ruler or measuring tape: For measuring the planting distances.
- Labels and a pen: For labeling the pots.
Step-by-Step Guide: How to Grow Your Own Carrots Indoors
Now let’s get down to it! Follow these steps to successfully grow your carrots indoors:
1. Prepare the pots:
- Clean the pots thoroughly with warm water and dish soap.
- Make sure the pots have drainage holes so excess water can run off.
- Fill the pots with a mixture of potting soil, sand, and compost. The ratio should be about 2:1:1.
- Leave about 2-3 cm (1 inch) of space at the top.
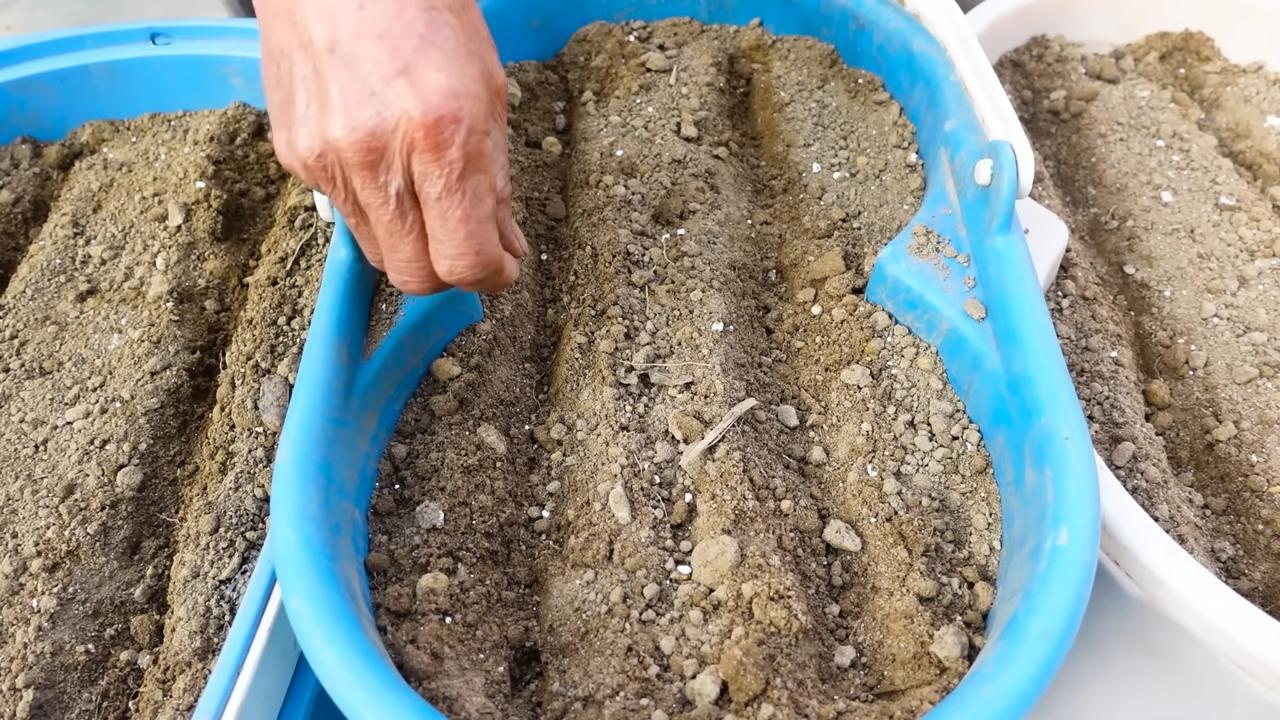
2. Sow the seeds:
- Lightly moisten the soil with the spray bottle.
- Sprinkle the carrot seeds evenly over the soil. Make sure the seeds are not too close together. A distance of about 2-3 cm (1 inch) between the seeds is ideal.
- Cover the seeds with a thin layer of soil (about 0.5 cm / 0.2 inches).
- Gently press the soil down.
- Spray the soil again with the spray bottle.
3. Choose a location:
- Place the pots in a bright, sunny location. A south-facing window is ideal.
- If you don’t have enough sunlight, you can use a grow light. The lamp should be on for about 12-14 hours a day.
4. Watering:
- Keep the soil moist, but not wet. Water the plants regularly, but avoid waterlogging.
- Check the soil’s moisture by sticking your finger about 2 cm (1 inch) deep into it. If the soil feels dry, it’s time to water.
- It’s best to water in the morning so the leaves can dry during the day.
5. Germination:
- The germination of carrot seeds can take 1-3 weeks, depending on the variety and temperature.
- Keep the soil moist during germination.
- Once the first seedlings appear, you can reduce the watering a bit.
6. Thinning:
- When the seedlings are about 2-3 cm (1 inch) tall, you need to thin them out. This means removing the weakest plants so that the stronger ones have enough space to grow.
- Leave a distance of about 5-7 cm (2-3 inches) between the plants.
- Be careful when thinning to avoid damaging the roots of the remaining plants.
7. Fertilizing:
- Fertilize the carrots every 2-3 weeks with an organic liquid fertilizer.
- Follow the instructions on the fertilizer’s packaging.
- Do not over-fertilize the plants, as this can lead to excessive leaf growth and small roots.
8. Rotating:
- Rotate the pots regularly so that the plants are supplied with light evenly.
- This prevents the plants from leaning towards the light and growing crooked.
9. Pests and Diseases:
- Watch out for pests like aphids or carrot flies.
- If you spot pests, you can combat them with a natural insecticide.
- Also, watch for diseases like powdery mildew or root rot.
- Remove affected leaves or plants immediately to prevent the spread of the disease.
Special Tips for Indoor Cultivation
Growing carrots indoors is a bit different from growing them outdoors. Here are a few special tips that will help you succeed:
- Choose the right variety: As mentioned, short, round varieties like ‘Paris Market’ or ‘Thumbelina’ are ideal for growing in pots. These varieties need less space and mature faster.
- Provide sufficient light: Carrots need a lot of light to grow. If you don’t have enough sunlight, use a grow light.
- Keep the soil loose: Loose, well-draining soil is important for the roots to spread easily. Mix sand and compost into the potting soil to improve drainage.
- Avoid waterlogging: Waterlogging can lead to root rot. Make sure the pots have drainage holes and do not water the plants too much.
- Be patient: Carrots take time to grow. It can take 2-3 months until you can harvest your first carrots.
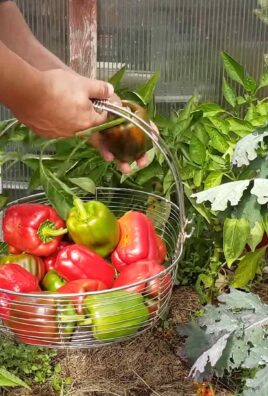
Harvest Time: When are my carrots ripe?
The harvest time depends on the variety and the growing conditions. As a rule, carrots are ready to harvest after 2-3 months. You can check the ripeness by gently pulling a carrot out of the soil. If the carrot has the desired size and color, you can harvest it.
- Size: The size of the carrots depends on the variety. ‘Paris Market’ carrots, for example, are smaller than ‘Nantes’ carrots.
- Color: The color of the carrots should be strong and even.
- Firmness: The carrots should be firm and crisp.
After the Harvest: How to store your carrots properly
After the harvest, you should store your carrots properly so they stay fresh for a long time.
Shelf life: Properly stored carrots will keep in the refrigerator for several weeks.
Cleaning: Remove the soil from the carrots, but do not wash them.
Remove the leaves: Cut the leaves about 2 cm (1 inch) above the carrot.
Storing: Wrap the carrots in a damp cloth or place them in a plastic bag with holes. Store the carrots in the refrigerator.
Conclusion
So, there you have it! Growing carrots indoors isn’t just a quirky gardening experiment; it’s a genuinely rewarding way to enjoy fresh, homegrown produce year-round, regardless of your climate or outdoor space. We’ve walked through the steps, from selecting the right carrot varieties to providing the optimal growing conditions. But why is this DIY trick a must-try?
Firstly, the sheer convenience is undeniable. Imagine having access to crisp, sweet carrots whenever you need them, right at your fingertips. No more last-minute trips to the grocery store or settling for less-than-fresh produce. Secondly, it’s incredibly satisfying to nurture a plant from seed to harvest, witnessing the miracle of growth firsthand. This connection to nature can be especially beneficial in urban environments where green spaces are limited.
Beyond the practical benefits, growing carrots indoors offers a unique opportunity to experiment and personalize your gardening experience. Consider trying different carrot varieties to discover your favorites. Nantes carrots, with their cylindrical shape and sweet flavor, are a popular choice for indoor growing. Alternatively, round varieties like Parisian carrots are well-suited for smaller containers.
Don’t be afraid to get creative with your container choices. While standard pots work perfectly well, you could also repurpose old buckets, crates, or even grow bags. Just ensure that your chosen container is deep enough to accommodate the carrot roots and has adequate drainage.
For those seeking a more advanced challenge, explore hydroponic or aquaponic systems for growing carrots indoors. These methods offer the potential for faster growth and higher yields, but they require a greater initial investment and a deeper understanding of plant nutrition.
Remember, success in indoor carrot growing hinges on providing the right conditions. Adequate sunlight is crucial, so supplement natural light with grow lights if necessary. Consistent watering and well-draining soil are also essential to prevent root rot and ensure healthy growth.
But the most important ingredient for success is patience. Carrots take time to mature, so don’t be discouraged if you don’t see results immediately. Keep tending to your plants, and you’ll be rewarded with a bountiful harvest of delicious, homegrown carrots.
We wholeheartedly encourage you to embark on this indoor gardening adventure. It’s a fun, educational, and ultimately rewarding experience that will connect you with nature and provide you with fresh, healthy produce. And most importantly, we want to hear about your experiences! Share your tips, tricks, and photos with us in the comments below. Let’s create a community of indoor carrot growers and learn from each other’s successes and challenges. Let us know what you think of this DIY trick!
Frequently Asked Questions (FAQ)
What are the best carrot varieties to grow indoors?
The best carrot varieties for indoor growing are typically shorter and more compact. Nantes varieties, like ‘Nelson’ or ‘Scarlet Nantes,’ are popular choices due to their cylindrical shape and sweet flavor. Round varieties, such as ‘Parisian’ or ‘Thumbelina,’ are also well-suited for smaller containers. Consider the size of your container when selecting a variety. Shorter, rounder carrots will thrive in shallower pots, while longer varieties will require deeper containers. Also, look for varieties that are known for their quick maturity, as this will allow you to harvest your carrots sooner.
How much sunlight do indoor carrots need?
Carrots need at least 6-8 hours of direct sunlight per day to thrive. If you don’t have a sunny windowsill, you’ll need to supplement with grow lights. LED grow lights are a great option because they are energy-efficient and provide the full spectrum of light that plants need. Position the grow lights about 6-12 inches above the carrot seedlings. You can also use a timer to ensure that your carrots receive the appropriate amount of light each day. Insufficient light can lead to leggy growth and poor root development.
What type of soil is best for growing carrots indoors?
Carrots need well-draining soil that is loose and free of rocks and debris. A sandy loam soil is ideal. You can purchase a potting mix specifically formulated for vegetables, or you can create your own mix by combining equal parts of potting soil, compost, and sand. Avoid using heavy clay soil, as it can compact and prevent the carrots from developing properly. Ensure that your container has drainage holes to prevent waterlogging, which can lead to root rot.
How often should I water my indoor carrots?
Water your carrots regularly, keeping the soil consistently moist but not soggy. Check the soil moisture level by sticking your finger about an inch into the soil. If it feels dry, it’s time to water. Water deeply, allowing the water to drain out of the drainage holes. Avoid overwatering, as this can lead to root rot. The frequency of watering will depend on factors such as the size of your container, the type of soil, and the temperature and humidity of your home.
How long does it take for carrots to grow indoors?
Carrots typically take 60-80 days to mature, depending on the variety. You can start harvesting baby carrots as early as 50 days. To check if your carrots are ready to harvest, gently brush away some of the soil around the base of the plant to expose the top of the carrot. If the carrot is the size you desire, you can carefully pull it out of the soil.
Do I need to fertilize my indoor carrots?
Yes, carrots benefit from regular fertilization. Use a balanced fertilizer, such as a 10-10-10 or 5-5-5, diluted to half strength. Fertilize every 2-3 weeks, following the instructions on the fertilizer package. Avoid over-fertilizing, as this can lead to excessive foliage growth and poor root development. Organic fertilizers, such as compost tea or fish emulsion, are also good options.
How do I prevent pests and diseases from affecting my indoor carrots?
Indoor carrots are generally less susceptible to pests and diseases than outdoor carrots. However, it’s still important to take precautions. Inspect your plants regularly for signs of pests, such as aphids or spider mites. If you find any pests, you can try washing them off with a strong stream of water or using insecticidal soap. To prevent fungal diseases, ensure that your plants have good air circulation and avoid overwatering.
Can I grow carrots in a container with other plants?
While it’s possible to grow carrots in a container with other plants, it’s generally best to grow them separately. Carrots need plenty of space to develop their roots, and they may not thrive if they are crowded by other plants. If you do choose to grow carrots with other plants, select companion plants that have similar growing requirements and won’t compete with the carrots for nutrients or sunlight. Good companion plants for carrots include radishes, onions, and lettuce.
What do I do if my carrot greens are turning yellow?
Yellowing carrot greens can be a sign of several problems, including overwatering, underwatering, nutrient deficiency, or pest infestation. Check the soil moisture level and adjust your watering accordingly. If the soil is consistently dry, water more frequently. If the soil is consistently soggy, water less frequently. If you suspect a nutrient deficiency, fertilize your carrots with a balanced fertilizer. Inspect your plants for pests and treat them accordingly.
Can I save carrot seeds from my indoor-grown carrots?
Saving carrot seeds is a two-year process and is more complex than saving seeds from other vegetables. Carrots are biennials, meaning they don’t produce seeds until their second year. To save seeds, you would need to overwinter your carrots and allow them to flower and produce seeds in the following spring. This is generally not practical for indoor-grown carrots. It’s easier to purchase carrot seeds from a reputable source.


Leave a Comment