
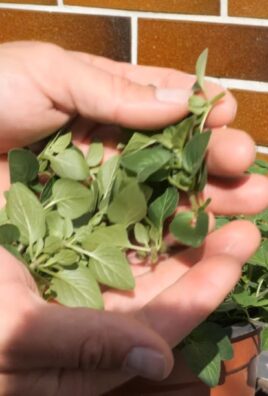
Growing Celery on Stones: Sounds a little crazy, right? But trust me, this simple DIY trick will revolutionize how you think about regrowing vegetables! Forget complicated gardening setups and endless trips to the grocery store for celery. I’m going to show you how to breathe new life into those celery stalks you’d normally toss in the compost, using nothing more than a bowl, some water, and, you guessed it, stones!
The idea of regrowing vegetables isn’t new. In fact, resourceful gardeners have been employing similar techniques for generations. Think about it – our grandparents and great-grandparents often relied on these clever hacks to stretch their food supplies, especially during times of scarcity. It’s a testament to human ingenuity and our connection to the earth. While we might not be facing the same challenges, the satisfaction of nurturing something back to life and reducing food waste is incredibly rewarding.
But why growing celery on stones specifically? Well, let’s be honest, celery can be a bit of a pain to buy. You often only need a few stalks for a recipe, leaving the rest to wilt in the fridge. This method allows you to use those leftover bases to cultivate fresh celery, even if you don’t have a garden! Plus, it’s a fantastic project for kids, teaching them about plant life cycles and sustainability. So, are you ready to ditch the wilting celery and embrace this easy, eco-friendly hack? Let’s get started!
Sellerie auf Steinen ziehen: Ein DIY-Projekt für den Fenstergarten
Hallo liebe Gartenfreunde! Habt ihr euch jemals gefragt, ob man Sellerie einfach so auf Steinen ziehen kann? Die Antwort ist: Ja, das geht! Und es ist ein super einfaches und lohnendes DIY-Projekt, das ihr ganz bequem auf eurer Fensterbank starten könnt. Ich zeige euch, wie ihr aus einem einfachen Strunk frischen Sellerie ziehen könnt – ganz ohne Erde!
Was ihr dafür braucht:
* Ein Sellerie-Strunk (am besten mit Wurzelansatz)
* Ein Gefäß (Glas, Schale, etc.)
* Kieselsteine oder Ziersteine
* Wasser
* Ein sonniger Platz
Warum Sellerie auf Steinen?
Sellerie auf Steinen zu ziehen ist nicht nur platzsparend, sondern auch eine tolle Möglichkeit, Gemüsereste zu verwerten und den Kindern (oder auch sich selbst!) die Wunder der Natur näherzubringen. Außerdem sieht es einfach cool aus! Die Steine dienen als Stütze für den Strunk und halten ihn gleichzeitig feucht.
Schritt-für-Schritt-Anleitung: Sellerie-Regeneration
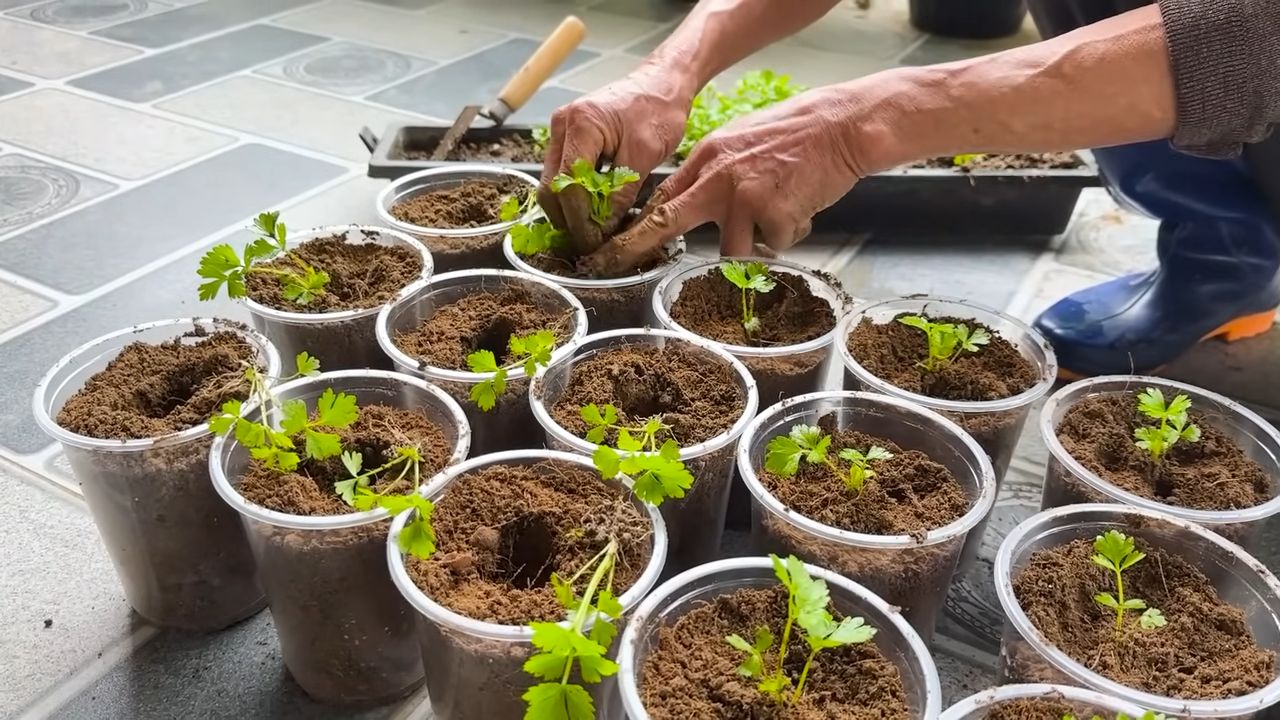
1. Den richtigen Strunk auswählen: Achtet beim Kauf von Sellerie darauf, dass der Strunk fest und knackig ist. Am besten ist es, wenn noch ein paar Wurzelansätze vorhanden sind. Je frischer der Strunk, desto besser die Chancen auf Erfolg.
2. Den Strunk vorbereiten: Schneidet den Sellerie etwa 5-7 cm vom unteren Ende ab. Achtet darauf, dass ihr den Wurzelansatz nicht beschädigt. Ihr könnt den oberen Teil des Selleries natürlich für Suppen, Salate oder Smoothies verwenden – Zero Waste ist angesagt!
3. Das Gefäß vorbereiten: Sucht euch ein passendes Gefäß aus. Ein Glas, eine Schale oder ein alter Joghurtbecher funktionieren prima. Wichtig ist, dass das Gefäß wasserdicht ist.
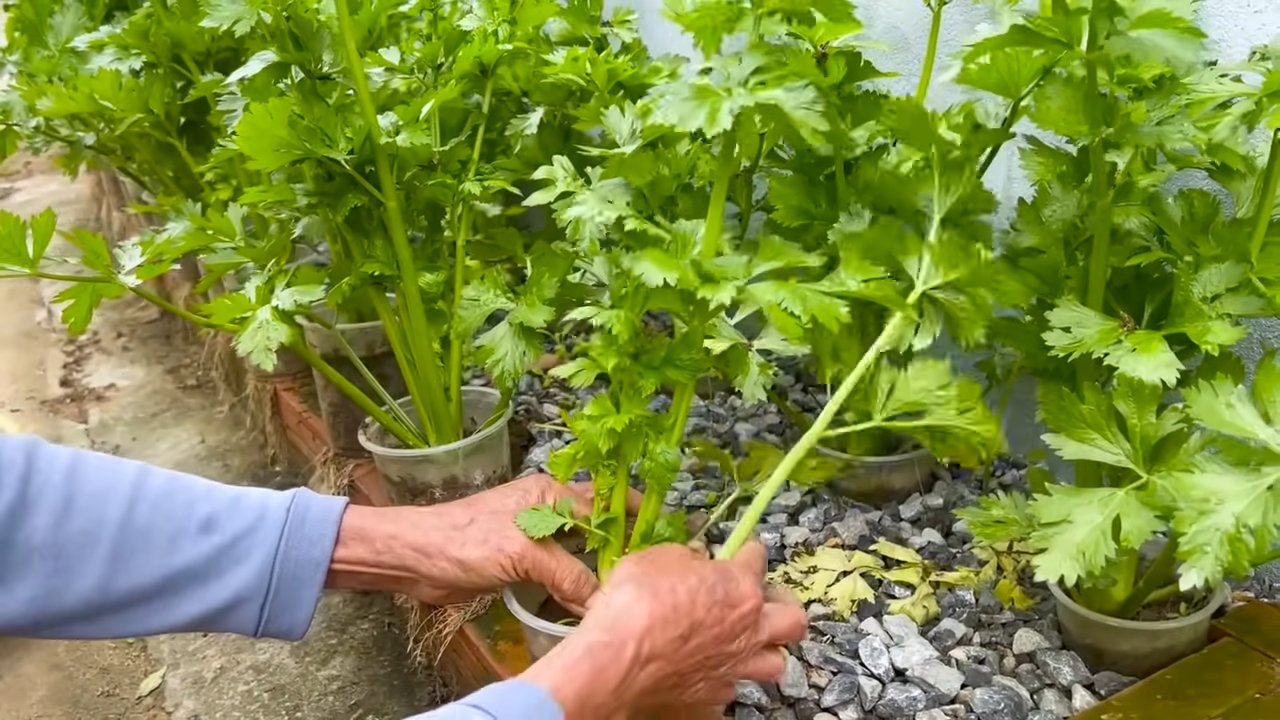
4. Steine einfüllen: Füllt das Gefäß mit den Kieselsteinen oder Ziersteinen. Die Steine sollten etwa 2-3 cm hoch sein. Sie dienen als Basis für den Sellerie-Strunk und sorgen dafür, dass er nicht direkt im Wasser steht. Das verhindert Fäulnis.
5. Den Strunk platzieren: Setzt den Sellerie-Strunk mit dem Wurzelansatz nach unten auf die Steine. Achtet darauf, dass er stabil steht und nicht umkippt.
6. Wasser hinzufügen: Gießt vorsichtig Wasser in das Gefäß, bis die Steine etwa zur Hälfte bedeckt sind. Das Wasser sollte den Strunk selbst nicht berühren, sondern nur die Wurzelansätze feucht halten.
7. Der richtige Standort: Stellt das Gefäß an einen hellen, sonnigen Platz. Ein Fensterbrett ist ideal. Sellerie liebt Licht!
8. Regelmäßige Pflege: Überprüft täglich den Wasserstand und füllt bei Bedarf Wasser nach. Achtet darauf, dass das Wasser nicht zu hoch steht, da der Strunk sonst faulen kann. Wechselt das Wasser alle paar Tage, um Algenbildung zu vermeiden.
9. Geduld haben: Es dauert ein paar Tage bis Wochen, bis ihr die ersten grünen Blätter seht. Habt Geduld und gebt dem Sellerie Zeit, sich zu regenerieren.
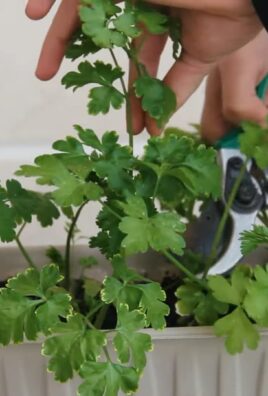
10. Die ersten Blätter ernten: Sobald die Blätter groß genug sind, könnt ihr sie ernten und für Salate, Suppen oder als Garnitur verwenden.
Die nächste Phase: Einpflanzen in Erde (optional)
Wenn ihr möchtet, könnt ihr den Sellerie-Strunk auch in Erde einpflanzen, sobald er ausreichend Wurzeln gebildet hat. Das ist aber kein Muss, er kann auch weiterhin auf den Steinen wachsen.
1. Vorbereitung: Sucht euch einen Topf mit guter Drainage und füllt ihn mit Blumenerde.
2. Den Strunk einpflanzen: Grabt ein kleines Loch in die Erde und setzt den Sellerie-Strunk vorsichtig hinein. Achtet darauf, dass die Wurzeln nicht beschädigt werden.
3. Angießen: Gießt den Sellerie nach dem Einpflanzen gut an.
4. Pflege: Stellt den Topf an einen hellen, sonnigen Platz und gießt ihn regelmäßig. Achtet darauf, dass die Erde nicht austrocknet.
Tipps und Tricks für den erfolgreichen Sellerie-Anbau
* Die richtige Wassermenge: Zu viel Wasser kann zu Fäulnis führen, zu wenig Wasser lässt den Sellerie austrocknen. Findet das richtige Mittelmaß!
* Regelmäßiges Düngen: Wenn ihr den Sellerie in Erde eingepflanzt habt, könnt ihr ihn regelmäßig mit einem organischen Dünger düngen.
* Schädlinge: Achtet auf Schädlinge wie Blattläuse oder Schnecken. Bei Bedarf könnt ihr natürliche Schädlingsbekämpfungsmittel einsetzen.
* Die richtige Temperatur: Sellerie mag es nicht zu heiß. Eine Temperatur zwischen 15 und 20 Grad Celsius ist ideal.
* Sellerie-Sorten: Es gibt verschiedene Sellerie-Sorten. Probiert verschiedene Sorten aus, um herauszufinden, welche euch am besten schmeckt. Knollensellerie ist für diese Methode weniger geeignet, da er hauptsächlich für die Knolle angebaut wird. Stangensellerie (Bleichsellerie) ist ideal.
* Licht ist wichtig: Sellerie braucht viel Licht, um zu wachsen. Stellt ihn daher an einen möglichst hellen Standort. Wenn ihr keinen sonnigen Platz habt, könnt ihr auch eine Pflanzenlampe verwenden.
* Geduld zahlt sich aus: Sellerie wächst nicht über Nacht. Habt Geduld und gebt ihm Zeit, sich zu entwickeln.
Häufige Probleme und Lösungen
* Fäulnis: Wenn der Strunk fault, ist das ein Zeichen dafür, dass er zu viel Wasser bekommen hat. Entfernt den faulen Teil und wechselt das Wasser. Achtet darauf, dass der Strunk nicht direkt im Wasser steht.
* Gelbe Blätter: Gelbe Blätter können ein Zeichen für Nährstoffmangel sein. Düngt den Sellerie bei Bedarf mit einem organischen Dünger.
* Schädlinge: Kontrolliert den Sellerie regelmäßig auf Schädlinge. Bei Befall könnt ihr natürliche Schädlingsbekämpfungsmittel einsetzen.
* Langsames Wachstum: Langsames Wachstum kann verschiedene Ursachen haben. Überprüft den Standort, die Wassermenge und die Nährstoffversorgung.
Sellerie in der Küche: Vielseitig und gesund
Sellerie ist nicht nur ein tolles DIY-Projekt, sondern auch ein vielseitiges und gesundes Gemüse. Ihr könnt die Blätter und Stängel für Salate, Suppen, Smoothies oder als Garnitur verwenden. Sellerie ist reich an Vitaminen, Mineralstoffen und Ballaststoffen. Er wirkt entzündungshemmend, entwässernd und verdauungsfördernd.
* Selleriesalat: Ein Klassiker! Sellerie, Apfel, Walnüsse und Mayonnaise ergeben einen leckeren und erfrischenden Salat.
* Selleriesuppe: Eine wärmende und gesunde Suppe für kalte Tage.
* Selleriesaft: Ein Detox-Getränk für einen gesunden Start in den Tag.
* Sellerie-Sticks mit Dip: Ein gesunder Snack für zwischendurch.
Fazit: Sellerie auf Steinen – ein lohnendes DIY-Projekt
Sellerie auf Steinen zu ziehen ist ein einfaches und lohnendes DIY-Projekt, das ihr ganz bequem auf eurer Fensterbank starten könnt. Es ist eine tolle Möglichkeit, Gemüsereste zu verwerten, den Kindern die Wunder der Natur näherzubringen und frischen Sellerie zu ernten. Probiert es aus und lasst euch von den Ergebnissen überraschen! Ich wünsche euch viel Spaß beim Gärtnern!
Conclusion
So, there you have it! Growing celery on stones isn’t just a quirky gardening experiment; it’s a genuinely effective way to enjoy fresh, flavorful celery without the space commitment of a traditional garden. It’s a testament to the resourcefulness of gardeners and a fantastic example of how we can adapt to limited spaces and still cultivate our own food. This method breathes new life into celery scraps that would otherwise end up in the compost bin, turning them into a continuous supply of crisp stalks for salads, soups, and snacks.
Why is this DIY trick a must-try? Because it’s incredibly simple, cost-effective, and rewarding. It requires minimal effort and resources, making it accessible to everyone, regardless of their gardening experience. Imagine the satisfaction of harvesting celery grown from kitchen scraps, knowing you’ve reduced waste and created something delicious. Plus, it’s a fantastic conversation starter!
But the beauty of this method lies in its adaptability. Feel free to experiment with different types of stones. River rocks, lava rocks, or even decorative glass pebbles can all work, adding a touch of personal style to your setup. You can also explore different containers. While a simple bowl or jar works perfectly, consider using a repurposed plastic container or even a decorative planter to elevate the aesthetic.
For those looking to take their celery growing to the next level, consider adding a diluted liquid fertilizer to the water every few weeks. This will provide the celery with extra nutrients and encourage faster growth. Just be sure to use a balanced fertilizer and avoid over-fertilizing, which can lead to leggy growth. Another variation is to try growing other vegetables from scraps using a similar method. Lettuce, bok choy, and even some herbs can be successfully regrown in water.
We wholeheartedly encourage you to give this DIY celery growing trick a try. It’s a fun, educational, and ultimately delicious experience. Don’t be afraid to experiment and adapt the method to suit your own preferences and resources. The most important thing is to have fun and enjoy the process of nurturing new life from something that would otherwise be discarded.
Once you’ve tried growing celery on stones, we’d love to hear about your experience! Share your photos, tips, and variations in the comments below. Let’s create a community of resourceful gardeners who are passionate about reducing waste and growing their own food. Your insights could inspire others to embark on their own celery-growing adventures. Let’s see those beautiful celery stalks thriving on stones! This method of **growing celery on stones** is not only sustainable but also a great way to introduce children to the wonders of gardening and the importance of reducing food waste. So, grab some celery scraps, gather your stones, and get growing!
Frequently Asked Questions (FAQ)
1. What kind of celery works best for regrowing on stones?
Any type of celery you buy from the grocery store will work for regrowing. The key is to choose a bunch with a healthy, intact base. Look for celery with a firm, compact base and avoid bunches that are wilted or discolored. Organic celery is a great option, but conventional celery will also work just fine. The most important thing is to ensure the base has a good amount of root nubbins, which are the small, undeveloped roots that will eventually sprout.
2. How long does it take for celery to regrow using this method?
The time it takes for celery to regrow on stones can vary depending on several factors, including the temperature, light exposure, and the health of the celery base. Generally, you can expect to see new growth within a week or two. After about 3-4 weeks, you should have a noticeable amount of new celery stalks. Keep in mind that the regrown celery may not be as large or thick as the original celery, but it will still be flavorful and perfect for adding to dishes.
3. What kind of water should I use?
Tap water is generally fine to use for regrowing celery on stones, but it’s best to let it sit out for a few hours to allow any chlorine to dissipate. Alternatively, you can use filtered water or rainwater. Avoid using distilled water, as it lacks the minerals that plants need to thrive. Change the water every 1-2 days to prevent the growth of bacteria and algae.
4. How much sunlight does the celery need?
Celery needs bright, indirect sunlight to thrive. Place your celery setup near a sunny window, but avoid direct sunlight, which can scorch the leaves. If you don’t have a sunny window, you can use a grow light to provide supplemental light. Aim for at least 6-8 hours of light per day.
5. Can I grow celery on stones outdoors?
Yes, you can grow celery on stones outdoors, but you’ll need to protect it from extreme temperatures and direct sunlight. Choose a location that receives partial shade and is sheltered from strong winds. Be sure to monitor the water level regularly, as it will evaporate more quickly outdoors.
6. How often should I change the water?
It’s important to change the water every 1-2 days to prevent the growth of bacteria and algae. This will also help to keep the celery healthy and prevent it from rotting. When you change the water, gently rinse the stones and the celery base to remove any debris.
7. What if my celery starts to rot?
If your celery starts to rot, it’s important to take action quickly to prevent the rot from spreading. Remove any affected leaves or stalks and change the water immediately. You can also try adding a small amount of hydrogen peroxide to the water to kill any bacteria. If the rot is severe, it may be necessary to discard the celery and start with a fresh base.
8. Can I eat the regrown celery?
Yes, you can absolutely eat the regrown celery! It will have a similar flavor to the original celery, although it may be slightly milder. Use it in salads, soups, stews, or as a snack.
9. How do I harvest the regrown celery?
To harvest the regrown celery, simply cut off the stalks near the base with a sharp knife or scissors. Leave the base intact so that it can continue to produce new growth. You can harvest the celery as needed, whenever you want to add it to a dish.
10. Can I transplant the celery to soil after it has regrown on stones?
Yes, you can transplant the celery to soil after it has regrown on stones. Once the celery has developed a good root system, you can carefully remove it from the water and plant it in a pot or garden bed. Choose a location that receives partial shade and has well-draining soil. Water the celery regularly and fertilize it every few weeks.
11. What kind of fertilizer should I use?
A balanced liquid fertilizer is best for growing celery on stones. Look for a fertilizer with an NPK ratio of 10-10-10 or similar. Dilute the fertilizer according to the instructions on the label and add it to the water every few weeks. Avoid over-fertilizing, which can lead to leggy growth.
12. Can I grow other vegetables using this method?
Yes, you can try growing other vegetables from scraps using a similar method. Lettuce, bok choy, and some herbs can be successfully regrown in water. Experiment with different vegetables and see what works best for you.
13. What if I don’t have stones?
If you don’t have stones, you can use other materials to support the celery base. Gravel, marbles, or even glass beads can all work. The key is to use something that will allow the celery base to sit above the water level while still providing support.
14. Is growing celery on stones sustainable?
Yes, growing celery on stones is a sustainable practice because it reduces food waste and allows you to grow your own food without the need for a traditional garden. It’s a great way to make the most of your kitchen scraps and contribute to a more sustainable lifestyle.
Leave a Comment