
Growing corn in your kitchen garden might sound like a whimsical dream, conjuring images of sprawling fields in your tiny backyard. But guess what? It’s totally achievable, and I’m here to show you how! Forget those store-bought cobs; imagine the satisfaction of biting into sweet, juicy corn you nurtured from seed to table, right outside your kitchen door.
Corn, or maize, has a rich history, dating back thousands of years to its origins in Mexico. It was a staple crop for ancient civilizations like the Mayans and Aztecs, and its cultivation spread throughout the Americas and eventually the world. Today, it remains a vital food source, and bringing a piece of that history into your own garden is incredibly rewarding.
Why should you try growing corn in your kitchen garden? Well, for starters, the taste of homegrown corn is simply unmatched. Plus, it’s a fantastic way to connect with nature, learn about the growing process, and reduce your reliance on commercially grown produce. Many people think they don’t have the space, but with a few clever DIY tricks and hacks, even the smallest gardens can yield a surprisingly bountiful harvest. I’m excited to share some simple, effective methods that will have you enjoying fresh, homegrown corn in no time!
Growing Corn in Your Own Kitchen Garden: A DIY Guide
Hello, dear garden friends! Have you ever dreamed of growing your own corn in the garden? It’s easier than you think, and the result is incredibly delicious! In this article, I’ll show you how to grow your own corn in the kitchen garden with a few simple steps. Let’s get started!
What You’ll Need for Growing Corn
Before we begin, here is a list of the things you’ll need for growing corn:
- Corn seeds: Choose a variety that is suitable for your climate. There are many different varieties, from sweet corn to popcorn.
- Garden tools: A shovel, a rake, and possibly a dibber.
- Good soil: Corn loves nutrient-rich, well-draining soil.
- Compost or fertilizer: To enrich the soil.
- Water: Corn needs a lot of water, especially during the growth phase.
- Sunlight: Corn needs at least 6-8 hours of sunlight per day.
- Patience: Corn takes time to grow, so be patient!
Step-by-Step Guide to Growing Corn
Here is a detailed guide on how to grow your own corn in your kitchen garden:
1. Choosing the Right Time
The right time for sowing corn is crucial. Corn is very sensitive to cold and should only be sown after the last frost. In most regions, this is mid to late May. I always wait until the soil has warmed up well, ideally above 15 degrees Celsius (59°F). A good indicator is when the forsythias bloom or the oaks get their leaves.
2. Preparing the Soil
Corn needs well-prepared soil to grow optimally. Here are the steps for soil preparation:
- Clean: Remove all weeds, stones, and other debris from the growing area.
- Loosen: Loosen the soil with a shovel or a spade. Work the soil at least 30 cm (12 inches) deep.
- Enrich: Mix compost or organic fertilizer into the soil. Corn is a heavy feeder and needs a lot of nutrients. I like to use well-rotted manure or horn shavings.
- Smooth: Rake the soil smooth to create an even surface.
3. Sowing
Now comes the exciting part: sowing the corn seeds!
- Make rows: Make rows about 75-90 cm (30-36 inches) apart. Corn needs space to spread out.
- Sow: Place the corn seeds in the rows at a distance of about 20-25 cm (8-10 inches). The seeds should be placed about 2-3 cm (1 inch) deep in the soil.
- Cover: Cover the seeds with soil and press down lightly.
- Water: Water the rows gently to keep the soil moist. Be careful not to flood the soil.
Important: Corn is best grown in blocks, not in a single row. This helps with pollination. So, plant at least four rows next to each other.
4. Care
After sowing, proper care is crucial for a successful harvest.
- Watering: Corn needs a lot of water, especially during the growth phase. Water regularly, especially in dry weather. Make sure the soil is moist but not wet.
- Weeding: Keep the growing area free of weeds. Weeds compete with the corn for nutrients and water. Weed regularly to control weed growth.
- Fertilizing: Fertilize the corn during the growth phase. I like to use an organic fertilizer, such as nettle tea or diluted compost tea. Fertilize about every 2-3 weeks.
- Hilling: When the corn plants are about 30 cm (12 inches) high, hill them up. This means you pile soil around the base of the plants. This gives the plants more stability and promotes root formation.
5. Pollination
Corn is wind-pollinated, which means the wind carries the pollen from the male flowers (the tassels at the top of the plant) to the female flowers (the silks on the ears). To promote pollination, you can take the following measures:
- Plant in blocks: As mentioned, planting in blocks helps with pollination.
- Shaking: On windless days, you can gently shake the corn plants to distribute the pollen.
- Hand pollination: If you want to be particularly careful, you can also pollinate by hand. Collect the pollen from the male flowers with a brush and apply it to the female flowers.
6. Pests and Diseases
Corn can be affected by various pests and diseases. Here are some of the most common problems and how you can combat them:
- Corn Borer: The corn borer is a moth whose larvae develop in the corn stalks and ears. You can combat the corn borer with biological agents, such as Bacillus thuringiensis (Bt).
- Aphids: Aphids suck the plant sap and can weaken the corn plants. You can spray aphids off with a jet of water or combat them with a soap solution.
- Fungal Diseases: Fungal diseases can occur in wet weather. Ensure good ventilation and remove affected leaves.
7. The Harvest
Harvest time is the highlight of the corn-growing season!
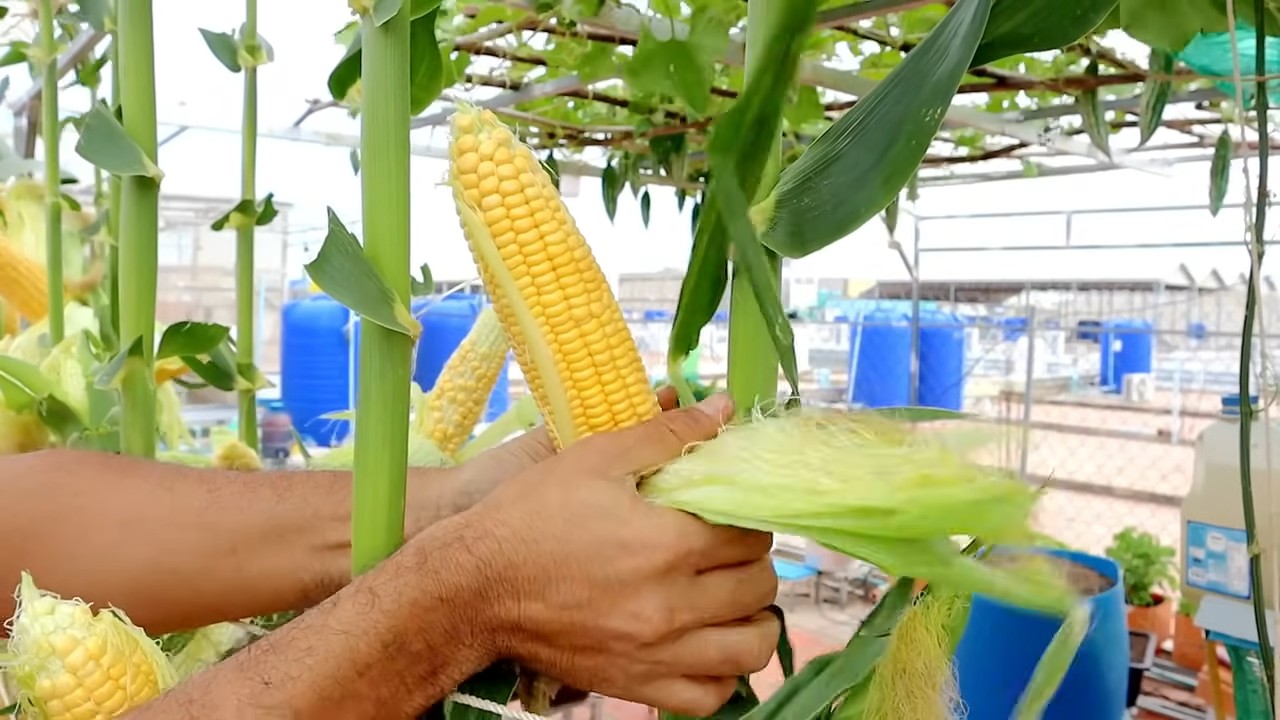
- Recognizing Ripeness: The corn is ripe when the silks are brown and dry and the ears feel plump. Press a kernel with your fingernail. If it is milky, the corn is ripe.
- Harvesting: Break the ears off the plants. Twist them slightly to loosen them more easily.
- Enjoy: Now you can enjoy your homegrown corn! Grill it, cook it, or process it into delicious dishes.
Additional Tips for Successful Corn Cultivation
- Variety Selection: Choose a corn variety that is suitable for your climate and needs. There are different varieties, from sweet corn to popcorn. Inform yourself about the different varieties before sowing and choose the right one.
- Crop Rotation: Do not grow corn in the same spot every year. Rotate the crops to keep the soil healthy and prevent diseases.
- Mulching: Mulch the soil around the corn plants. This helps to keep the soil moist and suppress weed growth.
- Bird Protection: Birds love corn seeds and young corn plants. Protect your sowing with a net or a scarecrow.
- Experimenting: Try different growing methods and find out what works best for you. Every garden is different, and there is always something new to learn.
Common Mistakes in Corn Cultivation and How to Avoid Them
Too little fertilizer: Corn is a heavy feeder and needs a lot of nutrients. Fertilize the corn during the growth phase.
Sowing too early: Corn is very sensitive to cold and should only be sown after the last frost. Wait until the soil has warmed up well.
Too little water: Corn needs a lot of water, especially during the growth phase. Water regularly, especially in dry weather.

Conclusion
So, there you have it! Growing corn in your kitchen garden is not only achievable, but it’s also incredibly rewarding. Imagine stepping outside your back door to harvest fresh, sweet corn for dinner – a taste far superior to anything you can find in the supermarket. This DIY trick transforms your garden into a mini-farm, providing you with a sustainable source of delicious produce and a deeper connection to the food you eat.
This isn’t just about saving money; it’s about experiencing the joy of nurturing something from seed to table. It’s about understanding the process, appreciating the effort, and savoring the unparalleled flavor of homegrown corn. And let’s be honest, there’s a certain satisfaction in showing off your impressive corn stalks to friends and neighbors!
But the benefits extend beyond the personal. By growing your own corn, you’re reducing your carbon footprint, supporting sustainable practices, and contributing to a more localized food system. You’re also ensuring that your corn is free from harmful pesticides and herbicides, giving you peace of mind about what you’re feeding your family.
Don’t be afraid to experiment with different varieties of corn to find your favorites. Try growing sweet corn for grilling, popcorn kernels for movie nights, or even ornamental corn for fall decorations. You can also companion plant your corn with beans and squash, following the traditional “Three Sisters” method for a more productive and balanced garden. Consider adding sunflowers nearby to attract pollinators and provide additional support for your corn stalks.
Ready to give it a try? We encourage you to embrace this DIY trick and transform your kitchen garden into a cornucopia of deliciousness. Start small, learn as you go, and don’t be discouraged by initial setbacks. Gardening is a journey, and every mistake is an opportunity to learn and improve.
We’re confident that you’ll be amazed by the results. And once you’ve harvested your first batch of homegrown corn, we want to hear all about it! Share your experiences, tips, and photos in the comments below. Let’s build a community of corn-growing enthusiasts and inspire others to embrace the joys of homegrown food. Let us know what worked for you, what challenges you faced, and any creative solutions you discovered along the way. Together, we can unlock the secrets to successful corn cultivation and enjoy the bounty of our own backyards. So, grab your seeds, get your hands dirty, and get ready to experience the magic of growing corn in your kitchen garden!
Frequently Asked Questions (FAQ)
What kind of corn should I grow in my kitchen garden?
The best type of corn to grow depends on your personal preferences and the size of your garden. Sweet corn is a popular choice for eating fresh, while popcorn corn is great for making homemade popcorn. Ornamental corn can add a decorative touch to your garden. Consider the climate in your area and choose varieties that are well-suited to your growing conditions. Look for varieties that are specifically bred for smaller gardens or container growing if space is limited. Some popular sweet corn varieties include ‘Golden Bantam,’ ‘Silver Queen,’ and ‘Honey Select.’ For popcorn, try ‘Strawberry Popcorn’ or ‘Japanese Hulless.’
How much space does corn need to grow?
Corn plants need adequate space to thrive. As a general rule, space corn plants about 8-12 inches apart in rows that are 2-3 feet apart. This allows for proper air circulation and sunlight penetration, which are essential for healthy growth. If you’re growing corn in containers, choose large pots (at least 12 inches in diameter) and plant only one or two plants per pot. Remember that corn is wind-pollinated, so planting in blocks rather than a single row will improve pollination rates.
What kind of soil does corn need?
Corn thrives in well-drained, fertile soil that is rich in organic matter. Before planting, amend your soil with compost or well-rotted manure to improve its structure and nutrient content. Corn is a heavy feeder, so it’s important to provide it with adequate nutrients throughout the growing season. A soil pH of 6.0 to 6.8 is ideal for corn growth. You can test your soil pH with a home testing kit or by sending a sample to your local agricultural extension office.
How often should I water corn?
Corn needs consistent moisture, especially during germination and pollination. Water deeply and regularly, aiming to keep the soil consistently moist but not waterlogged. During hot, dry weather, you may need to water daily. Use a soaker hose or drip irrigation to deliver water directly to the roots, minimizing water loss through evaporation. Avoid overhead watering, as this can increase the risk of fungal diseases.
How do I know when my corn is ready to harvest?
The timing of harvest depends on the variety of corn you’re growing. For sweet corn, the silks will turn brown and dry, and the kernels will be plump and milky when pierced with a fingernail. The husk should feel full and tight. For popcorn, allow the ears to dry completely on the stalk before harvesting. The kernels should be hard and glassy. Ornamental corn is typically harvested when the husks are dry and the kernels are fully colored.
What are some common pests and diseases that affect corn?
Common pests of corn include corn earworms, aphids, and Japanese beetles. Diseases that can affect corn include corn smut, rust, and leaf blight. Monitor your plants regularly for signs of pests or diseases and take action promptly to prevent them from spreading. Use organic pest control methods whenever possible, such as hand-picking pests, using insecticidal soap, or introducing beneficial insects. Ensure good air circulation and avoid overhead watering to minimize the risk of fungal diseases.
Can I grow corn in containers?
Yes, you can grow corn in containers, but it requires some extra attention. Choose large containers (at least 12 inches in diameter) and use a high-quality potting mix. Plant only one or two plants per container to avoid overcrowding. Water frequently and fertilize regularly, as container-grown plants tend to dry out and deplete nutrients more quickly. Place the containers in a sunny location that receives at least 6-8 hours of sunlight per day.
How can I improve pollination in my corn patch?
Corn is wind-pollinated, so it’s important to ensure good air circulation and plant your corn in blocks rather than a single row. You can also hand-pollinate your corn by gently shaking the tassels (the male flowers at the top of the plant) over the silks (the female flowers on the ears). Do this in the morning when the pollen is most active. Attract pollinators to your garden by planting flowers that provide nectar and pollen, such as sunflowers, zinnias, and marigolds.
What are some companion plants for corn?
Corn benefits from being planted alongside certain companion plants. The “Three Sisters” method, which involves planting corn with beans and squash, is a traditional and effective way to improve soil fertility and pest control. Beans fix nitrogen in the soil, which benefits the corn, while squash provides ground cover that helps to suppress weeds and retain moisture. Other good companion plants for corn include sunflowers, marigolds, and herbs like basil and oregano.
How do I store my harvested corn?
Freshly harvested sweet corn is best eaten immediately, but it can be stored in the refrigerator for a few days. To store corn, leave it in the husk and wrap it tightly in plastic wrap. Popcorn corn should be dried completely before storing in an airtight container in a cool, dry place. Ornamental corn can be dried and used for decorations.
Leave a Comment