
Growing corn on concrete might sound like an impossible feat, a horticultural oxymoron! But what if I told you that with a little ingenuity and some DIY magic, you could actually harvest sweet, juicy corn even without a traditional garden plot? Forget sprawling acres; we’re talking about bringing the farm to your patio, balcony, or even your driveway!
For centuries, corn has been a staple crop, deeply woven into the fabric of countless cultures. From the ancient civilizations of Mesoamerica, where it was revered as a sacred gift, to its modern-day prominence in global cuisine, corn’s journey is a testament to its adaptability and nutritional value. But traditionally, growing corn required vast fields and fertile soil. What if you don’t have that?
That’s where this DIY guide comes in. Maybe you’re an apartment dweller yearning for a taste of homegrown goodness, or perhaps you’re a seasoned gardener looking for a fun and unconventional challenge. Whatever your reason, learning how to grow corn on concrete opens up a world of possibilities. It’s a fantastic way to maximize limited space, experiment with container gardening, and enjoy the satisfaction of harvesting your own delicious corn, no matter where you live. Plus, it’s a conversation starter! So, let’s ditch the dirt (well, mostly!) and dive into the secrets of successfully growing corn on concrete!
Mais Anbauen auf Beton: Ein DIY-Projekt für den Urbanen Gärtner
Hey Leute! Habt ihr auch so wenig Platz, aber trotzdem Lust auf frischen Mais aus dem eigenen Anbau? Dann seid ihr hier genau richtig! Ich zeige euch, wie ihr Mais sogar auf Beton anbauen könnt. Klingt verrückt? Ist es vielleicht ein bisschen, aber es funktioniert! Wir nutzen die Kraft des Container-Gärtnerns, um auch auf kleinstem Raum oder eben auf versiegelten Flächen leckeren Mais zu ernten. Los geht’s!
Was du brauchst:
* Große Pflanzgefäße: Am besten Tonnen, große Kübel oder sogar selbstgebaute Holzkisten. Sie sollten mindestens 45-60 cm tief sein, da Mais tiefe Wurzeln bildet.
* Hochwertige Pflanzerde: Mais ist ein Starkzehrer, also braucht er nährstoffreiche Erde. Ich empfehle eine Mischung aus Gartenerde, Kompost und etwas Sand für eine gute Drainage.
* Mais-Saatgut: Wählt eine Sorte, die für den Anbau im Kübel geeignet ist. Es gibt spezielle Sorten, die kompakter wachsen.
* Dünger: Organischer Dünger wie Hornspäne oder Komposttee sind ideal. Ihr könnt auch einen mineralischen Dünger verwenden, aber achtet auf die Dosierung.
* Gießkanne oder Schlauch: Mais braucht viel Wasser, besonders während der Blütezeit.
* Stützmaterial: Bambusstäbe oder ähnliches, um die Pflanzen bei Bedarf zu stützen. Gerade bei Wind kann das sehr hilfreich sein.
* Mulchmaterial: Stroh, Holzhackschnitzel oder Grasschnitt, um die Feuchtigkeit im Boden zu halten und Unkraut zu unterdrücken.
* Geduld und Liebe: Das Wichtigste!
Schritt-für-Schritt-Anleitung:
1. Die Pflanzgefäße vorbereiten:
* Zuerst müsst ihr sicherstellen, dass eure Pflanzgefäße Abzugslöcher haben. Staunässe ist Gift für Mais! Wenn keine Löcher vorhanden sind, bohrt welche hinein.
* Bedeckt den Boden der Gefäße mit einer Schicht Kies oder Blähton. Das verbessert die Drainage zusätzlich.
* Füllt die Gefäße mit eurer vorbereiteten Pflanzerde. Lasst etwa 5-10 cm Platz bis zum Rand.
* Gießt die Erde einmal gründlich an, damit sie sich setzt.
2. Das Mais-Saatgut aussäen:
* Macht kleine Löcher in die Erde, etwa 2-3 cm tief. Der Abstand zwischen den Löchern sollte etwa 15-20 cm betragen.
* Legt in jedes Loch 2-3 Maiskörner. Das erhöht die Wahrscheinlichkeit, dass mindestens ein Korn keimt.
* Bedeckt die Löcher mit Erde und drückt sie leicht an.
* Gießt die Erde vorsichtig an, ohne sie wegzuspülen.
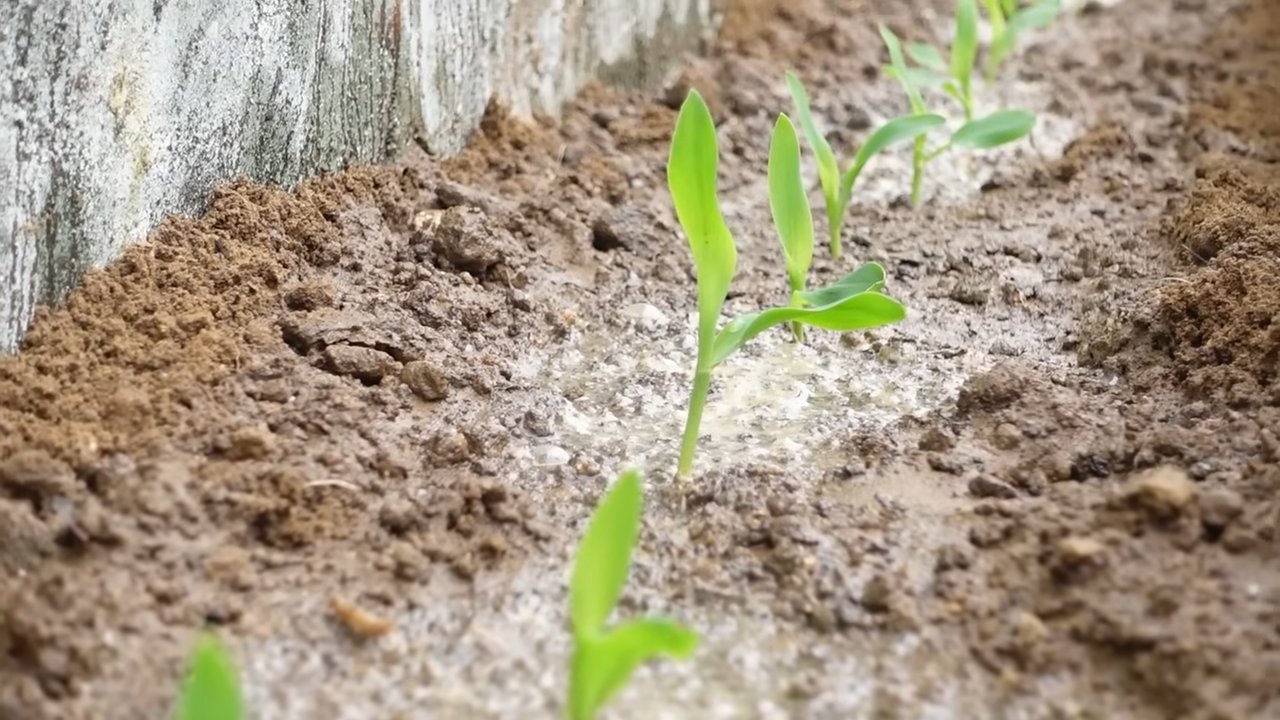
3. Die Keimung und das Wachstum:
* Stellt die Pflanzgefäße an einen sonnigen Standort. Mais braucht mindestens 6-8 Stunden Sonne pro Tag.
* Haltet die Erde feucht, aber nicht nass. Gießt regelmäßig, besonders bei trockenem Wetter.
* Nach etwa einer Woche sollten die ersten Keimlinge zu sehen sein.
* Wenn mehrere Keimlinge pro Loch aufgegangen sind, entfernt den schwächsten, damit der stärkste genug Platz hat.
4. Die Pflege der Maispflanzen:
* Düngen: Beginnt etwa 4-6 Wochen nach der Keimung mit dem Düngen. Gebt euren Maispflanzen alle 2-3 Wochen organischen Dünger oder Komposttee.
* Gießen: Mais braucht viel Wasser, besonders während der Blütezeit. Achtet darauf, dass die Erde immer feucht ist.
* Stützen: Wenn eure Maispflanzen hoch wachsen und drohen umzukippen, stützt sie mit Bambusstäben oder ähnlichem.
* Mulchen: Bedeckt die Erde mit Mulchmaterial, um die Feuchtigkeit zu halten und Unkraut zu unterdrücken.
* Seitentriebe entfernen: Entfernt die Seitentriebe (auch “Diebe” genannt), die sich an der Basis der Pflanze bilden. Diese nehmen der Pflanze unnötig Kraft.
5. Die Bestäubung:
* Mais ist windbestäubt. Das bedeutet, dass der Pollen von den männlichen Blüten (die sich oben an der Pflanze befinden) zu den weiblichen Blüten (die sich an den Kolben befinden) gelangen muss.
* Wenn ihr wenig Wind habt, könnt ihr die Bestäubung unterstützen, indem ihr die männlichen Blüten vorsichtig schüttelt oder den Pollen mit einem Pinsel auf die weiblichen Blüten übertragt.
* Eine gute Bestäubung ist entscheidend für eine reiche Ernte.
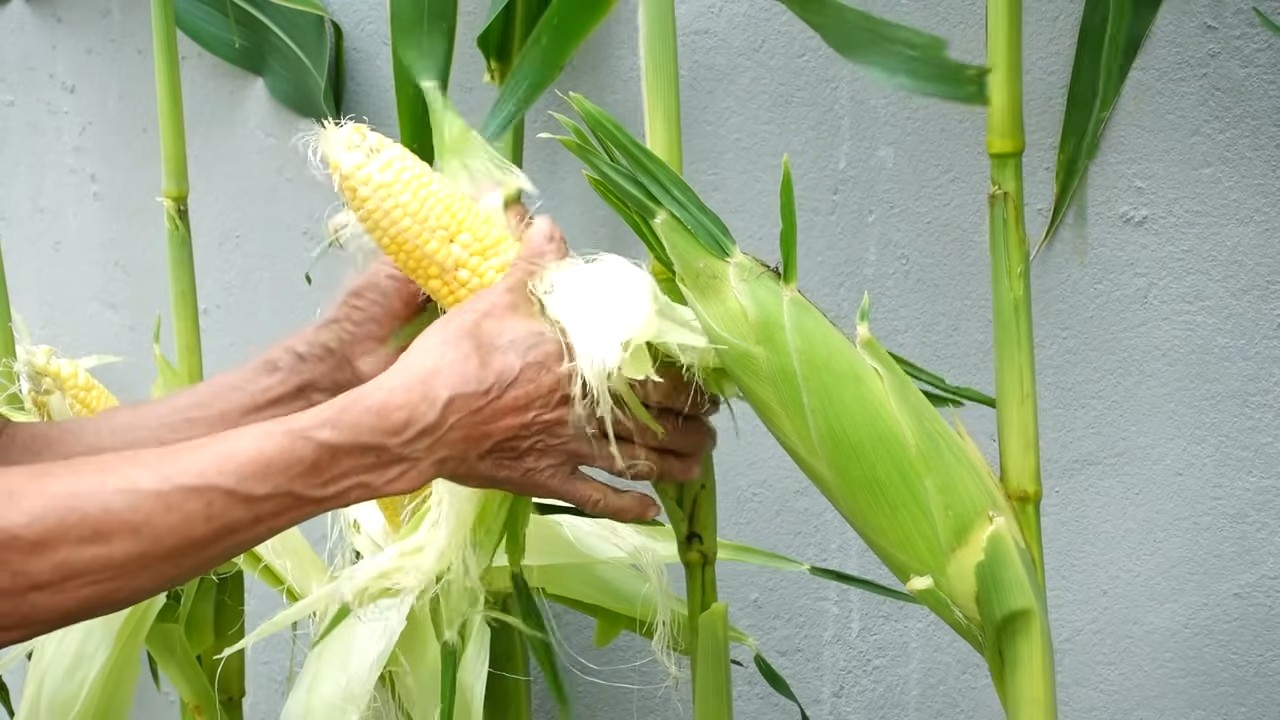
6. Die Ernte:
* Die Maiskolben sind reif, wenn die Seidenfäden braun und trocken sind und die Kolben sich prall anfühlen.
* Drückt mit dem Fingernagel in ein Maiskorn. Wenn milchige Flüssigkeit austritt, ist der Mais reif.
* Brecht die Kolben vorsichtig von der Pflanze ab.
Zusätzliche Tipps und Tricks:
* Sortenwahl: Achtet bei der Sortenwahl darauf, dass die Sorte für den Anbau im Kübel geeignet ist. Es gibt spezielle Sorten, die kompakter wachsen und weniger Platz benötigen.
* Pflanzabstand: Haltet einen ausreichenden Pflanzabstand ein, damit die Pflanzen genügend Platz zum Wachsen haben.
* Windschutz: Stellt die Pflanzgefäße an einen windgeschützten Ort, um zu verhindern, dass die Pflanzen umkippen.
* Schädlinge: Achtet auf Schädlinge wie Maiszünsler oder Blattläuse. Bei Bedarf könnt ihr biologische Schädlingsbekämpfungsmittel einsetzen.
* Fruchtfolge: Baut im nächsten Jahr keine Mais an der gleichen Stelle an, um Krankheiten und Schädlingen vorzubeugen.
Herausforderungen beim Maisanbau im Kübel:
* Platzbedarf: Mais braucht Platz, auch im Kübel. Achtet darauf, dass eure Pflanzgefäße groß genug sind.
* Wasserbedarf: Mais hat einen hohen Wasserbedarf, besonders während der Blütezeit. Gießt regelmäßig und ausreichend.
* Nährstoffbedarf: Mais ist ein Starkzehrer und benötigt viele Nährstoffe. Düngt regelmäßig, um eine gute Ernte zu erzielen.
* Bestäubung: Die Bestäubung kann im Kübel schwieriger sein als im Freiland. Unterstützt die Bestäubung bei Bedarf manuell.
Warum Maisanbau auf Beton?
Klar, es ist nicht die natürlichste Umgebung für Mais. Aber gerade in Städten, wo der Platz knapp ist, bietet der Anbau im Kübel eine tolle Möglichkeit, trotzdem frisches Gemüse anzubauen. Und der Beton? Der dient einfach als Untergrund für unsere Pflanzgefäße. So können wir auch versiegelte Flächen nutzen und ein bisschen Grün in die Stadt bringen. Außerdem ist es einfach ein cooles Projekt, das zeigt, dass man mit ein bisschen Kreativität und Know-how fast überall etwas anbauen kann!
Noch ein paar abschließende Gedanken:
Ich hoffe, diese Anleitung hat euch inspiriert, euren eigenen Mais auf Beton anzubauen. Es ist ein lohnendes Projekt, das euch mit frischem, selbst angebautem Mais belohnt. Und wer weiß, vielleicht inspiriert ihr ja auch eure Nachbarn, es euch gleichzutun! Viel Spaß beim Gärtnern! Und vergesst nicht: Geduld und Liebe sind die wichtigsten Zutaten für eine erfolgreiche Ernte!
Conclusion
So, there you have it! Growing corn on concrete might sound like an impossible feat, a horticultural oxymoron, but with this simple, effective DIY trick, you can indeed cultivate your own sweet, juicy corn, even without access to traditional soil. This method opens up a world of possibilities for urban gardeners, apartment dwellers, or anyone with limited space. It’s not just about growing corn; it’s about proving that with a little ingenuity and the right approach, you can overcome limitations and enjoy the fruits (or rather, vegetables) of your labor.
This DIY approach to growing corn on concrete is a must-try for several reasons. First, it’s incredibly space-efficient. Forget sprawling fields; all you need are containers and a sunny spot. Second, it’s a fantastic way to recycle and repurpose materials. Those old buckets, tubs, or even repurposed tires can become thriving corn planters. Third, it offers a level of control over the growing environment that traditional gardening simply can’t match. You can tailor the soil composition, watering schedule, and nutrient levels to perfectly suit your corn’s needs.
But the real magic lies in the satisfaction of watching those tiny seeds sprout and grow into towering stalks, laden with delicious corn. It’s a testament to the power of nature and your own ability to nurture life, even in the most unexpected places.
Don’t be afraid to experiment with variations! Try different corn varieties to see which ones thrive best in your concrete jungle. Consider adding companion plants like beans or squash to your containers to create a mini-ecosystem. You can also adjust the fertilizer blend to optimize growth and yield. Perhaps you want to try a hydroponic version of this method? The possibilities are endless.
Remember to pay close attention to watering and sunlight. Corn needs plenty of both, especially when grown in containers. Monitor the soil moisture regularly and adjust your watering schedule accordingly. And make sure your plants get at least six hours of direct sunlight each day.
We are confident that this DIY trick will revolutionize your approach to urban gardening. It’s a fun, rewarding, and surprisingly easy way to enjoy fresh, homegrown corn, no matter where you live.
So, what are you waiting for? Gather your supplies, get your hands dirty, and start growing corn on concrete today! We can’t wait to hear about your experiences. Share your photos, tips, and stories in the comments below. Let’s build a community of concrete corn growers and inspire others to embrace the possibilities of urban agriculture. Let us know what challenges you faced and how you overcame them. Your insights could be invaluable to other aspiring gardeners. Happy growing!
Frequently Asked Questions (FAQ)
1. What kind of corn is best for growing in containers on concrete?
The best corn varieties for container gardening are typically shorter, more compact types. Look for varieties labeled as “dwarf” or “container-friendly.” Some excellent choices include:
* ‘On Deck’ Hybrid: A very early and compact variety.
* ‘Golden Bantam’: A classic sweet corn that performs well in containers.
* ‘Trinity’: A multi-purpose variety that can be harvested as baby corn or allowed to mature.
* ‘Blue Hopi’: An heirloom variety that is drought-tolerant and produces beautiful blue kernels.
Consider the size of your containers when choosing a variety. Larger containers can accommodate slightly taller varieties, while smaller containers are better suited for dwarf types. Also, consider your local climate and growing season when selecting a variety.
2. What size containers do I need for growing corn on concrete?
Corn plants need plenty of space for their roots to grow, so choose containers that are at least 12 inches in diameter and 12 inches deep. Larger containers, such as 15-20 gallon tubs, are even better, as they provide more room for root development and help retain moisture. Make sure the containers have drainage holes to prevent waterlogging.
3. What type of soil should I use for growing corn in containers?
Use a well-draining potting mix that is rich in organic matter. Avoid using garden soil, as it can become compacted in containers and hinder root growth. You can also amend your potting mix with compost or other organic materials to improve its fertility and water-holding capacity. A good mix would be equal parts of potting soil, compost, and perlite or vermiculite.
4. How often should I water my corn plants grown on concrete?
Corn plants need consistent moisture, especially during hot weather. Water deeply whenever the top inch of soil feels dry to the touch. Avoid overwatering, as this can lead to root rot. The frequency of watering will depend on the weather, the size of your containers, and the type of potting mix you are using. Check the soil moisture regularly and adjust your watering schedule accordingly. Concrete can also heat up, so be mindful of the soil temperature.
5. How much sunlight do corn plants need when grown on concrete?
Corn plants need at least six hours of direct sunlight per day to thrive. Choose a sunny spot for your containers, such as a south-facing balcony or patio. If you don’t have enough sunlight, you can supplement with grow lights. Rotate the containers regularly to ensure that all sides of the plants receive adequate sunlight.
6. What kind of fertilizer should I use for growing corn on concrete?
Corn is a heavy feeder, so it needs regular fertilization. Use a balanced fertilizer, such as 10-10-10, or a fertilizer specifically formulated for vegetables. Apply the fertilizer according to the package directions. You can also supplement with organic fertilizers, such as compost tea or fish emulsion. Fertilize every 2-3 weeks during the growing season.
7. How do I pollinate corn plants grown in containers?
Corn is wind-pollinated, so you may need to hand-pollinate your plants if they are grown in a sheltered location. When the tassels (male flowers) appear at the top of the plant, gently shake them to release pollen. Then, brush the pollen onto the silks (female flowers) that emerge from the developing ears of corn. Repeat this process every day for several days to ensure pollination. You can also use a small paintbrush to collect pollen from the tassels and apply it to the silks.
8. How long does it take to grow corn on concrete?
The time it takes to grow corn from seed to harvest depends on the variety and the growing conditions. Generally, it takes about 60-100 days. Check the seed packet for specific information on the variety you are growing.
9. How do I know when my corn is ready to harvest?
The silks on the ears of corn will turn brown and dry when the corn is ready to harvest. You can also peel back the husk slightly and check the kernels. The kernels should be plump and milky. If the kernels are dry and hard, the corn is overripe.
10. Can I grow corn on concrete in cold climates?
Yes, you can grow corn on concrete in cold climates, but you may need to start the seeds indoors and transplant them outdoors after the last frost. You can also use row covers or other protective measures to extend the growing season. Choose early-maturing varieties that will have enough time to mature before the first frost.
11. What are some common pests and diseases that affect corn grown on concrete?
Common pests that affect corn include corn earworms, aphids, and spider mites. Common diseases include corn smut and rust. You can control pests and diseases with organic methods, such as insecticidal soap, neem oil, and copper fungicide. Regularly inspect your plants for signs of pests or diseases and take action promptly.
12. Can I grow other vegetables in the same containers as corn?
Yes, you can grow companion plants in the same containers as corn. Good companion plants for corn include beans, squash, and cucumbers. These plants can help to improve soil fertility, suppress weeds, and attract beneficial insects. Avoid planting plants that will compete with corn for nutrients or sunlight.

Leave a Comment