
Growing Giant Mustard Greens might sound like something out of a fairytale, but I’m here to tell you it’s totally achievable right in your own backyard! Forget those puny, store-bought greens; imagine harvesting mustard leaves so big they could practically double as umbrellas. Intrigued? I thought you might be!
Mustard greens have a rich history, cultivated for centuries across Asia and Europe, not just for their peppery flavor but also for their medicinal properties. They’ve been a staple in various cuisines, from Southern comfort food to vibrant Asian stir-fries. But let’s be honest, while the flavor is fantastic, the size can sometimes be… underwhelming. That’s where this DIY guide comes in.
Why bother with the effort of growing giant mustard greens? Well, for starters, imagine the sheer abundance! One or two giant leaves can provide enough greens for an entire salad or side dish. Plus, it’s incredibly satisfying to nurture something so impressive from seed to harvest. More importantly, this DIY trick will help you maximize your garden space and yield, ensuring you have a constant supply of fresh, nutritious greens. I’m going to share some simple, yet effective techniques that will transform your mustard greens from ordinary to extraordinary. Get ready to impress your friends, family, and even yourself with your gardening prowess!
Riesige Senfblätter selbst anbauen: Dein ultimativer DIY-Leitfaden
Hallo Gartenfreunde! Habt ihr jemals von riesigen Senfblättern geträumt, die so groß sind, dass sie fast wie Elefantenohren aussehen? Ich schon! Und ich habe herausgefunden, wie man sie selbst anbaut. Es ist einfacher als ihr denkt und das Ergebnis ist einfach fantastisch. In diesem Artikel zeige ich euch Schritt für Schritt, wie ihr eure eigenen gigantischen Senfblätter züchten könnt. Lasst uns loslegen!
Was du brauchst: Die Vorbereitung
Bevor wir mit dem Pflanzen beginnen, müssen wir sicherstellen, dass wir alles haben, was wir brauchen. Hier ist eine Liste der wichtigsten Dinge:
* Senfsamen: Wählt eine Sorte, die für große Blätter bekannt ist. ‘Florida Broadleaf’ oder ‘Giant Southern Curled’ sind gute Optionen.
* Gute Erde: Senfblätter lieben nährstoffreiche, gut durchlässige Erde.
* Kompost oder organischer Dünger: Um die Erde zusätzlich anzureichern.
* Pflanzgefäße (optional): Wenn ihr keinen Garten habt, könnt ihr Senfblätter auch in großen Töpfen anbauen.
* Gießkanne oder Gartenschlauch: Für die Bewässerung.
* Gartengeräte: Schaufel, Harke, etc.
* Sonniger Standort: Senfblätter brauchen viel Sonne.
* Geduld: Und ein bisschen Liebe!
Schritt-für-Schritt-Anleitung: Vom Samen zum Riesenblatt
Hier ist der detaillierte Plan, wie wir unsere riesigen Senfblätter zum Leben erwecken:
1. Den richtigen Zeitpunkt wählen: Senfblätter sind kühle Wetterpflanzen. Das bedeutet, dass die beste Zeit zum Pflanzen im Frühjahr (einige Wochen vor dem letzten Frost) oder im Herbst ist. Die Hitze des Sommers kann dazu führen, dass die Pflanzen schnell in Samen schießen (bolting), was die Blätter bitter macht.
2. Den Boden vorbereiten:
* Wählt einen sonnigen Standort in eurem Garten. Senfblätter brauchen mindestens 6 Stunden Sonnenlicht pro Tag.
* Lockert den Boden mit einer Schaufel oder Harke auf. Entfernt Steine, Wurzeln und andere Hindernisse.
* Mischt Kompost oder organischen Dünger in den Boden. Das gibt den Senfblättern einen guten Start. Ich verwende gerne gut verrotteten Mist, aber Kompost funktioniert genauso gut.
* Wenn ihr in Töpfen pflanzt, verwendet eine hochwertige Blumenerde und stellt sicher, dass die Töpfe Drainagelöcher haben.
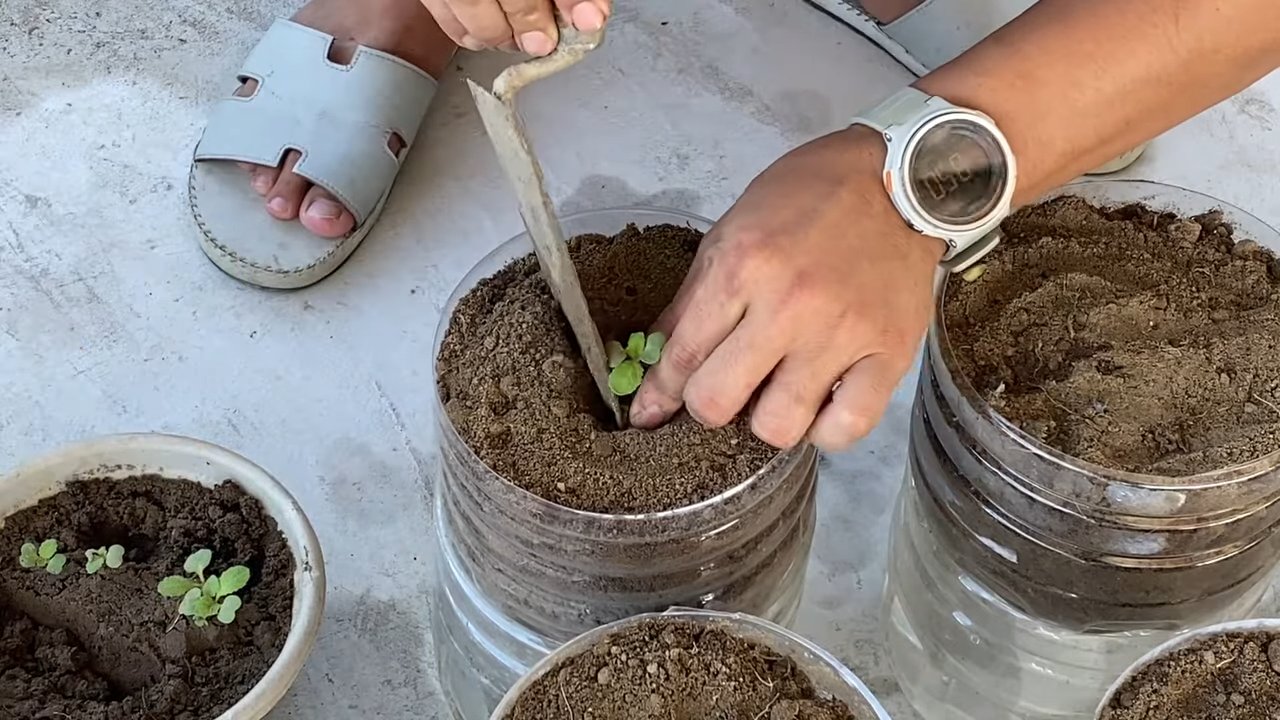
3. Die Samen säen:
* Senfsamen sind klein, also müsst ihr nicht tief graben. Macht flache Rillen im Abstand von etwa 30-45 cm.
* Streut die Samen gleichmäßig in die Rillen.
* Bedeckt die Samen leicht mit Erde (etwa 0,5 cm).
* Gießt die Erde vorsichtig an, damit die Samen nicht weggespült werden.
4. Die Keimung:
* Die Samen sollten innerhalb von 5-10 Tagen keimen.
* Haltet die Erde feucht, aber nicht durchnässt.
5. Ausdünnen:
* Sobald die Sämlinge ein paar Zentimeter groß sind, müsst ihr sie ausdünnen. Das bedeutet, dass ihr einige der Pflanzen entfernt, damit die verbleibenden Pflanzen genügend Platz zum Wachsen haben.
* Lasst etwa 15-20 cm zwischen den Pflanzen.
* Die entfernten Sämlinge könnt ihr in Salaten verwenden!
6. Bewässerung:
* Senfblätter brauchen regelmäßige Bewässerung, besonders bei trockenem Wetter.
* Gießt die Pflanzen am Morgen, damit die Blätter Zeit haben, vor der Nacht zu trocknen. Das hilft, Pilzkrankheiten vorzubeugen.
* Vermeidet es, die Blätter direkt zu gießen, da dies zu Verbrennungen führen kann.
7. Düngung:
* Senfblätter sind hungrig! Düngt sie alle paar Wochen mit einem organischen Dünger.
* Ich verwende gerne Fischdünger oder Algenextrakt.
8. Schutz vor Schädlingen:
* Senfblätter können von verschiedenen Schädlingen befallen werden, wie z.B. Blattläusen, Kohlweißlingen und Schnecken.
* Kontrolliert die Pflanzen regelmäßig auf Schädlinge.
* Entfernt Schädlinge von Hand oder verwendet ein biologisches Insektizid.
* Schnecken können mit Schneckenkorn oder Bierfallen bekämpft werden.
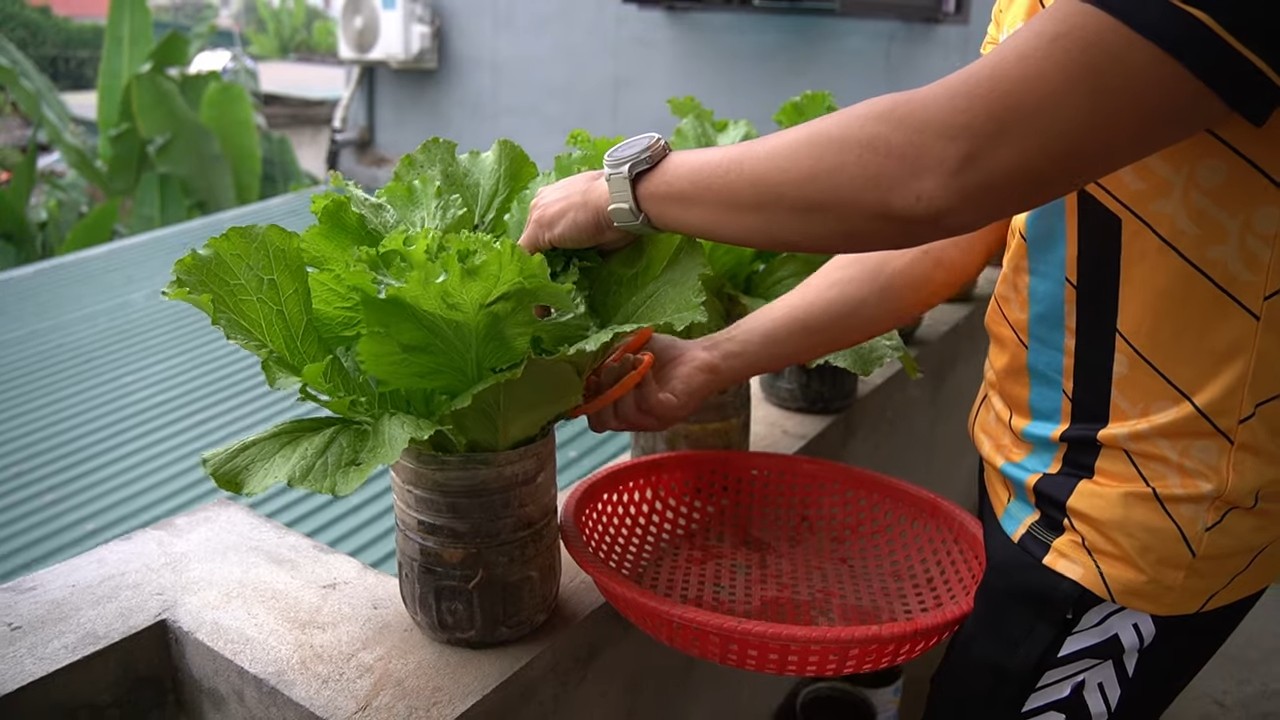
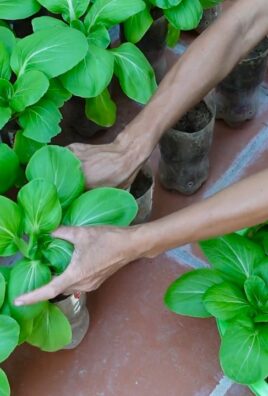
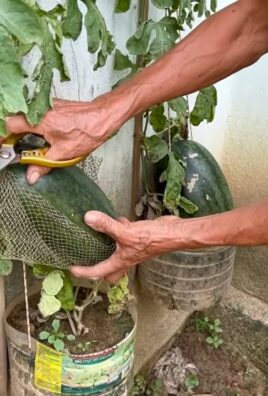
9. Ernte:
* Die Ernte kann beginnen, sobald die Blätter groß genug sind, um sie zu verwenden. Das ist normalerweise etwa 4-6 Wochen nach der Aussaat.
* Schneidet die äußeren Blätter ab, während die inneren Blätter weiterwachsen.
* Erntet die Blätter am Morgen, wenn sie am frischesten sind.
Zusätzliche Tipps für gigantische Senfblätter
Hier sind noch ein paar Tricks, die ich gelernt habe, um wirklich riesige Senfblätter zu züchten:
* Regelmäßiges Gießen: Senfblätter brauchen viel Wasser, besonders während der heißen Sommermonate. Achtet darauf, dass der Boden immer feucht ist, aber nicht durchnässt.
* Schatten: Wenn es sehr heiß ist, kann es hilfreich sein, die Pflanzen mit einem Schattiernetz zu schützen. Das verhindert, dass die Blätter verbrennen.
* Bodenqualität: Je besser der Boden, desto größer die Blätter. Verwendet viel Kompost und organischen Dünger.
* Sortenwahl: Einige Senfblattsorten sind von Natur aus größer als andere. Recherchiert, welche Sorten für eure Region am besten geeignet sind.
* Schädlinge im Auge behalten: Schädlinge können das Wachstum der Pflanzen beeinträchtigen. Kontrolliert die Pflanzen regelmäßig und behandelt sie bei Bedarf.
* Nicht zu dicht säen: Wenn die Pflanzen zu dicht beieinander stehen, konkurrieren sie um Nährstoffe und Wasser. Achtet darauf, dass ihr sie rechtzeitig ausdünnt.
* Regelmäßig ernten: Durch das regelmäßige Ernten der äußeren Blätter fördert ihr das Wachstum der inneren Blätter.
Die richtige Erde: Das A und O für gesunde Pflanzen
Die Erde ist das Fundament für gesunde und kräftige Senfblätter. Hier sind einige Tipps, wie ihr die perfekte Erde für eure Pflanzen zubereitet:
* Gut durchlässig: Senfblätter mögen keine Staunässe. Achtet darauf, dass die Erde gut durchlässig ist, damit das Wasser ablaufen kann.
* Nährstoffreich: Senfblätter brauchen viele Nährstoffe, um zu wachsen. Mischt Kompost, organischen Dünger oder gut verrotteten Mist in die Erde.
* pH-Wert: Der ideale pH-Wert für Senfblätter liegt zwischen 6,0 und 7,5. Ihr könnt den pH-Wert eurer Erde mit einem Bodentest überprüfen.
* Bodenverbesserung: Wenn eure Erde sehr sandig oder lehmig ist, könnt ihr sie mit Kompost oder anderen organischen Materialien verbessern.
Schädlinge und Krankheiten: So schützt du deine Senfblätter
Leider sind auch Senfblätter nicht vor Schädlingen und Krankheiten gefeit. Hier sind einige der häufigsten Probleme und wie ihr sie bekämpfen könnt:
* Blattläuse: Blattläuse saugen den Saft aus den Blättern und können das Wachstum der Pflanzen beeinträchtigen. Ihr könnt sie mit einem starken Wasserstrahl abspritzen oder ein biologisches Insektizid verwenden.
* Kohlweißlinge: Die Raupen des Kohlweißlings fressen Löcher in die Blätter. Ihr könnt sie von Hand absammeln oder ein biologisches Insektizid verwenden.
* Schnecken: Schnecken fressen die Blätter und können die Pflanzen stark beschädigen. Ihr könnt Schneckenkorn oder Bierfallen verwenden.
* Falscher Mehltau: Falscher Mehltau ist eine Pilzkrankheit, die sich durch gelbe Flecken auf den Blättern äußert. Ihr könnt die befallenen Blätter entfernen und ein Fungizid verwenden.
Conclusion
So, there you have it! Growing giant mustard greens isn’t just a gardening experiment; it’s a rewarding journey that culminates in a vibrant, flavorful, and visually stunning addition to your garden and your plate. We’ve walked through the steps, from selecting the right seeds and preparing the soil to nurturing your plants and harvesting those impressive leaves. But why is this DIY trick a must-try?
Firstly, the sheer size of these mustard greens is a spectacle. Imagine the conversations sparked by these leafy behemoths towering in your garden! Beyond the novelty, however, lies a practical benefit: a single giant leaf can provide enough greens for a substantial salad or side dish, reducing the need to harvest multiple smaller leaves. This makes harvesting more efficient and less time-consuming.
Secondly, growing giant mustard greens allows you to control the entire process, ensuring that your greens are free from harmful pesticides and herbicides. You know exactly what goes into nurturing your plants, resulting in a healthier and more flavorful final product. This is particularly important for those who prioritize organic and sustainable gardening practices.
Thirdly, the taste! While regular mustard greens offer a peppery bite, giant mustard greens, when harvested at the right stage, can offer a milder, more nuanced flavor. The larger leaves also lend themselves well to various cooking methods, from stir-frying and steaming to braising and even grilling.
Variations and Suggestions
Don’t be afraid to experiment! Try different varieties of mustard greens to see which ones grow best in your climate and which flavor profiles you prefer. Some popular choices include ‘Florida Broadleaf,’ ‘Giant Red,’ and ‘Southern Giant Curled.’
Consider companion planting to enhance the growth and flavor of your mustard greens. Planting them alongside herbs like dill or chamomile can attract beneficial insects and deter pests.
For those with limited space, growing giant mustard greens in large containers is a viable option. Just ensure that the containers are deep enough to accommodate the plant’s root system and that you provide adequate drainage.
And finally, think beyond the leaves! The stems of giant mustard greens are also edible and can be cooked similarly to collard greens or kale. Don’t let any part of your harvest go to waste!
We wholeheartedly encourage you to embark on this exciting gardening adventure. Growing giant mustard greens is not only a fun and rewarding experience but also a fantastic way to connect with nature and enjoy the fruits (or rather, the leaves) of your labor. The satisfaction of harvesting a massive, homegrown mustard green is truly unparalleled.
So, grab your seeds, prepare your soil, and get ready to witness the magic of growing giant mustard greens. We’re confident that you’ll be amazed by the results. And most importantly, don’t forget to share your experiences with us! We’d love to see your photos, hear your tips, and learn from your successes (and even your challenges). Let’s create a community of giant mustard green enthusiasts! Share your journey on social media using relevant hashtags and tag us in your posts. Happy gardening!
Frequently Asked Questions (FAQ)
Q: What kind of soil is best for growing giant mustard greens?
A: Giant mustard greens thrive in well-draining, fertile soil that is rich in organic matter. Ideally, the soil should have a pH between 6.0 and 7.5. Before planting, amend the soil with compost, aged manure, or other organic amendments to improve its fertility and drainage. A soil test can help you determine if your soil is lacking any essential nutrients. If so, you can add appropriate fertilizers to correct the deficiencies. Good drainage is crucial to prevent root rot, which can be a common problem with mustard greens.
Q: How much sunlight do giant mustard greens need?
A: Mustard greens generally prefer full sun, which means at least 6 hours of direct sunlight per day. However, in hotter climates, they can benefit from some afternoon shade to prevent the leaves from scorching. Insufficient sunlight can result in leggy growth and smaller leaves. If you’re growing your mustard greens indoors, use grow lights to supplement natural sunlight, especially during the shorter days of winter.
Q: How often should I water my giant mustard greens?
A: Water your giant mustard greens regularly, especially during dry periods. The soil should be consistently moist but not waterlogged. Overwatering can lead to root rot, while underwatering can cause the leaves to wilt and become tough. A good rule of thumb is to water deeply whenever the top inch of soil feels dry to the touch. Mulching around the plants can help retain moisture in the soil and reduce the need for frequent watering.
Q: What are some common pests and diseases that affect giant mustard greens, and how can I control them?
A: Common pests that can affect mustard greens include aphids, flea beetles, cabbage worms, and slugs. Diseases include downy mildew, white rust, and root rot. To control pests, you can use organic methods such as handpicking, insecticidal soap, or neem oil. Row covers can also help protect your plants from pests. To prevent diseases, ensure good air circulation, avoid overwatering, and practice crop rotation. Remove any infected leaves promptly to prevent the spread of disease.
Q: When is the best time to harvest giant mustard greens?
A: The best time to harvest giant mustard greens is when the leaves are large but still tender. Generally, this is about 40-60 days after planting, depending on the variety and growing conditions. You can harvest individual leaves as needed, starting with the outer leaves. Avoid harvesting leaves that are too old or tough, as they may have a bitter taste. For the best flavor, harvest your mustard greens in the morning after the dew has dried.
Q: Can I grow giant mustard greens in containers?
A: Yes, you can grow giant mustard greens in containers, but you’ll need to choose a large container that is at least 12 inches deep and wide to accommodate the plant’s root system. Use a well-draining potting mix and ensure that the container has drainage holes. Water regularly and fertilize as needed. Container-grown mustard greens may require more frequent watering and fertilization than those grown in the ground.
Q: How do I prevent my mustard greens from becoming too bitter?
A: Several factors can contribute to bitterness in mustard greens, including hot weather, lack of water, and over-maturity. To prevent bitterness, provide adequate water, especially during hot weather. Harvest the leaves when they are young and tender. You can also try growing mustard greens in partial shade to reduce their exposure to intense sunlight. Some varieties of mustard greens are naturally less bitter than others, so consider choosing a milder variety.
Q: Can I save seeds from my giant mustard greens for future planting?
A: Yes, you can save seeds from your giant mustard greens, but keep in mind that if you are growing multiple varieties of mustard greens, they may cross-pollinate, resulting in seeds that produce plants with mixed characteristics. To save seeds, allow some of your plants to bolt (go to seed). Once the seed pods are dry and brown, harvest them and allow them to dry further indoors. Then, thresh the pods to release the seeds and store them in an airtight container in a cool, dry place.
Q: Are giant mustard greens nutritious?
A: Absolutely! Giant mustard greens are packed with nutrients, including vitamins A, C, and K, as well as folate, calcium, and fiber. They are also a good source of antioxidants, which can help protect your body against cell damage. Incorporating giant mustard greens into your diet can contribute to overall health and well-being.
Q: What are some creative ways to use giant mustard greens in cooking?
A: Giant mustard greens are incredibly versatile in the kitchen. You can use them in salads, stir-fries, soups, stews, and braised dishes. They can also be steamed, sautéed, or even grilled. Try adding them to smoothies for a nutrient boost. The large leaves can be used as wraps for fillings like rice, vegetables, or meat. Get creative and experiment with different flavors and cooking methods to discover your favorite ways to enjoy giant mustard greens.
Leave a Comment