
Growing Ginger at Home might seem like a challenge reserved for seasoned gardeners, but I’m here to tell you it’s surprisingly achievable, even if you’re a complete beginner! Imagine the satisfaction of harvesting your own fresh, zesty ginger, ready to add a kick to your favorite dishes or brew into a soothing tea. Forget those bland, store-bought rhizomes – homegrown ginger boasts an unparalleled flavor and aroma.
Ginger has a rich history, dating back thousands of years in Asian cultures, where it was prized for its medicinal properties and culinary uses. From ancient remedies to flavorful curries, ginger has played a vital role in traditions across the globe. Today, with a growing interest in sustainable living and fresh, local ingredients, more and more people are discovering the joy of growing ginger at home.
Why should you try this DIY trick? Well, for starters, it’s incredibly rewarding! Plus, you’ll have a constant supply of fresh ginger right at your fingertips. No more last-minute grocery store runs! This guide will walk you through every step, from selecting the perfect ginger root to harvesting your very own crop. So, grab your gardening gloves, and let’s get started on this exciting journey of growing ginger at home!
Growing Ginger at Home: Your DIY Guide for an Aromatic Harvest
Hello garden friends! Have you ever wondered how you could easily grow that spicy, healthy ginger you love using in your tea or curry yourself? I’ll show you how it’s done! It’s easier than you think and incredibly fun. Let’s dive into the world of growing ginger together!
What you need: The Ingredients for Your Ginger Success
Before we get started, we’ll obviously need the right tools and materials. Here is a list so you have everything ready:
- A ginger rhizome: Choose a plump, healthy-looking rhizome (that’s the “ginger” you buy at the supermarket) with well-developed buds (small “eyes”). Organic ginger is often the better choice as it’s less likely to have been treated with growth inhibitors.
- A planter: A pot with good drainage is crucial. It should be at least 30 cm (12 inches) wide and deep to allow the ginger to develop well.
- High-quality potting soil: A well-draining, nutrient-rich potting soil is ideal. You can also make your own mix of potting soil, compost, and perlite.
- Water: Clear, clean water for watering.
- A warm, bright location: Ginger loves warmth and indirect sunlight.
- Optional: Organic fertilizer, spray bottle.
Step-by-Step Guide: How to Plant Your Ginger
Now let’s get down to business! Follow these steps to successfully plant your ginger:
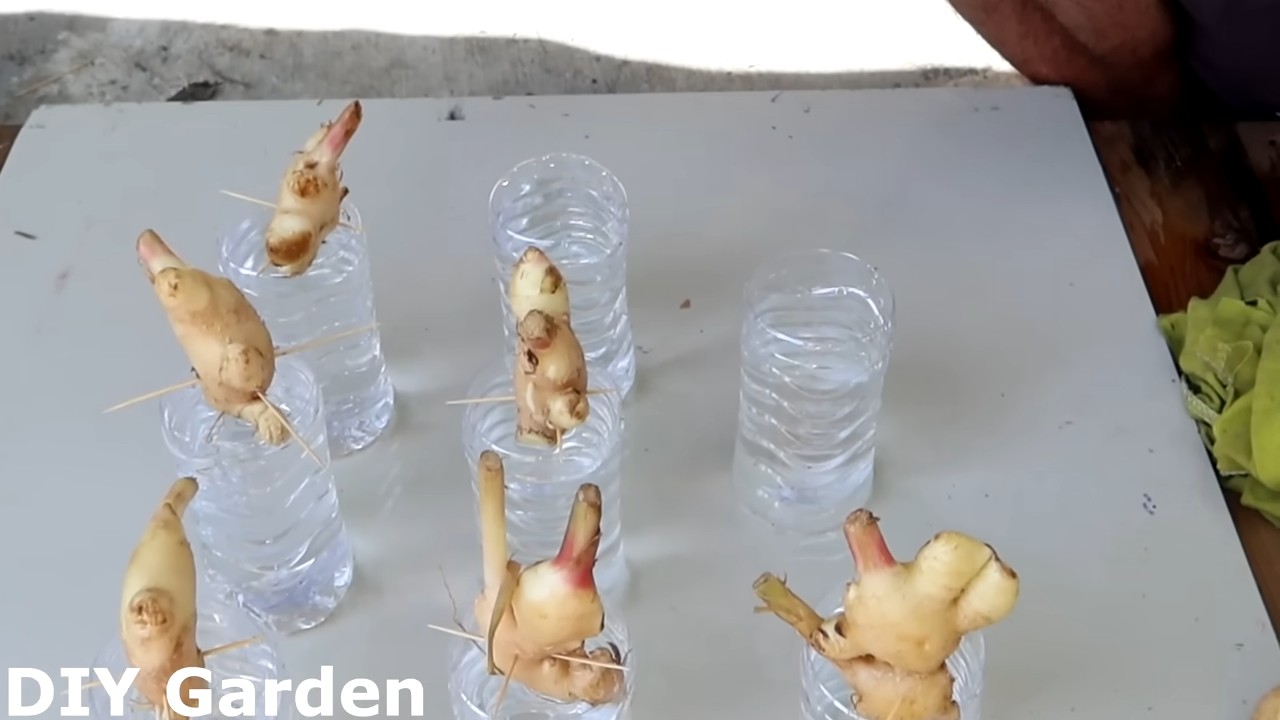
1. Preparing the Ginger Rhizome:
- If your ginger rhizome has several “eyes,” you can cut it into pieces, with each piece having at least one or two buds. Let the cut surfaces air-dry for a few days to prevent rot.
- You can also plant the rhizome whole if you prefer.
- Important: If you’ve just bought the ginger, soak it in water overnight. This helps to remove any potential growth inhibitors.
2. Preparing the Pot:
- Fill the pot with potting soil, but leave about 5-7 cm (2-3 inches) of space to the rim.
- Press the soil down lightly.
3. Planting the Ginger:
- Place the ginger rhizome horizontally on the soil, with the buds facing up.
- Cover the rhizome with about 2-5 cm (1-2 inches) of soil.
- Press the soil down lightly.
4. Watering:
- Water the ginger thoroughly until water runs out of the drainage holes.
- Make sure the soil is moist, but not waterlogged.
5. Choosing the Location:
- Place the pot in a warm, bright spot with indirect sunlight. An east- or west-facing window is ideal.
- Avoid direct sunlight, as it can burn the leaves.
The Care: How to Get Your Ginger to Grow
After planting comes care! Here are a few tips to help your ginger thrive:
1. Watering:
- Water the ginger regularly, but avoid waterlogging. The soil should always be slightly moist.
- In winter, when growth is slower, you will need to water less.
- Tip: Stick your finger into the soil to check if it’s dry before you water.
2. Fertilizing:
- Fertilize the ginger every few weeks with an organic fertilizer.
- Use a fertilizer that is rich in nitrogen, phosphorus, and potassium.
- Caution: Over-fertilizing can be harmful, so follow the instructions on the fertilizer package.
3. Humidity:
- Ginger loves high humidity. You can increase the humidity by misting the ginger regularly with water or by placing the pot on a tray of pebbles filled with water.
4. Temperature:
- Ginger grows best at temperatures between 20 and 30 degrees Celsius (68-86°F).
- Protect the ginger from frost.
5. Pests and Diseases:
- Ginger is relatively resistant to pests and diseases.
- However, watch for signs of aphids or spider mites.
- If you discover pests, you can combat them with a natural insecticide.
The Harvest: When is the Ginger Ready?
The harvest is the most exciting part! Here’s when and how you can harvest your ginger:
1. When to harvest?
- You can harvest ginger about 8-10 months after planting.
- The leaves will turn yellow and begin to die back when the ginger is mature.
- However, you can also harvest small amounts earlier by carefully cutting off a piece of the rhizome.
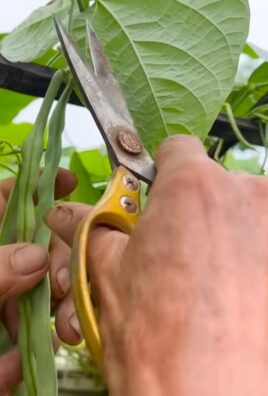
2. How to harvest?
- Water the ginger thoroughly before harvesting.
- Loosen the soil around the ginger.
- Carefully pull the entire rhizome out of the soil.
- Cut off the leaves.
3. Storage:
- You can store the harvested ginger in the refrigerator. Wrap it in a damp paper towel and place it in a plastic bag.
- You can also freeze the ginger. Peel it and cut it into slices or grate it.
Common Problems and Solutions: What to Do When Something Goes Wrong?
Problems can also arise when growing ginger. Here are a few common problems and how you can solve them:
- Yellow leaves: This can have various causes, e.g., too much or too little water, nutrient deficiency, or pests. Check your watering habits, fertilize the ginger, and look for pests.
- No growth: This can be due to too little light, low temperature, or a bad rhizome. Move the ginger to a brighter spot, ensure a warm environment, and use a healthy rhizome.
- Rot: This is usually caused by waterlogging. Make sure the pot has good drainage holes and don’t water the ginger too much.
Additional Tips and Tricks: How to Optimize Your Ginger Cultivation
Here are a few more tips to help you optimize your ginger cultivation:
- Use rainwater: Rainwater is softer than tap water and contains no chemicals that could impair the ginger’s growth.
- Mulch the soil: A layer of mulch made of straw or compost helps to retain moisture in the soil and suppress weeds.
- Rotate the pot: Rotate the pot regularly so the ginger gets even light.
- Be patient: Ginger takes time to grow. Be patient and don’t give up!
I hope this guide has helped you to grow your own ginger at home. It’s a rewarding project that provides you with fresh, aromatic ginger straight from your own garden. Happy gardening
Conclusion
So, there you have it! Growing ginger at home is not only achievable, but it’s also a deeply rewarding experience that connects you to the source of this incredible spice. Forget those bland, store-bought rhizomes that have been sitting on shelves for weeks. Imagine the vibrant, fresh ginger you can harvest right from your own kitchen or garden, bursting with flavor and aroma. This DIY trick is a must-try for anyone who appreciates fresh ingredients, enjoys a little gardening, or simply wants to add a touch of green to their living space.
Think of the possibilities! You can use your homegrown ginger in everything from stir-fries and curries to teas and baked goods. The flavor is simply unmatched. Plus, you’ll have the satisfaction of knowing exactly where your ginger came from and how it was grown.
Beyond the basic method, there are plenty of ways to customize your ginger-growing adventure. Experiment with different varieties of ginger, such as the spicier Chinese ginger or the milder Hawaiian ginger. Try growing your ginger in different types of containers, from terracotta pots to repurposed buckets. You can even try growing it outdoors in a raised bed if you live in a warm climate.
Consider companion planting to enhance your ginger’s growth and deter pests. Turmeric, another rhizome in the same family, makes a great companion plant. Marigolds can help repel nematodes, while basil can deter aphids.
Don’t be afraid to experiment with different soil mixes to find what works best for your ginger. A well-draining mix is crucial, but you can also add compost or other organic matter to boost fertility.
And remember, growing ginger at home is a journey, not a destination. There will be successes and challenges along the way. But with a little patience and care, you’ll be rewarded with a bountiful harvest of fresh, flavorful ginger.
We wholeheartedly encourage you to give this DIY trick a try. It’s easier than you might think, and the results are well worth the effort. Once you’ve harvested your first batch of homegrown ginger, be sure to share your experience with us! We’d love to hear your tips, tricks, and favorite ways to use your fresh ginger. Post photos of your ginger plants, share your recipes, and let us know what you’ve learned along the way. Let’s create a community of home ginger growers and inspire others to discover the joy of growing their own food. So, get your hands dirty, embrace the process, and enjoy the delicious rewards of growing ginger at home!
Frequently Asked Questions (FAQ)
1. What kind of ginger should I use to start growing?
The best ginger to use for starting is a fresh, plump rhizome from the grocery store or a local farmer’s market. Look for rhizomes that are firm, with no signs of shriveling or mold. They should have visible “eyes” or buds, which are the points from which new shoots will emerge. Organic ginger is often recommended, as it’s less likely to have been treated with growth inhibitors. Avoid using powdered ginger or ginger that has been processed in any way. The goal is to find a healthy, viable rhizome that’s ready to sprout.
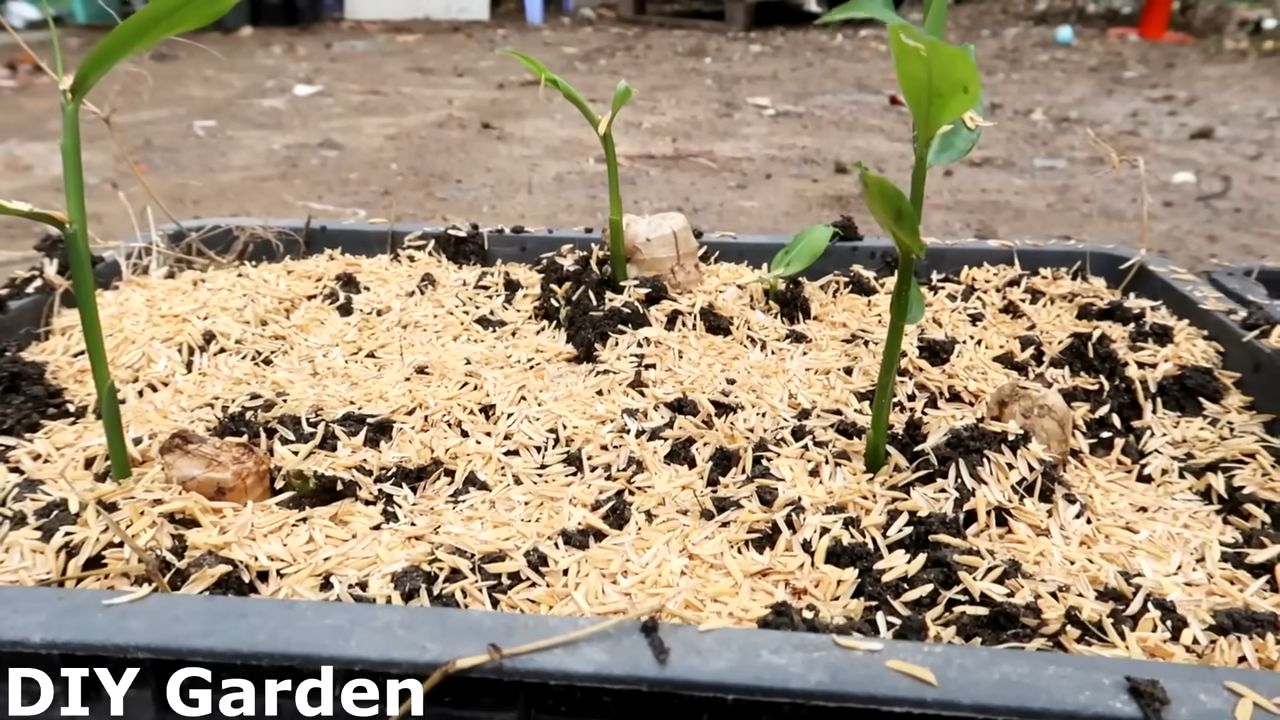
2. How long does it take for ginger to sprout?
Sprouting time can vary depending on several factors, including the temperature, humidity, and the health of the rhizome. Generally, you can expect to see sprouts emerge within 2 to 3 weeks. However, it could take longer, especially if the conditions are not ideal. Keep the soil consistently moist but not waterlogged, and maintain a warm environment. Patience is key! If you don’t see any sprouts after a month, don’t give up. Continue to provide the right conditions, and the ginger may eventually sprout.
3. What kind of soil is best for growing ginger?
Ginger thrives in well-draining, nutrient-rich soil. A good mix would be equal parts potting soil, compost, and perlite or vermiculite. The potting soil provides a base, the compost adds nutrients and improves drainage, and the perlite or vermiculite helps to aerate the soil and prevent it from becoming compacted. Avoid using heavy clay soil, as it can retain too much moisture and lead to root rot. You can also add a small amount of slow-release fertilizer to the soil to provide a steady supply of nutrients.
4. How much sunlight does ginger need?
Ginger prefers bright, indirect sunlight. Direct sunlight can scorch the leaves, especially during the hottest part of the day. If you’re growing ginger indoors, place it near a window that receives morning sun or filtered light. If you’re growing it outdoors, choose a spot that is shaded during the afternoon. A location under a tree or on a covered patio would be ideal. The key is to provide enough light for the ginger to grow without exposing it to harsh, direct sunlight.
5. How often should I water my ginger plant?
Water your ginger plant regularly, keeping the soil consistently moist but not waterlogged. The frequency of watering will depend on the climate, the type of soil, and the size of the pot. In general, you should water when the top inch of soil feels dry to the touch. Avoid overwatering, as this can lead to root rot. During the winter months, when the ginger plant is dormant, you can reduce the frequency of watering.
6. When is the best time to harvest ginger?
You can start harvesting ginger about 8-10 months after planting. The leaves will start to turn yellow and die back, indicating that the rhizomes are mature. You can harvest the entire plant or just a portion of the rhizomes, leaving the rest to continue growing. To harvest, gently dig around the plant and lift the rhizomes out of the soil. Wash them thoroughly and use them fresh or store them in a cool, dry place.
7. Can I grow ginger in a container?
Yes, ginger grows very well in containers. Choose a pot that is at least 12 inches deep and wide to allow the rhizomes plenty of room to spread. Make sure the pot has drainage holes to prevent waterlogging. Use a well-draining potting mix and follow the same watering and sunlight guidelines as you would for growing ginger in the ground. Container-grown ginger is easy to move around, so you can adjust its location to provide the optimal growing conditions.
8. What are some common problems when growing ginger and how can I fix them?
Some common problems include root rot (caused by overwatering), pests (such as aphids and spider mites), and nutrient deficiencies. To prevent root rot, make sure the soil is well-draining and avoid overwatering. If you notice pests, you can treat them with insecticidal soap or neem oil. For nutrient deficiencies, you can add a balanced fertilizer to the soil. Regularly inspect your ginger plants for any signs of problems and address them promptly to keep your plants healthy and productive.
9. Can I grow ginger indoors year-round?
Yes, you can grow ginger indoors year-round, especially in climates with cold winters. Provide the ginger with adequate light, warmth, and humidity. A humidifier can help to increase the humidity levels, especially during the winter months when the air is dry. You may need to adjust your watering schedule depending on the season. With proper care, you can enjoy fresh, homegrown ginger all year long.
10. How do I store harvested ginger?
Freshly harvested ginger can be stored in the refrigerator for several weeks. Wrap it in a paper towel and place it in a plastic bag to prevent it from drying out. You can also freeze ginger for longer storage. Peel the ginger and chop it into small pieces or grate it before freezing. Store it in an airtight container or freezer bag. Frozen ginger can be used directly from the freezer in your cooking. Another option is to pickle the ginger in vinegar or brine. Pickled ginger can be stored in the refrigerator for several months.


Leave a Comment