
Growing gourds at home can be an incredibly rewarding experience, transforming your backyard into a vibrant, whimsical space. Have you ever imagined crafting your own birdhouses, bowls, or even musical instruments from something you’ve grown yourself? It’s more achievable than you think! For centuries, gourds have held a special place in various cultures, serving not only as practical tools but also as artistic canvases. From the intricate carvings of Native American tribes to the decorative uses in Asian art, gourds boast a rich history that connects us to traditions passed down through generations.
But beyond their historical significance, why should you consider growing gourds at home? In today’s world, where sustainability and DIY projects are gaining immense popularity, gourds offer a unique opportunity to connect with nature and create something truly special. Plus, let’s be honest, store-bought decorations can be expensive and lack that personal touch. Imagine the satisfaction of displaying a gourd you nurtured from seed to stunning creation! This article is packed with easy-to-follow DIY tricks and hacks that will guide you through every step of the process, ensuring you have a bountiful harvest and a whole lot of fun along the way. Get ready to unleash your inner gardener and artist!
Growing Gourds: A Beginner’s Guide to a Bountiful Harvest
Hey there, fellow gardening enthusiasts! Ever thought about growing your own gourds? It’s a surprisingly rewarding experience, and you get some pretty cool decorations (or even functional items!) out of it. I’ve been growing gourds for a few years now, and I’m excited to share my tips and tricks with you. It might seem daunting at first, but trust me, with a little patience and effort, you’ll be amazed at what you can achieve.
Choosing Your Gourd Variety
Before we dive into the nitty-gritty, let’s talk about gourd varieties. There are tons to choose from, and the best one for you will depend on what you want to do with your gourds.
* Ornamental Gourds: These are the small, colorful gourds you often see in fall decorations. They’re relatively easy to grow and come in a wide range of shapes and sizes.
* Luffa Gourds: If you’re looking for a natural sponge, luffa gourds are the way to go! They require a long growing season and plenty of sunlight.
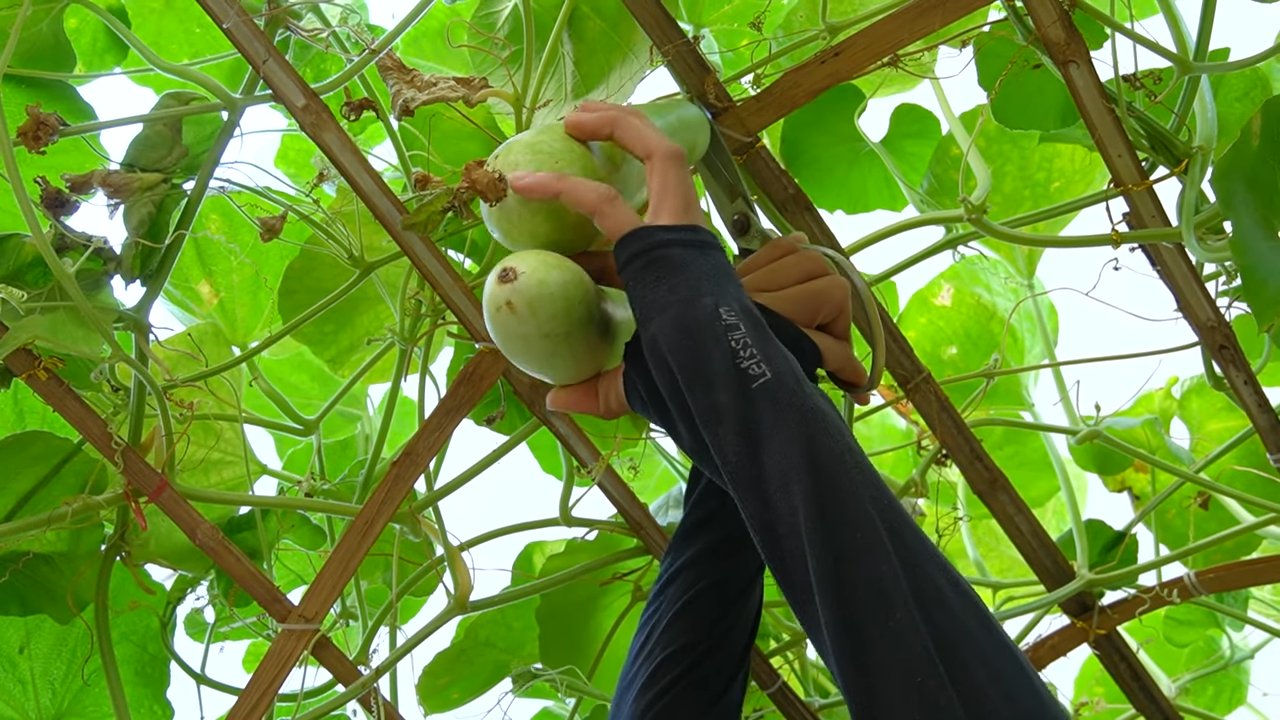
* Bottle Gourds: These are the classic gourds used for making birdhouses, dippers, and other functional items. They come in various shapes, from long and slender to round and bulbous.
* Snake Gourds: These are long, slender gourds that can grow up to several feet long! They’re a bit more challenging to grow, but they’re definitely a conversation starter.
Once you’ve decided on your gourd variety, it’s time to get started!
Preparing Your Gourd Garden
Gourds are hungry plants, so soil preparation is key. They need plenty of sunlight, well-drained soil, and a sturdy support system.
* Sunlight: Gourds need at least 6-8 hours of direct sunlight per day. Choose a location in your garden that gets plenty of sun.
* Soil: Gourds prefer well-drained soil that is rich in organic matter. Amend your soil with compost or well-rotted manure before planting. A slightly acidic to neutral pH (around 6.0 to 7.0) is ideal.
* Support System: Gourds are vines, so they need something to climb on. You can use a trellis, fence, or even a sturdy pergola. Make sure your support system is strong enough to support the weight of the mature gourds. I’ve learned the hard way that flimsy supports just won’t cut it!
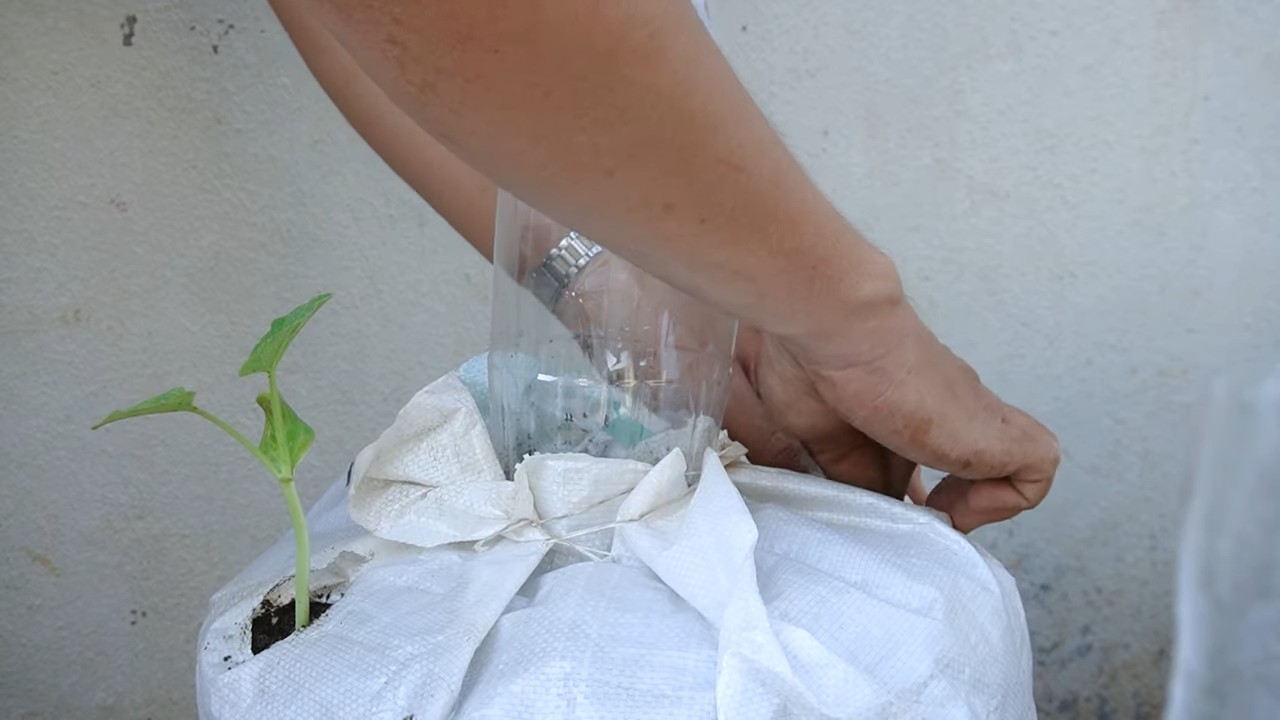
Planting Your Gourd Seeds
Gourds have a long growing season, so it’s best to start them indoors a few weeks before the last expected frost.
1. Start Seeds Indoors (Optional): About 4-6 weeks before the last expected frost, sow your gourd seeds in peat pots or seed trays filled with seed-starting mix. Plant the seeds about 1 inch deep. Keep the soil moist but not soggy, and provide plenty of light. A heat mat can help speed up germination.
2. Direct Sowing (After Last Frost): If you live in a warm climate with a long growing season, you can direct sow your gourd seeds after the last expected frost. Choose a sunny location with well-drained soil. Plant the seeds about 1 inch deep and space them according to the instructions on the seed packet.
3. Harden Off Seedlings: If you started your seeds indoors, you’ll need to harden them off before transplanting them into the garden. This means gradually exposing them to outdoor conditions over a period of a week or two. Start by placing them in a sheltered location for a few hours each day, gradually increasing the amount of time they spend outdoors.
4. Transplant Seedlings: Once the danger of frost has passed and your seedlings have been hardened off, you can transplant them into the garden. Space them according to the instructions on the seed packet. Water them well after transplanting.
Caring for Your Gourd Plants
Once your gourd plants are in the ground, it’s important to provide them with proper care to ensure a bountiful harvest.
1. Watering: Gourds need plenty of water, especially during hot, dry weather. Water deeply and regularly, especially when the fruits are developing. Aim for about 1 inch of water per week.
2. Fertilizing: Gourds are heavy feeders, so they need regular fertilization. Use a balanced fertilizer every few weeks, or amend your soil with compost or well-rotted manure.
3. Pruning: Pruning can help improve air circulation and encourage fruit production. Remove any dead or diseased leaves and stems. You can also pinch off the tips of the vines to encourage branching.
4. Pest and Disease Control: Gourds can be susceptible to various pests and diseases, such as squash bugs, squash vine borers, and powdery mildew. Inspect your plants regularly for signs of pests or diseases, and take action promptly. Use organic pest control methods whenever possible. I’ve found that neem oil is a great all-purpose solution.
5. Support: Make sure your gourd vines have adequate support. As the gourds grow heavier, they may need additional support to prevent them from breaking off the vine. You can use twine or netting to support the gourds.
6. Pollination: Gourds have separate male and female flowers. The female flowers need to be pollinated in order to produce fruit. If you’re not seeing many gourds developing, you may need to hand-pollinate the flowers. To do this, use a small paintbrush to transfer pollen from the male flowers to the female flowers.
Harvesting Your Gourds
The timing of your gourd harvest will depend on the variety you’re growing and what you plan to do with them.
1. Ornamental Gourds: Harvest ornamental gourds when they are fully mature and the stems have dried out. The skin should be hard and resistant to scratching.
2. Luffa Gourds: Harvest luffa gourds when they are fully mature and the skin has turned brown and dry. The gourd should feel light and hollow.
3. Bottle Gourds: Harvest bottle gourds when they are fully mature and the stems have dried out. The skin should be hard and resistant to scratching.
4. Snake Gourds: Harvest snake gourds when they are young and tender, before they become too tough.
Curing Your Gourds
Curing is an essential step in preserving your gourds and preventing them from rotting.
1. Wash the Gourds: After harvesting, wash your gourds with soapy water to remove any dirt or debris.
2. Dry the Gourds: Place the gourds in a well-ventilated area to dry. You can use a fan to speed up the drying process.
3. Curing Time: The curing process can take several weeks or even months, depending on the size and thickness of the gourds. The gourds are cured when they are lightweight and the seeds rattle inside.
4. Check for Soft Spots: During the curing process, check the gourds regularly for soft spots or signs of rot. Discard any gourds that show signs of rot.
Cleaning Your Gourds
Once your gourds are cured, you’ll need to clean them before you can use them for crafts or decorations.
1. Soak the Gourds: Soak the gourds in warm, soapy water for several hours to soften the outer skin.
2. Scrub the Gourds: Use a scrub brush or steel wool to remove the outer skin. You may need to soak the gourds for a longer period of time if the skin is difficult to remove.
3. Rinse the Gourds: Rinse the gourds thoroughly with clean water.
4. Dry the Gourds: Allow the gourds to dry completely before using them.
Crafting with Gourds
Now for the fun part! Once your gourds are cleaned and dried, you can use them for a variety of crafts and decorations.
* Painting: Paint your gourds with acrylic paints to create colorful and unique decorations.
* Carving: Carve your gourds with wood carving tools to create intricate designs.
* Wood Burning: Use a wood burning tool to create designs on your gourds.
* Decoupage: Decoupage your gourds with paper or fabric to create unique and decorative items.
* Birdhouses: Turn your bottle gourds into birdhouses by cutting a hole in the side and adding a perch.
* Dippers: Turn your bottle gourds into dippers by cutting off the top and attaching a handle.
Troubleshooting Common Gourd Growing Problems
Even with the best care, you might encounter some problems while growing gourds. Here are a few common issues and how to address them:
* Poor Germination: If your gourd seeds aren’t germinating, make sure the soil is warm enough (around 70
Conclusion
So, there you have it! Growing gourds at home isn’t just a quirky gardening project; it’s a rewarding journey from seed to stunning, handcrafted art. We’ve explored the ins and outs of cultivating these fascinating fruits, from selecting the right varieties and preparing your garden to nurturing their growth and patiently awaiting the harvest.
But why is this DIY trick a must-try? Because it offers a unique blend of creativity, sustainability, and connection to nature. Imagine the satisfaction of displaying a gourd birdhouse you crafted from a plant you nurtured from a tiny seed. Think of the personalized gifts you can create, each one a testament to your dedication and artistic flair. And consider the eco-friendly aspect of using natural materials instead of mass-produced plastic decorations.
The possibilities are truly endless. Feel free to experiment with different gourd varieties to achieve unique shapes and sizes. Try painting your gourds with vibrant colors and intricate designs. Incorporate them into seasonal decorations, from whimsical Halloween displays to elegant Thanksgiving centerpieces. You can even explore carving techniques to create stunning lanterns or decorative bowls.
Don’t be afraid to get creative with your growing methods, too. Try training your gourds to grow on trellises for a more compact garden, or experiment with different soil amendments to optimize their growth. Consider companion planting to deter pests and attract beneficial insects.
We encourage you to embrace the challenge and embark on your own gourd-growing adventure. It might seem daunting at first, but with a little patience and dedication, you’ll be amazed at what you can achieve. Remember to document your progress, take photos of your creations, and most importantly, have fun!
We’re confident that you’ll find growing gourds at home to be a deeply satisfying and enriching experience. So, grab your seeds, prepare your garden, and get ready to witness the magic of nature unfold. And once you’ve harvested your bounty and transformed them into works of art, we want to hear all about it! Share your photos, tips, and experiences in the comments below. Let’s build a community of gourd enthusiasts and inspire others to discover the joy of this unique DIY project. Let us know what you think about our guide on growing gourds at home.
Frequently Asked Questions (FAQs)
What are the best gourd varieties to grow for beginners?
For beginners, some of the easiest and most rewarding gourd varieties to grow include:
* **Birdhouse Gourds:** These are relatively easy to grow and produce large, round gourds perfect for crafting birdhouses.
* **Dipper Gourds:** These have a long handle and a rounded body, making them ideal for creating dippers, ladles, and other utensils.
* **Ornamental Gourds:** These come in a wide variety of shapes, sizes, and colors, making them perfect for decorative purposes. Look for varieties like ‘Apple’ gourds, ‘Pear’ gourds, or ‘Turk’s Turban’ gourds.
* **Sponge Gourds (Luffa):** While technically a vegetable, luffa gourds are grown for their fibrous interior, which can be used as a natural sponge. They require a long growing season but are relatively easy to cultivate.
How much space do gourds need to grow?
Gourds are vigorous vines that require a significant amount of space to grow. As a general rule, allow at least 6-8 feet of space between plants. If you’re growing gourds on a trellis, make sure the trellis is sturdy enough to support the weight of the mature vines and gourds. Consider the mature size of the specific variety you’re growing when determining spacing. Smaller ornamental gourds may require less space than larger birdhouse or dipper gourds.
How often should I water my gourds?
Gourds need consistent moisture, especially during hot, dry weather. Water deeply and regularly, aiming to keep the soil consistently moist but not waterlogged. Check the soil moisture regularly and water when the top inch or two feels dry to the touch. Avoid overhead watering, as this can promote fungal diseases. Drip irrigation or soaker hoses are ideal for delivering water directly to the roots.
What kind of fertilizer should I use for gourds?
Gourds benefit from regular fertilization, especially during their active growing season. Use a balanced fertilizer with equal amounts of nitrogen, phosphorus, and potassium (e.g., 10-10-10). Apply fertilizer according to the package directions, typically every 2-3 weeks. You can also supplement with compost or other organic matter to improve soil fertility and drainage. Avoid over-fertilizing, as this can lead to excessive vine growth at the expense of fruit production.
How long does it take for gourds to mature?
The time it takes for gourds to mature depends on the variety and growing conditions. Generally, gourds require a long growing season of 100-120 days from planting to harvest. The gourds are ready to harvest when the stems turn brown and dry, and the gourds feel lightweight. It’s important to allow the gourds to mature fully on the vine before harvesting, as this will ensure they are properly cured and will last longer.
How do I cure gourds after harvesting?
Curing is essential for preserving gourds and preventing them from rotting. To cure gourds, follow these steps:
1. **Harvest:** Cut the gourds from the vine, leaving a few inches of stem attached.
2. **Wash:** Gently wash the gourds with soapy water to remove any dirt or debris.
3. **Dry:** Place the gourds in a well-ventilated area, such as a garage or shed, away from direct sunlight.
4. **Air Circulation:** Elevate the gourds on racks or pallets to allow for good air circulation.
5. **Patience:** Allow the gourds to dry for several weeks or months, until they are completely dry and lightweight. Shake the gourds periodically to check for loose seeds.
6. **Mold:** It’s normal for mold to develop on the surface of the gourds during curing. Simply wipe it off with a damp cloth.
How do I prevent pests and diseases from affecting my gourds?
To prevent pests and diseases from affecting your gourds, follow these tips:
* **Choose disease-resistant varieties:** Select gourd varieties that are known to be resistant to common diseases.
* **Practice crop rotation:** Avoid planting gourds in the same location year after year.
* **Provide good air circulation:** Space plants adequately to allow for good air circulation.
* **Water properly:** Avoid overhead watering and water deeply and regularly.
* **Monitor for pests:** Regularly inspect your plants for pests, such as squash bugs, squash vine borers, and aphids.
* **Use organic pest control methods:** If you find pests, use organic pest control methods, such as insecticidal soap or neem oil.
* **Remove diseased plants:** If you find diseased plants, remove them immediately to prevent the spread of disease.
Can I eat gourds?
While some gourds are edible when young, most ornamental gourds are not edible and can be toxic. Luffa gourds are edible when young and tender, and their mature fibrous interior is used as a sponge. Always research the specific variety of gourd you’re growing to determine if it’s safe to eat. When in doubt, it’s best to err on the side of caution and avoid consuming ornamental gourds.
How can I decorate my gourds?
The possibilities for decorating gourds are endless! Here are a few ideas:
* **Painting:** Paint your gourds with acrylic paints, using stencils or freehand designs.
* **Carving:** Carve intricate designs into your gourds using carving tools or a rotary tool.
* **Wood burning:** Use a wood-burning tool to create decorative patterns on your gourds.
* **Decoupage:** Apply decorative papers or fabrics to your gourds using decoupage techniques.
* **Adding embellishments:** Glue on beads, sequins, buttons, or other embellishments to add texture and sparkle.
* **Sealing:** Seal your decorated gourds with a clear sealant to protect them from moisture and damage.

Leave a Comment