
Growing Gourds Smartly isn’t just about planting seeds and hoping for the best; it’s about unlocking a world of creativity and resourcefulness right in your backyard! Have you ever imagined crafting your own birdhouses, bowls, or even musical instruments from something you grew yourself? Gourds, with their fascinating shapes and versatile nature, offer endless possibilities for DIY projects.
For centuries, gourds have held a special place in various cultures. From being used as water containers in ancient civilizations to serving as decorative art in modern times, their history is as rich and diverse as their forms. In many indigenous communities, gourds are not just plants; they are symbols of life, sustenance, and artistic expression. I find it incredibly inspiring to connect with this history by cultivating my own gourds.
But why should you delve into the world of growing gourds smartly? Well, beyond the sheer joy of nurturing a plant from seed to harvest, gourds offer a sustainable and cost-effective way to create unique items for your home and garden. In a world increasingly focused on eco-friendly living, growing your own materials is a fantastic way to reduce your carbon footprint and embrace a more self-sufficient lifestyle. Plus, let’s be honest, who wouldn’t want to impress their friends with a handcrafted gourd creation? This article will provide you with the essential tricks and DIY hacks to ensure a bountiful gourd harvest and inspire your next creative project. Let’s get growing!
Kürbisse clever anbauen: Dein DIY-Guide für eine reiche Ernte
Hallo liebe Gartenfreunde! Ich liebe es, im Herbst meine eigenen Kürbisse zu ernten. Es gibt einfach nichts Schöneres, als mit selbstgezogenen Kürbissen zu dekorieren oder eine leckere Kürbissuppe zu kochen. Aber Kürbisse können manchmal etwas zickig sein. Deshalb habe ich diesen umfassenden DIY-Guide zusammengestellt, der dir hilft, deine Kürbisse clever anzubauen und eine reiche Ernte einzufahren. Keine Angst, es ist einfacher als du denkst!
Die Vorbereitung: Der Schlüssel zum Erfolg
Bevor wir mit dem eigentlichen Anbau beginnen, ist eine gute Vorbereitung das A und O. Kürbisse sind nämlich kleine Gourmets und brauchen die richtigen Bedingungen, um prächtig zu gedeihen.
* **Wahl des richtigen Standorts:** Kürbisse lieben die Sonne! Wähle einen Standort, der mindestens 6-8 Stunden direkte Sonneneinstrahlung pro Tag erhält. Außerdem brauchen sie viel Platz, da ihre Ranken sich gerne ausbreiten. Plane also genügend Raum ein.
* **Bodenbeschaffenheit:** Kürbisse bevorzugen einen nährstoffreichen, gut durchlässigen Boden. Schwere Lehmböden solltest du mit Kompost und Sand auflockern.
* **Bodenverbesserung:** Arbeite vor dem Pflanzen reichlich Kompost oder gut verrotteten Mist in den Boden ein. Das gibt deinen Kürbissen einen ordentlichen Wachstumsschub.
* **Vorkultur oder Direktsaat:** Du kannst Kürbisse entweder im Haus vorziehen oder direkt ins Beet säen. Die Vorkultur hat den Vorteil, dass die Pflanzen einen Vorsprung haben und früher Früchte tragen.
Schritt-für-Schritt-Anleitung: Kürbisse säen und pflanzen
Jetzt geht’s ans Eingemachte! Egal, ob du dich für die Vorkultur oder die Direktsaat entscheidest, hier sind die Schritte, die du befolgen musst:
Vorkultur (optional):
1. **Aussaatgefäße vorbereiten:** Fülle kleine Töpfe (ca. 8-10 cm Durchmesser) mit Anzuchterde.
2. **Samen säen:** Lege pro Topf 1-2 Kürbissamen ca. 2-3 cm tief in die Erde.
3. **Angießen:** Gieße die Erde vorsichtig an, sodass sie feucht, aber nicht nass ist.
4. **Warm stellen:** Stelle die Töpfe an einen warmen, hellen Ort (ca. 20-25°C). Ein Mini-Gewächshaus oder eine Fensterbank eignen sich gut.
5. **Feucht halten:** Halte die Erde gleichmäßig feucht, aber vermeide Staunässe.
6. **Pikieren (optional):** Wenn beide Samen aufgegangen sind, kannst du den schwächeren Sämling entfernen, um dem stärkeren mehr Platz zu geben.
7. **Abhärten:** Bevor du die Jungpflanzen ins Freie pflanzt, solltest du sie einige Tage lang abhärten. Stelle sie tagsüber für einige Stunden ins Freie und hole sie abends wieder rein.
Direktsaat:
1. **Boden vorbereiten:** Lockere den Boden gründlich auf und entferne Unkraut. Arbeite Kompost oder Mist ein.
2. **Pflanzlöcher graben:** Grabe Pflanzlöcher im Abstand von ca. 1-1,5 Metern (je nach Kürbissorte).
3. **Samen säen:** Lege pro Pflanzloch 2-3 Kürbissamen ca. 2-3 cm tief in die Erde.
4. **Angießen:** Gieße die Erde vorsichtig an.
5. **Schutz vor Schnecken:** Kürbissamen und junge Pflanzen sind bei Schnecken sehr beliebt. Schütze sie mit Schneckenkorn oder einem Schneckenzaun.
6. **Ausdünnen:** Wenn die Sämlinge aufgegangen sind, kannst du die schwächeren entfernen, sodass nur der stärkste Sämling pro Pflanzloch übrig bleibt.
Pflanzen (nach der Vorkultur oder Direktsaat):
1. **Pflanzlöcher vorbereiten:** Grabe Pflanzlöcher im Abstand von ca. 1-1,5 Metern (je nach Kürbissorte).
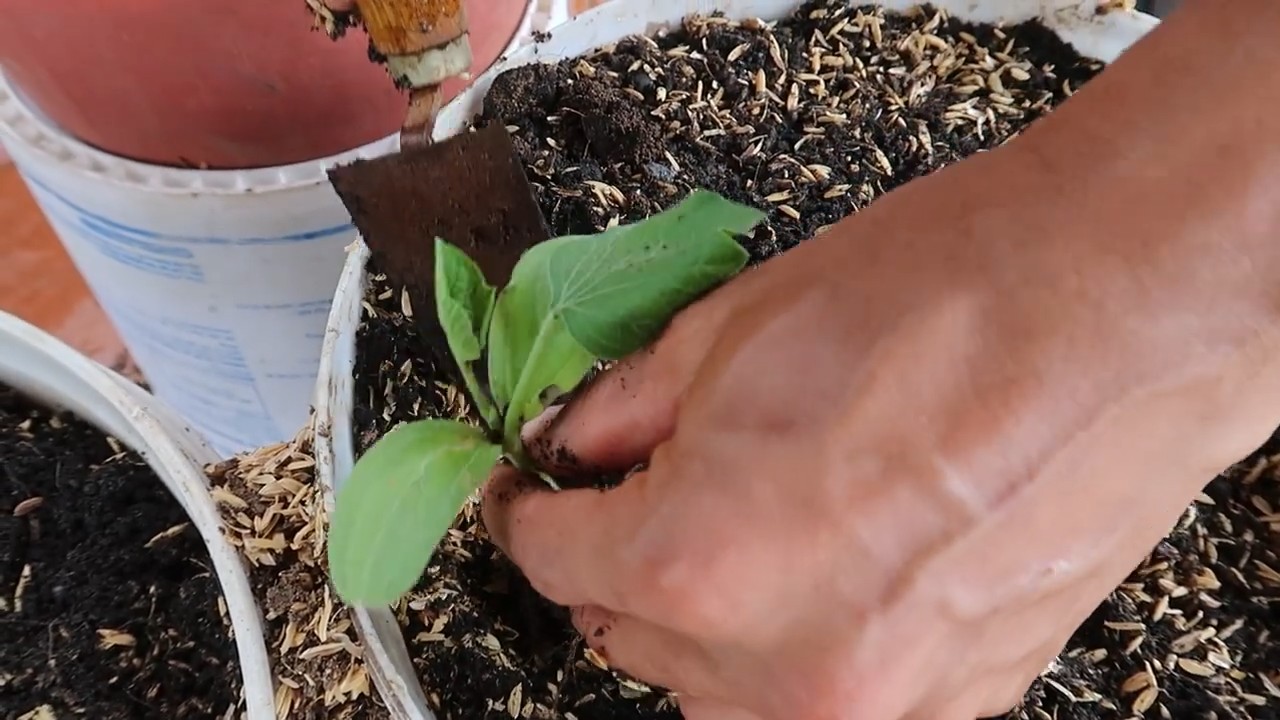
2. **Pflanzen einsetzen:** Setze die Jungpflanzen vorsichtig in die Pflanzlöcher ein. Achte darauf, dass der Wurzelballen nicht beschädigt wird.
3. **Angießen:** Gieße die Pflanzen gründlich an.
4. **Mulchen:** Bedecke den Boden um die Pflanzen mit Mulch (z.B. Stroh oder Rasenschnitt). Das hält den Boden feucht und unterdrückt Unkraut.
Die Pflege: Damit deine Kürbisse prächtig gedeihen
Nach dem Pflanzen ist die richtige Pflege entscheidend für eine reiche Ernte. Hier sind meine besten Tipps:
* **Gießen:** Kürbisse brauchen viel Wasser, besonders während der Fruchtbildung. Gieße regelmäßig und gründlich, am besten am Morgen. Vermeide es, die Blätter zu benetzen, um Pilzkrankheiten vorzubeugen.
* **Düngen:** Dünge deine Kürbisse regelmäßig mit einem organischen Dünger (z.B. Komposttee oder Brennnesseljauche). Das gibt ihnen die nötigen Nährstoffe für ein gesundes Wachstum und eine reiche Fruchtbildung.
* **Unkraut jäten:** Halte den Boden um die Kürbispflanzen unkrautfrei. Unkraut konkurriert mit den Kürbissen um Wasser und Nährstoffe.
* **Ranken lenken:** Kürbisranken können sich sehr weit ausbreiten. Lenke sie in die gewünschte Richtung, um Platz zu sparen und die Früchte besser zu belüften.
* **Früchte schützen:** Lege unter die wachsenden Kürbisse Stroh oder Holzbretter. Das verhindert, dass sie auf feuchtem Boden liegen und faulen.
* **Bestäubung:** Kürbisse haben männliche und weibliche Blüten. Die weiblichen Blüten erkennst du an dem kleinen Fruchtansatz unterhalb der Blüte. Wenn die Bestäubung nicht von selbst erfolgt (z.B. durch Bienen), kannst du sie manuell durchführen. Nimm dazu den Pollen einer männlichen Blüte und übertrage ihn auf die Narbe einer weiblichen Blüte.
* **Krankheiten und Schädlinge:** Achte auf Anzeichen von Krankheiten und Schädlingen. Mehltau, Kürbiskäfer und Schnecken können Probleme verursachen. Bekämpfe sie frühzeitig mit geeigneten Mitteln.
Die Ernte: Der Lohn deiner Mühe
Endlich ist es soweit! Die Kürbisse sind reif und bereit für die Ernte. Aber wann ist der richtige Zeitpunkt?
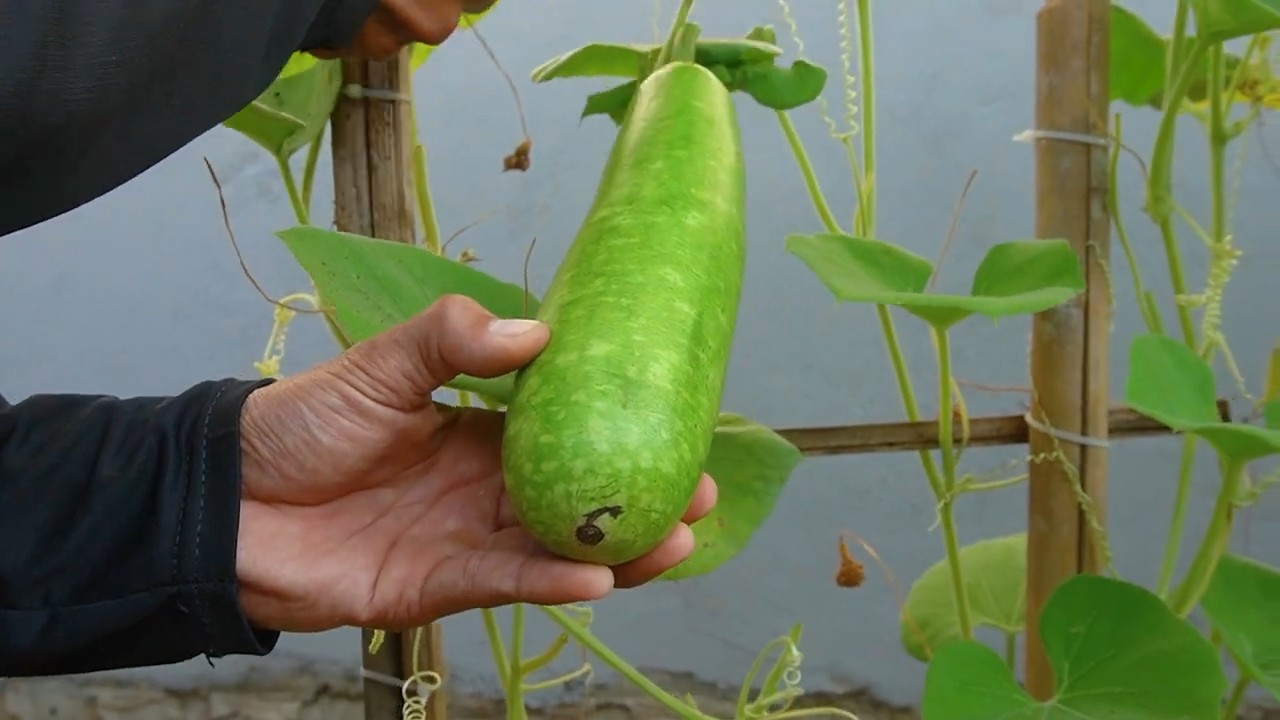
* **Reifezeichen:** Ein reifer Kürbis hat eine harte Schale, die sich nicht mehr leicht eindrücken lässt. Der Stiel ist trocken und verholzt. Wenn du auf den Kürbis klopfst, sollte er hohl klingen.
* **Ernten:** Schneide den Kürbis mit einem scharfen Messer oder einer Gartenschere vom Stiel ab. Lasse dabei einen ca. 5-10 cm langen Stiel am Kürbis. Das verlängert die Haltbarkeit.
* **Lagerung:** Lagere die Kürbisse an einem kühlen, trockenen und gut belüfteten Ort. Ideal ist ein Keller oder eine Garage. Vermeide es, die Kürbisse zu stapeln, da sie sich sonst gegenseitig beschädigen können.
Spezielle Tipps für verschiedene Kürbissorten
Es gibt unzählige Kürbissorten, und jede hat ihre eigenen Besonderheiten. Hier sind ein paar Tipps für beliebte Sorten:
* **Hokkaido:** Hokkaido-Kürbisse sind relativ pflegeleicht und eignen sich gut für Anfänger. Sie sind frühreif und haben einen nussigen Geschmack.
* **Butternut:** Butternut-Kürbisse sind etwas anspruchsvoller, aber ihr süßlicher Geschmack ist unschlagbar. Sie brauchen viel Wärme und Sonne.
* **Gartenkürbis (Zierkürbis):** Zierkürbisse sind vor allem für ihre dekorativen Formen und Farben bekannt. Sie sind nicht zum Verzehr geeignet.
* **Riesenkürbis:** Riesenkürbisse sind die Könige unter den Kürbissen. Sie brauchen viel Platz, Wasser und Dünger. Wenn du einen Riesenkürbis ziehen möchtest, solltest du dich gut informieren und viel Zeit investieren.
Häufige Fehler vermeiden: Meine persönlichen Erfahrungen
Im Laufe der Jahre habe ich beim Kürbisanbau so einige Fehler gemacht. Hier sind die häufigsten Stolpersteine und wie du sie vermeiden kannst:
*
Conclusion
So, there you have it! Mastering the art of growing gourds smartly isn’t just about planting seeds and hoping for the best; it’s about understanding their needs, providing the right support, and employing clever techniques to maximize your harvest. This DIY approach, focusing on [mention a specific DIY trick from the article, e.g., “creating a gourd trellis from repurposed materials”], is a game-changer for several reasons.
First and foremost, it allows you to tailor the growing environment to your specific space and gourd variety. Pre-made solutions are often generic and may not adequately address the unique requirements of your garden. By building your own system, you can ensure optimal airflow, sunlight exposure, and support, leading to healthier plants and larger, more impressive gourds.
Secondly, this DIY method is incredibly cost-effective. Instead of investing in expensive commercial trellises or supports, you can repurpose readily available materials like old ladders, branches, or even sturdy wire fencing. This not only saves you money but also promotes sustainability by giving new life to items that would otherwise end up in a landfill.
Thirdly, and perhaps most importantly, this approach fosters a deeper connection with your garden. You’re not just passively observing; you’re actively involved in creating the ideal conditions for your gourds to thrive. This hands-on experience is incredibly rewarding and allows you to learn more about the intricacies of plant growth.
But the possibilities don’t end there! Feel free to experiment with different variations of this DIY trick. For example, if you’re growing smaller gourds, you could create a hanging system using macrame or repurposed rope. If you’re dealing with a limited space, consider building a vertical garden against a wall or fence. You can also incorporate decorative elements into your structure, such as adding colorful paint or incorporating climbing vines to create a visually stunning display.
Another variation is to focus on soil amendments. Consider adding compost tea regularly to boost nutrient uptake, or incorporating mycorrhizae fungi to improve root health. Experiment with different mulches to retain moisture and suppress weeds. Remember, every garden is unique, so don’t be afraid to adapt and customize this DIY trick to suit your specific needs and preferences.
Growing gourds smartly is an investment in your garden’s future. It’s about creating a sustainable, thriving ecosystem that yields beautiful and bountiful harvests year after year.
We strongly encourage you to try this DIY trick and experience the difference it can make in your gourd-growing endeavors. Don’t be afraid to get creative, experiment with different materials and techniques, and most importantly, have fun!
Once you’ve given it a try, we’d love to hear about your experience. Share your photos, tips, and stories in the comments section below. Let’s build a community of gourd-growing enthusiasts who are passionate about sharing their knowledge and inspiring others to embrace the joy of DIY gardening. Your insights could be invaluable to someone just starting out, and together, we can all learn and grow. So, get your hands dirty, embrace the challenge, and discover the satisfaction of growing gourds smartly!
Frequently Asked Questions (FAQ)
What types of gourds are best suited for this DIY growing method?
This DIY growing method, particularly focusing on creating your own support structures, is suitable for a wide variety of gourds. However, it’s especially beneficial for larger, heavier gourds like bottle gourds, bushel gourds, and dipper gourds, which require significant support to prevent them from rotting on the ground or breaking their vines. Smaller gourds, such as ornamental gourds, can also benefit from this method, as it allows you to train them into specific shapes and create visually appealing displays. Consider the mature size and weight of your chosen gourd variety when designing your support structure to ensure it’s strong enough to handle the load. Remember that proper spacing is also important, regardless of the gourd type.
What materials can I use to build my own gourd trellis or support system?
The beauty of this DIY approach is that you can use a wide range of readily available and repurposed materials. Some popular options include:
* Old ladders: These provide excellent vertical support and can be easily adapted to different heights.
* Branches and tree limbs: These offer a natural and rustic look and can be used to create a sturdy framework.
* Wire fencing: This is a durable and versatile option that can be easily shaped and secured.
* Repurposed metal pipes: These provide a strong and stable base for your trellis.
* Rope or twine: These can be used to create a network of support for the gourd vines to climb.
* Bamboo poles: These are lightweight, strong, and sustainable.
When choosing your materials, consider their durability, weather resistance, and ability to support the weight of the gourds. Make sure to properly clean and treat any repurposed materials to prevent the spread of diseases or pests.
How do I train the gourd vines to climb the trellis or support system?
Gourd vines are naturally climbers, but they may need a little guidance to get started. Gently guide the vines towards the trellis or support system and use soft ties, such as twine or cloth strips, to secure them in place. As the vines grow, continue to train them by directing them along the desired path. Avoid using wire or other materials that could cut into the vines. Regularly check the ties to ensure they’re not too tight and adjust them as needed. Pruning the vines can also help to encourage branching and create a fuller, more balanced plant.
How often should I water and fertilize my gourds?
Gourds require consistent moisture, especially during the growing season. Water deeply and regularly, ensuring that the soil is evenly moist but not waterlogged. The frequency of watering will depend on the weather conditions and soil type. As a general rule, water when the top inch of soil feels dry to the touch. Fertilize your gourds every 2-3 weeks with a balanced fertilizer or compost tea. Avoid over-fertilizing, as this can lead to excessive foliage growth and reduced fruit production. Monitor your plants for signs of nutrient deficiencies, such as yellowing leaves, and adjust your fertilization schedule accordingly.
What are some common pests and diseases that affect gourds, and how can I prevent them?
Gourds are susceptible to a variety of pests and diseases, including squash bugs, squash vine borers, powdery mildew, and downy mildew. To prevent these problems, practice good garden hygiene by removing any dead or diseased plant material. Rotate your crops each year to prevent the buildup of soilborne pathogens. Inspect your plants regularly for signs of pests or diseases and take action promptly. You can use organic pest control methods, such as insecticidal soap or neem oil, to control pests. To prevent fungal diseases, ensure good airflow around your plants and avoid overhead watering. If necessary, you can use a fungicide to control fungal infections.
How do I know when my gourds are ready to harvest?
The timing of gourd harvest depends on the specific variety and your intended use. Generally, gourds are ready to harvest when the stems have dried and turned brown, and the skin is hard and resistant to scratching. For ornamental gourds, you can harvest them as soon as they reach their desired size and color. For hard-shelled gourds, such as bottle gourds, allow them to fully mature on the vine until the stems are completely dry. After harvesting, cure the gourds in a well-ventilated area for several weeks to allow them to dry and harden.
Can I save seeds from my gourds to plant next year?
Yes, you can save seeds from your gourds to plant next year, but keep in mind that gourds are prone to cross-pollination, so the seeds may not produce plants that are identical to the parent plant. To ensure true-to-type seeds, you’ll need to hand-pollinate your gourds. To save seeds, allow the gourds to fully mature on the vine. Then, cut them open and scoop out the seeds. Rinse the seeds thoroughly and spread them out on a paper towel to dry. Once the seeds are completely dry, store them in an airtight container in a cool, dark place.
What if I don’t have a lot of space for a traditional garden? Can I still grow gourds?
Absolutely! Even if you have limited space, you can still enjoy growing gourds. Consider growing them in containers or using vertical gardening techniques. Choose smaller gourd varieties that are well-suited for container growing. Use a large container with good drainage and fill it with a high-quality potting mix. Provide a trellis or support system for the vines to climb. You can also grow gourds in hanging baskets or window boxes. With a little creativity and planning, you can successfully grow gourds even in the smallest of spaces.
Leave a Comment