
Growing Kohlrabi in Pots might sound like a challenge, but trust me, it’s totally achievable, even if you’re short on garden space! Have you ever dreamt of snipping fresh, crisp kohlrabi right from your balcony or patio? Well, dream no more! This often-overlooked vegetable, with its unique bulbous stem and mild, slightly sweet flavor, is surprisingly well-suited for container gardening.
Kohlrabi, sometimes called the “German turnip,” has a fascinating history, dating back to the Roman Empire. While not as widely known as its cabbage cousins, it’s a staple in many European cuisines and is gaining popularity worldwide for its nutritional benefits and versatility. But why bother growing it in a pot, you ask? Well, for many of us, sprawling gardens are a luxury. Apartment living, limited yard space, or even just wanting to keep your veggies close at hand makes container gardening the perfect solution. Plus, growing kohlrabi in pots allows you to control the soil quality, protect your plants from pests, and even extend the growing season by moving them indoors during harsh weather.
This DIY guide is packed with simple, easy-to-follow tips and tricks to help you successfully cultivate this delightful vegetable in containers. I’ll walk you through everything from choosing the right pot and soil to watering and fertilizing, ensuring you’ll be enjoying a bountiful harvest of homegrown kohlrabi in no time. So, grab your gardening gloves, and let’s get started!
Growing Kohlrabi in Pots: A Beginner’s Guide
So, you want to grow kohlrabi in pots? Awesome! It’s totally doable, even if you don’t have a sprawling garden. Kohlrabi, with its quirky bulb and delicious leaves, is a surprisingly easy and rewarding vegetable to cultivate in containers. I’ve had great success with it, and I’m excited to share my tips and tricks with you. Let’s get started!
Choosing the Right Variety
First things first, let’s talk about kohlrabi varieties. While most kohlrabi will grow in pots, some are better suited than others.
* Early White Vienna and Early Purple Vienna: These are classic choices, known for their relatively compact size and quick maturity. They’re perfect for container gardening.
* Grand Duke: This variety is also a good option, offering good disease resistance and a mild flavor.
* Avoid Larger Varieties: Steer clear of varieties like ‘Gigante,’ which are bred to grow very large and need a lot of space. They’re not ideal for pots.
Gathering Your Supplies
Before we dive into planting, let’s make sure you have everything you need. Here’s a checklist:
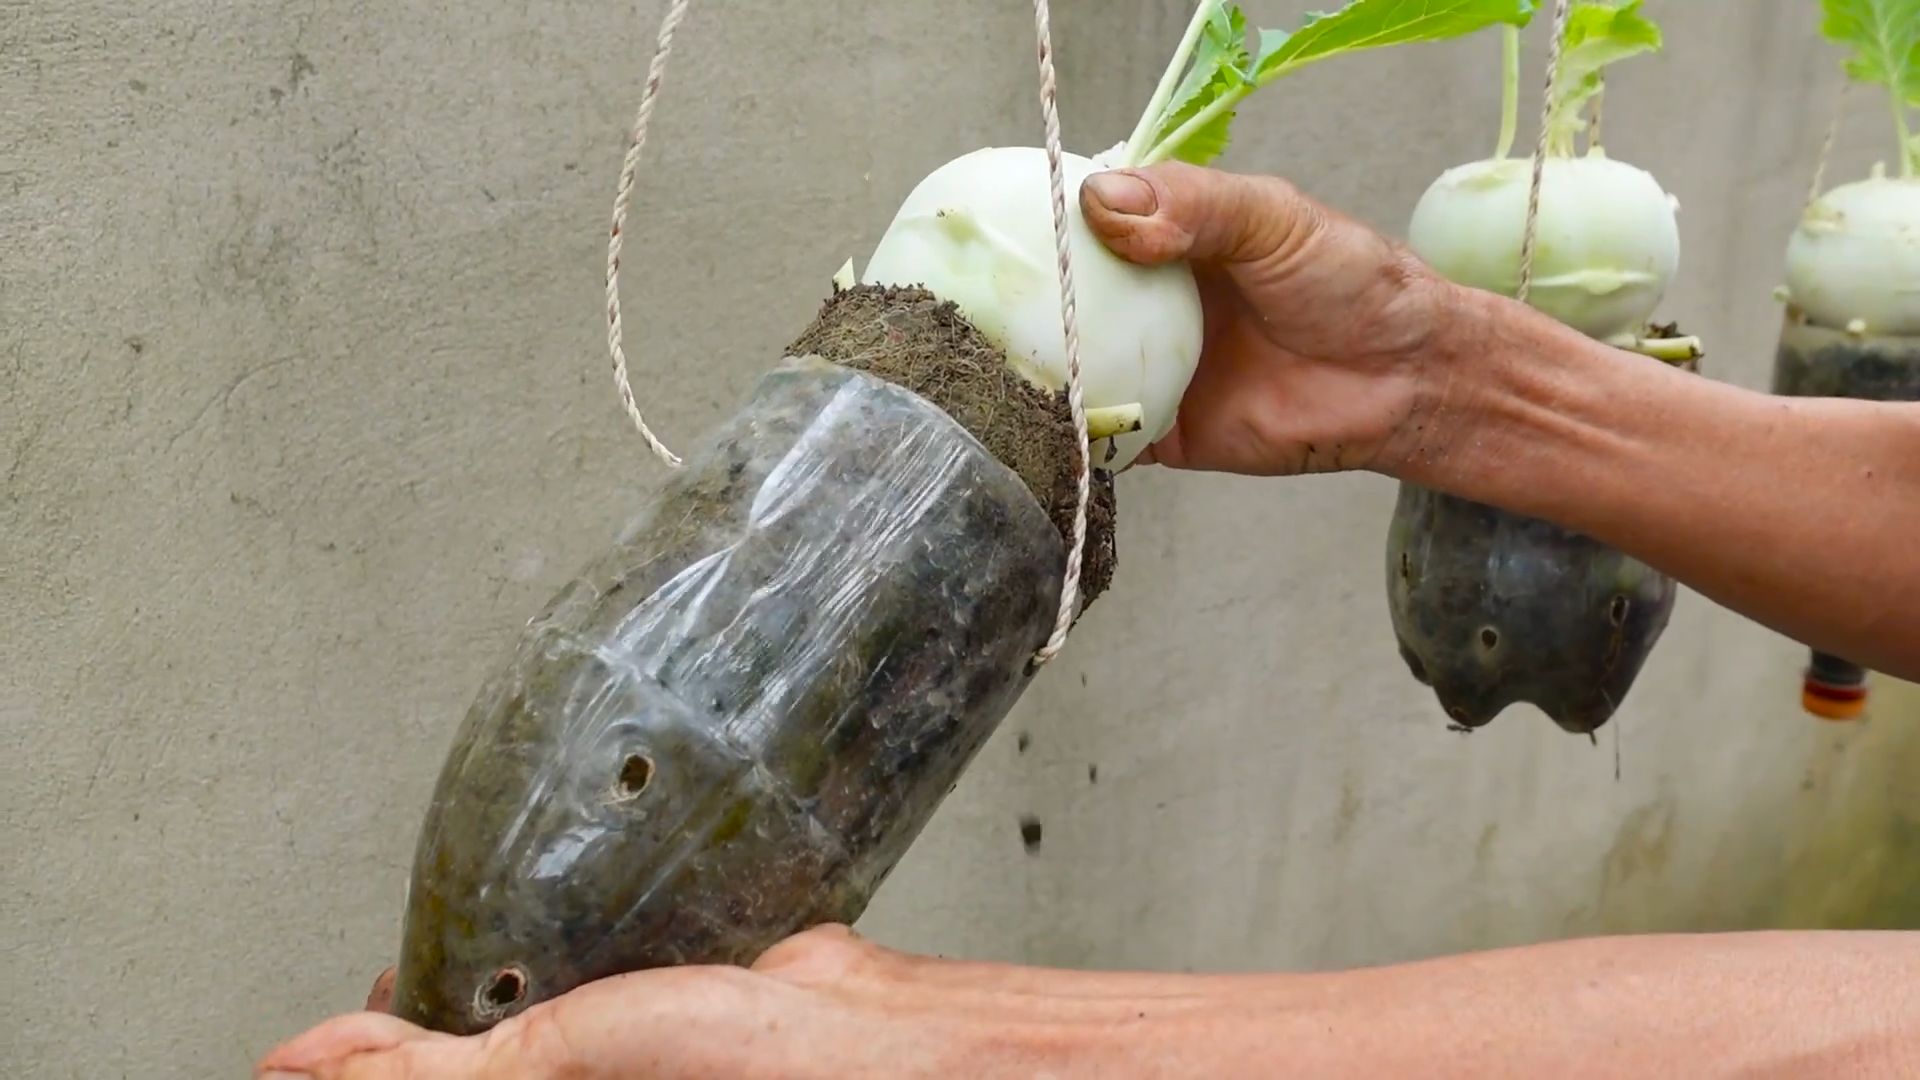
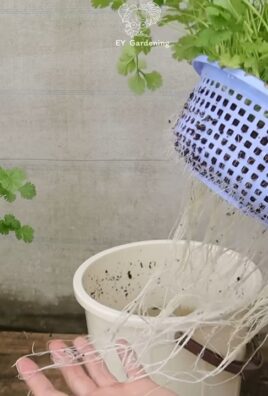
* Pots: Choose pots that are at least 12 inches in diameter and 12 inches deep. Kohlrabi needs room for its roots to develop. Fabric pots are a great option because they allow for good drainage and air circulation.
* Potting Mix: Use a high-quality potting mix, not garden soil. Potting mix is lighter and drains better, which is crucial for container gardening. I like to use a mix that contains peat moss, perlite, and vermiculite.
* Kohlrabi Seeds: Select your desired variety from a reputable seed supplier.
* Watering Can or Hose: You’ll need a way to water your kohlrabi regularly.
* Fertilizer: A balanced, water-soluble fertilizer will help your kohlrabi thrive. Look for something like a 10-10-10 or 20-20-20 formula.
* Optional:
* Seed starting tray and seedling pots (if you’re starting seeds indoors).
* Plant labels to keep track of your varieties.
* Gardening gloves to keep your hands clean.
Planting Your Kohlrabi
Now for the fun part – planting! You have two options: starting seeds indoors or direct sowing into your pots. I usually prefer starting indoors, especially if I want an earlier harvest.
Starting Seeds Indoors (Optional)
1. Sow the Seeds: Fill your seed starting tray with potting mix and moisten it. Sow the kohlrabi seeds about ¼ inch deep, spacing them about an inch apart.
2. Provide Light and Warmth: Place the tray in a warm location (around 70°F) and provide plenty of light. A sunny windowsill or a grow light will work well.
3. Keep the Soil Moist: Water the seedlings regularly, keeping the soil consistently moist but not soggy.
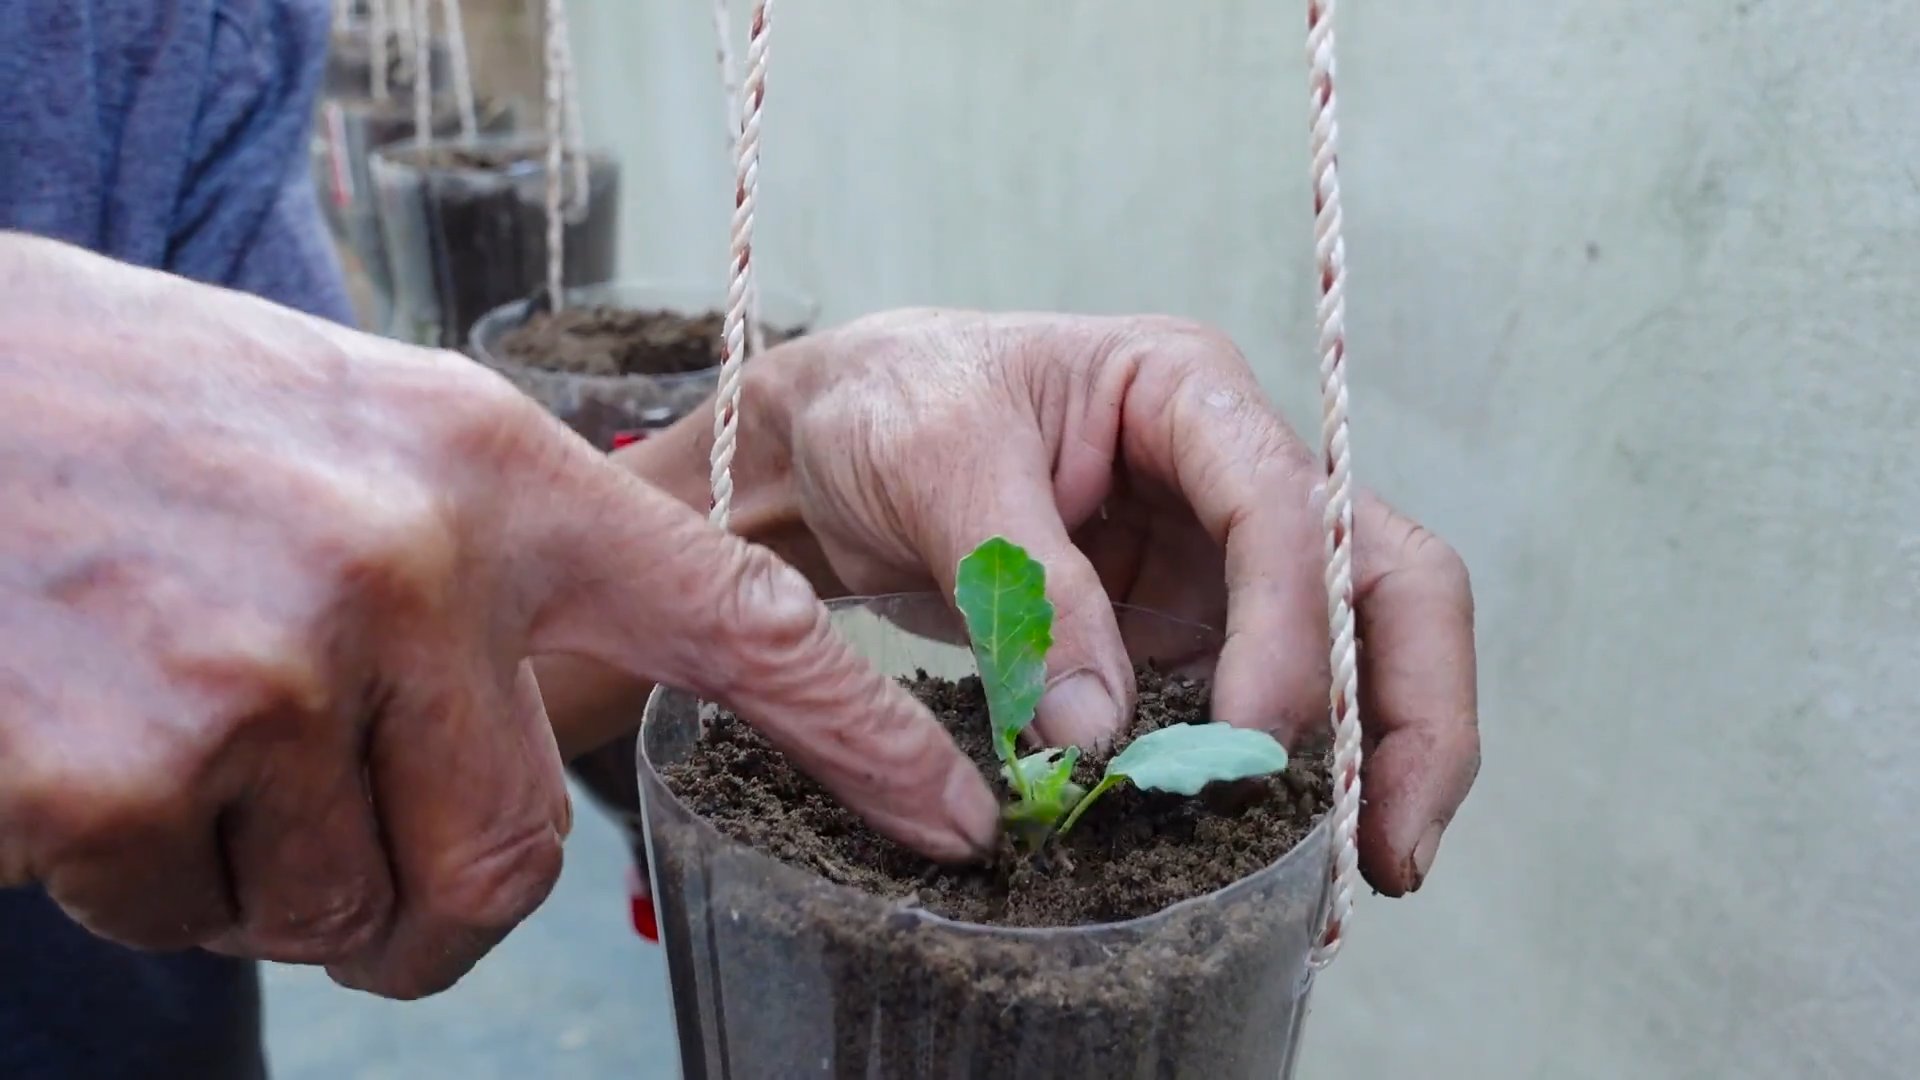
4. Transplant Seedlings: Once the seedlings have developed a few sets of true leaves (usually after 4-6 weeks), they’re ready to be transplanted into individual pots. Gently remove the seedlings from the tray and transplant them into 3-4 inch pots filled with potting mix.
5. Harden Off: Before transplanting the seedlings into their final pots outdoors, you’ll need to “harden them off.” This means gradually exposing them to outdoor conditions over a period of a week or two. Start by placing them outside for an hour or two each day, gradually increasing the amount of time they spend outdoors. This will help them adjust to the sun, wind, and temperature changes.
Direct Sowing into Pots
1. Fill the Pots: Fill your pots with potting mix, leaving about an inch of space at the top.
2. Sow the Seeds: Sow 2-3 kohlrabi seeds per pot, about ½ inch deep. Space the seeds a few inches apart.
3. Water Gently: Water the pots gently to moisten the soil.
4. Thin Seedlings: Once the seedlings emerge (usually within a week), thin them to one plant per pot. Choose the strongest, healthiest-looking seedling and snip off the others at the soil line.
Caring for Your Kohlrabi
Once your kohlrabi is planted, it’s time to provide the care it needs to thrive.
Watering
Kohlrabi needs consistent moisture to grow well. Water your plants regularly, especially during hot, dry weather. The soil should be moist but not waterlogged. Check the soil moisture by sticking your finger into the soil – if the top inch feels dry, it’s time to water.
Fertilizing
Kohlrabi is a heavy feeder, so regular fertilization is important. Start fertilizing about 2-3 weeks after planting, using a balanced, water-soluble fertilizer. Follow the instructions on the fertilizer package for application rates. I usually fertilize every 2-3 weeks.
Sunlight
Kohlrabi needs at least 6 hours of sunlight per day. Choose a sunny location for your pots. If you live in a very hot climate, some afternoon shade can be beneficial.
Pest and Disease Control
Kohlrabi is generally pest-resistant, but it can be susceptible to a few problems, such as aphids, cabbage worms, and flea beetles.
* Aphids: These tiny insects can suck the sap from your plants. You can control them by spraying them with a strong stream of water or by using insecticidal soap.
* Cabbage Worms: These green caterpillars can devour the leaves of your kohlrabi. Handpick them off the plants or use Bacillus thuringiensis (Bt), a natural insecticide.
* Flea Beetles: These tiny beetles can create small holes in the leaves. Cover your plants with row covers to prevent flea beetles from reaching them.
To prevent diseases, make sure your plants have good air circulation and avoid overwatering. If you notice any signs of disease, such as yellowing leaves or spots, remove the affected leaves immediately.
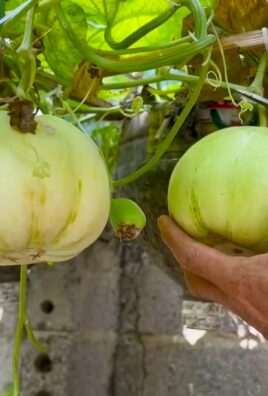
Harvesting Your Kohlrabi
The best part of growing kohlrabi is harvesting it! Kohlrabi is typically ready to harvest about 50-60 days after planting.
* Harvest Time: The bulb should be about 2-3 inches in diameter. Don’t let it get too large, as it can become tough and woody.
* Harvesting Technique: To harvest, simply cut the bulb off at the base of the plant with a sharp knife.
* Leafy Greens: The leaves are also edible and can be harvested at any time. They have a mild, cabbage-like flavor.
Enjoying Your Harvest
Kohlrabi can be eaten raw or cooked. It has a mild, slightly sweet flavor.
* Raw: Peel the bulb and slice it into thin strips or cubes. Add it to salads, slaws, or veggie platters.
* Cooked: Kohlrabi can be steamed, boiled, roasted, or stir-fried. It’s a great addition to soups, stews, and casseroles.
* Leaves: The leaves can be cooked like spinach or kale.
Troubleshooting
Even with the best care, you might encounter some problems while growing kohlrabi. Here are a few common issues and how to address them:
* Bulb Cracking: This can be caused by inconsistent watering. Make sure to water your plants regularly and evenly.
* Tough or Woody Bulbs: This can be caused by letting the bulbs get too large before harvesting. Harvest them when they’re 2-3 inches in diameter.
* Slow Growth: This can be caused by lack of nutrients or sunlight. Make sure to fertilize your plants regularly and provide them with at least 6 hours of sunlight per day.
Extending the Growing Season
If you live in a climate with a short growing season, you can extend the season by starting seeds indoors and using row covers to protect your plants from frost. You can also plant a second crop of kohlrabi in late summer for a fall harvest.
Final Thoughts
Growing kohlrabi in pots is a fun and rewarding experience. With a little care and attention, you can enjoy a delicious harvest of this unique vegetable. Don’t be afraid to experiment and try different varieties. Happy gardening!
Conclusion
So, there you have it! Growing kohlrabi in pots is not only achievable but also incredibly rewarding. We’ve walked through the entire process, from selecting the right pot and soil to nurturing your kohlrabi plants to a bountiful harvest. But why should you bother with this DIY project?
Simply put, growing kohlrabi in pots offers a level of control and convenience that in-ground gardening often lacks. You can easily move your pots to chase the sun, protect them from unexpected frosts, and keep a closer eye on pests and diseases. This is especially beneficial for those with limited garden space, poor soil conditions, or a desire to extend the growing season. Plus, there’s something deeply satisfying about nurturing a plant from seed to table, knowing exactly where your food comes from and how it was grown.
Beyond the practical benefits, growing kohlrabi in pots opens up a world of culinary possibilities. Imagine harvesting your own fresh kohlrabi and using it in salads, slaws, stir-fries, or even roasting it for a sweet and nutty side dish. The crisp, slightly sweet flavor of homegrown kohlrabi is simply unmatched by anything you can find in the grocery store.
Don’t be afraid to experiment with different varieties of kohlrabi. While the classic green and purple varieties are always a good choice, consider trying some of the more unusual cultivars, such as ‘Superschmelz’ for its exceptionally large bulbs or ‘White Vienna’ for its mild flavor. You can also play around with different companion plants in your pots. Marigolds, for example, can help deter pests, while basil can improve the flavor of your kohlrabi.
Another variation to consider is succession planting. By planting new seeds every few weeks, you can ensure a continuous harvest of kohlrabi throughout the growing season. This is a great way to maximize your yield and enjoy fresh kohlrabi for months on end.
Growing kohlrabi in pots is a must-try for any gardener, regardless of experience level. It’s a fun, easy, and rewarding way to grow your own fresh produce and enjoy the many benefits of homegrown food.
We encourage you to give this DIY trick a try and see for yourself how easy and rewarding it can be. Don’t be afraid to get your hands dirty, experiment with different techniques, and most importantly, have fun! Once you’ve harvested your first crop of homegrown kohlrabi, be sure to share your experience with us in the comments below. We’d love to hear your tips, tricks, and favorite recipes. Happy gardening!
Frequently Asked Questions (FAQ)
What size pot is best for growing kohlrabi?
A pot that is at least 12 inches in diameter and 12 inches deep is ideal for growing kohlrabi. This provides enough space for the roots to develop properly and allows the plant to grow to its full potential. If you’re planning on growing multiple kohlrabi plants in the same pot, you’ll need a larger container, such as a half-barrel or a large planter box. Ensure that the pot has adequate drainage holes to prevent waterlogging, which can lead to root rot. Remember, the larger the pot, the more room the kohlrabi has to grow, resulting in larger and healthier bulbs.
What type of soil should I use for growing kohlrabi in pots?
Kohlrabi thrives in well-draining, fertile soil that is rich in organic matter. A good potting mix for kohlrabi should consist of a combination of peat moss, perlite, and compost. You can also add some slow-release fertilizer to provide the plants with a steady supply of nutrients. Avoid using garden soil in pots, as it can become compacted and doesn’t drain as well as potting mix. The ideal pH for kohlrabi is between 6.0 and 7.5. You can test the pH of your soil using a soil testing kit and amend it as needed with lime or sulfur.
How often should I water kohlrabi plants in pots?
Kohlrabi plants need consistent moisture to thrive, especially when grown in pots. Water your kohlrabi plants deeply whenever the top inch of soil feels dry to the touch. Avoid overwatering, as this can lead to root rot. During hot, dry weather, you may need to water your plants daily. A good way to check if your plants need water is to stick your finger into the soil. If the soil feels dry, it’s time to water. Also, consider using a moisture meter to accurately gauge the soil’s moisture level.
How much sunlight do kohlrabi plants need?
Kohlrabi plants need at least 6 hours of direct sunlight per day to grow properly. If you live in a hot climate, you may need to provide some afternoon shade to prevent the plants from overheating. Place your kohlrabi pots in a sunny location, such as a south-facing balcony or patio. If you don’t have enough sunlight, you can supplement with grow lights. Rotate your pots regularly to ensure that all sides of the plants receive adequate sunlight.
When should I harvest my kohlrabi?
Kohlrabi is typically ready to harvest about 6-8 weeks after planting. The bulbs should be about 2-3 inches in diameter. Don’t let the bulbs get too large, as they can become tough and woody. To harvest, simply cut the bulb from the stem with a sharp knife. You can also harvest the leaves, which are edible and can be used in salads or stir-fries. The best time to harvest kohlrabi is in the morning, when the plants are cool and hydrated.
What are some common pests and diseases that affect kohlrabi?
Kohlrabi can be susceptible to a variety of pests and diseases, including aphids, cabbage worms, flea beetles, and clubroot. To prevent pests and diseases, practice good garden hygiene, such as removing weeds and debris from around your plants. You can also use organic pest control methods, such as insecticidal soap or neem oil. If you notice any signs of disease, such as yellowing leaves or stunted growth, remove the affected plants immediately to prevent the spread of the disease. Crop rotation can also help to prevent soilborne diseases.
Can I grow kohlrabi indoors?
Yes, you can grow kohlrabi indoors, but it requires a bit more effort. You’ll need to provide your plants with plenty of light, either from a sunny window or grow lights. You’ll also need to ensure that the plants are properly watered and fertilized. Indoor kohlrabi plants may not grow as large as those grown outdoors, but you can still harvest the leaves for salads and stir-fries. Choose a compact variety of kohlrabi that is well-suited for indoor growing.
How do I store kohlrabi after harvesting?
After harvesting, store your kohlrabi in the refrigerator. Remove the leaves and store them separately in a plastic bag. The bulbs can be stored in a plastic bag or container for up to several weeks. Kohlrabi can also be frozen for longer storage. To freeze, blanch the bulbs for a few minutes and then transfer them to an ice bath. Once cooled, drain the bulbs and store them in freezer bags. Frozen kohlrabi can be used in soups, stews, and stir-fries.
What are some creative ways to use homegrown kohlrabi?
Homegrown kohlrabi is incredibly versatile and can be used in a variety of dishes. You can eat it raw in salads or slaws, or cook it in stir-fries, soups, and stews. Kohlrabi can also be roasted, grilled, or mashed. The leaves are also edible and can be used in salads or stir-fries. Try grating kohlrabi into fritters or using it as a substitute for potatoes in gratins. The possibilities are endless! Don’t be afraid to experiment and find your own favorite ways to enjoy this delicious and nutritious vegetable.
Leave a Comment