
Growing Peppers Easily is something I’ve been passionate about for years, and let me tell you, there’s nothing quite like the satisfaction of biting into a juicy, homegrown pepper! Forget those bland, store-bought varieties – we’re talking vibrant colors, intense flavors, and a garden bursting with life.
For centuries, peppers have been a staple in cuisines around the world, from the fiery chilies of South America to the sweet bell peppers gracing our salads. Their journey from the New World to global kitchens is a testament to their versatility and deliciousness. But what if I told you that achieving pepper perfection in your own backyard is easier than you think?
That’s right! This isn’t just another gardening guide; it’s your passport to a pepper paradise. We’re diving deep into simple, yet effective DIY tricks and hacks that will transform your pepper-growing game. Whether you’re a seasoned gardener or just starting out, these tips will help you avoid common pitfalls, maximize your yield, and ultimately, enjoy the freshest, most flavorful peppers imaginable.
Why do you need these tricks? Because let’s face it, gardening can be tricky! Pests, diseases, and unpredictable weather can all throw a wrench in your plans. But with a little know-how and some clever DIY solutions, you can overcome these challenges and growing peppers easily becomes a reality. So, grab your gardening gloves, and let’s get started!
Growing Peppers Like a Pro: My Foolproof DIY Guide
Okay, pepper lovers, gather ’round! I’m going to share my secrets for growing peppers that are so plump, juicy, and flavorful, you’ll never want to buy them from the store again. This isn’t just about throwing some seeds in the ground and hoping for the best. This is about creating the *perfect* environment for your pepper plants to thrive. I’ve learned a lot over the years, and I’m excited to pass on my knowledge to you. Let’s get started!
Choosing Your Pepper Varieties
Before we even think about soil, let’s talk peppers! The world of peppers is vast and exciting. From sweet bell peppers to fiery habaneros, there’s a pepper out there for everyone.
* **Sweet Peppers:** These are your bell peppers (red, yellow, orange, green), banana peppers, and pimentos. They’re mild and great for salads, stuffing, and roasting.
* **Mildly Spicy Peppers:** Think jalapeños, poblanos, and Anaheim peppers. They offer a little kick without being overwhelming. Perfect for salsas and adding a bit of heat to your dishes.
* **Hot Peppers:** Now we’re talking! This category includes serranos, cayenne peppers, and Thai chilies. Use these sparingly if you’re not a fan of intense heat.
* **Super-Hot Peppers:** Handle with care! Ghost peppers, habaneros, scotch bonnets, and Carolina reapers fall into this category. They’re not for the faint of heart.
My tip: Start with a mix of sweet and mildly spicy peppers. That way, you’ll have something for everyone and can experiment with different flavors.
Starting Your Pepper Seeds Indoors
Because peppers need a long growing season, starting them indoors is crucial, especially if you live in a cooler climate. I usually start mine about 8-10 weeks before the last expected frost.
1. **Gather Your Supplies:** You’ll need:
* Pepper seeds (of course!)
* Seed starting trays or small pots
* Seed starting mix (this is different from regular potting soil – it’s lighter and better for seedlings)
* A spray bottle filled with water
* A heat mat (optional, but highly recommended)
* A grow light (also optional, but it makes a HUGE difference)
* A humidity dome (optional, but helpful for maintaining moisture)
2. **Prepare Your Seed Starting Trays:** Fill each cell of your seed starting tray with seed starting mix. Gently tap the tray to settle the mix.
3. **Sow Your Seeds:** Make a small indentation (about ¼ inch deep) in the center of each cell. Place 2-3 seeds in each indentation. This increases your chances of at least one seed germinating.
4. **Cover the Seeds:** Gently cover the seeds with seed starting mix.
5. **Water Thoroughly:** Use your spray bottle to thoroughly moisten the soil. You want it to be damp, but not soggy.
6. **Provide Heat and Light:** Place your seed starting tray on a heat mat and under a grow light. The heat mat will help the seeds germinate faster, and the grow light will prevent the seedlings from becoming leggy. If you don’t have a grow light, place the tray in a sunny window, but be sure to rotate it regularly so the seedlings don’t lean towards the light.
7. **Maintain Moisture:** Cover the tray with a humidity dome to help retain moisture. Check the soil daily and mist with water as needed to keep it damp.
8. **Wait Patiently:** Pepper seeds can take anywhere from 7-21 days to germinate, so be patient! Once the seedlings emerge, remove the humidity dome.
9. **Thin the Seedlings:** Once the seedlings have their first true leaves (the second set of leaves that appear after the initial seed leaves), thin them out by snipping off the weaker seedlings at the soil line. Leave only the strongest seedling in each cell.
Transplanting Your Pepper Seedlings
Once the danger of frost has passed and the soil has warmed up, it’s time to transplant your pepper seedlings outdoors.
1. **Harden Off Your Seedlings:** This is a crucial step! Hardening off gradually acclimates your seedlings to the outdoor environment. About a week before you plan to transplant them, start taking them outside for a few hours each day. Gradually increase the amount of time they spend outdoors each day. This will help them adjust to the sun, wind, and temperature changes.
2. **Choose a Sunny Location:** Peppers need at least 6-8 hours of sunlight per day. Choose a location in your garden that gets plenty of sun.
3. **Prepare the Soil:** Peppers prefer well-drained soil that is rich in organic matter. Amend your soil with compost or well-rotted manure before planting.
4. **Dig the Holes:** Dig holes that are slightly larger than the root balls of your seedlings. Space the holes about 18-24 inches apart, depending on the variety of pepper.
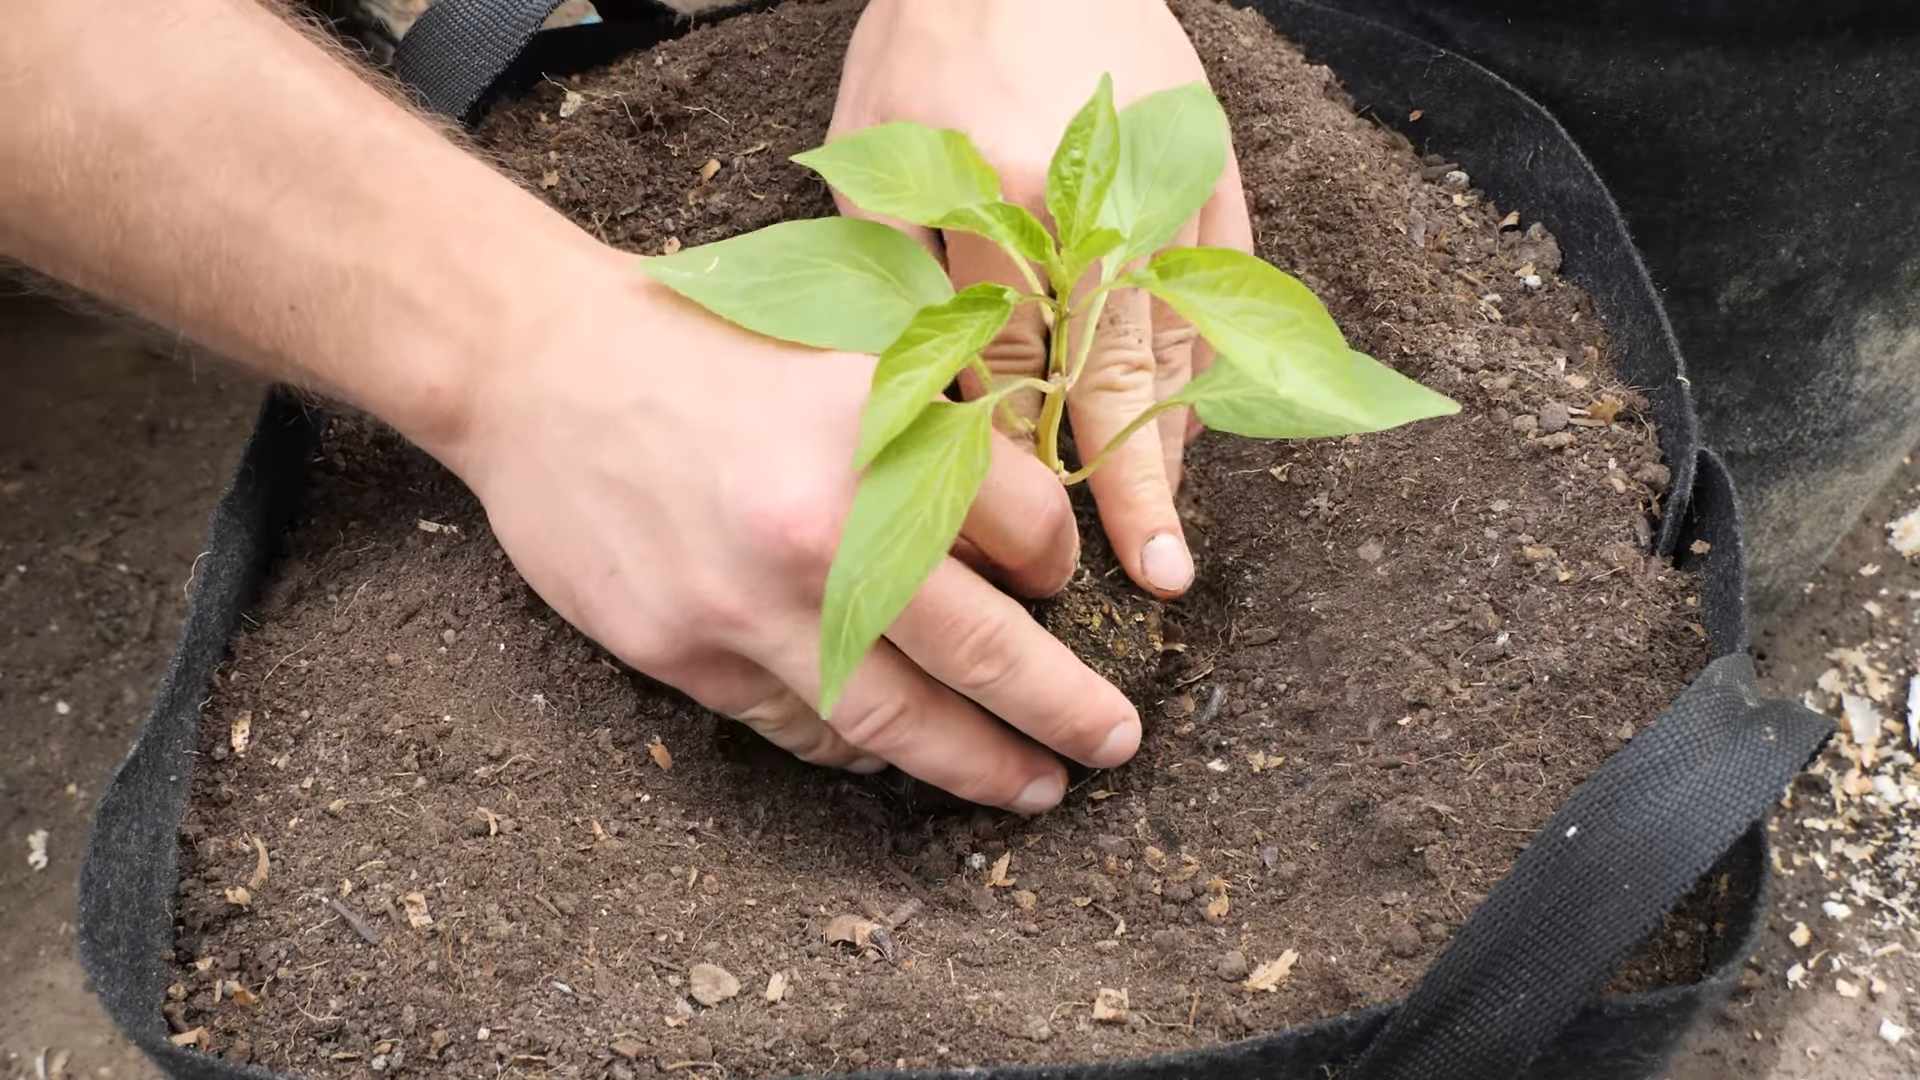
5. **Transplant the Seedlings:** Gently remove the seedlings from their cells. If the roots are tightly bound, gently loosen them before planting. Place the seedlings in the holes and backfill with soil.
6. **Water Thoroughly:** Water the seedlings thoroughly after transplanting.
7. **Mulch:** Apply a layer of mulch around the base of the plants to help retain moisture, suppress weeds, and regulate soil temperature. I like to use straw or wood chips.
Caring for Your Pepper Plants
Now that your pepper plants are in the ground, it’s time to give them the care they need to thrive.
1. **Watering:** Peppers need consistent watering, especially during hot, dry weather. Water deeply whenever the top inch of soil feels dry. Avoid overwatering, as this can lead to root rot.
2. **Fertilizing:** Peppers are heavy feeders, so they need regular fertilization. Use a balanced fertilizer (e.g., 10-10-10) every 2-3 weeks. You can also use a liquid fertilizer, such as fish emulsion or seaweed extract.
3. **Staking or Caging:** As your pepper plants grow, they may need support to prevent them from falling over. Stake or cage your plants to provide support. This is especially important for taller varieties.
4. **Pruning:** Pruning can help improve air circulation and encourage fruit production. Remove any suckers (small shoots that grow from the base of the plant) and any yellowing or diseased leaves.
5. **Pest and Disease Control:** Keep an eye out for pests and diseases. Common pepper pests include aphids, flea beetles, and spider mites. Common pepper diseases include blossom end rot and fungal diseases. Treat any problems promptly with appropriate organic pesticides or fungicides.
* Aphids: These tiny insects suck the sap from plants. You can control them with insecticidal soap or by spraying them with a strong stream of water.
* Flea Beetles: These small beetles chew holes in the leaves. You can control them with row covers or by spraying them with neem oil.
* Spider Mites: These tiny mites create webs on the leaves and suck the sap. You can control them with insecticidal soap or by spraying them with a strong stream of water.
* Blossom End Rot: This is a calcium deficiency that causes the bottom of the peppers to rot. You can prevent it by adding calcium to the soil before planting and by watering consistently.
* Fungal Diseases: These diseases can cause spots on the leaves and fruit. You can prevent them by providing good air circulation and by avoiding overhead watering.
Harvesting Your Peppers
The moment we’ve all been waiting for! Harvesting your peppers is the most rewarding part of the process.
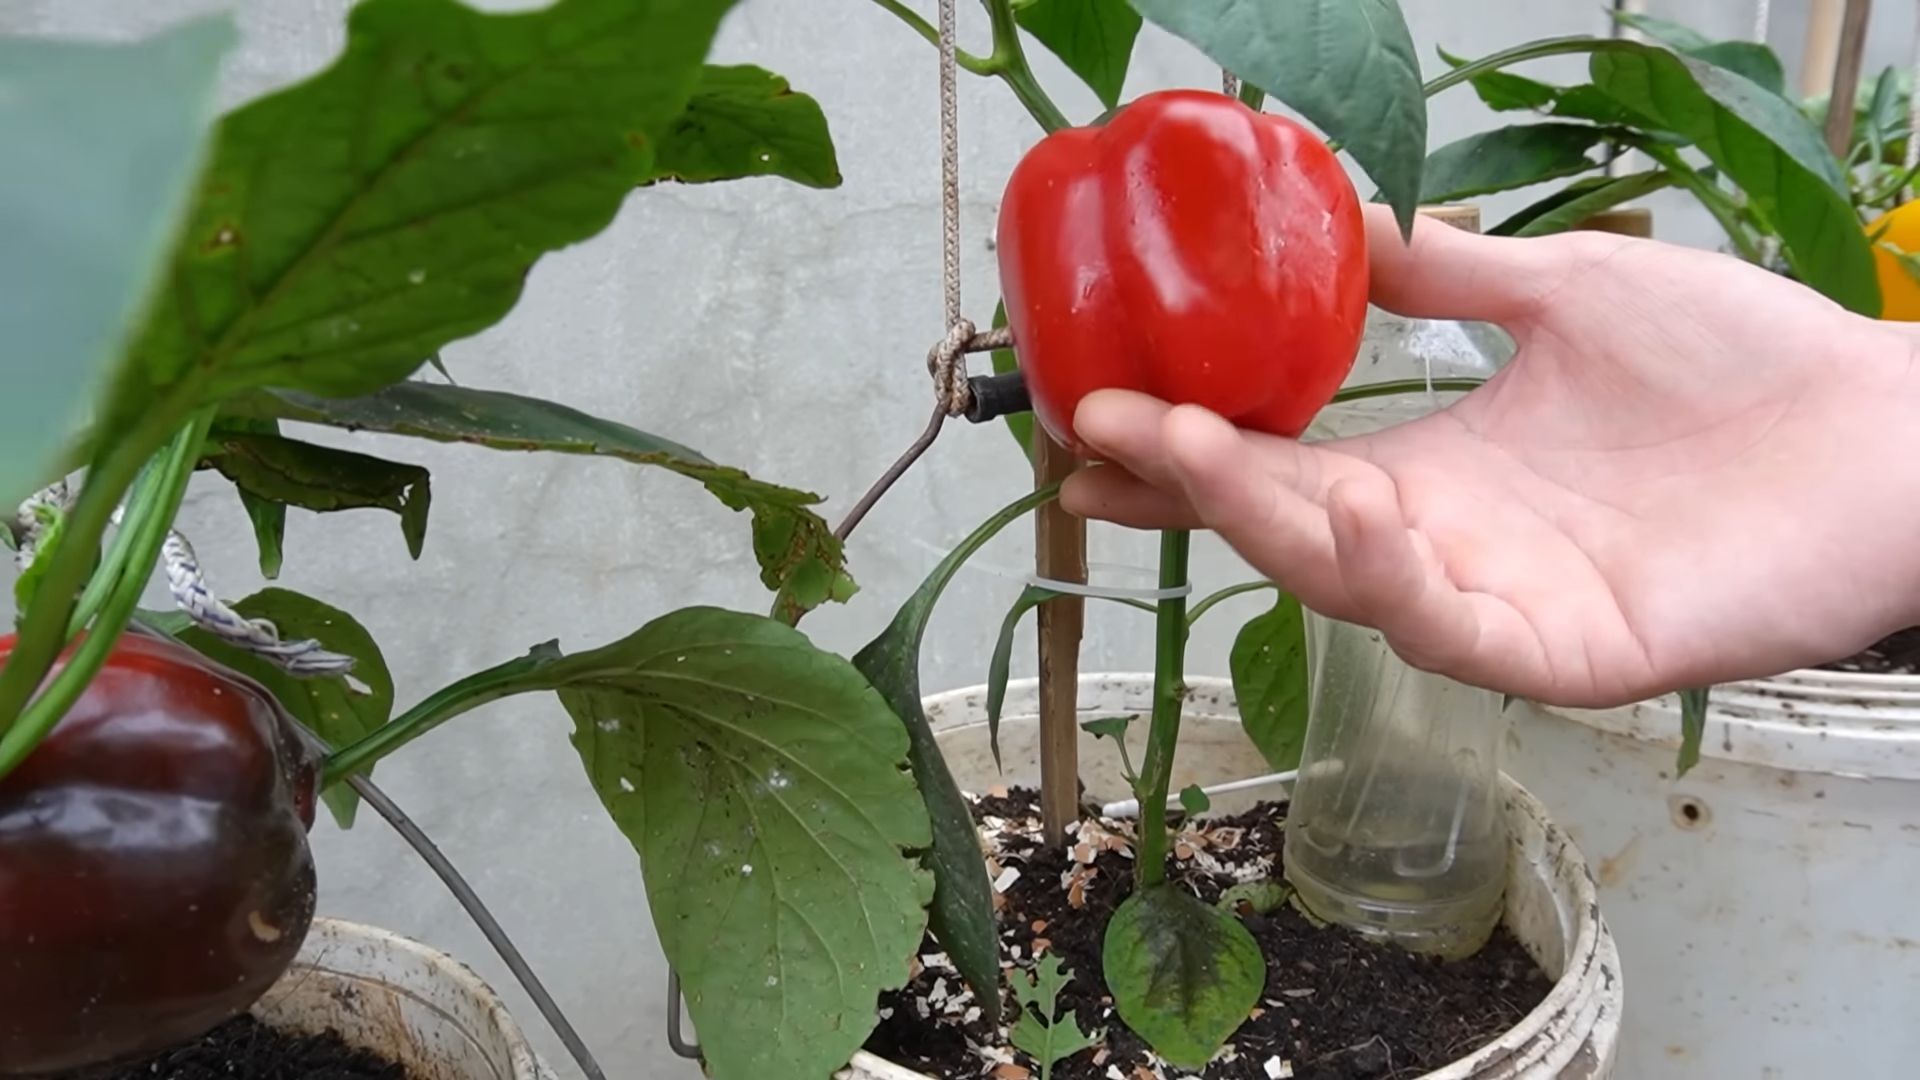
1. **Know When to Harvest:** The timing of your harvest will depend on the variety of pepper and your personal preference. Sweet peppers are typically harvested when they are fully colored and firm. Hot peppers can be harvested when they are green or when they turn their mature color (usually red, orange, or yellow).
2. **Use Pruning Shears:** Use pruning shears or a sharp knife to cut the peppers from the plant. This will prevent you from damaging the plant.
3. **Handle with Care:** Peppers are delicate, so handle them with care. Avoid bruising or scratching them.
4. **Store Properly:** Store your peppers in a cool, dry place. Sweet peppers can be stored in the refrigerator for up to a week. Hot peppers can be dried, pickled, or frozen for longer storage.
Troubleshooting Common Pepper Problems
Even with the best care, you may encounter some problems along the way. Here are some common pepper problems and how to fix them:
* **Peppers Not Setting Fruit:** This can be caused by a number of factors, including high temperatures, lack of pollination, and nutrient deficiencies. Make sure your plants are getting enough water and fertilizer. You can also try hand-pollinating the flowers by gently shaking the plants.
* **Yellowing Leaves
Conclusion
So, there you have it! Growing peppers easily doesn’t have to be a daunting task reserved for seasoned gardeners. With this simple DIY trick, you can unlock a bountiful harvest of vibrant, flavorful peppers, regardless of your gardening experience. We’ve shown you how to create the perfect environment for your pepper plants to thrive, maximizing their potential and minimizing the common pitfalls that often lead to disappointment.
This method isn’t just about ease; it’s about efficiency. By focusing on creating optimal conditions from the start, you’re investing in the long-term health and productivity of your pepper plants. Think of it as giving them a head start, a nutritional boost, and a protective shield all in one go. The result? Stronger, healthier plants that are more resistant to pests and diseases, and ultimately, produce more peppers.
But don’t just take our word for it. The real magic happens when you try it yourself. Imagine the satisfaction of harvesting your own homegrown peppers, knowing that you nurtured them from seedling to maturity with your own hands. Picture the delicious meals you’ll create, bursting with the fresh, vibrant flavor of your homegrown bounty.
And the best part? This trick is incredibly versatile. Feel free to experiment with different types of peppers. From sweet bell peppers to fiery habaneros, the possibilities are endless. You can also adjust the soil composition to suit the specific needs of your chosen pepper variety. Consider adding a slow-release fertilizer for an extra boost of nutrients, or incorporating companion plants like basil or marigolds to deter pests naturally.
Variations to Consider:
* Hydroponics Adaptation: While this guide focuses on soil-based gardening, the principles of providing optimal nutrients and support can be adapted to hydroponic systems. Research specific nutrient solutions tailored for pepper plants in hydroponic setups.
* Container Gardening: This trick works wonders in containers! Just ensure your containers are large enough to accommodate the mature size of your pepper plants and provide adequate drainage.
* Climate Considerations: If you live in a region with a short growing season, start your pepper seeds indoors several weeks before the last expected frost. This will give your plants a head start and ensure a longer harvest period.
We are confident that this DIY trick will revolutionize your pepper-growing experience. It’s a game-changer that will empower you to grow peppers easily and successfully, no matter your skill level.
So, what are you waiting for? Grab your seeds, gather your supplies, and get ready to embark on a pepper-growing adventure. We encourage you to try this method and share your results with us. Let us know what varieties you’re growing, what challenges you encounter, and what successes you achieve. Your feedback will help us refine this guide and empower even more gardeners to grow their own delicious peppers. Share your photos and stories on social media using [Your Hashtag Here]! We can’t wait to see your pepper-growing triumphs!
Frequently Asked Questions (FAQ)
What type of soil is best for growing peppers using this method?
The ideal soil for growing peppers is well-draining, loamy soil that is rich in organic matter. A slightly acidic pH between 6.0 and 6.8 is also preferred. You can amend your existing soil with compost, aged manure, or other organic materials to improve its drainage and fertility. Avoid heavy clay soils, as they can retain too much water and lead to root rot. A good starting mix is equal parts garden soil, compost, and perlite or vermiculite.
How often should I water my pepper plants?
Watering frequency depends on several factors, including the weather, soil type, and size of your plants. Generally, you should water your pepper plants when the top inch of soil feels dry to the touch. Avoid overwatering, as this can lead to root rot. During hot, dry weather, you may need to water daily. In cooler, wetter weather, you may only need to water every few days. A good rule of thumb is to water deeply and less frequently, rather than shallowly and more often. Use a soaker hose or drip irrigation to deliver water directly to the roots, minimizing water loss through evaporation.
What kind of fertilizer should I use for my pepper plants?
Pepper plants are heavy feeders and benefit from regular fertilization. Start with a balanced fertilizer (e.g., 10-10-10) when planting, and then switch to a fertilizer with a higher phosphorus content (e.g., 5-10-5) once the plants start to flower. Phosphorus promotes fruit development. You can also use organic fertilizers such as bone meal, fish emulsion, or compost tea. Apply fertilizer according to the package directions, and avoid over-fertilizing, as this can burn the roots. Side-dressing with compost or aged manure throughout the growing season can also provide a slow-release source of nutrients.
How much sunlight do pepper plants need?
Pepper plants need at least 6-8 hours of direct sunlight per day to thrive. Choose a sunny location in your garden that receives plenty of sunlight throughout the day. If you are growing peppers in containers, you can move them to follow the sun. In hot climates, providing some afternoon shade can help prevent the plants from getting scorched.
How do I protect my pepper plants from pests and diseases?
Pepper plants are susceptible to various pests and diseases, including aphids, whiteflies, spider mites, and fungal diseases. To prevent pest and disease problems, start with healthy seedlings, provide good air circulation, and avoid overwatering. Regularly inspect your plants for signs of pests or diseases, and take action promptly if you notice any problems. You can use insecticidal soap, neem oil, or other organic pesticides to control pests. For fungal diseases, use a copper-based fungicide or other appropriate treatment. Companion planting with herbs like basil or marigolds can also help deter pests.
When should I harvest my peppers?
The timing of pepper harvest depends on the variety and your personal preference. Bell peppers are typically harvested when they are fully colored and firm to the touch. Hot peppers can be harvested when they are green or allowed to ripen to their mature color (e.g., red, yellow, orange). Use pruning shears or a sharp knife to cut the peppers from the plant, leaving a small stem attached. Regular harvesting encourages the plant to produce more peppers.
My pepper plants are flowering, but not producing any peppers. What could be the problem?
There are several reasons why your pepper plants might be flowering but not producing peppers. One common cause is lack of pollination. Pepper flowers are self-pollinating, but they may need some help from wind or insects to transfer pollen. You can gently shake the plants or use a small brush to transfer pollen from one flower to another. Other possible causes include high temperatures, lack of water, or nutrient deficiencies. Ensure your plants are receiving adequate water, sunlight, and nutrients, and consider providing some shade during the hottest part of the day.
Can I grow peppers indoors?
Yes, you can grow peppers indoors, but you will need to provide them with adequate light and warmth. Use grow lights to supplement natural sunlight, and ensure the plants are kept at a consistent temperature between 70-80°F (21-27°C). Choose a compact pepper variety that is well-suited for container gardening. Pollinate the flowers by hand, as there will be no wind or insects to do it for you.
How do I save seeds from my pepper plants?
To save seeds from your pepper plants, allow the peppers to fully ripen on the plant. Once they are ripe, cut them open and remove the seeds. Spread the seeds out on a paper towel to dry for several days. Once the seeds are completely dry, store them in an airtight container in a cool, dark place. Label the container with the pepper variety and the date. Pepper seeds can remain viable for several years if stored properly.
Leave a Comment