
Growing Rosemary Indoors can seem daunting, but trust me, with a few simple tricks, you can enjoy the fragrant and flavorful herb year-round, right from the comfort of your home! Have you ever dreamed of snipping fresh rosemary sprigs to season your roasted chicken or infuse your olive oil, even when the snow is falling outside? Well, dream no more! This DIY guide is packed with easy-to-follow steps and insider tips to help you cultivate a thriving rosemary plant indoors.
Rosemary, with its rich history dating back to ancient Mediterranean civilizations, has long been revered for its culinary and medicinal properties. The ancient Greeks and Romans associated it with memory and remembrance, often wearing rosemary garlands during important ceremonies. Today, while we might not be wearing it in our hair (though, why not?), we can certainly appreciate its versatility in the kitchen and its delightful aroma in our homes.
But why bother with the effort of growing rosemary indoors? Well, for starters, it guarantees a constant supply of fresh herbs, eliminating those last-minute grocery store runs. More importantly, growing rosemary indoors allows you to control the growing environment, protecting your precious plant from harsh weather conditions and pests. Plus, let’s be honest, a healthy, vibrant rosemary plant adds a touch of natural beauty and a refreshing scent to any living space. So, let’s dive in and unlock the secrets to successful indoor rosemary cultivation!
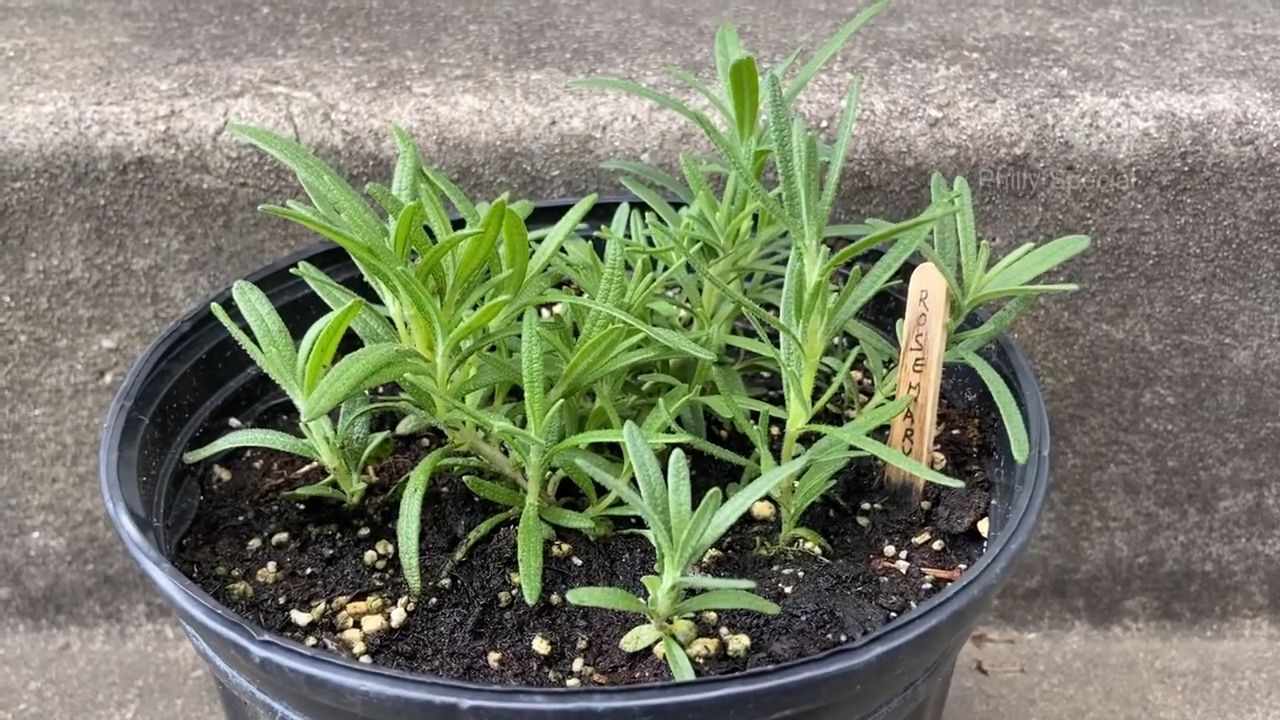
Rosemary in a Pot: How to Grow Your Own Mediterranean Herb Indoors
I love the scent of rosemary! And what could be better than having it always on hand in the kitchen? Growing rosemary in a pot is not as hard as you might think. With a few simple tips and tricks, you can bring a piece of the Mediterranean into your home. Here’s how I’ll show you to do it!
What You Need:
- A rosemary sprig (about 10-15 cm / 4-6 inches long) or a rosemary plant from a nursery
- A pot (at least 15 cm / 6 inches in diameter) with a drainage hole
- Drainage material (e.g., expanded clay pebbles, pottery shards)
- Herb soil or a mixture of potting soil and sand
- A watering can
- Optional: Rooting powder
Propagating Rosemary: Taking Cuttings
If you don’t want to buy a rosemary plant, you can easily propagate it yourself. The best way to do this is with cuttings.
- Select the right sprig: Choose a healthy, strong rosemary sprig. It should not be flowering and should show no signs of disease or pests. It’s best to cut the sprig in the morning when it’s still full of sap.
- Prepare the cutting: Remove the lower leaves from the sprig, so that about 5-7 cm (2-3 inches) of the stem is bare. This prevents the leaves from rotting in the substrate.
- Encourage rooting (optional): Dip the lower end of the cutting in rooting powder. This is not a must, but it can speed up root formation.
- Plant the cutting: Fill a small pot with seed starting mix or a mixture of sand and peat. Stick the cutting about 3-5 cm (1-2 inches) deep into the soil.
- Maintain humidity: Water the cutting gently and cover it with a clear plastic bag or a glass. This creates high humidity, which promotes root formation. Make sure the bag or glass does not touch the cutting.
- The right location: Place the pot in a bright, warm spot, but not in direct sun.
- Be patient: After about 4-6 weeks, roots should have formed. You’ll know this when the cutting starts to produce new leaves.
- Repotting: Once the cutting is well-rooted, you can repot it into a larger pot with herb soil.
Planting Rosemary: Step by Step
Whether you’ve taken a cutting or bought a rosemary plant, planting is the next important step.
- Prepare the pot: Choose a pot with enough space for the roots. Rosemary doesn’t like to be too crowded. Make sure the pot has a drainage hole so excess water can run off.
- Create drainage: Fill a layer of drainage material (e.g., expanded clay pebbles or pottery shards) at the bottom of the pot. This prevents waterlogging, which rosemary really dislikes.
- Fill with soil: Fill the pot with herb soil or a mixture of potting soil and sand. Rosemary prefers well-draining, rather lean soil.
- Insert the plant: Dig a hole in the soil large enough for the plant’s root ball. Carefully place the plant inside and fill the hole with soil. Press the soil down lightly.
- Water: Water the plant thoroughly until water runs out of the drainage hole.
Caring for Rosemary: Keeping it Healthy and Happy
Rosemary is relatively low-maintenance, but you should keep a few things in mind for it to feel at home with you.
Location
Rosemary loves the sun! Place it in the brightest and sunniest spot possible. A south-facing window is ideal. In the summer, you can also put it on the balcony or patio. However, make sure to acclimate it to the sun slowly to prevent sunburn.
Watering
Rosemary does not tolerate waterlogging. Water it only when the surface of the soil is dry. In winter, it needs even less water. The finger test is best: stick your finger about 2 cm (1 inch) deep into the soil. If it feels dry, it’s time to water.
Fertilizing
Rosemary doesn’t need much fertilizer. In spring and summer, you can feed it every few weeks with a liquid herb fertilizer. Be sure to follow the dosage recommendations on the package. It does not need fertilizer in the winter.
Pruning
Regular pruning promotes growth and prevents the rosemary from becoming woody. It’s best to prune it back after the flowering season. You can also snip off sprigs for cooking at any time.
Overwintering
Rosemary is not winter-hardy. If you had it outside in the summer, you should bring it back inside before the first frost. Place it in a bright, cool spot (approx. 5-10 degrees Celsius / 41-50°F). Water it only sparingly.
Common Problems and Solutions
Problems can also arise with rosemary. Here are a few common issues and how to solve them:
- Yellow leaves: This can have various causes. Either the rosemary is getting too much water (waterlogging) or too little light. Check your watering habits and the location.
- Brown leaves: This can be a sign of dryness. Water the rosemary thoroughly.
- Pests: Rosemary can be infested by aphids, spider mites, or scale insects. Spray the plant with an organic pesticide.
- Fungal diseases: Fungal diseases can occur with too high humidity. Ensure good ventilation and remove affected leaves.
Rosemary in the Kitchen
Rosemary is a versatile herb that can be used in many ways in the kitchen. It pairs excellently with meat, fish, vegetables, and potatoes. You can use it fresh or dried. I love adding rosemary to roasts, lamb, or potato dishes. Rosemary is also a great ingredient in homemade herb oil or vinegar.
Additional Tips for a Healthy Rosemary
- Increase humidity: Especially in winter, when the heating air is dry, it can be helpful to increase the humidity around the rosemary. You can place a bowl of water near the plant or regularly spray the leaves with water.
- Rotate regularly: Rotate the pot regularly so the rosemary gets even light from all sides.
- Repotting: Every few years, you should repot the rosemary into a larger pot. This gives the roots more space and provides the plant with fresh soil.
- Make your own rosemary oil: Place rosemary sprigs in a high-quality oil (e.g., olive oil) and let it infuse for a few weeks. This way, you’ll have your own aromatic rosemary oil.
I hope this guide helps you to grow your own rosemary in a pot. With a little patience and care, you will soon be rewarded with a lush, fragrant rosemary plant. Happy gardening

Conclusion
So, there you have it! Mastering the art of growing rosemary indoors is not only achievable but also incredibly rewarding. We’ve walked through the essential steps, from selecting the right variety and pot to providing optimal light, watering, and humidity. But why should you embark on this fragrant journey?
Simply put, having fresh rosemary at your fingertips elevates your culinary creations to a whole new level. Imagine the convenience of snipping off a few sprigs to infuse your roasted chicken, flavor your olive oil, or add a touch of herbaceousness to your cocktails. No more last-minute trips to the grocery store or settling for dried rosemary that lacks the vibrant aroma and flavor of the fresh stuff.
Beyond the culinary benefits, growing rosemary indoors offers a therapeutic experience. The act of nurturing a plant, watching it thrive, and inhaling its invigorating scent can be incredibly calming and stress-relieving. Plus, rosemary is known for its potential cognitive benefits, so having it around might even boost your memory and focus!
But the best part? It’s easier than you think! With a little attention and the right conditions, you can successfully cultivate a thriving rosemary plant indoors, even if you don’t have a green thumb.
Ready to take your indoor gardening to the next level?
Don’t be afraid to experiment with different varieties of rosemary. ‘Blue Boy’ is a compact and slow-growing option that’s perfect for smaller spaces, while ‘Tuscan Blue’ boasts upright growth and beautiful blue flowers. You can also try propagating rosemary from cuttings to expand your collection or share with friends and family.
Consider using a self-watering pot to simplify your watering routine, especially if you tend to forget. Adding a layer of pebbles to the bottom of the pot can also improve drainage and prevent root rot. And don’t be afraid to prune your rosemary plant regularly to encourage bushier growth and prevent it from becoming leggy.
Growing rosemary indoors is a journey of discovery, and we encourage you to embrace the process. Don’t be discouraged if you encounter a few challenges along the way. Every plant is different, and what works for one person may not work for another. The key is to observe your plant closely, adjust your care accordingly, and learn from your experiences.
We’re confident that you can successfully grow rosemary indoors and enjoy all the benefits it has to offer. So, go ahead, give it a try! We’d love to hear about your experiences. Share your tips, tricks, and photos in the comments below. Let’s create a community of indoor rosemary growers and inspire others to embark on this fragrant adventure. Happy growing!
Frequently Asked Questions (FAQ)
Q: What is the best type of rosemary to grow indoors?
A: While many rosemary varieties can be grown indoors, some are better suited than others. Compact varieties like ‘Blue Boy’ and ‘Roman Beauty’ are excellent choices because they don’t get too large and are relatively easy to manage. ‘Tuscan Blue’ is another popular option, known for its upright growth and beautiful blue flowers. Ultimately, the best variety for you will depend on your personal preferences and the space you have available. Consider the mature size of the plant and its growth habit when making your selection.
Q: How much sunlight does indoor rosemary need?
A: Rosemary thrives in bright, sunny conditions. Ideally, your indoor rosemary plant should receive at least 6-8 hours of direct sunlight per day. A south-facing window is usually the best option, but an east- or west-facing window can also work if it provides sufficient light. If you don’t have enough natural light, you can supplement with a grow light. Position the grow light a few inches above the plant and leave it on for 12-14 hours per day. Insufficient light can lead to leggy growth and reduced flavor.
Q: How often should I water my indoor rosemary plant?
A: Overwatering is one of the most common mistakes people make when growing rosemary indoors. Rosemary prefers well-draining soil and doesn’t like to sit in soggy conditions. Water your plant only when the top inch of soil feels dry to the touch. When you do water, water thoroughly until the water drains out of the bottom of the pot. Be sure to empty the saucer underneath the pot to prevent root rot. During the winter months, when the plant is not actively growing, you may need to water less frequently.
Q: What kind of soil is best for growing rosemary indoors?
A: Rosemary needs well-draining soil to thrive. A potting mix specifically formulated for herbs is a good option. You can also create your own potting mix by combining equal parts of potting soil, perlite, and sand. Perlite and sand help to improve drainage and prevent the soil from becoming compacted. Avoid using garden soil, as it can be too heavy and may contain pests or diseases.
Q: How do I fertilize my indoor rosemary plant?
A: Rosemary is not a heavy feeder, so you don’t need to fertilize it frequently. Fertilize your plant every 2-3 months during the growing season (spring and summer) with a balanced liquid fertilizer diluted to half strength. Avoid fertilizing during the winter months when the plant is dormant. Over-fertilizing can lead to leggy growth and reduced flavor.
Q: How do I prune my indoor rosemary plant?
A: Pruning is essential for maintaining the shape and health of your indoor rosemary plant. Prune your plant regularly to encourage bushier growth and prevent it from becoming leggy. You can prune at any time of year, but the best time to prune is in the spring after the plant has finished flowering. Use sharp, clean pruning shears to make your cuts. Remove any dead, damaged, or diseased branches. You can also trim back the tips of the branches to encourage new growth.
Q: How do I deal with pests and diseases on my indoor rosemary plant?
A: Rosemary is generally resistant to pests and diseases, but it can occasionally be affected by aphids, spider mites, or powdery mildew. Inspect your plant regularly for signs of infestation or disease. If you notice any pests, you can try washing them off with a strong stream of water or treating the plant with insecticidal soap. For powdery mildew, improve air circulation around the plant and treat it with a fungicide.
Q: Can I propagate rosemary from cuttings?
A: Yes, propagating rosemary from cuttings is a relatively easy way to expand your collection. Take cuttings from new growth in the spring or summer. The cuttings should be about 4-6 inches long and have several leaves. Remove the leaves from the bottom inch of the cutting and dip the cut end in rooting hormone. Plant the cutting in a pot filled with well-draining potting mix. Keep the soil moist and place the pot in a warm, bright location. The cuttings should root in a few weeks.
Q: Why is my rosemary plant turning brown?
A: There are several reasons why your rosemary plant might be turning brown. Overwatering is a common cause, as it can lead to root rot. Underwatering can also cause the leaves to turn brown and dry. Other possible causes include insufficient light, nutrient deficiencies, and pest infestations. Inspect your plant carefully to determine the cause of the problem and adjust your care accordingly.
Q: Can I use my indoor rosemary plant for cooking?
A: Absolutely! That’s one of the best things about growing rosemary indoors. You can harvest fresh sprigs of rosemary whenever you need them for cooking. Simply snip off a few sprigs with scissors or pruning shears. Rinse the sprigs under water and pat them dry before using them in your recipes. Fresh rosemary adds a wonderful flavor and aroma to a wide variety of dishes.


Leave a Comment