
Growing Thyme Indoors can feel like a secret superpower for any home cook or gardening enthusiast! Imagine having fresh, fragrant thyme readily available, no matter the season, right on your kitchen windowsill. Forget those sad, wilted sprigs from the grocery store; we’re talking vibrant, flavorful thyme at your fingertips.
Thyme, with its rich history dating back to ancient Egypt where it was used for embalming, and its association with courage and bravery in ancient Greece, has always been more than just a culinary herb. It’s a symbol of resilience and enduring flavor. But let’s be honest, sometimes life gets in the way, and tending an outdoor herb garden just isn’t feasible. That’s where the magic of indoor gardening comes in!
I’ve found that growing thyme indoors is not only incredibly rewarding but also surprisingly easy. This DIY guide will walk you through simple, effective tricks and hacks to ensure your indoor thyme thrives. We’ll cover everything from choosing the right pot and soil to providing the perfect amount of light and water. Why struggle with subpar herbs when you can cultivate your own little slice of Provence right in your home? Let’s get started and unlock the secrets to a flourishing indoor thyme garden!
Growing Thyme Indoors: A Beginner’s Guide to Aromatic Success
Okay, so you want to grow thyme indoors? Awesome! I’m a huge fan of having fresh herbs right at my fingertips, and thyme is definitely a staple in my kitchen. It’s surprisingly easy to grow indoors with a little know-how. Let’s dive in!
Choosing the Right Thyme Variety
First things first, not all thyme is created equal. Some varieties are better suited for indoor growing than others. Here are a few of my favorites:
* English Thyme (Thymus vulgaris): This is your classic culinary thyme. It has a strong, earthy flavor and is relatively easy to grow.
* Lemon Thyme (Thymus citriodorus): If you want a bit of a citrusy twist, lemon thyme is fantastic. It’s also quite fragrant.
* Creeping Thyme (Thymus serpyllum): While often used as ground cover outdoors, creeping thyme can also thrive indoors, especially in hanging baskets. It’s more ornamental but still has a lovely aroma.
Gathering Your Supplies
Before we get started, let’s make sure you have everything you need. This will save you a ton of time and frustration later on.
* Thyme Seeds or Seedlings: You can start from seed, but honestly, buying seedlings from a local nursery is much easier and faster.
* Potting Mix: Don’t use garden soil! It’s too heavy and doesn’t drain well. Opt for a well-draining potting mix specifically formulated for herbs or vegetables.
* Pot with Drainage Holes: Drainage is crucial! Thyme hates soggy roots. Choose a pot that’s at least 6 inches in diameter. Terracotta pots are great because they allow the soil to breathe.
* Grow Lights (Optional but Recommended): While thyme loves sunlight, it can be tricky to provide enough indoors, especially during the winter months. Grow lights will ensure your thyme gets the light it needs.
* Watering Can or Spray Bottle: For gentle watering.
* Small Trowel or Spoon: For transplanting seedlings.
* Pebbles or Gravel (Optional): To improve drainage at the bottom of the pot.
Planting Your Thyme
Alright, let’s get our hands dirty!
1. Prepare the Pot: If you’re using a new pot, give it a quick rinse. Place a layer of pebbles or gravel at the bottom of the pot to improve drainage. This is optional, but I find it helps.
2. Fill with Potting Mix: Fill the pot with your chosen potting mix, leaving about an inch of space at the top.
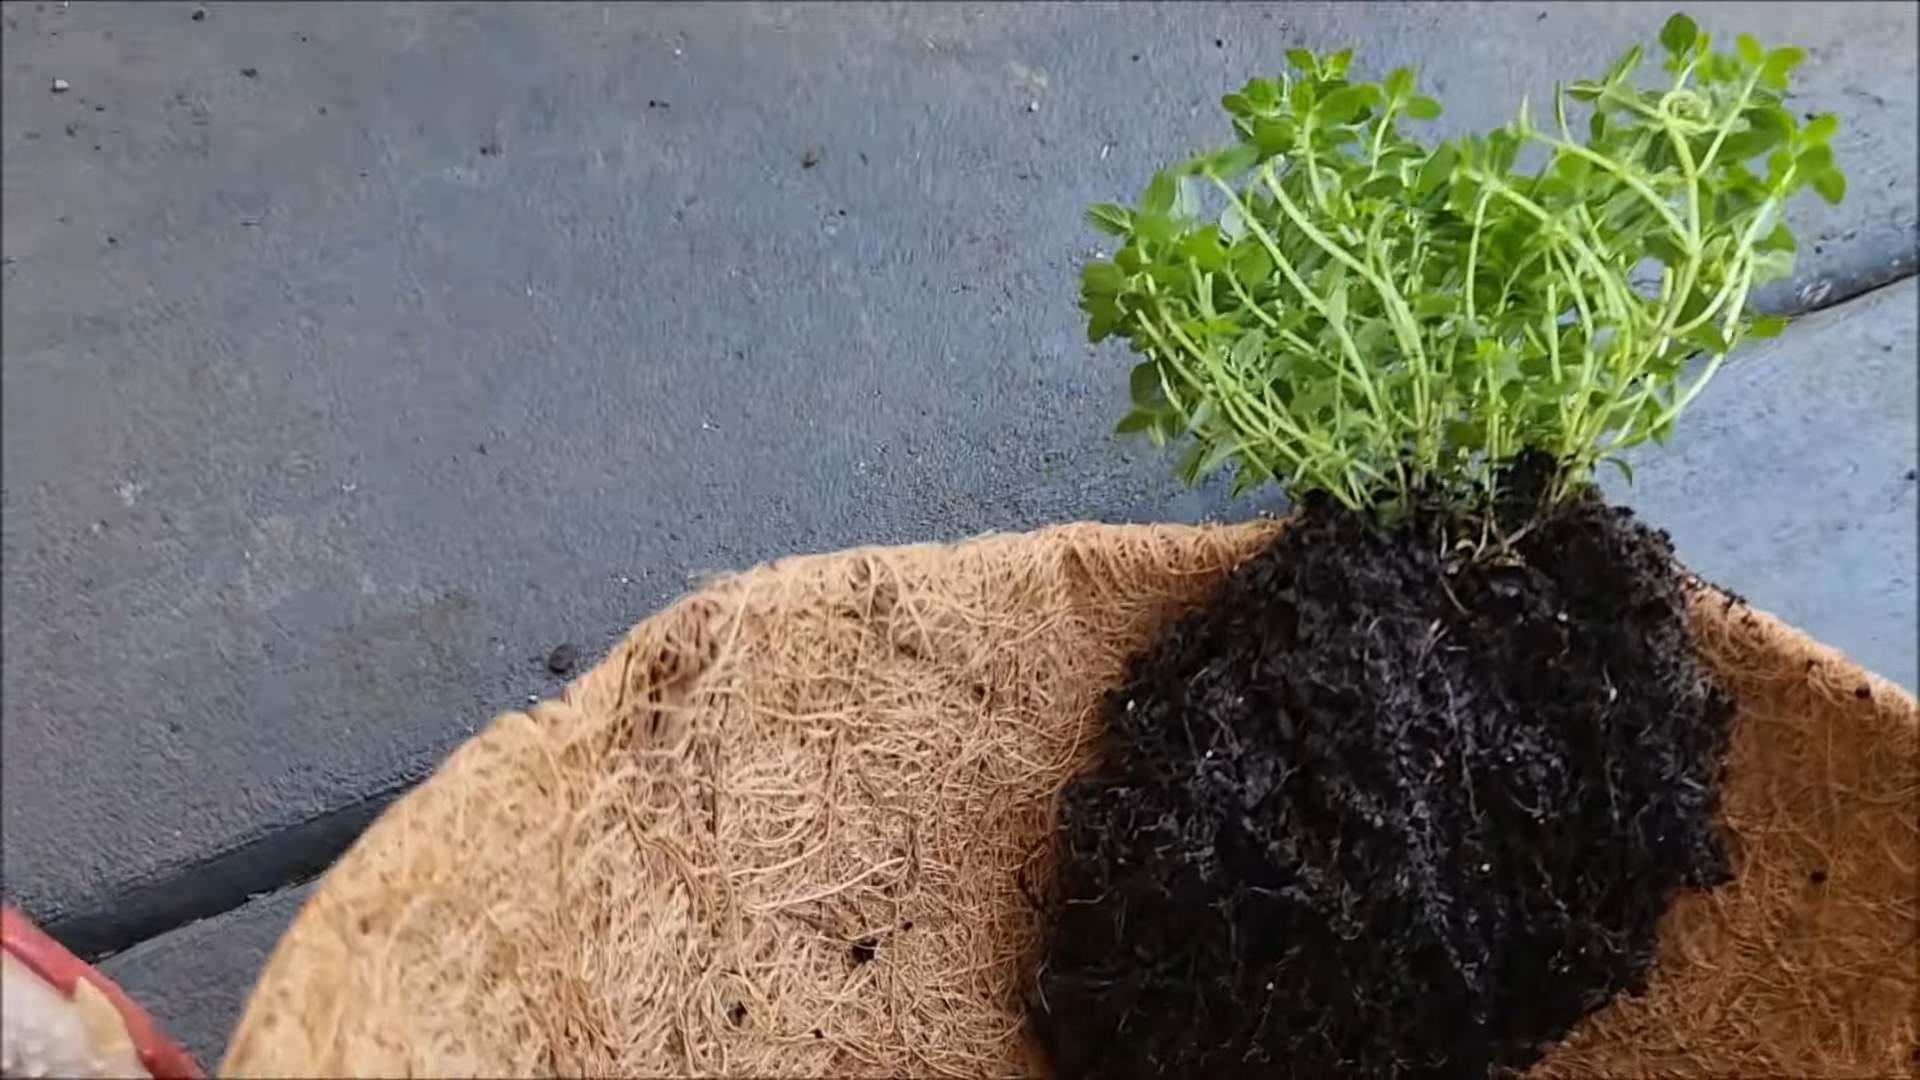
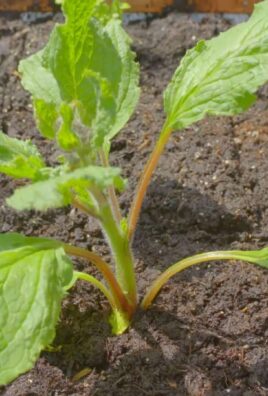
3. Planting from Seedlings: Gently remove the thyme seedling from its container. Loosen the roots a bit with your fingers. Dig a small hole in the potting mix and place the seedling in the hole. Make sure the top of the root ball is level with the soil surface. Gently pat the soil around the seedling.
4. Planting from Seeds: If you’re starting from seed, sprinkle the seeds evenly over the surface of the potting mix. Lightly cover the seeds with a thin layer of soil. Gently water the soil.
5. Water Thoroughly: Water the newly planted thyme until the water drains out of the bottom of the pot. This helps settle the soil and ensures the roots are well-hydrated.
Providing the Right Environment
Thyme is a pretty hardy herb, but it does have some specific needs.
1. Sunlight: Thyme needs at least 6-8 hours of sunlight per day. If you don’t have a sunny windowsill, use grow lights. Place the lights about 6-12 inches above the plants.
2. Temperature: Thyme prefers temperatures between 60-70°F (15-21°C). Avoid placing it near drafts or heating vents.
3. Watering: Water thyme when the top inch of soil feels dry to the touch. Be careful not to overwater, as this can lead to root rot. Allow the soil to dry out slightly between waterings. I usually water mine about once a week, but it depends on the humidity and temperature in my home.
4. Humidity: Thyme doesn’t need high humidity. In fact, it prefers drier conditions. If your home is particularly humid, you can improve air circulation by placing a small fan near the plants.
5. Fertilizing: Thyme doesn’t need a lot of fertilizer. In fact, too much fertilizer can make it leggy and less flavorful. I usually fertilize mine once a month with a diluted liquid fertilizer specifically formulated for herbs.
Pruning and Harvesting
Pruning and harvesting are essential for keeping your thyme plant healthy and productive.
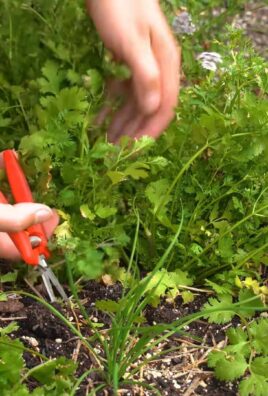
1. Pruning: Prune your thyme regularly to encourage bushier growth. Use clean scissors or pruning shears to trim the stems. Remove any dead or yellowing leaves.
2. Harvesting: You can start harvesting thyme once the plant is about 4-6 inches tall. Simply snip off the stems with scissors or pruning shears. Harvest about 1/3 of the plant at a time. The more you harvest, the more the plant will grow!
3. Drying Thyme: If you have more thyme than you can use fresh, you can dry it for later use. Tie the stems together in small bundles and hang them upsid
Okay, so you want to grow thyme indoors? Awesome! I’m a huge fan of having fresh herbs right at my fingertips, and thyme is definitely a staple in my kitchen. It’s surprisingly easy to grow indoors with a little know-how. Let’s dive in!
Choosing the Right Thyme Variety
First things first, not all thyme is created equal. Some varieties are better suited for indoor growing than others. Here are a few of my favorites:
* English Thyme (Thymus vulgaris): This is your classic culinary thyme. It has a strong, earthy flavor and is relatively easy to grow.
* Lemon Thyme (Thymus citriodorus): If you want a bit of a citrusy twist, lemon thyme is fantastic. It’s also quite fragrant.
* Creeping Thyme (Thymus serpyllum): While often used as ground cover outdoors, creeping thyme can also thrive indoors, especially in hanging baskets. It’s more ornamental but still has a lovely aroma.
Gathering Your Supplies
Before we get started, let’s make sure you have everything you need. This will save you a ton of time and frustration later on.
* Thyme Seeds or Seedlings: You can start from seed, but honestly, buying seedlings from a local nursery is much easier and faster.
* Potting Mix: Don’t use garden soil! It’s too heavy and doesn’t drain well. Opt for a well-draining potting mix specifically formulated for herbs or vegetables.
* Pot with Drainage Holes: Drainage is crucial! Thyme hates soggy roots. Choose a pot that’s at least 6 inches in diameter. Terracotta pots are great because they allow the soil to breathe.
* Grow Lights (Optional but Recommended): While thyme loves sunlight, it can be tricky to provide enough indoors, especially during the winter months. Grow lights will ensure your thyme gets the light it needs.
* Watering Can or Spray Bottle: For gentle watering.
* Small Trowel or Spoon: For transplanting seedlings.
* Pebbles or Gravel (Optional): To improve drainage at the bottom of the pot.
Planting Your Thyme
Alright, let’s get our hands dirty!
1. Prepare the Pot: If you’re using a new pot, give it a quick rinse. Place a layer of pebbles or gravel at the bottom of the pot to improve drainage. This is optional, but I find it helps.
2. Fill with Potting Mix: Fill the pot with your chosen potting mix, leaving about an inch of space at the top.
3. Planting from Seedlings: Gently remove the thyme seedling from its container. Loosen the roots a bit with your fingers. Dig a small hole in the potting mix and place the seedling in the hole. Make sure the top of the root ball is level with the soil surface. Gently pat the soil around the seedling.
4. Planting from Seeds: If you’re starting from seed, sprinkle the seeds evenly over the surface of the potting mix. Lightly cover the seeds with a thin layer of soil. Gently water the soil.
5. Water Thoroughly: Water the newly planted thyme until the water drains out of the bottom of the pot. This helps settle the soil and ensures the roots are well-hydrated.
Providing the Right Environment
Thyme is a pretty hardy herb, but it does have some specific needs.
1. Sunlight: Thyme needs at least 6-8 hours of sunlight per day. If you don’t have a sunny windowsill, use grow lights. Place the lights about 6-12 inches above the plants.
2. Temperature: Thyme prefers temperatures between 60-70°F (15-21°C). Avoid placing it near drafts or heating vents.
3. Watering: Water thyme when the top inch of soil feels dry to the touch. Be careful not to overwater, as this can lead to root rot. Allow the soil to dry out slightly between waterings. I usually water mine about once a week, but it depends on the humidity and temperature in my home.
4. Humidity: Thyme doesn’t need high humidity. In fact, it prefers drier conditions. If your home is particularly humid, you can improve air circulation by placing a small fan near the plants.
5. Fertilizing: Thyme doesn’t need a lot of fertilizer. In fact, too much fertilizer can make it leggy and less flavorful. I usually fertilize mine once a month with a diluted liquid fertilizer specifically formulated for herbs.
Pruning and Harvesting
Pruning and harvesting are essential for keeping your thyme plant healthy and productive.
1. Pruning: Prune your thyme regularly to encourage bushier growth. Use clean scissors or pruning shears to trim the stems. Remove any dead or yellowing leaves.
2. Harvesting: You can start harvesting thyme once the plant is about 4-6 inches tall. Simply snip off the stems with scissors or pruning shears. Harvest about 1/3 of the plant at a time. The more you harvest, the more the plant will grow!
3. Drying Thyme: If you have more thyme than you can use fresh, you can dry it for later use. Tie the stems together in small bundles and hang them upside down in a cool, dry place. Once the leaves are dry and brittle, you can crumble them and store them in an airtight container. You can also dry thyme in a dehydrator or oven on a low setting.
Troubleshooting Common Problems
Even with the best care, you might encounter some problems. Here are a few common issues and how to fix them:
* Yellowing Leaves: This could be a sign of overwatering, underwatering, or nutrient deficiency. Check the soil moisture and adjust your watering accordingly. If the soil is dry, water thoroughly. If the soil is soggy, allow it to dry out before watering again. If the problem persists, try fertilizing with a diluted liquid fertilizer.
* Leggy Growth: This is usually caused by insufficient light. Move your thyme to a sunnier location or use grow lights. Prune the leggy stems to encourage bushier growth.
* Root Rot: This is caused by overwatering. Make sure your pot has good drainage and allow the soil to dry out slightly between waterings. If the root rot is severe, you may need to repot the thyme in fresh potting mix.
* Pests: Thyme is generally pest-resistant, but it can occasionally be affected by aphids or spider mites. If you notice pests, try spraying the plants with insecticidal soap or neem oil.
Propagating Thyme
Want more thyme plants? You can easily propagate thyme from cuttings.
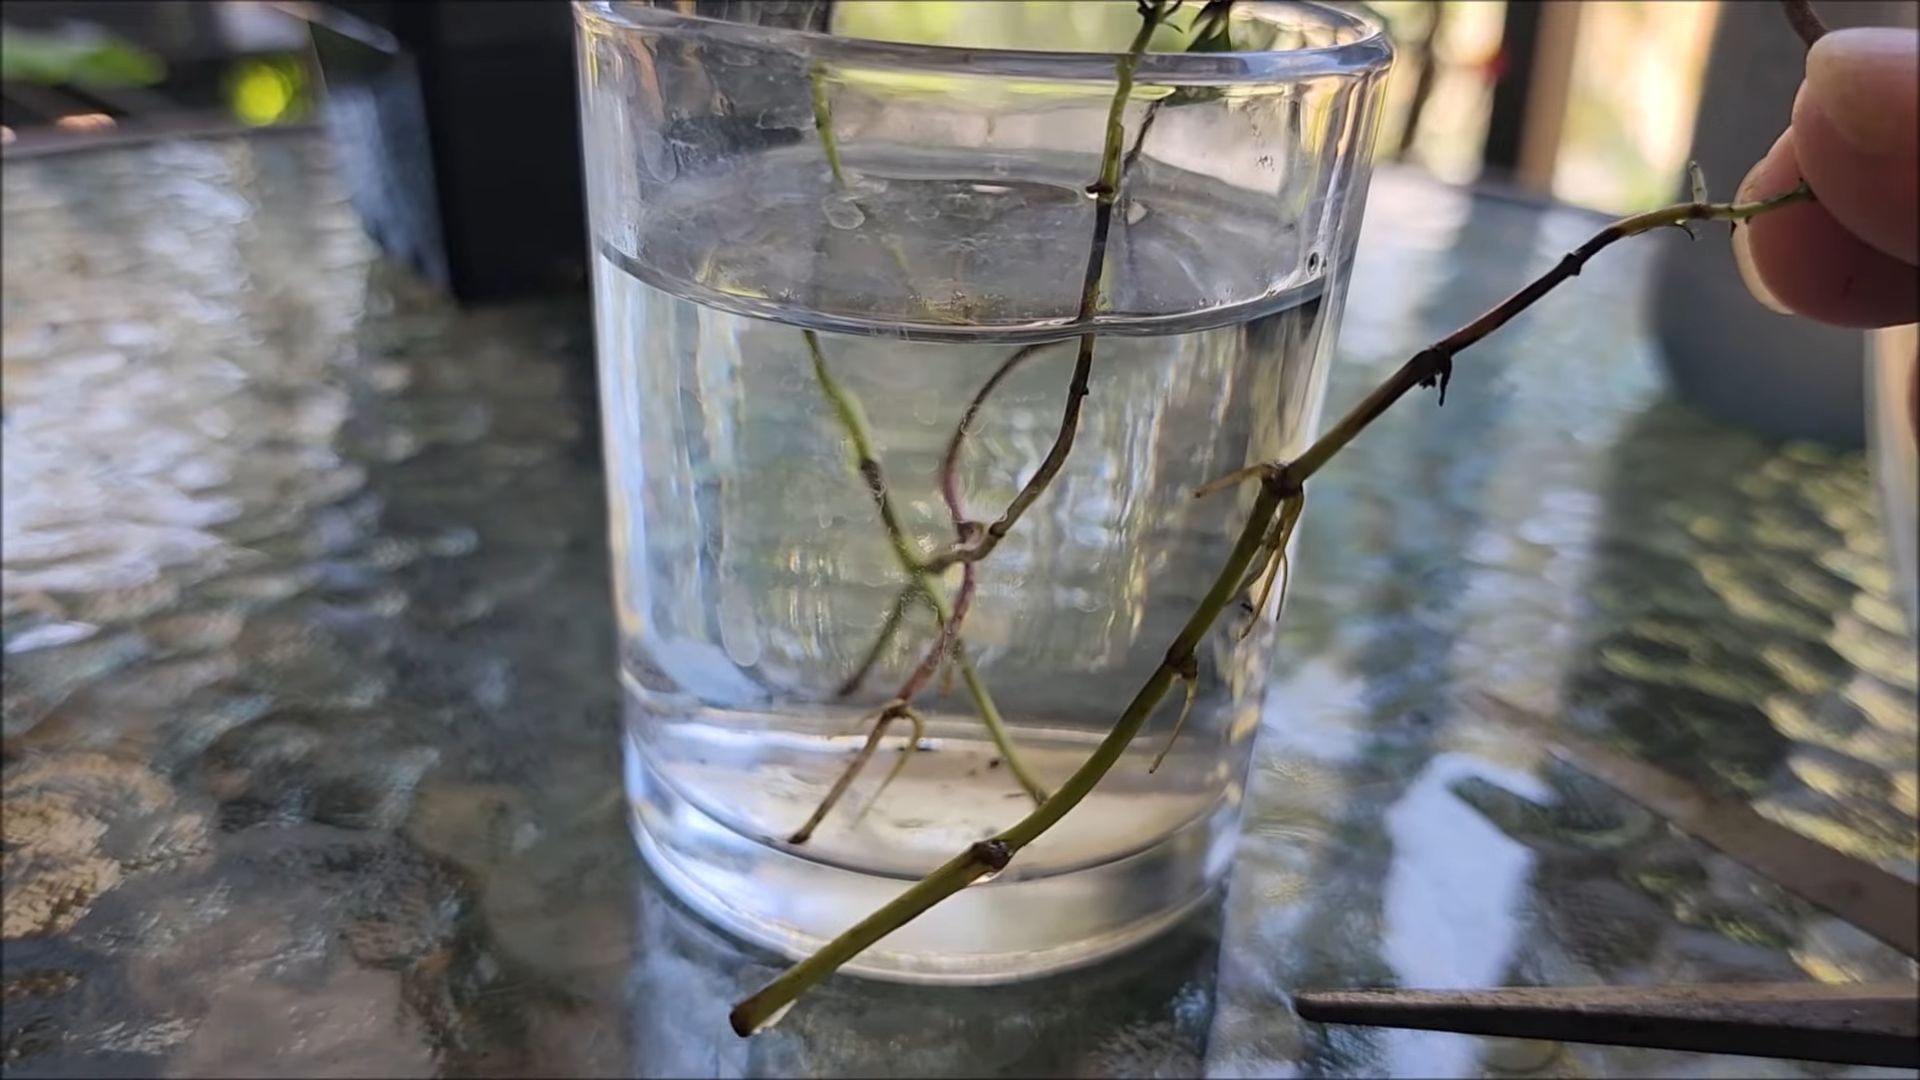
1. Take Cuttings: Use clean scissors or pruning shears to take cuttings from healthy stems. The cuttings should be about 4-6 inches long.
2. Remove Lower Leaves: Remove the leaves from the bottom inch of the cuttings.
3. Rooting Hormone (Optional): Dip the cut ends of the cuttings in rooting hormone. This will help them root faster.
4. Plant Cuttings: Plant the cuttings in a pot filled with moist potting mix.
5. Cover with Plastic: Cover the pot with a plastic bag or humidity dome to create a humid environment.
6. Place in a Warm Location: Place the pot in a warm, bright location, but out of direct sunlight.
7. Water Regularly: Water the cuttings regularly to keep the soil moist.
8. Wait for Roots: After a few weeks, the cuttings should start to develop roots. You can check for roots by gently tugging on the cuttings. If they resist, they have rooted.
9. Transplant: Once the cuttings have developed a good root system, you can transplant them into individual pots.
Enjoying Your Homegrown Thyme
Now that you’ve successfully grown thyme indoors, it’s time to enjoy the fruits (or rather, herbs!) of your labor. Use fresh thyme in your favorite recipes, such as soups, stews, roasted vegetables, and meats. You can also use it to make herbal teas or infused oils.
Growing thyme indoors is a rewarding experience. With a little care and attention, you can have a constant supply of fresh, flavorful thyme right at your fingertips. Happy growing!
Conclusion
So, there you have it! Growing thyme indoors is not only achievable, but it’s also incredibly rewarding. Imagine having fresh, fragrant thyme readily available to elevate your culinary creations, no matter the season. Forget those sad, dried-out jars from the supermarket; with a little effort, you can cultivate your own thriving thyme plant right on your windowsill.
This DIY trick is a must-try for several reasons. First, it’s cost-effective. Think of all the money you’ll save by not constantly buying fresh thyme. Second, it’s incredibly convenient. No more last-minute trips to the store when you realize you’re out of this essential herb. Third, and perhaps most importantly, it’s incredibly satisfying. There’s something truly special about nurturing a plant from a tiny seedling (or even a cutting) to a flourishing herb that you can use in your cooking.
But the benefits don’t stop there. Growing thyme indoors also allows you to control the growing environment, ensuring that your plant receives the optimal amount of light, water, and nutrients. This means you can avoid the common pitfalls of outdoor gardening, such as pests, diseases, and unpredictable weather.
Looking for variations? Absolutely! Consider experimenting with different varieties of thyme. Lemon thyme adds a bright, citrusy note to your dishes, while creeping thyme makes a beautiful ground cover (though it might require a larger pot). You can also try growing thyme in different types of containers, from terracotta pots to repurposed jars. Just make sure the container has adequate drainage. Another fun variation is to create a small indoor herb garden, combining thyme with other complementary herbs like rosemary, oregano, and chives. This will not only provide you with a wider range of flavors but also create a visually appealing display in your kitchen.
Don’t be intimidated if you’ve never grown herbs indoors before. Growing thyme indoors is surprisingly easy, even for beginners. Just follow the simple steps outlined in this guide, and you’ll be well on your way to enjoying fresh, homegrown thyme in no time.
We wholeheartedly encourage you to give this DIY trick a try. It’s a simple, affordable, and rewarding way to add fresh flavor to your meals and bring a touch of nature into your home. Once you’ve experienced the joy of harvesting your own thyme, you’ll never go back to store-bought again.
And finally, we’d love to hear about your experience! Share your tips, tricks, and photos of your thriving thyme plants in the comments below. Let’s create a community of indoor herb gardeners and inspire others to discover the joys of growing their own food. Happy growing!
Frequently Asked Questions
What kind of soil is best for growing thyme indoors?
The best soil for growing thyme indoors is a well-draining potting mix. Thyme prefers slightly sandy soil, so you can amend a standard potting mix with a bit of horticultural sand or perlite to improve drainage. Avoid using garden soil, as it can be too heavy and may contain pests or diseases. A mix of equal parts potting soil, perlite, and compost is a good starting point. The key is to ensure that the soil doesn’t retain too much moisture, as thyme is susceptible to root rot.
How much sunlight does indoor thyme need?
Thyme thrives in bright sunlight, so aim to provide at least 6-8 hours of direct sunlight per day. A south-facing window is ideal. If you don’t have a sunny window, you can supplement with a grow light. Position the grow light about 6-12 inches above the plant and keep it on for 12-14 hours per day. Insufficient sunlight can lead to leggy growth and reduced flavor. Rotate the pot regularly to ensure that all sides of the plant receive adequate light.
How often should I water my indoor thyme plant?
Water your thyme plant when the top inch of soil feels dry to the touch. Avoid overwatering, as this can lead to root rot. When you do water, water thoroughly until excess water drains out of the bottom of the pot. Allow the soil to dry out slightly between waterings. During the winter months, when growth slows down, you may need to water less frequently. Always check the soil moisture before watering to avoid overwatering.
How do I prune my indoor thyme plant?
Pruning is essential for maintaining a healthy and productive thyme plant. Prune regularly to encourage bushier growth and prevent the plant from becoming leggy. Use clean, sharp scissors or pruning shears to trim the stems. You can prune thyme at any time of year, but it’s best to do a more significant pruning in the spring after the plant has finished flowering. Remove any dead or yellowing leaves and trim back the stems by about one-third. You can also harvest thyme leaves regularly for culinary use, which will also help to keep the plant trimmed.
Can I propagate thyme from cuttings?
Yes, propagating thyme from cuttings is a relatively easy and effective way to create new plants. Take cuttings from healthy, non-flowering stems. The cuttings should be about 4-6 inches long. Remove the lower leaves from the cuttings and dip the cut end in rooting hormone (optional). Plant the cuttings in a well-draining potting mix and keep the soil moist but not soggy. Place the cuttings in a warm, bright location, but avoid direct sunlight. Roots should develop within a few weeks. Once the cuttings have rooted, you can transplant them into individual pots.
What are some common pests and diseases that affect indoor thyme?
While thyme is relatively pest-resistant, it can occasionally be affected by aphids, spider mites, or whiteflies. Inspect your plant regularly for signs of infestation. If you notice any pests, you can try washing them off with a strong stream of water or using insecticidal soap. Overwatering can lead to root rot, which is a common problem with indoor thyme. To prevent root rot, ensure that your plant is planted in well-draining soil and avoid overwatering. Good air circulation can also help to prevent fungal diseases.
How do I harvest thyme leaves?
You can harvest thyme leaves at any time of year, but the flavor is most intense just before the plant flowers. To harvest, simply snip off the stems with scissors or pruning shears. You can use the leaves fresh or dry them for later use. To dry thyme, tie the stems together in a bundle and hang them upside down in a cool, dry, and well-ventilated place. Once the leaves are completely dry, you can crumble them and store them in an airtight container.
Can I grow thyme from seed indoors?
Yes, you can grow thyme from seed indoors, although it can be a bit more challenging than propagating from cuttings. Start the seeds indoors 6-8 weeks before the last expected frost. Sow the seeds thinly on the surface of a well-draining potting mix and gently press them into the soil. Keep the soil moist but not soggy. Germination can take 14-21 days. Once the seedlings have developed a few sets of true leaves, you can transplant them into individual pots.
My thyme plant is turning yellow. What should I do?
Yellowing leaves can be a sign of several problems, including overwatering, underwatering, nutrient deficiency, or pest infestation. Check the soil moisture to determine if you are overwatering or underwatering. If the soil is consistently wet, reduce the frequency of watering. If the soil is dry, water more frequently. If you suspect a nutrient deficiency, you can fertilize your plant with a balanced liquid fertilizer. Inspect your plant for pests and treat accordingly. Ensure that your plant is receiving adequate sunlight.
Is growing thyme indoors worth it?
Absolutely! Growing thyme indoors provides you with a constant supply of fresh, flavorful herbs right at your fingertips. It’s a cost-effective, convenient, and rewarding way to enhance your culinary creations and bring a touch of nature into your home. Plus, the aroma of fresh thyme can be incredibly uplifting. Give it a try, and you’ll be amazed at how easy and enjoyable it is to grow your own thyme indoors.
Leave a Comment