
Growing Tomatoes at Home can feel like a daunting task, right? I get it! You dream of juicy, sun-ripened tomatoes bursting with flavor, but the reality of struggling seedlings and disappointing harvests can be disheartening. But don’t worry, I’m here to tell you that with a few clever tricks and DIY hacks, you can transform your backyard (or even your balcony!) into a tomato-growing paradise.
Tomatoes have a rich history, originating in South America and gradually making their way into cuisines worldwide. For centuries, cultures have cherished them for their taste and nutritional value. From Italian pasta sauces to Spanish gazpacho, the tomato’s versatility is undeniable. But beyond their culinary appeal, there’s something deeply satisfying about nurturing a plant from seed to fruit, connecting us to the earth and providing fresh, healthy food for our tables.
That’s why I’m so excited to share these simple yet effective DIY tricks for growing tomatoes at home. In today’s world, where access to fresh, organic produce can be limited or expensive, learning to grow your own food is more important than ever. These hacks will help you overcome common challenges like pests, diseases, and lack of space, ensuring a bountiful harvest that you can be proud of. So, let’s dive in and unlock the secrets to successful home tomato gardening!
Growing Tomatoes at Home: A Beginner’s Guide to Juicy Success!
Hey there, fellow gardening enthusiasts! I’m so excited you’re thinking about growing your own tomatoes. Trust me, there’s nothing quite like biting into a sun-warmed, homegrown tomato bursting with flavor. It’s a truly rewarding experience, and I’m here to guide you through every step of the process. Don’t worry if you’re a complete beginner; I’ll break it down into easy-to-follow steps. Let’s get started!
Choosing Your Tomato Varieties
Before we even think about soil, we need to decide what kind of tomatoes we want to grow! There are so many options, it can be a little overwhelming. Here’s a quick rundown of some popular choices:
* **Determinate Tomatoes:** These are bush-type tomatoes that grow to a certain size and then stop. They produce most of their fruit all at once, making them great for canning or making sauce. Popular varieties include Roma, Celebrity, and Rutgers.
* **Indeterminate Tomatoes:** These are vining tomatoes that keep growing and producing fruit throughout the season. They need staking or caging to support their growth. Think of varieties like Beefsteak, Cherry, Grape, and Heirloom tomatoes.
* **Cherry Tomatoes:** Small, sweet, and perfect for snacking! They come in both determinate and indeterminate varieties.
* **Heirloom Tomatoes:** These are older varieties that have been passed down through generations. They often have unique flavors and colors, but can be a bit more challenging to grow.
* **Paste Tomatoes:** These are meaty tomatoes with fewer seeds, ideal for making sauces and pastes. Roma and San Marzano are popular choices.
My tip: Start with a mix of determinate and indeterminate varieties to get a good harvest throughout the season. I personally love growing cherry tomatoes for snacking and Roma tomatoes for making my own pasta sauce!
Getting Started: Seeds vs. Seedlings
You have two main options for starting your tomato plants: from seeds or from seedlings (also called transplants).
* **Starting from Seeds:** This gives you more control over the varieties you grow and can be more cost-effective. However, it requires more time and effort, as you’ll need to start the seeds indoors 6-8 weeks before the last expected frost.
* **Buying Seedlings:** This is a quicker and easier option, especially for beginners. You can find healthy seedlings at your local garden center or nursery.
I usually do both! I like to start some seeds indoors to get a head start on the season, and then supplement with seedlings from the nursery to try out different varieties.
Starting Seeds Indoors (Optional)
If you decide to start your tomatoes from seeds, here’s what you’ll need:
* **Tomato seeds:** Choose your favorite varieties!
* **Seed starting mix:** This is a sterile, lightweight mix that’s specifically designed for starting seeds.
* **Seed starting trays or pots:** You can use plastic trays with individual cells or small peat pots.
* **Humidity dome (optional):** This helps to keep the seeds moist and warm.
* **Grow lights:** Tomato seedlings need plenty of light to grow strong and healthy.
* **Heat mat (optional):** This helps to speed up germination.
Step-by-step instructions:
1. **Sow the seeds:** Fill your seed starting trays or pots with seed starting mix. Moisten the mix thoroughly. Sow 2-3 seeds per cell or pot, about 1/4 inch deep.
2. **Cover and water:** Gently cover the seeds with more seed starting mix and water lightly.
3. **Provide warmth and humidity:** Place the trays or pots in a warm location (around 70-75°F) or on a heat mat. Cover with a humidity dome to retain moisture.
4. **Provide light:** Once the seeds germinate (usually within 5-10 days), remove the humidity dome and place the seedlings under grow lights. Keep the lights on for 14-16 hours per day.
5. **Water regularly:** Keep the soil consistently moist, but not soggy.
6. **Thin the seedlings:** Once the seedlings have their first true leaves (the second set of leaves), thin them to one seedling per cell or pot. Choose the strongest, healthiest seedling and snip off the others at the soil line.
7. **Harden off the seedlings:** About a week before you plan to transplant the seedlings outdoors, start hardening them off. This means gradually exposing them to outdoor conditions. Start by placing them outside for an hour or two each day, gradually increasing the amount of time they spend outdoors.
Preparing Your Garden Bed
Whether you’re starting with seeds or seedlings, preparing your garden bed is crucial for success. Tomatoes need:
* **Full sun:** At least 6-8 hours of direct sunlight per day.
* **Well-drained soil:** Tomatoes don’t like to sit in soggy soil.
* **Rich soil:** Tomatoes are heavy feeders and need plenty of nutrients.
Here’s how I prepare my garden bed:
1. **Choose a sunny location:** Make sure the area gets at least 6 hours of direct sunlight per day.
2. **Clear the area:** Remove any weeds, grass, rocks, or debris.
3. **Amend the soil:** This is the most important step! I like to add plenty of compost, aged manure, and other organic matter to improve the soil’s drainage, fertility, and water-holding capacity.
4. **Test the soil pH:** Tomatoes prefer a slightly acidic soil pH of around 6.0-6.8. You can buy a soil testing kit at your local garden center. If your soil is too alkaline, you can add sulfur to lower the pH. If it’s too acidic, you can add lime to raise the pH.
5. **Till or dig the soil:** Loosen the soil to a depth of at least 12 inches. This will help the roots of your tomato plants to grow easily.
6. **Create raised beds (optional):** Raised beds can improve drainage and warm up the soil more quickly in the spring.
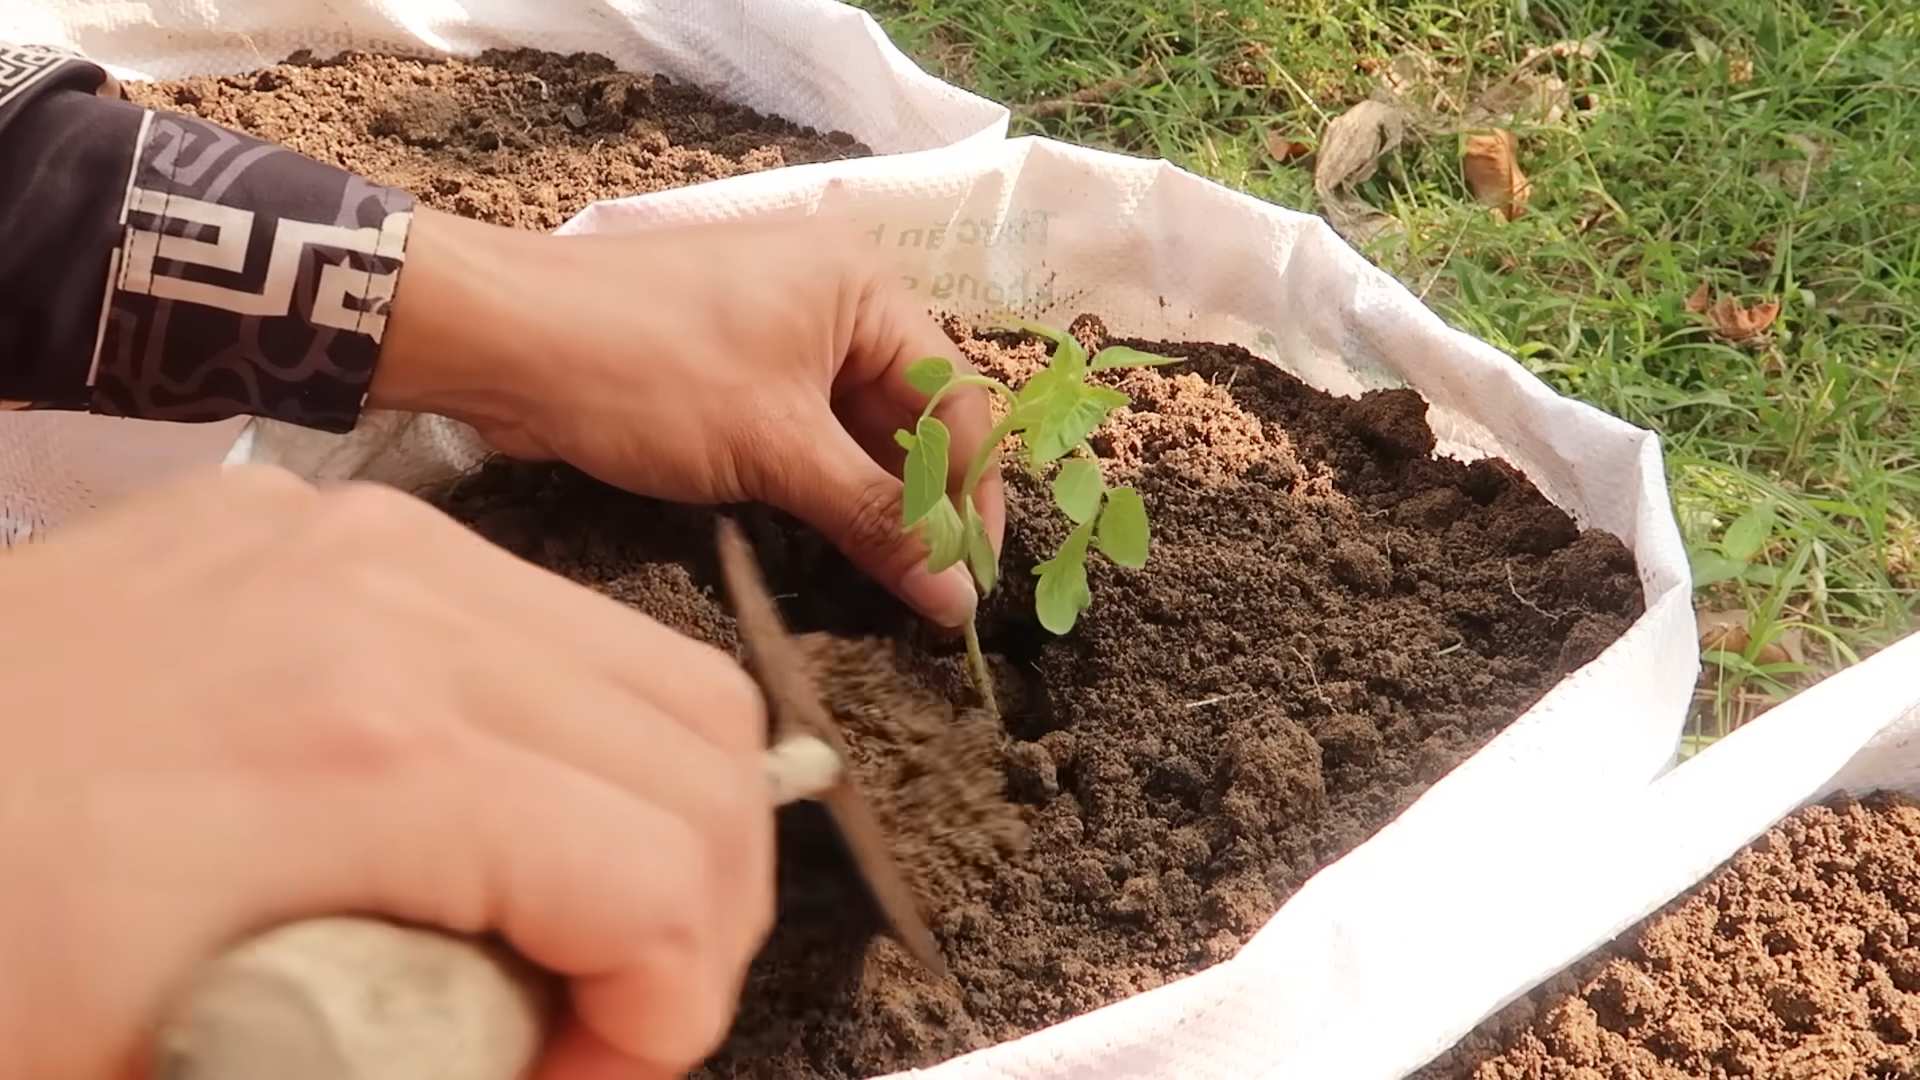
Transplanting Your Tomato Plants
Once the danger of frost has passed and your soil is warm enough (around 60°F), it’s time to transplant your tomato plants into the garden.
Here’s how I do it:
1. **Choose a cloudy day:** Transplanting on a cloudy day will help to reduce stress on the plants.
2. **Dig a hole:** Dig a hole that’s slightly larger than the root ball of your tomato plant.
3. **Add fertilizer:** I like to add a handful of slow-release tomato fertilizer to the bottom of the hole. This will provide the plants with a steady supply of nutrients throughout the growing season.
4. **Remove the plant from the pot:** Gently squeeze the sides of the pot to loosen the root ball. Carefully remove the plant from the pot.
5. **Plant deeply:** This is a key tip for growing strong tomato plants! Plant the tomato plant deeply, burying the stem up to the first set of leaves. Tomatoes can grow roots along their stems, so planting deeply will encourage a stronger root system.
6. **Water thoroughly:** Water the plant thoroughly after transplanting.
7. **Mulch:** Apply a layer of mulch around the base of the plant. Mulch helps to retain moisture, suppress weeds, and regulate soil temperature. I like to use straw, wood chips, or shredded leaves.
Supporting Your Tomato Plants
As your tomato plants grow, they’ll need support to keep them from falling over. This is especially important for indeterminate varieties, which can grow quite tall.
Here are a few options for supporting your tomato plants:
* **Stakes:** Drive a sturdy stake into the ground next to each plant and tie the plant to the stake with soft twine or plant ties.
* **Cages:** Place a tomato cage around each plant. Cages provide support as the plant grows.
* **Trellises:** Use a trellis to support the plants. This is a good option for growing tomatoes in a small space.
I prefer using cages! They’re easy to set up and provide good support for the plants.
Caring for Your Tomato Plants
Once your tomato plants are in the ground, it’s important to provide them with proper care.
* **Watering:** Water your tomato plants deeply and regularly, especially during hot, dry weather. Aim to water at the base of the plant to avoid wetting the leaves, which can lead to disease.
* **Fertilizing:** Fertilize your tomato plants every 2-3 weeks with a tomato-specific fertilizer.
* **Pruning:** Prune your tomato plants to improve air circulation and encourage fruit production. Remove suckers (the small shoots that grow between the main stem and the branches) to direct the plant’s energy towards fruit production.
* **Pest and disease control:** Keep an eye out for pests and diseases. Common tomato pests include aphids, tomato hornworms, and whiteflies. Common tomato diseases include early blight, late
Conclusion
So, there you have it! Growing tomatoes at home, especially using our simple and effective DIY trick, is not just a gardening endeavor; it’s an investment in flavor, freshness, and a deeper connection with the food you eat. Forget those bland, store-bought tomatoes that lack the sun-ripened sweetness we all crave. With a little effort and our proven method, you can cultivate a bounty of juicy, vibrant tomatoes right in your own backyard, balcony, or even windowsill.
Why is this DIY trick a must-try? Because it simplifies the process, maximizes your yield, and minimizes common problems that plague novice tomato growers. We’ve taken the guesswork out of the equation, providing you with a clear, concise, and actionable plan to achieve tomato-growing success. This isn’t just about planting seeds; it’s about creating an optimal environment for your tomato plants to thrive, from nutrient-rich soil to proper watering techniques and strategic pruning.
But the beauty of gardening lies in its adaptability. Feel free to experiment with different tomato varieties to discover your personal favorites. Cherry tomatoes, Roma tomatoes, beefsteak tomatoes – the possibilities are endless! Consider adding companion plants like basil or marigolds to deter pests and enhance the flavor of your tomatoes. You can also explore different container sizes and materials to find what works best for your space and resources.
For those with limited space, consider growing dwarf or bush tomato varieties in hanging baskets or small pots. These compact plants are perfect for balconies and patios, allowing you to enjoy fresh tomatoes even in urban environments. If you live in a colder climate, you can start your tomato seeds indoors several weeks before the last expected frost, giving your plants a head start on the growing season.
Don’t be afraid to get your hands dirty and embrace the learning process. Gardening is a journey, and there will be challenges along the way. But with patience, persistence, and our DIY trick as your guide, you’ll be rewarded with a harvest of delicious, homegrown tomatoes that will elevate your meals and impress your friends and family.
We wholeheartedly encourage you to try this DIY trick for growing tomatoes at home. It’s a rewarding experience that will connect you with nature, improve your diet, and bring a sense of accomplishment to your life. And most importantly, we want to hear about your experiences! Share your photos, tips, and challenges in the comments section below. Let’s create a community of tomato-growing enthusiasts who can learn from each other and celebrate the joys of homegrown produce. Happy gardening!
Frequently Asked Questions (FAQ)
What kind of soil is best for growing tomatoes?
Tomatoes thrive in well-draining, nutrient-rich soil. A loamy soil that is slightly acidic (pH 6.0-6.8) is ideal. You can amend your existing soil with compost, aged manure, or other organic matter to improve its fertility and drainage. Avoid heavy clay soils, as they can become waterlogged and suffocate the roots. Consider using a raised bed or container filled with a high-quality potting mix specifically formulated for vegetables if your native soil is poor.
How often should I water my tomato plants?
Water deeply and regularly, especially during hot, dry weather. Aim to keep the soil consistently moist but not waterlogged. A good rule of thumb is to water when the top inch of soil feels dry to the touch. Water at the base of the plant to avoid wetting the foliage, which can increase the risk of fungal diseases. Mulching around the base of the plant can help retain moisture and suppress weeds. During periods of heavy rain, you may need to reduce watering to prevent overwatering.
What are some common tomato plant problems and how can I prevent them?
Some common tomato plant problems include blossom end rot, early blight, and tomato hornworms. Blossom end rot is caused by a calcium deficiency and can be prevented by ensuring consistent watering and adding calcium to the soil. Early blight is a fungal disease that can be prevented by providing good air circulation, avoiding overhead watering, and applying a fungicide if necessary. Tomato hornworms are large caterpillars that can defoliate your plants. They can be handpicked or controlled with insecticides. Regular inspection of your plants can help you identify and address problems early on.
How much sunlight do tomato plants need?
Tomato plants need at least 6-8 hours of direct sunlight per day to thrive. Choose a location that receives full sun for optimal growth and fruit production. If you live in a hot climate, some afternoon shade may be beneficial to prevent the plants from overheating. Insufficient sunlight can result in leggy plants with poor fruit set.
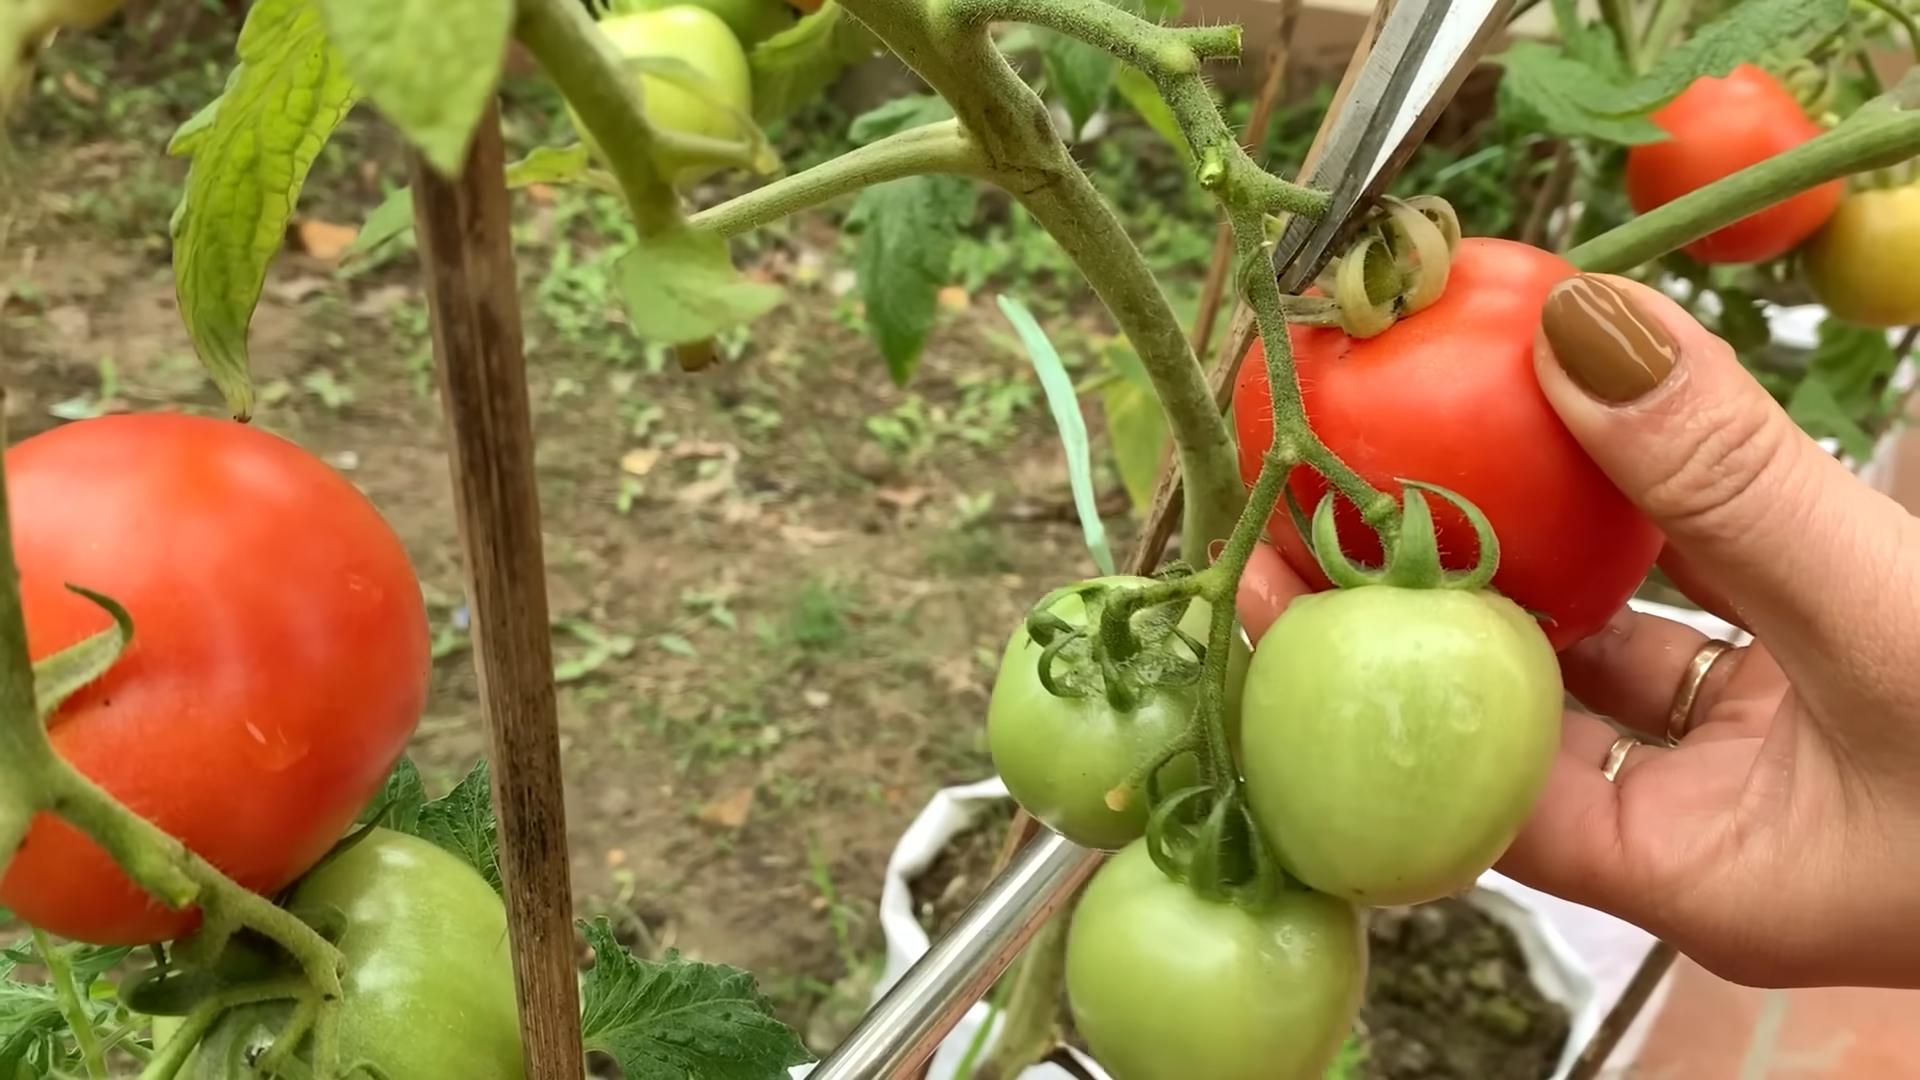
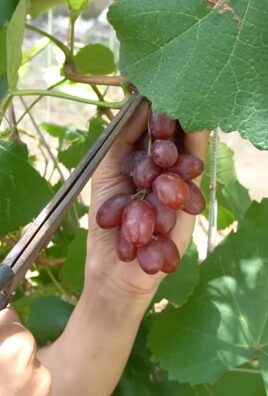
When is the best time to harvest tomatoes?
Tomatoes are typically ready to harvest when they are fully colored, slightly soft to the touch, and easily detach from the vine. The exact timing will depend on the variety of tomato and the growing conditions. Avoid harvesting tomatoes that are still green or hard, as they will not ripen properly off the vine. Overripe tomatoes will be soft, mushy, and may have cracks or blemishes.
Can I grow tomatoes in containers?
Yes, you can successfully grow tomatoes in containers, especially if you have limited space. Choose a container that is at least 12 inches in diameter and depth to provide enough room for the roots to grow. Use a high-quality potting mix and ensure that the container has drainage holes. Dwarf or bush tomato varieties are particularly well-suited for container gardening. Remember to water and fertilize your container-grown tomatoes regularly, as they will dry out and deplete nutrients more quickly than plants grown in the ground.
What are some good companion plants for tomatoes?
Several plants can benefit tomatoes when grown nearby. Basil is a classic companion plant that is said to improve the flavor of tomatoes and repel pests. Marigolds are also effective at deterring nematodes and other soil pests. Other good companion plants include onions, garlic, carrots, and parsley. Avoid planting tomatoes near brassicas (such as cabbage and broccoli) or fennel, as they can inhibit tomato growth.
How do I prune my tomato plants?
Pruning tomato plants can improve air circulation, reduce disease risk, and encourage fruit production. Remove suckers (the small shoots that grow between the main stem and the branches) to direct the plant’s energy towards fruit development. You can also remove yellowing or diseased leaves to improve air circulation and prevent the spread of disease. Determinate tomato varieties (those that grow to a fixed size) require less pruning than indeterminate varieties (those that continue to grow throughout the season).
What kind of fertilizer should I use for my tomato plants?
Use a balanced fertilizer with a ratio of N-P-K (nitrogen, phosphorus, potassium) that is appropriate for tomatoes. A fertilizer with a slightly higher phosphorus content can promote root development and flowering. Avoid over-fertilizing, as this can lead to excessive foliage growth and reduced fruit production. You can also use organic fertilizers such as compost tea or fish emulsion to provide nutrients to your tomato plants.
How do I save seeds from my tomato plants?
Saving seeds from your tomato plants can be a rewarding way to preserve your favorite varieties and save money. Choose ripe, healthy tomatoes from disease-free plants. Scoop out the seeds and pulp into a jar and add a small amount of water. Let the mixture ferment for several days, stirring occasionally. This process will help remove the gelatinous coating from the seeds. Once the fermentation is complete, rinse the seeds thoroughly and spread them out on a paper towel to dry completely. Store the dried seeds in an airtight container in a cool, dark place.
Leave a Comment