
Growing Watermelon at Home might seem like a challenge reserved for seasoned farmers, but I’m here to tell you it’s totally achievable, even in your own backyard! Forget those grocery store watermelons that lack that true, sun-ripened sweetness. Imagine biting into a juicy, crimson watermelon you nurtured from seed to fruit – the taste of summer doesn’t get any better than that!
Watermelons have a rich history, dating back thousands of years to Africa, where they originated. They were even found in King Tut’s tomb! Over centuries, different varieties have been cultivated, each with its unique flavor and size. Now, you can be a part of that history by growing watermelon at home.
Why should you try this DIY project? Well, for starters, you’ll have access to the freshest, most delicious watermelons imaginable. Plus, it’s incredibly rewarding to watch something you planted grow and thrive. In this article, I’ll share my favorite tricks and hacks to help you successfully cultivate these sweet treats, regardless of your gardening experience. From choosing the right variety to protecting your precious melons from pests, I’ve got you covered. Let’s get growing!
Wassermelonen selbst anbauen: Dein ultimativer DIY-Guide für den Garten
Hey Gartenfreunde! Habt ihr euch jemals vorgestellt, eine saftige, selbst angebaute Wassermelone direkt aus eurem Garten zu ernten? Klingt traumhaft, oder? Ich zeige euch, wie ihr diesen Traum Wirklichkeit werden lassen könnt. Es ist einfacher, als ihr denkt, und mit ein bisschen Geduld und den richtigen Tipps könnt ihr schon bald eure eigene Ernte genießen. Los geht’s!
Die Vorbereitung: Der Schlüssel zum Erfolg
Bevor wir mit dem Pflanzen loslegen, müssen wir sicherstellen, dass wir die richtigen Voraussetzungen schaffen. Eine gute Vorbereitung ist das A und O für eine erfolgreiche Wassermelonenernte.
* Die richtige Sorte wählen: Nicht jede Wassermelonensorte ist gleich. Einige sind besser für bestimmte Klimazonen oder Gartengrößen geeignet. Informiert euch, welche Sorten in eurer Region gut gedeihen. Beliebte Sorten sind z.B. ‘Sugar Baby’ (klein und frühreif), ‘Crimson Sweet’ (klassisch rot und süß) oder ‘Yellow Doll’ (gelbes Fruchtfleisch).
* Der perfekte Standort: Wassermelonen lieben die Sonne! Wählt einen Standort, der mindestens 6-8 Stunden direkte Sonneneinstrahlung pro Tag erhält. Außerdem brauchen sie viel Platz, da ihre Ranken sich weit ausbreiten.
* Der richtige Boden: Wassermelonen bevorzugen einen gut durchlässigen, sandigen Lehmboden mit einem pH-Wert zwischen 6,0 und 6,8. Wenn euer Boden zu schwer ist, könnt ihr ihn mit Kompost und Sand verbessern.
* Vorkultur oder Direktsaat: Ihr könnt Wassermelonen entweder im Haus vorziehen oder direkt ins Beet säen. Die Vorkultur hat den Vorteil, dass die Pflanzen einen Wachstumsvorsprung haben.
Schritt-für-Schritt-Anleitung: Wassermelonen pflanzen
Jetzt geht’s ans Eingemachte! Hier ist eine detaillierte Anleitung, wie ihr eure Wassermelonen pflanzt, egal ob ihr sie vorgezogen habt oder direkt säen wollt.
Vorgezogene Pflanzen auspflanzen:
1. Den Boden vorbereiten: Lockert den Boden gründlich auf und entfernt Unkraut. Mischt Kompost oder gut verrotteten Mist unter, um den Boden mit Nährstoffen anzureichern.
2. Pflanzlöcher graben: Grabt Löcher, die etwas größer sind als die Wurzelballen der Pflanzen. Der Abstand zwischen den Löchern sollte etwa 90-120 cm betragen, je nach Sorte.
3. Die Pflanzen einsetzen: Nehmt die Pflanzen vorsichtig aus ihren Töpfen und setzt sie in die Löcher. Achtet darauf, dass die Oberseite des Wurzelballens mit der Bodenoberfläche abschließt.
4. Angießen: Gießt die Pflanzen gründlich an, um den Boden um die Wurzeln herum zu festigen.
5. Mulchen: Eine Mulchschicht aus Stroh oder Holzhackschnitzeln hilft, die Feuchtigkeit im Boden zu halten und Unkraut zu unterdrücken.
Direktsaat:
1. Den Boden vorbereiten: Wie beim Auspflanzen von vorgezogenen Pflanzen, lockert den Boden auf, entfernt Unkraut und mischt Kompost unter.
2. Säen: Säet die Samen etwa 2-3 cm tief in den Boden. Legt 2-3 Samen pro Pflanzstelle, um sicherzustellen, dass mindestens eine Pflanze keimt. Der Abstand zwischen den Pflanzstellen sollte ebenfalls 90-120 cm betragen.
3. Angießen: Gießt die Pflanzstellen vorsichtig an, ohne die Samen wegzuschwemmen.
4. Ausdünnen: Sobald die Sämlinge ein paar Blätter haben, dünnt ihr sie auf eine Pflanze pro Pflanzstelle aus. Wählt die kräftigste Pflanze aus und entfernt die anderen.
Die Pflege: Wassermelonen verwöhnen
Nach dem Pflanzen ist vor der Pflege! Wassermelonen brauchen regelmäßige Aufmerksamkeit, um gut zu wachsen und leckere Früchte zu produzieren.
* Gießen: Wassermelonen brauchen viel Wasser, besonders während der Fruchtbildung. Gießt regelmäßig und gründlich, aber vermeidet Staunässe. Am besten gießt ihr am Morgen, damit die Blätter über den Tag abtrocknen können.
* Düngen: Düngt die Pflanzen regelmäßig mit einem ausgewogenen Dünger. Beginnt etwa 2 Wochen nach dem Auspflanzen oder nach dem Ausdünnen der Sämlinge.
* Unkraut jäten: Haltet den Bereich um die Pflanzen herum unkrautfrei, um Konkurrenz um Nährstoffe und Wasser zu vermeiden.
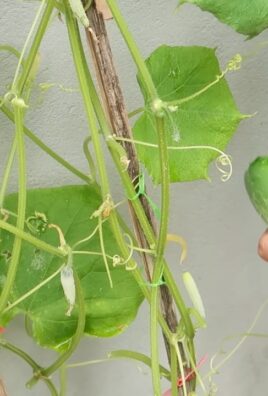
* Ranken lenken: Wassermelonenranken können sich weit ausbreiten. Lenkt sie in die gewünschte Richtung, um Platz zu sparen und die Früchte besser zu belüften.
* Schutz vor Schädlingen und Krankheiten: Achtet auf Schädlinge wie Blattläuse oder Schnecken und bekämpft sie bei Bedarf mit geeigneten Mitteln. Auch Pilzkrankheiten können auftreten, besonders bei feuchtem Wetter. Sorgt für gute Belüftung und entfernt befallene Blätter.
Die Ernte: Der Lohn der Mühe
Endlich ist es soweit! Die Erntezeit ist der aufregendste Teil des Wassermelonenanbaus. Aber wie erkennt man, ob eine Wassermelone reif ist?
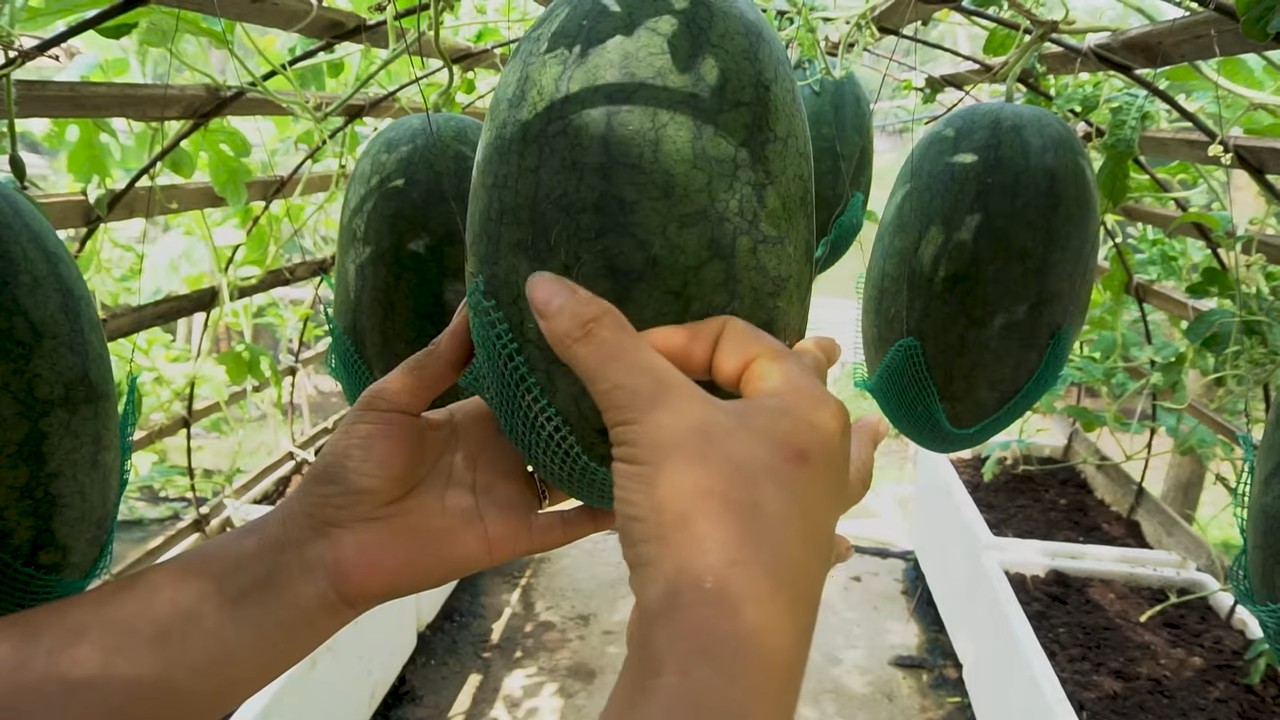
* Der Klopftest: Klopft leicht auf die Wassermelone. Eine reife Wassermelone klingt hohl und dumpf.
* Der Bodenfleck: Der Bodenfleck, die Stelle, an der die Wassermelone auf dem Boden liegt, sollte gelblich-cremefarben sein. Wenn er noch weiß ist, ist die Wassermelone noch nicht reif.
* Das Rankenblatt: Das Rankenblatt, das sich direkt an der Frucht befindet, sollte braun und trocken sein.
* Die Schale: Die Schale einer reifen Wassermelone ist hart und glänzend.
Wenn ihr euch sicher seid, dass die Wassermelone reif ist, schneidet ihr sie mit einem scharfen Messer vom Ranken ab. Lasst dabei einen kleinen Stielansatz stehen.
Zusätzliche Tipps und Tricks für eine erfolgreiche Ernte
Hier sind noch ein paar zusätzliche Tipps, die euch helfen können, eure Wassermelonenernte zu optimieren:
* Schwarze Folie: Das Auslegen von schwarzer Folie unter den Pflanzen kann helfen, den Boden zu erwärmen und das Wachstum zu beschleunigen.
* Künstliche Bestäubung: Wenn ihr wenig Bienen in eurem Garten habt, könnt ihr die Blüten von Hand bestäuben. Übertragt einfach mit einem Pinsel Pollen von den männlichen auf die weiblichen Blüten.
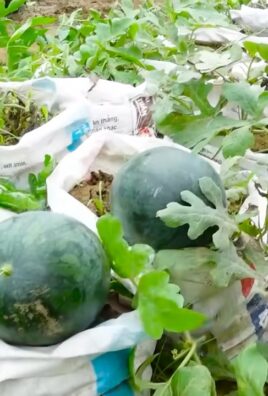
* Früchte schützen: Legt die Wassermelonen auf Stroh oder Holzbretter, um sie vor Bodenfeuchtigkeit und Schädlingen zu schützen.
* Regelmäßige Kontrolle: Kontrolliert eure Pflanzen regelmäßig auf Schädlinge, Krankheiten und andere Probleme. Je früher ihr etwas entdeckt, desto besser könnt ihr reagieren.
Häufige Probleme und Lösungen
Auch beim Wassermelonenanbau können Probleme auftreten. Hier sind einige der häufigsten Probleme und wie ihr sie lösen könnt:
* Keine Früchte: Wenn eure Pflanzen blühen, aber keine Früchte bilden, kann das an mangelnder Bestäubung liegen. Versucht es mit künstlicher Bestäubung oder lockt mehr Bienen in euren Garten.
* Kleine Früchte: Wenn eure Wassermelonen klein bleiben, kann das an Nährstoffmangel oder Wassermangel liegen. Düngt und gießt regelmäßig.
* Faule Früchte: Faule Früchte können durch Pilzkrankheiten verursacht werden. Sorgt für gute Belüftung und entfernt befallene Früchte.
* Schädlinge: Blattläuse, Schnecken und andere Schädlinge können eure Wassermelonen befallen. Bekämpft sie mit geeigneten Mitteln.
Fazit: Selbst angebaute Wassermelonen sind der Hit!
Ich hoffe, dieser Guide hat euch Mut gemacht, eure eigenen Wassermelonen anzubauen. Es ist ein lohnendes Projekt, das euch mit köstlichen, selbst geernteten Früchten belohnt. Mit ein bisschen Planung, Pflege und Geduld könnt ihr schon bald eure eigene Wassermelonenernte genießen. Viel Erfolg und lasst es euch schmecken!

Conclusion
So, there you have it! Growing watermelons at home, while it might seem like a daunting task reserved for seasoned gardeners, is entirely achievable with a little planning, patience, and the right approach. We’ve walked you through the entire process, from selecting the perfect variety for your climate to nurturing those precious seedlings and finally, harvesting your own juicy, homegrown watermelons.
But why should you even bother? Why not just pick one up at the grocery store? The answer is simple: flavor and satisfaction. There’s nothing quite like the taste of a watermelon you’ve grown yourself. It’s sweeter, more vibrant, and bursting with a freshness you just can’t find in commercially grown fruit. Plus, the sense of accomplishment you’ll feel when you slice into that first watermelon is truly unparalleled. It’s a testament to your hard work and dedication, a tangible reward for your efforts.
Beyond the superior flavor, growing your own watermelons allows you to control the entire process. You know exactly what goes into your fruit – no harmful pesticides or artificial fertilizers, just good old-fashioned sunshine, water, and care. This is especially important if you’re concerned about the environmental impact of your food choices or if you have specific dietary needs.
Don’t be afraid to experiment! Try different varieties of watermelons to find your favorite. Perhaps you’d like to try growing a smaller, personal-sized watermelon like a Sugar Baby, or maybe you’re feeling adventurous and want to tackle a giant heirloom variety. You can also experiment with different growing techniques, such as vertical gardening or using raised beds, to maximize your space and yield. Consider companion planting with herbs like basil or marigolds to deter pests and attract pollinators.
Growing watermelons at home is more than just a gardening project; it’s an experience. It’s a chance to connect with nature, learn new skills, and enjoy the fruits (literally!) of your labor. It’s a rewarding and fulfilling activity that can bring joy to your entire family.
We encourage you to take the plunge and give it a try. Don’t be discouraged if your first attempt isn’t perfect. Gardening is a learning process, and every mistake is an opportunity to grow (pun intended!). The most important thing is to have fun and enjoy the journey.
And once you’ve harvested your first watermelon, be sure to share your experience with us! We’d love to hear about your successes, your challenges, and any tips or tricks you’ve learned along the way. Share your photos and stories on our social media channels using #HomegrownWatermelon. Let’s inspire others to discover the joy of growing their own food!
Variations to Consider:
* Container Gardening: If you’re short on space, consider growing watermelons in large containers. Choose a dwarf variety and ensure the container is at least 20 gallons in size.
* Vertical Gardening: Train your watermelon vines to grow up a trellis or fence to save space and improve air circulation.
* Grafting: Grafting watermelon scions onto more vigorous rootstocks can improve disease resistance and yield.
* Seed Saving: Save seeds from your best watermelons to grow again next year. This is a great way to preserve heirloom varieties and adapt them to your local climate.
So, grab your seeds, get your hands dirty, and get ready to enjoy the sweet taste of success! Happy gardening!
Frequently Asked Questions (FAQ)
1. What is the best time to start growing watermelons?
The ideal time to start growing watermelons depends on your climate. In general, watermelons need a long, warm growing season of at least 70-85 days. If you live in a warmer climate with a longer growing season, you can direct sow watermelon seeds directly into the ground after the last frost. However, if you live in a cooler climate with a shorter growing season, it’s best to start your watermelon seeds indoors 4-6 weeks before the last expected frost. This will give your seedlings a head start and ensure they have enough time to mature before the end of the growing season. Check your local frost dates to determine the best time to start your seeds.
2. What kind of soil is best for growing watermelons?
Watermelons thrive in well-drained, sandy loam soil that is rich in organic matter. The soil should have a pH between 6.0 and 6.8. Before planting, amend your soil with compost or well-rotted manure to improve its fertility and drainage. Avoid heavy clay soils, as they can retain too much water and lead to root rot. If you have clay soil, consider growing your watermelons in raised beds or containers filled with a suitable potting mix.
3. How much sunlight do watermelons need?
Watermelons need at least 6-8 hours of direct sunlight per day to thrive. Choose a planting location that receives plenty of sunlight throughout the day. If you’re growing watermelons in containers, make sure to place them in a sunny spot. Insufficient sunlight can result in smaller, less flavorful watermelons.
4. How often should I water my watermelons?
Watermelons need consistent watering, especially during hot, dry weather. Water deeply and regularly, aiming to keep the soil consistently moist but not waterlogged. Avoid overhead watering, as this can promote fungal diseases. Instead, water at the base of the plant, using a soaker hose or drip irrigation system. As the watermelons ripen, you can reduce watering slightly to improve their sweetness.
5. What are some common pests and diseases that affect watermelons?
Watermelons can be susceptible to various pests and diseases, including aphids, squash bugs, vine borers, powdery mildew, and fusarium wilt. To prevent pest and disease problems, choose disease-resistant varieties, practice good sanitation, and monitor your plants regularly. If you notice any signs of pests or diseases, take action promptly. You can use organic pest control methods, such as insecticidal soap or neem oil, to control pests. For fungal diseases, you can use a fungicide.
6. How do I know when my watermelons are ripe?
Determining when a watermelon is ripe can be tricky, but there are a few telltale signs to look for. First, check the tendril closest to the watermelon stem. When this tendril turns brown and dries out, it’s a good indication that the watermelon is ripe. Second, check the underside of the watermelon where it rests on the ground. This spot, known as the ground spot, should turn from white to a creamy yellow color. Finally, give the watermelon a gentle thump. A ripe watermelon will sound hollow and deep, while an unripe watermelon will sound dull and solid.
7. Can I grow watermelons in containers?
Yes, you can grow watermelons in containers, but you’ll need to choose a large container (at least 20 gallons) and a dwarf variety of watermelon. Make sure the container has drainage holes and fill it with a well-draining potting mix. Water container-grown watermelons regularly and fertilize them every 2-3 weeks with a balanced fertilizer. You may also need to provide support for the vines, such as a trellis or stake.
8. How can I improve the sweetness of my watermelons?
Several factors can influence the sweetness of watermelons, including sunlight, water, and soil fertility. Make sure your watermelons receive plenty of sunlight and water them regularly, especially during hot, dry weather. Amend your soil with compost or well-rotted manure to improve its fertility. You can also fertilize your watermelons with a fertilizer that is high in potassium, which is essential for fruit development and sweetness. Reducing watering slightly as the watermelons ripen can also help to concentrate their sugars.
9. What are some good companion plants for watermelons?
Companion planting can help to deter pests, attract pollinators, and improve the overall health of your watermelon plants. Some good companion plants for watermelons include:
* Marigolds: Repel nematodes and other soil pests.
* Basil: Repels aphids, whiteflies, and other pests.
* Nasturtiums: Attract aphids away from watermelons.
* Radishes: Deter cucumber beetles.
* Oregano: Attracts beneficial insects.
10. How do I store my harvested watermelons?
Once you’ve harvested your watermelons, store them in a cool, dry place. Whole watermelons can be stored at room temperature for up to two weeks. Cut watermelons should be wrapped tightly in plastic wrap and stored in the refrigerator for up to 3-5 days.
Leave a Comment