
Growing Watermelon at Home might seem like a challenge reserved for seasoned farmers, but I’m here to tell you that juicy, sweet watermelon can absolutely be a reality in your own backyard! Forget those bland, store-bought melons – imagine sinking your teeth into a watermelon you nurtured from seed to fruit. Sounds amazing, right?
Watermelons have a rich history, dating back thousands of years to Africa, where they were prized for their hydrating properties in arid climates. Over time, they spread across the globe, becoming a symbol of summer refreshment and backyard barbecues. But you don’t need acres of land to participate in this delicious tradition.
In today’s busy world, many of us crave a connection to nature and a source of fresh, healthy food. Growing Watermelon at Home offers just that! This DIY guide will provide you with simple, effective tricks and hacks to cultivate your own watermelon patch, even if you have limited space. We’ll cover everything from seed selection and soil preparation to pest control and harvesting, ensuring you enjoy a bountiful harvest of homegrown goodness. So, let’s ditch the grocery store and get our hands dirty – your taste buds (and your garden) will thank you!
Growing Watermelon at Home: A Sweet DIY Project!
Hey there, fellow gardening enthusiasts! Ever dreamt of biting into a juicy, homegrown watermelon on a hot summer day? Well, dream no more! Growing your own watermelons is totally achievable, even if you don’t have acres of land. I’m going to walk you through everything you need to know to cultivate these sweet giants right in your own backyard (or even in containers!).
Choosing Your Watermelon Variety
First things first, let’s talk about watermelon varieties. There are tons to choose from, and the best one for you will depend on your climate, space, and personal preferences.
* For smaller gardens: Consider bush or dwarf varieties like ‘Sugar Baby’ (a classic!), ‘Bush Sugar Baby’, or ‘Golden Midget’. These take up significantly less space than traditional sprawling vines.
* For warmer climates: ‘Charleston Gray’ and ‘Crimson Sweet’ are known for their heat tolerance.
* For cooler climates: ‘Blacktail Mountain’ and ‘Northern Sweet’ are early-maturing varieties that can thrive in shorter growing seasons.
* Seedless varieties: If you’re not a fan of seeds, go for a seedless variety like ‘Triploid’ or ‘Millionaire’. Keep in mind that seedless watermelons need a pollinator variety planted nearby to produce fruit.
* Novelty colors: Want something different? Try ‘Yellow Crimson’ for a yellow-fleshed watermelon or ‘Orange Tendersweet’ for an orange one!
I personally love ‘Sugar Baby’ because it’s reliable, sweet, and perfect for smaller gardens. But feel free to experiment and find your own favorite!
Preparing Your Watermelon Patch
Watermelons are sun-loving, heavy feeders, so proper soil preparation is key to success.
* Sunlight: Watermelons need at least 6-8 hours of direct sunlight per day. Choose a location that gets plenty of sunshine throughout the growing season.
* Soil: Watermelons prefer well-drained, sandy loam soil with a pH between 6.0 and 6.8. If your soil is heavy clay, amend it with plenty of organic matter like compost, aged manure, or peat moss to improve drainage and aeration.
* Nutrients: Watermelons are heavy feeders, so it’s important to enrich the soil with nutrients before planting. Work in a generous amount of compost or aged manure into the soil. You can also add a balanced fertilizer (like 10-10-10) according to the package directions.
* Space: Give your watermelons plenty of room to grow. Vining varieties need at least 6-8 feet between plants, while bush varieties need about 3-4 feet.
* Raised beds (optional): If your soil is poorly drained, consider growing your watermelons in raised beds. This will improve drainage and warm the soil faster in the spring.
Step-by-Step Soil Preparation:
1. Clear the area: Remove any weeds, rocks, or debris from the planting area.
2. Amend the soil: Spread a 2-3 inch layer of compost or aged manure over the soil surface.
3. Till or dig: Use a garden fork or tiller to incorporate the organic matter into the soil to a depth of 12-18 inches.
4. Add fertilizer (optional): If using a fertilizer, follow the package directions and work it into the soil.
5. Rake smooth: Rake the soil smooth and level.
6. Create mounds or rows: For vining varieties, create mounds of soil about 1-2 feet in diameter and 6-8 feet apart. For bush varieties, create rows about 3-4 feet apart.
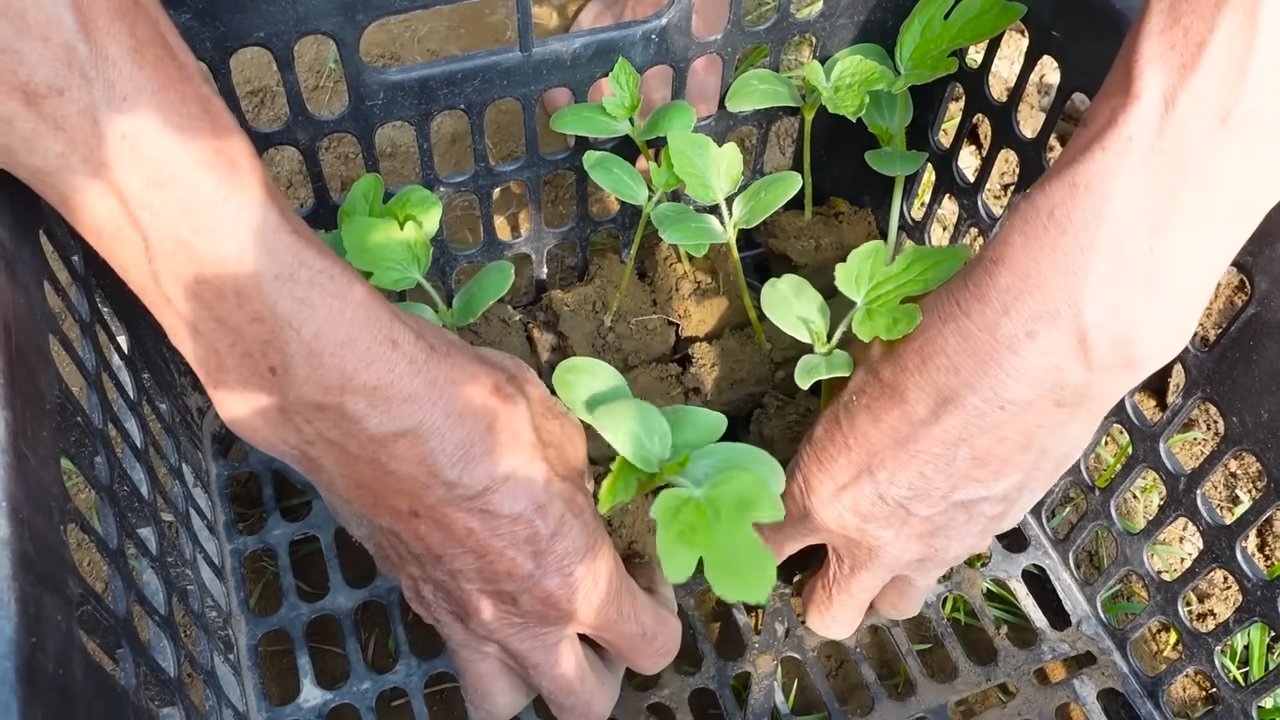
Starting Watermelon Seeds
You can either start watermelon seeds indoors or direct sow them in the garden. Starting seeds indoors gives you a head start, especially in cooler climates.
* Starting indoors: Start seeds indoors about 4-6 weeks before the last expected frost. Use peat pots or biodegradable pots to avoid disturbing the roots when transplanting.
* Direct sowing: Direct sow seeds in the garden after the soil has warmed to at least 70°F (21°C).
Step-by-Step Seed Starting (Indoors):
1. Fill pots with seed starting mix: Use a high-quality seed starting mix that is lightweight and well-draining.
2. Sow seeds: Plant 2-3 seeds per pot, about 1 inch deep.
3. Water gently: Water the soil gently to moisten it, but avoid overwatering.
4. Provide warmth: Place the pots in a warm location, such as on a heat mat or near a sunny window. Watermelon seeds germinate best at temperatures between 80-90°F (27-32°C).
5. Provide light: Once the seeds germinate, provide them with plenty of light. If you don’t have a sunny window, use a grow light.
6. Thin seedlings: Once the seedlings have developed their first true leaves, thin them to one plant per pot. Choose the strongest, healthiest seedling and snip off the others at the soil line.
7. Harden off seedlings: Before transplanting the seedlings outdoors, harden them off by gradually exposing them to outdoor conditions for a week or two. Start by placing them in a sheltered location for a few hours each day, gradually increasing the amount of time they spend outdoors.
Step-by-Step Direct Sowing (Outdoors):
1. Prepare the soil: Follow the soil preparation steps outlined above.
2. Sow seeds: Plant 4-5 seeds per mound or row, about 1 inch deep.
3. Water gently: Water the soil gently to moisten it, but avoid overwatering.
4. Thin seedlings: Once the seedlings have developed their first true leaves, thin them to 1-2 plants per mound or row. Choose the strongest, healthiest seedlings and snip off the others at the soil line.
Transplanting Watermelon Seedlings
Once the danger of frost has passed and the soil has warmed to at least 70°F (21°C), it’s time to transplant your watermelon seedlings into the garden.
Step-by-Step Transplanting:
1. Choose a cloudy day: Transplanting on a cloudy day will help reduce stress on the seedlings.
2. Dig holes: Dig holes in the prepared soil that are slightly larger than the pots the seedlings are in.
3. Remove seedlings from pots: Gently remove the seedlings from their pots, being careful not to damage the roots. If using peat pots, you can plant the entire pot directly into the ground.
4. Plant seedlings: Place the seedlings in the holes and backfill with soil. Gently firm the soil around the base of the plants.
5. Water thoroughly: Water the seedlings thoroughly after planting.
6. Mulch (optional): Apply a layer of mulch around the plants to help retain moisture, suppress weeds, and regulate soil temperature. I like to use straw or shredded leaves.
Caring for Your Watermelon Plants
Watermelons need consistent care to thrive and produce sweet, juicy fruit.
* Watering: Water watermelons deeply and regularly, especially during hot, dry weather. Aim for about 1-2 inches of water per week. Water at the base of the plants to avoid wetting the foliage, which can lead to fungal diseases.
* Fertilizing: Fertilize watermelons every 2-3 weeks with a balanced fertilizer or a fertilizer specifically formulated for melons. Follow the package directions.
* Weeding: Keep the watermelon patch free of weeds, which can compete with the plants for nutrients and water. Hand-pull weeds or use a hoe to cultivate the soil.
* Pruning (optional): Some gardeners prune watermelon vines to encourage fruit production. To prune, remove any side shoots that grow from the main vine. This will direct the plant’s energy towards producing fruit.
* Pollination: Watermelons need to be pollinated to produce fruit. Bees are the primary pollinators, so encourage them to visit your garden by planting flowers that attract bees. If you’re not seeing many bees, you can hand-pollinate the flowers. To hand-pollinate, use a small paintbrush to transfer pollen from the male flowers to the female flowers. Female flowers have a small, immature watermelon at the base of the flower.
* Protecting from pests and diseases: Watermelons can be susceptible to various pests and diseases, such as aphids, squash bugs, vine borers, and powdery mildew. Monitor your plants regularly for signs of pests or diseases and take action promptly. Use organic pest control methods whenever possible.
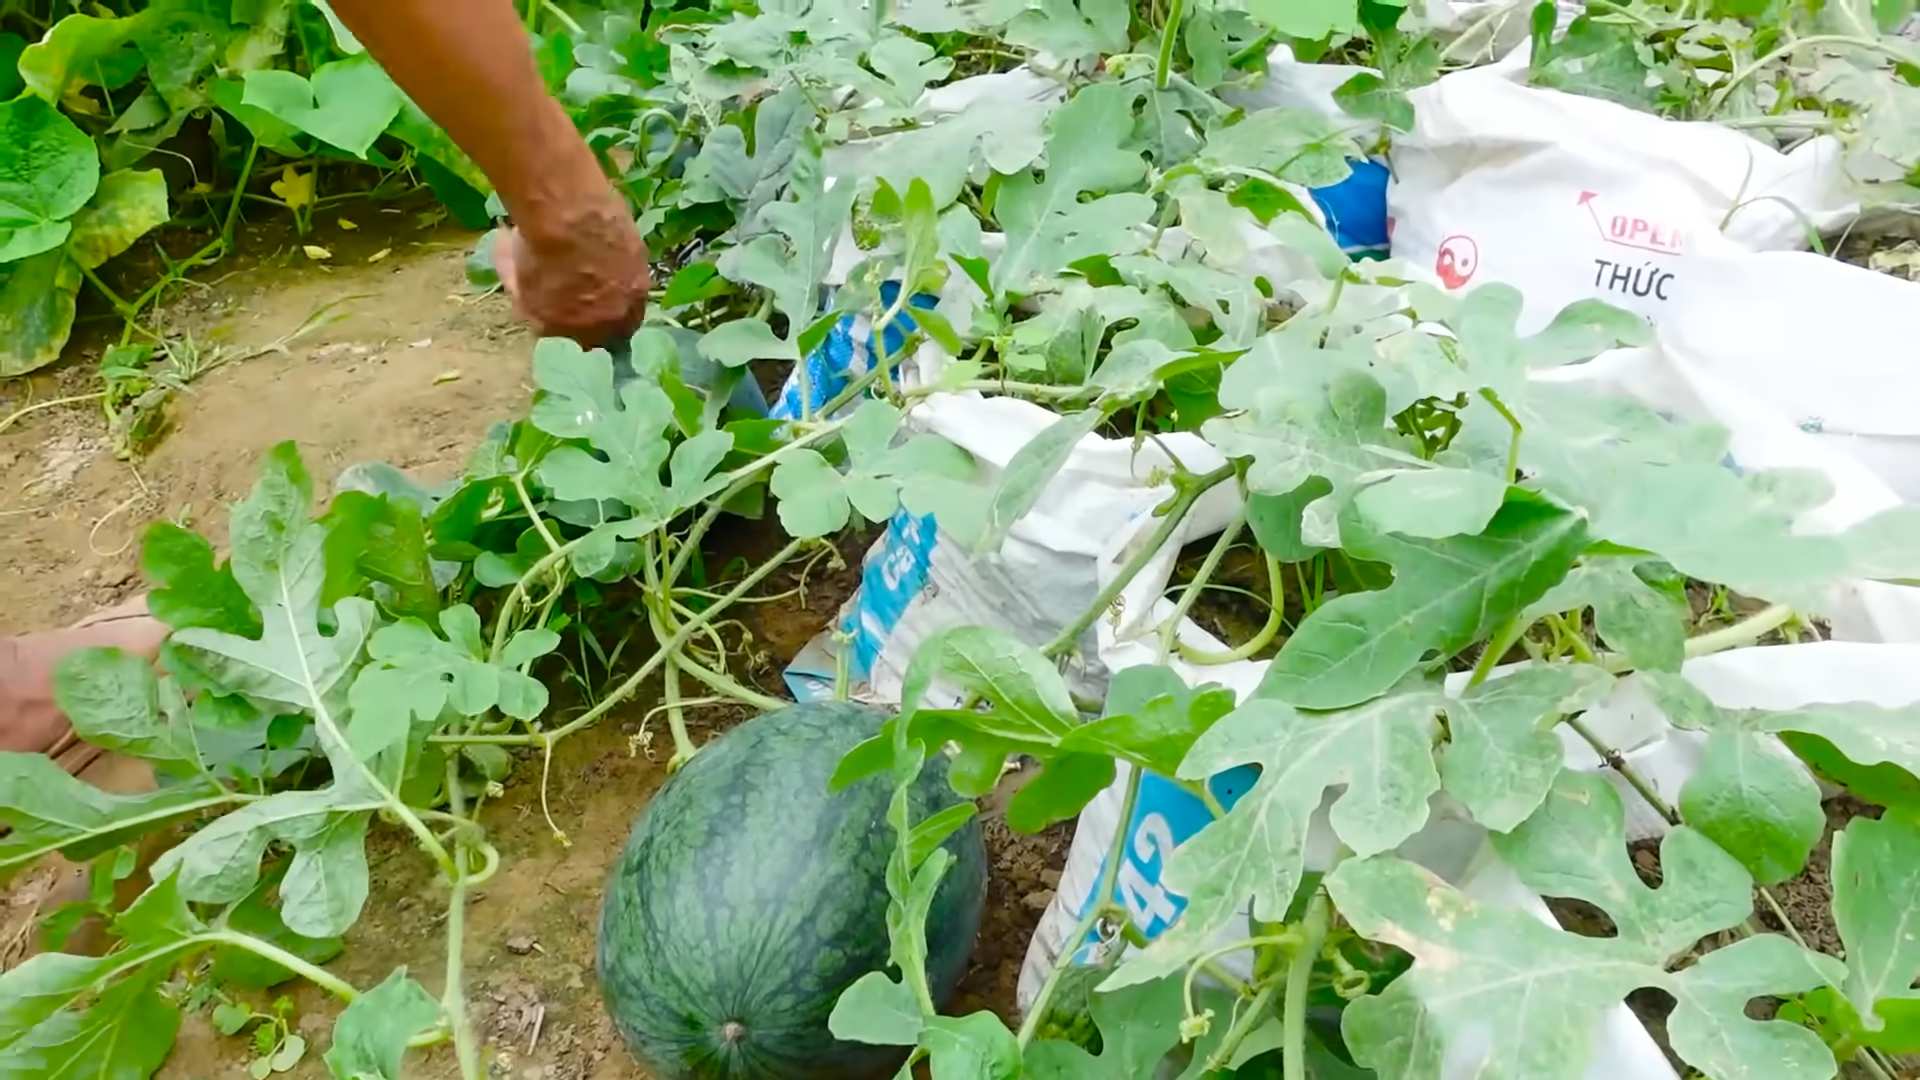
Harvesting Your Watermelons
Harvesting watermelons at the right time is crucial for getting the best
Conclusion
So, there you have it! Growing watermelons at home might seem daunting at first, but with a little planning, patience, and this comprehensive guide, you’ll be sinking your teeth into a juicy, homegrown watermelon before you know it. We’ve covered everything from selecting the right variety for your climate and space to nurturing your seedlings and protecting your precious fruits from pests and diseases.
But why should you bother with all this effort when you can simply buy a watermelon at the store? The answer is simple: flavor, satisfaction, and control. Store-bought watermelons often lack the intense sweetness and vibrant flavor of a vine-ripened, homegrown melon. Plus, there’s nothing quite like the pride and accomplishment that comes with harvesting something you’ve nurtured from seed to fruit. And, perhaps most importantly, when you grow your own watermelons, you have complete control over what goes into them – no harmful pesticides or artificial fertilizers necessary. You can truly enjoy a healthy and delicious treat.
This DIY approach to watermelon cultivation isn’t just about saving money; it’s about connecting with nature, learning new skills, and enjoying the unparalleled taste of fresh, homegrown produce. It’s about experiencing the magic of watching a tiny seed transform into a sprawling vine laden with sweet, refreshing fruit.
Don’t be afraid to experiment! Try different watermelon varieties to find your favorite. Consider using companion planting techniques to deter pests and attract pollinators. Explore vertical gardening methods if you’re short on space. You could even try fermenting your watermelon rind for a unique and tangy pickle! The possibilities are endless.
Growing watermelons at home is an incredibly rewarding experience. It’s a chance to get your hands dirty, learn about the natural world, and enjoy the fruits (literally!) of your labor. So, grab some seeds, find a sunny spot, and get ready to embark on your watermelon-growing adventure.
We’re confident that with the knowledge you’ve gained from this guide, you’ll be well on your way to harvesting a bumper crop of delicious watermelons. And remember, even if you encounter a few challenges along the way, don’t give up! Gardening is a learning process, and every mistake is an opportunity to grow (pun intended!).
We encourage you to try these techniques and share your experiences with us. Let us know what watermelon varieties you’re growing, what challenges you’ve faced, and what successes you’ve celebrated. Share your photos, tips, and tricks in the comments below. We’re eager to hear from you and learn from your experiences. Together, we can create a community of passionate watermelon growers and spread the joy of homegrown goodness! Happy growing!
Frequently Asked Questions (FAQ)
What is the best time to start growing watermelons?
The best time to start growing watermelons depends on your climate. In general, watermelons need a long, warm growing season of at least 70-85 days. If you live in a warm climate with a long growing season, you can direct sow watermelon seeds outdoors after the last frost. However, if you live in a cooler climate with a shorter growing season, it’s best to start your watermelon seeds indoors 4-6 weeks before the last expected frost. This will give your seedlings a head start and ensure that they have enough time to mature and produce fruit before the end of the growing season.
How much space do watermelons need?
Watermelons are sprawling plants that require a significant amount of space. Each watermelon plant needs at least 6-8 feet of space in all directions. If you’re growing watermelons in rows, space the rows 8-10 feet apart. If you’re short on space, consider growing bush or dwarf watermelon varieties, which are more compact. You can also train watermelon vines to grow vertically on a trellis or fence to save space.
What kind of soil do watermelons need?
Watermelons thrive in well-drained, sandy loam soil that is rich in organic matter. The soil should have a pH of 6.0-6.8. Before planting, amend the soil with compost, aged manure, or other organic matter to improve drainage and fertility. Watermelons are heavy feeders, so it’s also a good idea to add a slow-release fertilizer to the soil at planting time.
How often should I water my watermelons?
Watermelons need consistent watering, especially during hot, dry weather. Water deeply and regularly, providing about 1-2 inches of water per week. Avoid overhead watering, as this can promote fungal diseases. Instead, water at the base of the plants, using a soaker hose or drip irrigation system. As the watermelons ripen, reduce watering slightly to prevent the fruits from splitting.
How do I know when my watermelon is ripe?
There are several ways to tell when a watermelon is ripe. One of the most reliable methods is to check the tendril closest to the fruit. When the tendril turns brown and dries out, the watermelon is usually ripe. Another sign of ripeness is the ground spot, which is the area of the watermelon that rests on the ground. When the ground spot turns from white to yellow or cream-colored, the watermelon is likely ripe. You can also thump the watermelon with your knuckles. A ripe watermelon will sound hollow and deep.
What are some common watermelon pests and diseases?
Watermelons are susceptible to a variety of pests and diseases, including aphids, squash bugs, vine borers, powdery mildew, and fusarium wilt. To prevent pest and disease problems, choose disease-resistant watermelon varieties, practice crop rotation, and keep your garden clean and free of debris. Inspect your watermelon plants regularly for signs of pests or diseases and take action promptly if you notice any problems. Organic pest control methods, such as insecticidal soap and neem oil, can be effective for controlling many common watermelon pests.
Can I grow watermelons in containers?
Yes, you can grow watermelons in containers, but you’ll need to choose a large container (at least 20 gallons) and select a bush or dwarf watermelon variety. Use a high-quality potting mix and provide regular watering and fertilization. Container-grown watermelons may require more frequent watering and fertilization than watermelons grown in the ground.
What are some good companion plants for watermelons?
Companion planting can help to deter pests, attract pollinators, and improve the overall health of your watermelon plants. Some good companion plants for watermelons include marigolds, nasturtiums, basil, oregano, and rosemary. These plants can help to repel aphids, squash bugs, and other common watermelon pests. Sunflowers and zinnias can attract pollinators, such as bees and butterflies, which are essential for watermelon fruit production.
How can I prevent my watermelons from cracking?
Watermelon cracking, also known as splitting, can occur when the fruits experience sudden changes in moisture levels. To prevent cracking, water your watermelons consistently and avoid letting the soil dry out completely. Mulching around the plants can help to retain moisture in the soil. Also, avoid over-fertilizing your watermelons, as this can also contribute to cracking.
What should I do with my watermelon rinds?
Don’t throw away your watermelon rinds! Watermelon rinds are edible and can be used in a variety of creative ways. You can pickle them, candy them, or use them to make a refreshing watermelon rind gazpacho. Watermelon rinds are also a good source of nutrients, including vitamins A and C, as well as fiber.
Leave a Comment