
Harvest Malabar Spinach at Home: Imagine stepping into your backyard and plucking fresh, vibrant leaves for a delicious and nutritious meal. No grocery store trips, no questionable origins – just pure, homegrown goodness! That’s the magic of growing your own Malabar spinach, and I’m here to show you how easy it is to reap the rewards of your leafy greens.
Malabar spinach, also known as Basella alba, isn’t actually a true spinach, but a climbing vine with succulent leaves that have been enjoyed for centuries in Asian and African cuisines. Its history is rich, with evidence suggesting its cultivation dates back to ancient times. Today, it’s gaining popularity worldwide, and for good reason! It’s incredibly easy to grow, thrives in warm weather, and offers a continuous harvest throughout the growing season.
But when is the right time to harvest Malabar spinach at home? Knowing when and how to harvest properly is crucial for maximizing your yield and ensuring the plant continues to produce those delicious leaves. Many people struggle with knowing when the leaves are at their peak flavor and how to harvest without damaging the plant. This DIY guide will provide you with simple, step-by-step instructions and insider tips to ensure you get the most out of your Malabar spinach plant. I’ll walk you through everything you need to know, from identifying the perfect leaves to the best harvesting techniques, so you can enjoy a bountiful harvest all season long!
Malabar Spinat Ernten: Dein DIY-Leitfaden für eine reiche Ernte
Hallo liebe Gartenfreunde! Ich freue mich, euch heute zu zeigen, wie ihr euren Malabar Spinat (auch bekannt als Ceylon Spinat oder Indischer Spinat) zu Hause ernten könnt. Es ist einfacher als ihr denkt und mit ein paar Tipps und Tricks werdet ihr bald eine üppige Ernte genießen können. Malabar Spinat ist nicht nur lecker, sondern auch super gesund und eine tolle Ergänzung für euren Garten. Los geht’s!
Was du für die Malabar Spinat Ernte brauchst
Bevor wir loslegen, hier eine kurze Liste der Dinge, die du für die Ernte deines Malabar Spinats benötigst:
* Eine scharfe Schere oder Gartenschere
* Einen Korb oder eine Schüssel für die Ernte
* Eventuell Gartenhandschuhe (optional, aber empfehlenswert)
Wann ist der richtige Zeitpunkt für die Ernte?
Der richtige Zeitpunkt für die Ernte ist entscheidend für den Geschmack und die weitere Entwicklung deiner Pflanze. Hier sind ein paar Anhaltspunkte:
* Größe der Blätter: Die Blätter sollten mindestens 10-15 cm groß sein. Kleinere Blätter sind zwar auch essbar, aber die größeren Blätter haben mehr Geschmack und Substanz.
* Reife der Pflanze: Malabar Spinat kann etwa 60-70 Tage nach der Aussaat geerntet werden.
* Regelmäßige Ernte: Je öfter du erntest, desto mehr wird die Pflanze dazu angeregt, neue Triebe und Blätter zu bilden. Das ist wie ein kleiner Ansporn für sie!
* Vermeide die Blüte: Wenn die Pflanze anfängt zu blühen, kann das die Blattproduktion reduzieren und den Geschmack beeinträchtigen. Also, rechtzeitig ernten!
Schritt-für-Schritt Anleitung zur Malabar Spinat Ernte
Jetzt kommt der spannende Teil: Die eigentliche Ernte! Folge diesen Schritten, um sicherzustellen, dass du deinen Malabar Spinat optimal erntest:
1. Vorbereitung: Zieh deine Gartenhandschuhe an (wenn du welche benutzt) und nimm deine Schere oder Gartenschere zur Hand. Stelle deinen Korb oder deine Schüssel bereit, damit du die geernteten Blätter direkt hineinlegen kannst.
2. Auswahl der Blätter: Suche dir die größten und reifsten Blätter aus. Achte darauf, dass sie gesund aussehen und keine Anzeichen von Schädlingsbefall oder Krankheiten aufweisen.
3. Schneiden der Blätter: Schneide die Blätter etwa 2-3 cm über dem Hauptstamm ab. Das fördert das Wachstum neuer Triebe und Blätter. Achte darauf, einen sauberen Schnitt zu machen, um die Pflanze nicht zu verletzen.
4. Ernte der Triebspitzen: Du kannst auch die Triebspitzen ernten. Schneide einfach die obersten 10-15 cm der Triebe ab. Das regt die Pflanze an, sich zu verzweigen und buschiger zu werden.
5. Regelmäßige Ernte: Ernte deinen Malabar Spinat regelmäßig, etwa alle 1-2 Wochen. Das hält die Pflanze produktiv und sorgt für eine kontinuierliche Ernte.
6. Kontrolle der Pflanze: Während der Ernte solltest du die Pflanze auch auf Schädlinge oder Krankheiten überprüfen. Wenn du etwas Ungewöhnliches entdeckst, solltest du sofort Maßnahmen ergreifen, um das Problem zu beheben.
Tipps und Tricks für eine erfolgreiche Ernte
Hier sind noch ein paar zusätzliche Tipps, die dir helfen werden, das Beste aus deiner Malabar Spinat Ernte herauszuholen:
* Ernte am Morgen: Am besten erntest du deinen Malabar Spinat am Morgen, nachdem der Tau getrocknet ist. Dann sind die Blätter am frischesten und knackigsten.
* Bewässerung: Achte darauf, dass deine Pflanze ausreichend bewässert ist, besonders während der Erntezeit. Trockenheit kann die Blattproduktion reduzieren und den Geschmack beeinträchtigen.
* Düngung: Dünge deinen Malabar Spinat regelmäßig mit einem organischen Dünger. Das sorgt für ein gesundes Wachstum und eine reiche Ernte.
* Sonneneinstrahlung: Malabar Spinat liebt die Sonne! Stelle sicher, dass deine Pflanze mindestens 6 Stunden Sonnenlicht pro Tag bekommt.
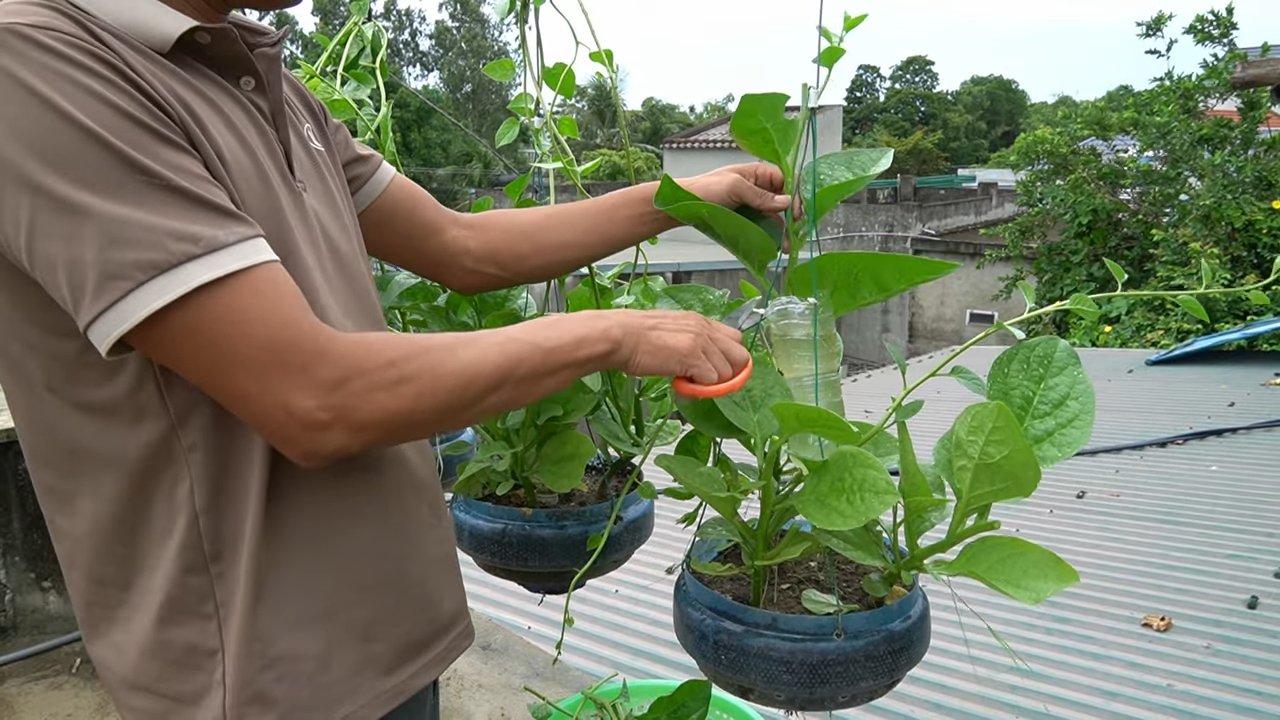
* Unterstützung: Da Malabar Spinat eine Kletterpflanze ist, benötigt sie eine Rankhilfe. Du kannst ein Spalier, einen Zaun oder ein anderes geeignetes Gerüst verwenden.
Was du mit deiner Malabar Spinat Ernte machen kannst
Nach der Ernte stellt sich natürlich die Frage: Was mache ich jetzt mit all dem leckeren Malabar Spinat? Hier sind ein paar Ideen:
* Frischer Verzehr: Malabar Spinat kann roh in Salaten gegessen werden. Die Blätter haben einen leicht säuerlichen Geschmack, der gut zu anderen Gemüsesorten passt.
* Gekocht: Du kannst Malabar Spinat auch kochen, dünsten oder braten. Er eignet sich hervorragend für Suppen, Eintöpfe, Currys und Pfannengerichte.
* Smoothies: Füge ein paar Blätter Malabar Spinat zu deinem Smoothie hinzu, um ihn mit zusätzlichen Nährstoffen anzureichern.
* Lagerung: Malabar Spinat ist nicht sehr lange haltbar. Am besten verbrauchst du ihn innerhalb von 1-2 Tagen nach der Ernte. Du kannst ihn aber auch einfrieren, um ihn länger haltbar zu machen.
Häufige Probleme und Lösungen
Manchmal gibt es bei der Malabar Spinat Ernte Probleme. Hier sind ein paar häufige Probleme und wie du sie lösen kannst:
* Gelbe Blätter: Gelbe Blätter können ein Zeichen für Nährstoffmangel oder Überwässerung sein. Überprüfe die Bewässerung und dünge die Pflanze gegebenenfalls.
* Schädlinge: Malabar Spinat kann von Blattläusen, Schnecken oder anderen Schädlingen befallen werden. Verwende natürliche Schädlingsbekämpfungsmittel, um die Schädlinge zu bekämpfen.
* Krankheiten: Malabar Spinat kann von Pilzkrankheiten befallen werden. Sorge für eine gute Belüftung und vermeide Staunässe, um Krankheiten vorzubeugen.
Zusätzliche Tipps für den Anbau von Malabar Spinat
Hier sind noch ein paar zusätzliche Tipps, die dir helfen werden, deinen Malabar Spinat erfolgreich anzubauen:
* Aussaat: Du kannst Malabar Spinat direkt ins Freiland säen oder ihn in Töpfen vorziehen. Die Samen sollten vor der Aussaat 24 Stunden in Wasser eingeweicht werden, um die Keimung zu beschleunigen.
* Standort: Malabar Spinat bevorzugt einen sonnigen Standort mit gut durchlässigem Boden.
* Boden: Der Boden sollte reich an organischen Stoffen sein. Du kannst Kompost oder andere organische Materialien in den Boden einarbeiten, um ihn zu verbessern.
* Bewässerung: Malabar Spinat benötigt regelmäßige Bewässerung, besonders während der heißen Sommermonate.
* Düngung: Dünge deinen Malabar Spinat regelmäßig mit einem organischen Dünger, um ein gesundes Wachstum zu fördern.
Fazit
Ich hoffe, dieser Leitfaden hat dir geholfen, deinen Malabar Spinat erfolgreich zu ernten. Mit ein wenig Geduld und Sorgfalt wirst du bald eine reiche Ernte genießen können. Viel Spaß beim Gärtnern und guten Appetit!

Conclusion
So, there you have it! Harvesting Malabar spinach at home is not only incredibly rewarding but also surprisingly simple. We’ve walked you through the entire process, from identifying the right time to harvest to ensuring you’re doing it in a way that encourages continued growth. Why is this a must-try? Because nothing beats the taste and freshness of homegrown produce. Store-bought spinach, even the organic varieties, simply can’t compare to the vibrant flavor and crisp texture of Malabar spinach picked straight from your own garden. Plus, you’re reducing your carbon footprint and saving money – a win-win for you and the planet!
But the benefits extend beyond just taste and cost. Growing your own food connects you to nature in a profound way. It’s a therapeutic activity that can reduce stress and improve your overall well-being. And let’s not forget the satisfaction of knowing exactly where your food comes from and what’s gone into growing it. No pesticides, no hidden ingredients, just pure, unadulterated goodness.
Now, let’s talk about variations and suggestions. While we’ve focused on the standard method of harvesting, feel free to experiment! If you prefer smaller, more tender leaves, harvest them more frequently. If you want larger, more mature leaves for stir-fries or soups, let them grow a bit longer. You can also try different pruning techniques to encourage bushier growth and maximize your yield. Some gardeners even train their Malabar spinach to grow vertically on trellises or fences, creating a beautiful and productive living wall.
Consider companion planting to further enhance your Malabar spinach harvest. Basil, tomatoes, and peppers are all excellent companions that can help deter pests and improve the overall health of your plants. And don’t forget to regularly fertilize your Malabar spinach with a balanced organic fertilizer to ensure it has the nutrients it needs to thrive.
Don’t be afraid to experiment with different recipes too! Malabar spinach is incredibly versatile and can be used in a wide variety of dishes. Try it in salads, stir-fries, soups, stews, or even smoothies. Its slightly mucilaginous texture makes it a great thickening agent for soups and stews. You can even use it as a substitute for spinach in your favorite recipes.
We truly believe that anyone can successfully harvest Malabar spinach at home, regardless of their gardening experience. All it takes is a little bit of knowledge, a little bit of effort, and a whole lot of enthusiasm. So, what are you waiting for? Grab your gardening gloves, head out to your garden, and start harvesting!
We’re confident that you’ll be amazed by the results. And we’d love to hear about your experience! Share your tips, tricks, and recipes in the comments below. Let’s create a community of Malabar spinach enthusiasts and inspire others to grow their own food. Happy harvesting! Remember, mastering the art of harvest Malabar spinach is a journey, and we’re here to support you every step of the way.
Frequently Asked Questions (FAQ)
Q: How do I know when my Malabar spinach is ready to harvest?
A: The best time to harvest Malabar spinach is when the leaves are about 4-6 inches long. They should be a vibrant green color and feel firm to the touch. Avoid harvesting leaves that are yellowing or have any signs of damage. You can also harvest the tender stems along with the leaves. The plant is generally ready for its first harvest about 60-70 days after planting. Regular harvesting encourages more growth, so don’t be shy about picking those leaves!
Q: Can I harvest all the leaves at once, or should I do it gradually?
A: It’s best to harvest Malabar spinach gradually, taking only the leaves and stems that you need. This allows the plant to continue growing and producing new leaves. If you harvest all the leaves at once, the plant may take longer to recover and produce new growth. Think of it as giving your plant a haircut – you want to trim it, not shave it bald! Aim to harvest about one-third of the plant at a time to ensure continued productivity.
Q: How often should I harvest my Malabar spinach?
A: You can harvest Malabar spinach as often as every few days, depending on how quickly it’s growing. The more you harvest, the more the plant will produce. A good rule of thumb is to harvest whenever the leaves reach the desired size. Regular harvesting also helps to prevent the plant from becoming too leggy and encourages bushier growth.
Q: What’s the best way to store harvested Malabar spinach?
A: To store harvested Malabar spinach, rinse the leaves thoroughly and pat them dry with a paper towel. Then, wrap them loosely in a paper towel and store them in a plastic bag in the refrigerator. This will help to keep them fresh for up to a week. Avoid storing them in a sealed container, as this can cause them to wilt and spoil more quickly.
Q: My Malabar spinach is growing very slowly. What can I do to encourage more growth?
A: There are several things you can do to encourage more growth in your Malabar spinach. First, make sure it’s getting enough sunlight. Malabar spinach needs at least 6 hours of sunlight per day to thrive. Second, fertilize it regularly with a balanced organic fertilizer. Third, make sure the soil is well-drained and rich in organic matter. Fourth, water it regularly, especially during hot, dry weather. Finally, check for pests and diseases and take appropriate action if necessary.
Q: Can I grow Malabar spinach in a container?
A: Yes, you can definitely grow Malabar spinach in a container! Choose a large container that is at least 12 inches in diameter and has good drainage holes. Use a high-quality potting mix that is rich in organic matter. Water regularly and fertilize every few weeks. You may also need to provide support for the plant to climb on, such as a trellis or stake.
Q: Is Malabar spinach the same as regular spinach?
A: No, Malabar spinach is not the same as regular spinach. While they share a similar flavor profile, they are actually different plants. Malabar spinach is a tropical vine, while regular spinach is a leafy green vegetable. Malabar spinach is also more heat-tolerant than regular spinach, making it a great option for gardeners in warmer climates. It also has a slightly thicker, more succulent leaf.
Q: My Malabar spinach leaves are turning yellow. What could be the problem?
A: Yellowing leaves on Malabar spinach can be caused by several factors, including overwatering, underwatering, nutrient deficiencies, or pests and diseases. Check the soil moisture to make sure you’re not overwatering or underwatering. Fertilize with a balanced organic fertilizer to address any nutrient deficiencies. Inspect the leaves for pests or diseases and take appropriate action if necessary.
Q: Can I eat the flowers and seeds of Malabar spinach?
A: While the leaves and stems are the primary edible parts of the Malabar spinach plant, the flowers and young seed pods are also edible. The flowers can be added to salads or used as a garnish. The young seed pods can be cooked like green beans. However, it’s important to note that the seeds of Malabar spinach contain saponins, which can be toxic in large quantities. Therefore, it’s best to consume the seeds in moderation.
Q: How can I propagate Malabar spinach?
A: Malabar spinach can be easily propagated from stem cuttings. Simply take a 4-6 inch stem cutting from a healthy plant and remove the lower leaves. Dip the cut end in rooting hormone and plant it in a pot filled with moist potting mix. Keep the soil moist and place the pot in a warm, sunny location. The cutting should root within a few weeks. You can also propagate Malabar spinach from seeds, but it’s generally easier and faster to propagate from stem cuttings.
Leave a Comment