
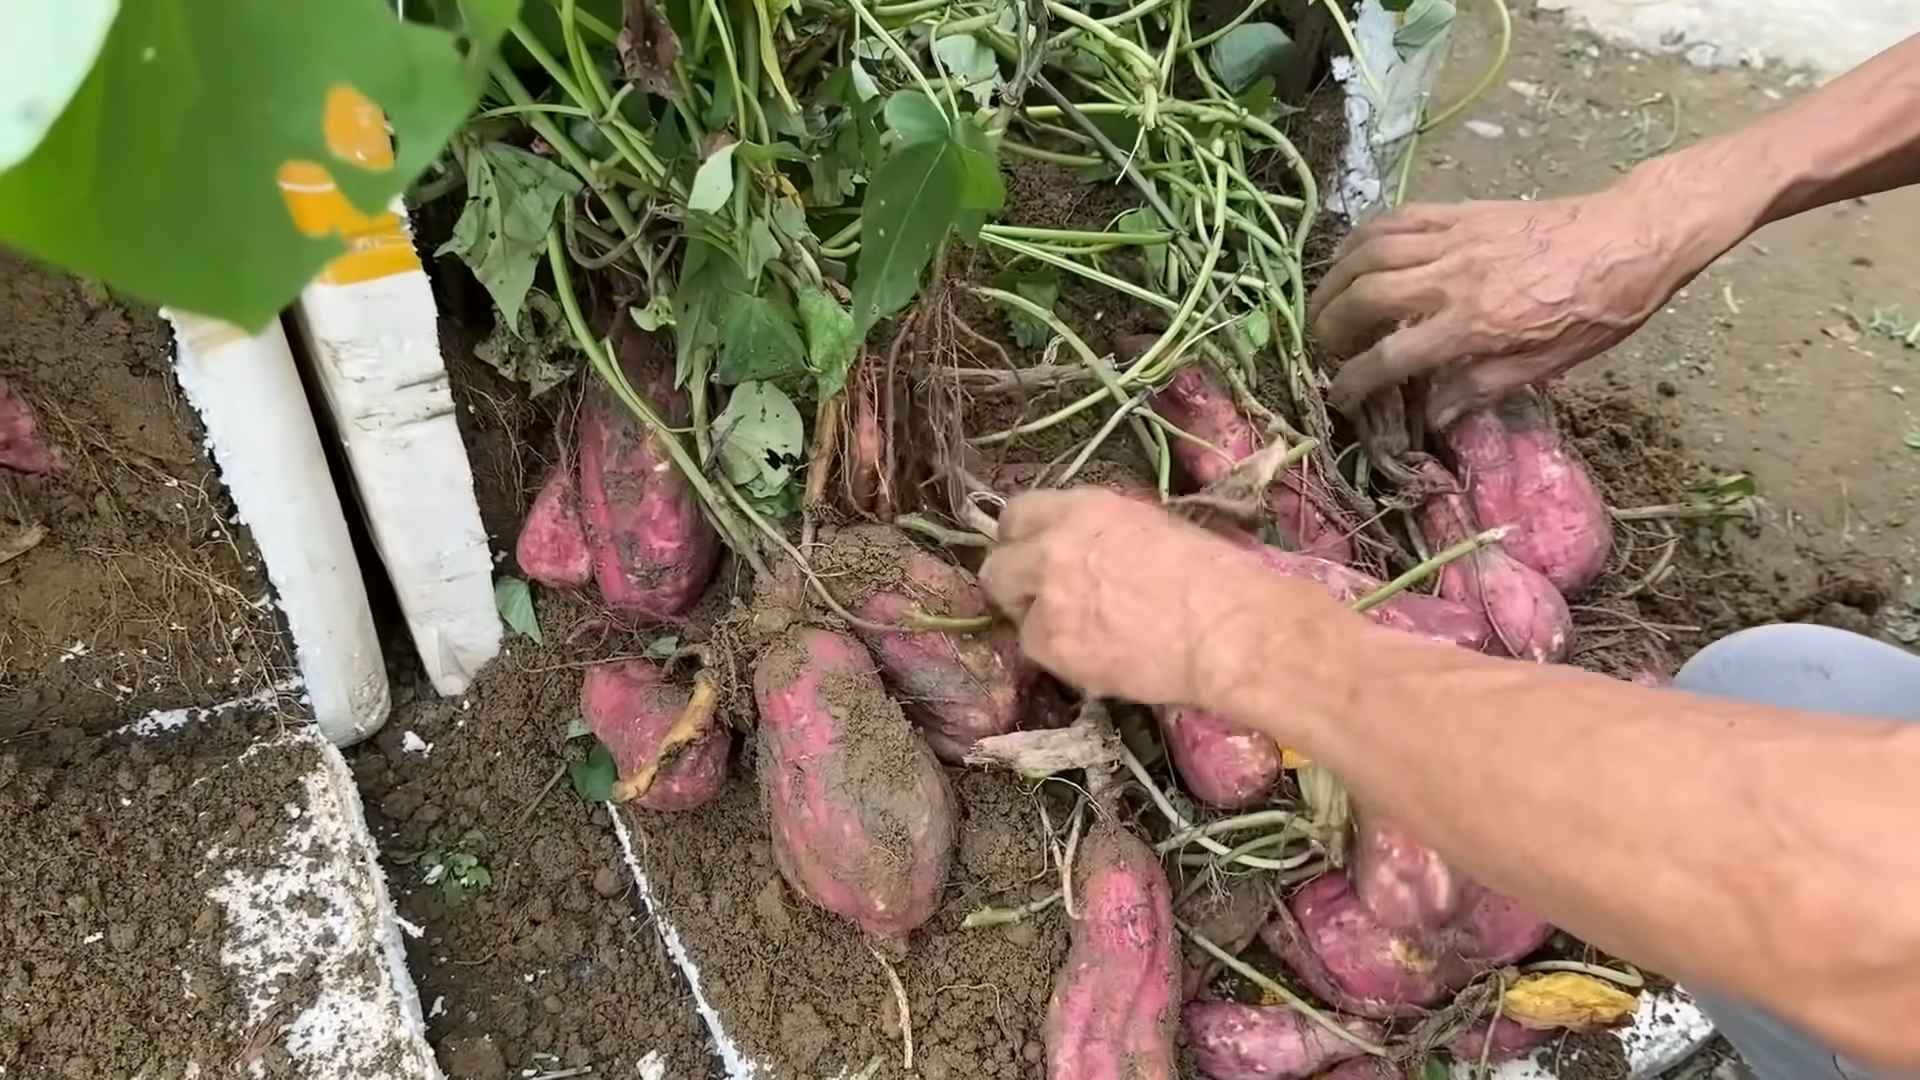
Harvest Sweet Potatoes Hack: Are you ready to unearth a treasure trove of homegrown goodness? Imagine pulling vibrant, sweet potatoes straight from your backyard, ready to be transformed into delicious meals. But what if I told you there’s a simple trick to ensure a bountiful harvest, even if you’re a beginner gardener?
Sweet potatoes, with their rich history rooted in Central and South America, have been cultivated for thousands of years. They’ve nourished civilizations and continue to be a staple in cuisines worldwide. Beyond their culinary appeal, growing your own sweet potatoes connects you to this rich agricultural heritage.
Now, you might be thinking, “Sweet potatoes? That sounds complicated!” But fear not! This DIY guide is designed to demystify the process and equip you with a game-changing harvest sweet potatoes hack. We’ll walk you through a simple, yet effective technique that will maximize your yield and minimize the risk of damaging your precious crop.
Why is this hack so important? Because knowing when and how to harvest sweet potatoes correctly can be the difference between a successful harvest and a disappointing one. Improper harvesting can lead to damaged potatoes, reduced storage life, and ultimately, a smaller yield. So, let’s dive in and unlock the secrets to a sweet potato harvest you’ll be proud of!
DIY Sweet Potato Harvest Basket: From Garden to Table with Ease
Okay, sweet potato lovers! Are you ready to harvest your homegrown bounty without breaking your back or damaging those precious tubers? I’ve got just the DIY project for you: a sweet potato harvest basket that makes digging up your crop a breeze. This isn’t just any basket; it’s designed to gently lift the sweet potatoes from the soil, minimizing bruising and maximizing your harvest. Let’s get started!
Materials You’ll Need:
* A sturdy plastic crate (approximately 12″ x 18″ x 10″ deep works well) – I found mine at a local hardware store.
* Heavy-duty wire mesh (1/2 inch or 1 inch grid) – This will form the bottom of the basket and allow soil to fall through.
* Heavy-duty work gloves – Protect those hands!
* Wire cutters – For cutting the wire mesh.
* Pliers – For bending and securing the wire mesh.
* Zip ties (heavy-duty) – To attach the mesh to the crate.
* A long, sturdy wooden handle (broom handle or similar) – This will be your leverage point.
* Two U-bolts with nuts and washers – To attach the handle to the crate.
* Drill with drill bits – For creating holes for the U-bolts.
* Measuring tape or ruler – For accurate measurements.
* Marker or pen – For marking cutting lines.
* Safety glasses – Always protect your eyes!
* Optional: Padding material (foam or rubber) – To protect the crate edges and sweet potatoes.
Planning and Preparation:
Before we dive into the construction, let’s talk planning. The key to a successful harvest basket is ensuring it’s the right size and shape for your sweet potato plants and garden layout.
* Measure Your Rows: Take measurements of the width of your sweet potato rows. You want the basket to be slightly narrower than the row width so you can easily maneuver it.
* Crate Selection: Choose a crate that’s deep enough to accommodate the size of your sweet potatoes. A shallower crate might work for smaller varieties, but a deeper one is generally better.
* Handle Length: Consider the length of the handle. A longer handle provides more leverage, but it can also be more cumbersome to use. I find a handle around 4-5 feet long to be ideal.
* Safety First: Always wear safety glasses and gloves when working with wire mesh and power tools.
Step-by-Step Construction:
Now for the fun part! Let’s build this harvest basket.
1. Preparing the Crate:
1. Clean the Crate: Give your plastic crate a good cleaning to remove any dirt or debris. This will make it easier to work with.
2. Mark Handle Placement: Decide where you want to attach the handle to the crate. I recommend placing it on one of the longer sides, near the top edge. Mark the locations for the U-bolt holes. Ensure the handle will be centered and balanced.
3. Drill U-Bolt Holes: Using your drill and a drill bit slightly larger than the U-bolt diameter, carefully drill the holes you marked. Be cautious not to crack the plastic.
4. Optional Padding: If you’re using padding material, now’s the time to apply it to the top edges of the crate. This will help prevent bruising of the sweet potatoes as you lift them. You can use adhesive-backed foam or rubber strips.
2. Creating the Wire Mesh Bottom:
1. Measure and Cut the Mesh: Measure the inside dimensions of the crate bottom. Add an extra inch or two to each side for overlap. Using your wire cutters, carefully cut the wire mesh to the required size. Remember to wear your gloves!
2. Bend the Edges: Using your pliers, bend the edges of the wire mesh downwards to create a lip. This will help secure the mesh to the crate and prevent sharp edges from scratching the sweet potatoes.
3. Secure the Mesh: Place the wire mesh inside the crate, ensuring the bent edges are facing down. Use zip ties to secure the mesh to the crate. Start by attaching the mesh at the corners, then add zip ties along the sides, spacing them a few inches apart. Make sure the zip ties are tight and trim off any excess length.
3. Attaching the Handle:
1. Position the Handle: Place the wooden handle against the outside of the crate, aligning it with the holes you drilled earlier.
2. Attach the U-Bolts: Insert the U-bolts through the holes in the crate and around the handle. Secure them with the washers and nuts. Tighten the nuts firmly, but be careful not to overtighten and crack the plastic.
3. Test the Handle: Give the handle a good test to make sure it’s securely attached and can withstand some weight.
4. Final Touches:
1. Inspect for Sharp Edges: Carefully inspect the entire basket for any sharp edges or protruding wires. Use pliers to bend them inwards or cover them with tape.
2. Reinforce if Needed: If you feel the basket needs additional reinforcement, you can add more zip ties or even use metal brackets to secure the handle.
3. Give it a Test Run: Before heading to the garden, give your basket a test run with some heavy objects to make sure it’s sturdy and balanced.
Using Your Sweet Potato Harvest Basket:
Alright, your harvest basket is ready! Here’s how to use it effectively:
1. Prepare the Area: Clear any weeds or debris from around your sweet potato plants.
2. Position the Basket: Carefully position the basket over the sweet potato plant, centering the plant within the basket.
3. Insert the Basket: Gently push the basket down into the soil, using the handle for leverage. Try to keep the basket level to avoid damaging the sweet potatoes.
4. Lift and Separate: Once the basket is deep enough, use the handle to lift the basket and the sweet potatoes out of the ground. The wire mesh bottom will allow the soil to fall through, leaving the sweet potatoes in the basket.
5. Remove the Sweet Potatoes: Carefully remove the sweet potatoes from the basket and place them in a separate container or basket.
6. Repeat: Repeat the process for each sweet potato plant.
Tips for a Successful Harvest:
* Harvest on a Dry Day: Harvesting sweet potatoes on a dry day will help prevent rot and disease.
* Handle with Care: Sweet potatoes are delicate and can bruise easily. Handle them with care to avoid damaging them.
* Curing is Key: After harvesting, cure your sweet potatoes in a warm, humid place for about a week to allow the skins to harden. This will improve their flavor and storage life. I usually use my garage for this, making sure it stays around 80-85 degrees Fahrenheit with high humidity.
* Proper Storage: Store cured sweet potatoes in a cool, dry, and dark place. They should last for several months.
* Don’t Wash Immediately: Avoid washing the sweet potatoes until you’re ready to use them. Washing them before curing or storing can promote rot.
* Consider Soil Type: If you have very heavy clay soil, you might need to loosen the soil around the plants before using the basket. A garden fork can help with this.
* Adjust Basket Depth: Depending on the size and depth of your sweet potatoes, you might need to adjust how deep you push the basket into the ground.
* Observe and Adapt: Pay attention to how the basket is working and make adjustments as needed. You might find that a slightly different technique works better for your specific plants and soil conditions.
Troubleshooting:
* Basket is Too Heavy: If the basket is too heavy to lift comfortably, try removing some of the soil around the plant before inserting the basket.
* Sweet Potatoes are Damaged: If you’re damaging the sweet potatoes, try padding the edges of the basket more thoroughly. Also, be more gentle when inserting and lifting the basket.
* Handle is Unstable: If the handle feels unstable, reinforce it with additional U-bolts or metal brackets.
* Mesh is Tearing: If the wire mesh is tearing, use a heavier gauge mesh or reinforce it with additional zip ties.
Why This DIY Basket is Awesome:
* Reduces Back Strain: The handle provides leverage, making it easier to lift the sweet potatoes without straining your back.
* Minimizes Bruising: The basket gently lifts the sweet potatoes from the soil, reducing the risk of bruising.
* Saves Time: The basket allows you to harvest multiple sweet potatoes at once, saving you time and effort.
* Cost-Effective: Building your own harvest basket is much cheaper than buying a commercially made one.
* Custom
Conclusion
So, there you have it! This simple yet incredibly effective DIY trick for harvesting sweet potatoes is a game-changer for any gardener, whether you’re a seasoned pro or just starting out. We’ve walked you through the process, highlighting how this method minimizes damage to your precious sweet potato crop, ensuring a bountiful and bruise-free harvest.
Why is this a must-try? Because it’s all about maximizing your yield and minimizing waste. Traditional digging methods often result in nicked, cut, or otherwise damaged sweet potatoes, which not only reduces their storage life but also diminishes their overall quality. This DIY approach, focusing on careful loosening and gentle lifting, dramatically reduces the risk of injury, allowing you to enjoy the fruits (or rather, vegetables!) of your labor for months to come.
But don’t think this is a one-size-fits-all solution. Feel free to experiment and adapt the technique to suit your specific garden conditions and sweet potato variety. For instance, if you’re dealing with particularly heavy clay soil, you might consider using a garden fork with wider tines to loosen the soil more effectively before attempting to lift the sweet potatoes. Alternatively, if you’re growing a variety with exceptionally long and sprawling roots, you might need to excavate a slightly wider area around the plant to avoid accidentally breaking any of the tubers.
Consider these variations to further enhance your sweet potato harvesting experience:
* Companion Planting Considerations: If you’ve interplanted your sweet potatoes with companion plants like beans or marigolds, be extra cautious when loosening the soil to avoid disturbing their root systems. A hand trowel might be a better option in these situations, allowing for more precise excavation.
* Timing is Everything: While we’ve emphasized the importance of waiting until after the first frost to harvest, keep a close eye on the weather forecast. If an unusually early and severe frost is predicted, it’s better to err on the side of caution and harvest your sweet potatoes a bit earlier, even if the vines haven’t completely died back.
* Curing for Longevity: Remember that proper curing is crucial for extending the storage life of your sweet potatoes. After harvesting, gently brush off any excess soil (avoid washing them) and place them in a warm, humid environment (around 80-85°F and 85-90% humidity) for about a week to ten days. This allows the skins to harden and any minor cuts or bruises to heal, preventing rot and spoilage.
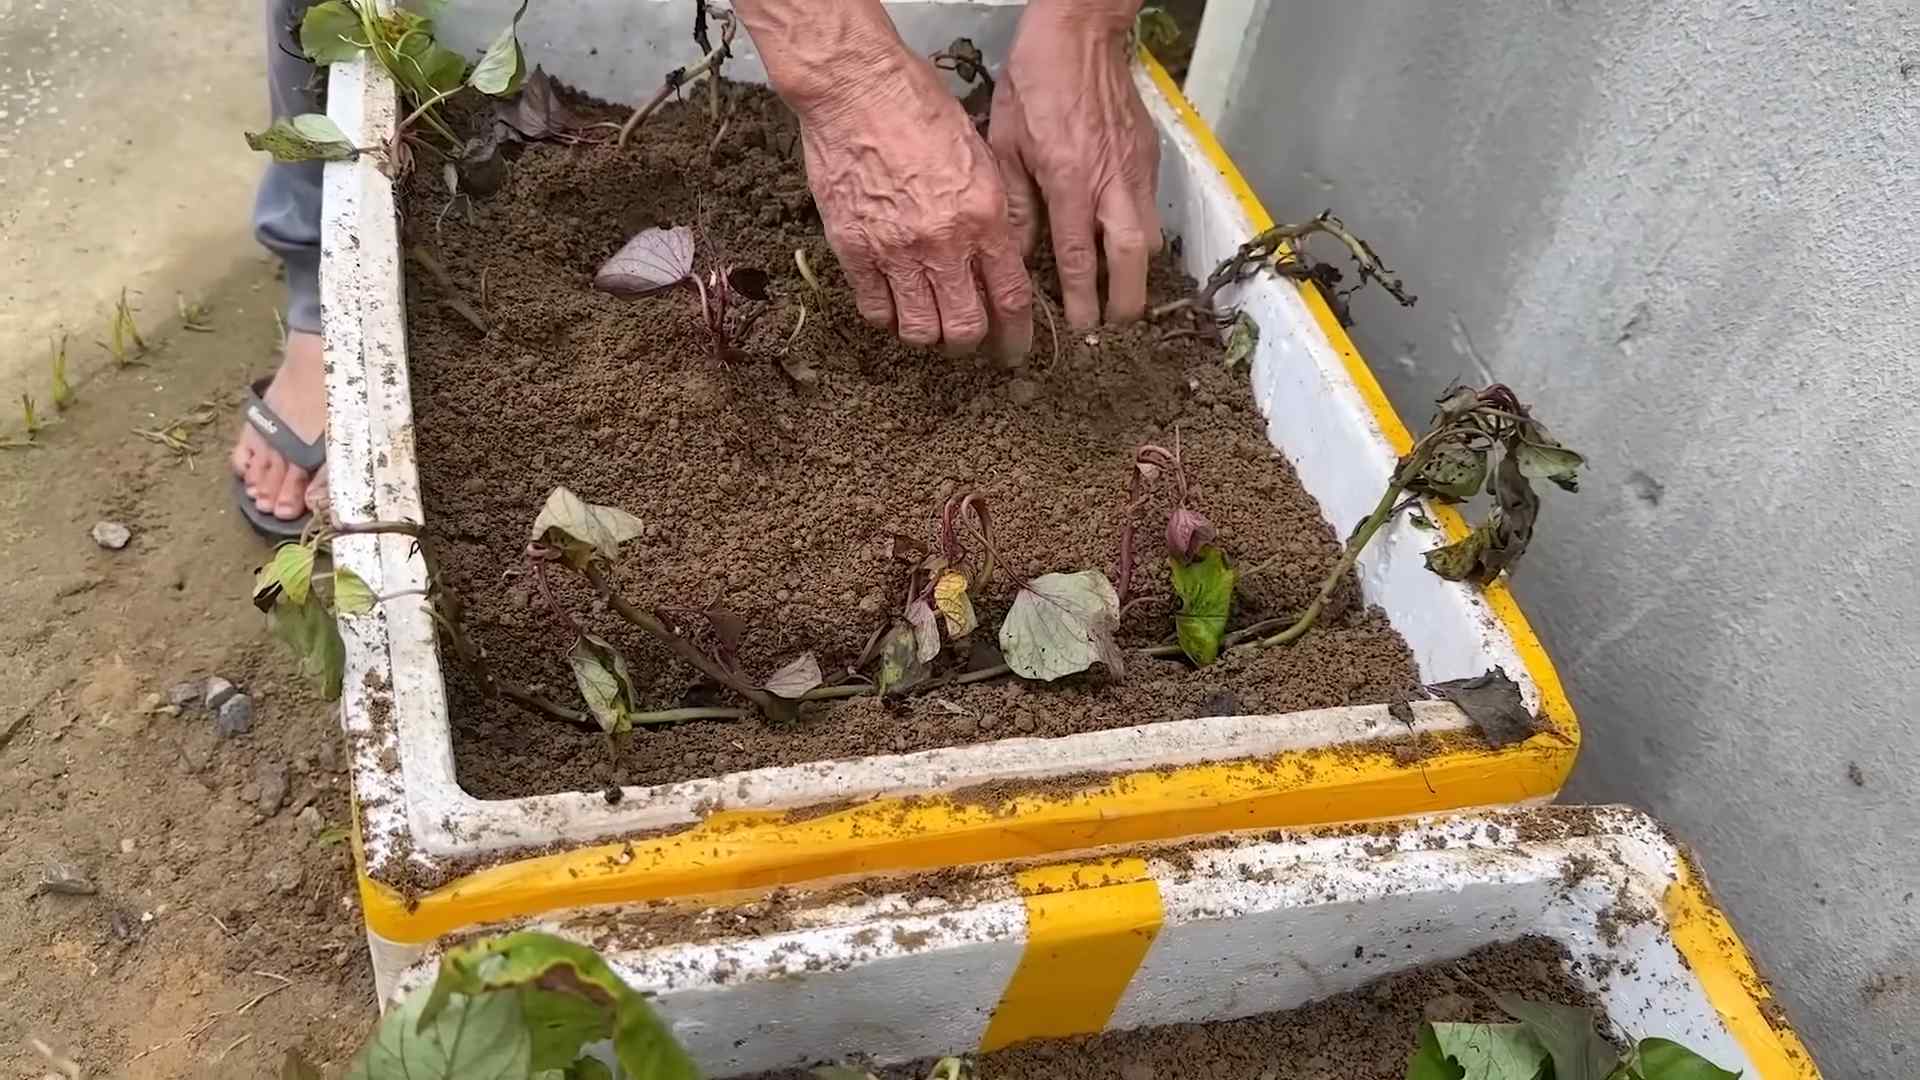
* Soil Amendments: Before planting next year’s crop, consider amending your soil with plenty of organic matter, such as compost or well-rotted manure. This will improve drainage and aeration, making it easier to harvest your sweet potatoes in the future.
Ultimately, the best way to perfect this DIY trick is to try it yourself and see what works best for you. We’re confident that you’ll be amazed at the difference it makes in the quality and quantity of your sweet potato harvest.
So, grab your gardening tools, head out to your sweet potato patch, and give this method a try. We’re eager to hear about your experiences! Share your tips, tricks, and photos in the comments below. Let’s build a community of sweet potato enthusiasts who are dedicated to maximizing their harvests and enjoying the delicious rewards of their hard work. Happy harvesting, and may your sweet potatoes be plentiful and perfect! Don’t forget to use this harvest sweet potatoes hack to get the best results.
Frequently Asked Questions (FAQ)
Q: When is the best time to harvest my sweet potatoes?
A: The ideal time to harvest sweet potatoes is typically in the fall, after the first light frost has killed back the vines. This signals that the plant has stopped producing and the sweet potatoes are ready to be dug up. However, it’s crucial to harvest before a hard freeze, as this can damage the tubers and reduce their storage life. Keep a close eye on the weather forecast and be prepared to harvest earlier if necessary.
Q: How do I know if my sweet potatoes are ready to harvest?
A: Besides the vines dying back after a light frost, there are a few other indicators that your sweet potatoes are ready for harvest. You can carefully dig around the base of one plant and check the size of the tubers. They should be a good size, depending on the variety you’re growing. Also, the skin should be firm and well-formed. If the skin is still thin and easily rubs off, the sweet potatoes may need more time to mature.
Q: What tools do I need for this DIY harvesting trick?
A: You’ll need a few basic gardening tools:
* A garden fork or spade: This is used to gently loosen the soil around the sweet potato plants. Choose a tool with wide tines to minimize the risk of damaging the tubers.
* A hand trowel: This is helpful for more precise excavation, especially if you’re working around companion plants or in tight spaces.
* Gardening gloves: To protect your hands from dirt and potential scratches.
* A clean, dry container: For collecting your harvested sweet potatoes.
* Pruning shears or a knife: To cut the vines away from the sweet potatoes before lifting them.
Q: Can I wash my sweet potatoes after harvesting them?
A: It’s generally not recommended to wash sweet potatoes immediately after harvesting. Washing can remove the protective layer of soil and increase the risk of rot and spoilage during curing. Instead, gently brush off any excess soil with your hands or a soft brush. If the sweet potatoes are particularly muddy, you can lightly rinse them with water, but be sure to dry them thoroughly before curing.
Q: How do I cure my sweet potatoes after harvesting?
A: Curing is an essential step in preserving sweet potatoes and extending their storage life. To cure your sweet potatoes, follow these steps:
1. Gently brush off any excess soil from the sweet potatoes.
2. Place them in a warm, humid environment (around 80-85°F and 85-90% humidity) for about a week to ten days. A greenhouse, a warm garage, or even a well-ventilated bathroom can work.
3. Ensure good air circulation around the sweet potatoes to prevent mold growth.
4. After curing, store the sweet potatoes in a cool, dry, and dark place (around 55-60°F) for long-term storage.
Q: How long can I store sweet potatoes after harvesting and curing?
A: Properly cured and stored sweet potatoes can last for several months, typically 4-7 months. Check them periodically for signs of spoilage, such as soft spots or mold. Discard any sweet potatoes that show signs of decay.
Q: What if I accidentally damage a sweet potato during harvesting?
A: If you accidentally nick or cut a sweet potato during harvesting, it’s best to use it as soon as possible. Damaged sweet potatoes are more susceptible to rot and won’t store as well as undamaged ones. You can cook them immediately or freeze them for later use.
Q: Can I use this harvesting trick for other root vegetables?
A: While this DIY trick is specifically designed for harvesting sweet potatoes, the principles of gentle loosening and careful lifting can be applied to other root vegetables as well, such as potatoes, carrots, and beets. However, you may need to adjust the technique slightly depending on the size and shape of the vegetable.
Q: What should I do with the sweet potato vines after harvesting?
A: After harvesting your sweet potatoes, you can compost the vines or use them as mulch in your garden. They are a good source of organic matter and can help improve soil fertility.
Q: My sweet potatoes are different sizes. Will they all cure the same way?
A: Yes, sweet potatoes of different sizes can be cured together. However, it’s important to ensure that they all receive adequate air circulation and are exposed to the same temperature and humidity levels. Smaller sweet potatoes may cure slightly faster than larger ones, so keep an eye on them and adjust the curing time accordingly.

Leave a Comment