
Harvesting mini carrots at home is easier than you might think, and I’m here to show you how! Forget those bland, pre-packaged baby carrots from the store. Imagine popping a sweet, crunchy, perfectly-sized carrot straight from your own garden into your mouth. Sounds amazing, right?
For centuries, home gardens have been a source of sustenance and pride. From the elaborate kitchen gardens of medieval monasteries to the victory gardens of wartime, growing your own food connects you to a rich history of self-sufficiency and resourcefulness. And while large-scale farming has its place, there’s something incredibly satisfying about nurturing a plant from seed to harvest, especially when that harvest is as adorable and delicious as a mini carrot!
But why bother with mini carrots? Well, besides their undeniable cuteness, they’re perfect for snacking, lunchboxes, and adding a touch of elegance to your dishes. Plus, they mature faster than full-sized carrots, meaning you can enjoy a quicker turnaround from planting to plate. Many people struggle with the perceived difficulty of growing root vegetables, often facing issues like overcrowded rows or poor soil conditions. This DIY guide will provide you with simple, effective tricks and hacks to overcome these challenges and ensure a bountiful harvest of these delightful little veggies. So, let’s get our hands dirty and learn how to master harvesting mini carrots at home!
Growing Your Own Mini Carrots: A Step-by-Step Guide
Okay, so you want to grow your own adorable, bite-sized mini carrots? Awesome! It’s a surprisingly easy and rewarding project, perfect for small gardens, containers, or even just a sunny windowsill. I’m going to walk you through everything you need to know, from choosing the right seeds to harvesting your tiny treasures. Let’s get started!
Choosing the Right Carrot Variety
Not all carrots are created equal, especially when it comes to growing mini versions. You’ll want to look for specific varieties that are bred to be small and sweet. Here are a few of my favorites:
* ‘Thumbelina’: These are round, almost like little radishes, and super cute. They mature quickly, which is a bonus.
* ‘Paris Market’: Similar to Thumbelina, these are also round and perfect for containers.
* ‘Little Finger’: These are more traditionally carrot-shaped, but still small and slender.
* ‘Short n Sweet’: As the name suggests, these are short, sweet, and perfect for snacking.
Important Tip: Always check the seed packet for information on spacing and days to maturity. This will help you plan your planting and harvesting schedule.
Preparing the Soil
Carrots need loose, well-drained soil to thrive. Rocky or compacted soil will result in stunted or misshapen carrots. Here’s how I prepare my soil:
* Choose the Right Location: Carrots need at least 6 hours of sunlight per day.
* Test Your Soil: A soil test can tell you the pH level and nutrient content of your soil. Carrots prefer a slightly acidic soil (pH 6.0-6.8). You can buy a soil test kit at most garden centers.
* Amend the Soil: If your soil is heavy clay or sandy, you’ll need to amend it with organic matter. Compost, well-rotted manure, or peat moss are all great options.
* Loosen the Soil: Use a garden fork or tiller to loosen the soil to a depth of at least 12 inches. This will allow the carrot roots to grow easily.
* Remove Rocks and Debris: Carefully remove any rocks, stones, or other debris from the soil. Even small pebbles can interfere with carrot growth.
* Create Raised Beds (Optional): Raised beds are a great option for improving drainage and soil quality. They also make it easier to control weeds.
Planting the Seeds
Carrot seeds are tiny, so planting them can be a bit tricky. But don’t worry, I’ve got some tips to help you succeed:
1. Timing is Key: Carrots are a cool-season crop, so plant them in early spring or late summer. Check your local frost dates to determine the best time to plant. I usually plant mine about 2-3 weeks before the last expected frost in spring, and again in late summer for a fall harvest.
2. Create Shallow Furrows: Use a trowel or your finger to create shallow furrows in the soil, about 1/4 to 1/2 inch deep.
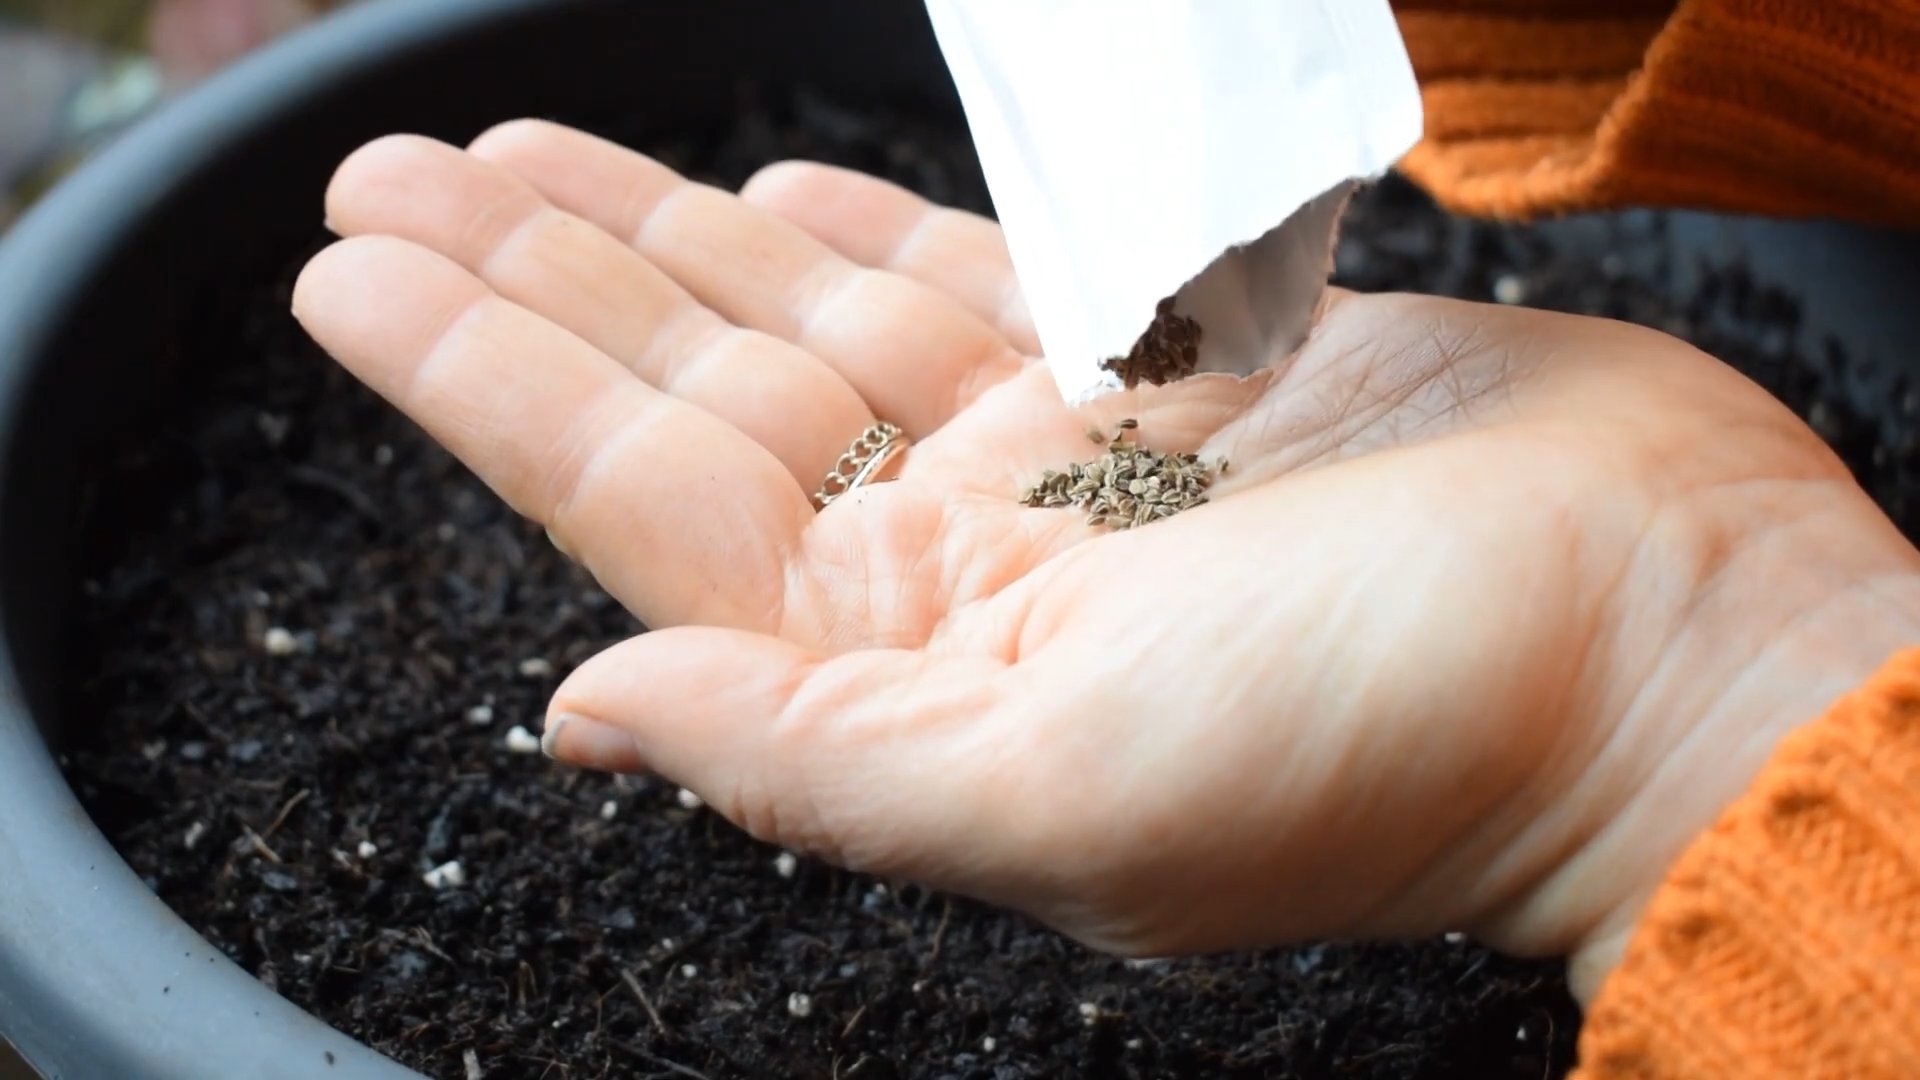
3. Sow the Seeds Sparsely: This is the most important part! Carrot seeds are tiny, and it’s easy to sow them too thickly. Try to space the seeds about 1/2 to 1 inch apart. You can use a seed dispenser or simply pinch a few seeds at a time and drop them into the furrow.
4. Cover the Seeds Lightly: Gently cover the seeds with a thin layer of soil or vermiculite.
5. Water Gently: Use a watering can or hose with a gentle spray nozzle to water the seeds. Be careful not to wash the seeds away.
6. Keep the Soil Moist: Carrot seeds need consistent moisture to germinate. Water the soil regularly, especially during dry spells. I like to check the soil moisture daily and water when the top inch feels dry.
7. Mark Your Rows: Use plant markers to label your rows of carrots. This will help you remember what you planted and where.
Thinning the Seedlings
This is a crucial step that many beginners skip, but it’s essential for growing healthy carrots. Thinning allows the remaining carrots to have enough space to grow to their full potential.
1. Wait Until Seedlings Emerge: Once the seedlings have emerged and have a few true leaves (usually about 2-3 weeks after planting), it’s time to thin them.
2. Thin to the Recommended Spacing: Thin the seedlings so that they are about 1-2 inches apart. For mini carrots, you can get away with slightly closer spacing than for full-sized varieties.
3. Gently Pull Out Excess Seedlings: Use your fingers to gently pull out the excess seedlings. Be careful not to disturb the roots of the remaining carrots.
4. Water After Thinning: Water the soil after thinning to help the remaining carrots recover.
Pro Tip: Don’t throw away the thinned seedlings! You can eat them as microgreens or add them to salads.
Watering and Fertilizing
Carrots need consistent moisture and nutrients to grow well. Here’s how I water and fertilize my carrots:
* Water Regularly: Water the carrots regularly, especially during dry spells. Aim to keep the soil consistently moist, but not waterlogged. I usually water deeply once or twice a week, depending on the weather.
* Avoid Overwatering: Overwatering can lead to root rot, so be careful not to overwater your carrots.
* Fertilize Sparingly: Carrots don’t need a lot of fertilizer. In fact, too much nitrogen can cause them to develop excessive foliage at the expense of root growth. I usually fertilize my carrots once or twice during the growing season with a balanced organic fertilizer.
* Side-Dress with Compost: You can also side-dress your carrots with compost to provide them with a slow-release source of nutrients.
Weed Control
Weeds can compete with carrots for water, nutrients, and sunlight. Here’s how I control weeds in my carrot patch:
* Hand-Pull Weeds: The best way to control weeds in a small garden is to hand-pull them. Be sure to remove the entire root system to prevent them from growing back.
* Mulch: Mulching can help to suppress weeds and retain moisture in the soil. I like to use straw, hay, or wood chips as mulch.
* Hoe Carefully: If you’re using a hoe to control weeds, be careful not to damage the carrot roots.
Pest and Disease Control
Carrots are generally pest-resistant, but they can be susceptible to certain pests and diseases. Here are a few common problems and how to deal with them:
* Carrot Rust Flies: These flies lay their eggs near the base of carrot plants, and the larvae burrow into the roots, causing damage. To prevent carrot rust flies, cover your carrot patch with row covers.
* Aphids: Aphids are small, sap-sucking insects that can weaken carrot plants. You can control aphids by spraying them with insecticidal soap or neem oil.
* Leaf Blight: Leaf blight is a fungal disease that can cause the leaves of carrot plants to turn yellow and brown. To prevent leaf blight, avoid overhead watering and provide good air circulation.
Harvesting Your Mini Carrots
This is the best part! Harvesting your own mini carrots is so satisfying.
1. Check the Days to Maturity: Refer to your seed packet for the estimated days to maturity. Mini carrots typically mature in 50-60 days.
2. Look for Size: You can harvest mini carrots when they are about 2-3 inches long.
3. Loosen the Soil: Use a garden fork or trowel to loosen the soil around the carrots.
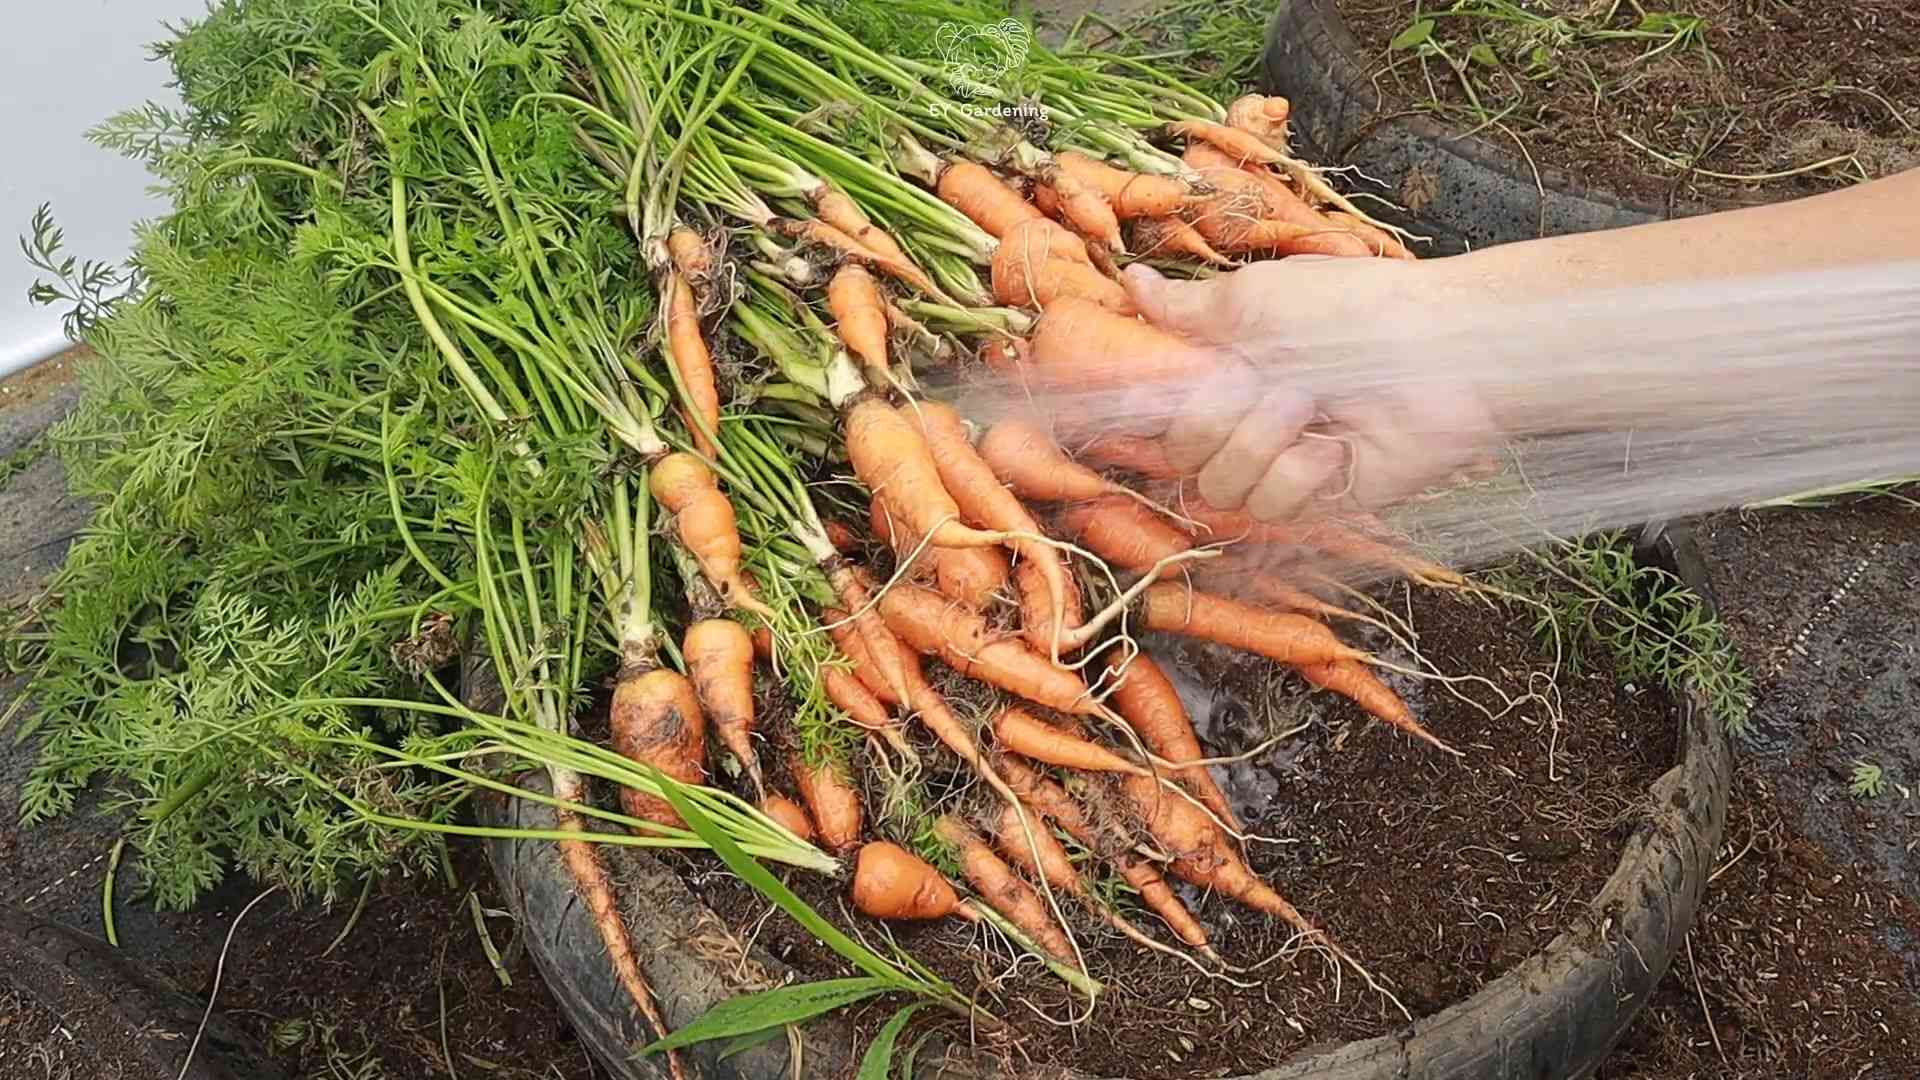
4. Gently Pull the Carrots: Grasp the carrot tops near the base and gently pull the carrots out of the soil.
5. Wash and Enjoy: Wash the carrots thoroughly and enjoy them fresh from the garden!
Storage Tip: Store your harvested carrots in the refrigerator in a plastic bag or container. They will keep for several weeks.
Growing Carrots in Containers
Don’t have a garden? No problem! You can easily grow mini carrots in containers.
* Choose the Right Container: Select a container that is at least 8-10 inches deep and has drainage holes.
* Use a Good Quality Potting Mix: Use a well-draining potting mix that is specifically formulated for vegetables.
* Plant the Seeds: Follow the same planting instructions as for growing carrots in the ground.
* Water Regularly: Container-grown carrots will need to be watered more frequently than carrots grown in the ground.
* Fertilize Regularly: Fertilize your container-grown carrots every 2-3 weeks with a balanced liquid
Conclusion
So, there you have it! Harvesting mini carrots at home is not just a fun gardening activity; it’s a game-changer for anyone who values fresh, flavorful produce and wants to connect with their food source. Forget those bland, pre-packaged baby carrots from the supermarket. With a little effort and this simple DIY trick, you can enjoy a continuous supply of sweet, tender, and perfectly sized mini carrots right from your own garden or even a container on your balcony.
Why is this a must-try? Because the taste difference is undeniable. Homegrown mini carrots burst with a sweetness and vibrancy that you simply can’t find in store-bought varieties. Plus, you have complete control over the growing process, ensuring that your carrots are free from harmful pesticides and herbicides. You’re not just growing food; you’re cultivating a healthier lifestyle.
But the benefits don’t stop there. This DIY trick is also incredibly rewarding. There’s something deeply satisfying about nurturing a plant from seed to harvest, and the joy of pulling those tiny, vibrant orange carrots from the soil is truly unmatched. It’s a fantastic activity for families, teaching children about where their food comes from and fostering a love for gardening.
Looking for variations? Consider experimenting with different carrot varieties. Nantes carrots are known for their sweetness and uniform shape, making them ideal for mini carrots. Parisian carrots are round and adorable, perfect for adding a touch of whimsy to your salads. You can also try interplanting your carrots with companion plants like onions or marigolds to deter pests and improve soil health. Another variation is to succession plant your carrots every few weeks to ensure a continuous harvest throughout the growing season. This way, you’ll always have a fresh supply of mini carrots on hand.
Don’t be afraid to get creative with your planting containers, too. While raised beds and garden plots are ideal, you can also grow mini carrots in pots, window boxes, or even repurposed containers. Just make sure your container is deep enough to accommodate the carrot roots and has good drainage.
We wholeheartedly encourage you to try this DIY trick for harvesting mini carrots at home. It’s easy, rewarding, and delicious! Once you’ve experienced the joy of growing your own mini carrots, you’ll never go back to store-bought again.
And most importantly, we want to hear about your experience! Share your photos, tips, and stories with us in the comments below. What varieties did you try? What challenges did you face? What successes did you celebrate? Your feedback will help other gardeners learn and grow, and together, we can create a community of passionate mini carrot enthusiasts. So, grab your seeds, get your hands dirty, and start growing your own delicious mini carrots today! You’ll be amazed at the difference it makes. This method of growing and harvesting **mini carrots** is truly a game changer.
Frequently Asked Questions (FAQ)
What is the best time of year to plant mini carrots?
The best time to plant mini carrots depends on your climate. In general, carrots are a cool-season crop, so they thrive in spring and fall. For a spring harvest, sow seeds 2-3 weeks before the last expected frost. For a fall harvest, sow seeds 2-3 months before the first expected frost. In warmer climates, you can even grow carrots throughout the winter. Check your local planting calendar for specific dates.
How much sunlight do mini carrots need?
Mini carrots need at least 6 hours of sunlight per day to thrive. Choose a location in your garden that receives full sun. If you’re growing carrots in containers, make sure to place them in a sunny spot. If you don’t have enough natural sunlight, you can supplement with grow lights.
What kind of soil is best for growing mini carrots?
Mini carrots prefer loose, well-drained soil that is rich in organic matter. Avoid heavy clay soils, as they can restrict root growth and result in misshapen carrots. Amend your soil with compost or other organic matter to improve drainage and fertility. A slightly acidic soil pH of 6.0 to 6.8 is ideal.
How often should I water my mini carrots?
Water your mini carrots regularly, especially during dry periods. Keep the soil consistently moist, but avoid overwatering, which can lead to root rot. Water deeply and less frequently, rather than shallowly and often. A good rule of thumb is to water when the top inch of soil feels dry to the touch.
How do I prevent pests and diseases from attacking my mini carrots?
There are several things you can do to prevent pests and diseases from attacking your mini carrots. First, choose disease-resistant varieties. Second, practice crop rotation to prevent soilborne diseases from building up. Third, keep your garden clean and free of weeds, which can harbor pests and diseases. Fourth, use row covers to protect your carrots from insect pests. Fifth, monitor your plants regularly for signs of pests or diseases and take action promptly.
How do I know when my mini carrots are ready to harvest?
Mini carrots are typically ready to harvest when they are about 2-3 inches long and about ½ inch in diameter. You can gently pull back the soil around the base of the carrot to check its size. If the carrots are large enough, you can harvest them. You can also harvest them at a smaller size if you prefer.
Can I grow mini carrots in containers?
Yes, you can definitely grow mini carrots in containers. Choose a container that is at least 6-8 inches deep and has good drainage. Fill the container with a well-draining potting mix. Sow the seeds according to the instructions on the seed packet. Water regularly and fertilize as needed.
What are some common problems when growing mini carrots and how can I fix them?
Some common problems when growing mini carrots include:
* **Poor germination:** This can be caused by old seeds, poor soil, or improper watering. Use fresh seeds, improve your soil, and water regularly.
* **Forked or misshapen carrots:** This can be caused by rocks or compacted soil. Remove rocks from your soil and amend it with compost to improve drainage.
* **Pest damage:** Carrots are susceptible to several pests, including carrot rust flies and aphids. Use row covers to protect your carrots from pests.
* **Diseases:** Carrots can be affected by several diseases, including leaf blight and root rot. Choose disease-resistant varieties and practice crop rotation.
Can I save seeds from my mini carrots?
Saving seeds from carrots is a bit more involved than with some other vegetables because carrots are biennials, meaning they take two years to complete their life cycle and produce seeds. You would need to overwinter the carrots and allow them to flower and produce seeds in the second year. However, for most home gardeners, it’s easier to purchase fresh seeds each year.
What are some good companion plants for mini carrots?
Good companion plants for mini carrots include onions, garlic, rosemary, sage, and marigolds. These plants can help deter pests and improve soil health. Avoid planting carrots near dill or fennel, as these plants can attract pests that also attack carrots.
How do I store my harvested mini carrots?
To store your harvested mini carrots, remove the greens and gently wash the carrots. Pat them dry and store them in a plastic bag or container in the refrigerator. They should last for several weeks. You can also freeze mini carrots for longer storage. Blanch them in boiling water for a few minutes, then cool them in ice water. Drain well and store in freezer bags.

Leave a Comment