
Malabar Spinach Fast Growth is within your reach! Imagine harvesting vibrant, leafy greens from your own backyard just weeks after planting. Sounds too good to be true? It’s not! For centuries, cultures across Asia and Africa have treasured Malabar Spinach, not only for its delicious flavor but also for its incredible growth rate and resilience. This climbing spinach, unlike its traditional counterpart, thrives in warm weather, making it a perfect addition to your summer garden.
But let’s face it, sometimes gardening feels more like a chore than a joy, especially when you’re waiting seemingly forever for your plants to mature. That’s where our DIY tricks and hacks come in. I’m here to share simple, effective methods to unlock the secret to Malabar Spinach Fast Growth. Whether you’re a seasoned gardener or just starting out, these tips will help you maximize your yield and enjoy fresh, homegrown spinach sooner than you ever thought possible. Get ready to transform your garden and your plate with this amazing, fast-growing vegetable!
DIY: Supercharge Your Malabar Spinach Growth!
Hey fellow gardeners! I’m so excited to share my secret weapon for getting a bumper crop of Malabar spinach. This climbing vine is a fantastic addition to any garden, offering delicious, nutritious leaves that are perfect for salads, stir-fries, and soups. But sometimes, it can be a bit slow to get going. That’s where this DIY hack comes in! I’ve tweaked a few things over the years, and now I consistently get vigorous growth and a ton of spinach. Let’s get started!
Understanding Malabar Spinach Needs
Before we dive into the hack, let’s quickly cover what Malabar spinach needs to thrive. This will help you understand why each step is important and how you can adapt it to your specific garden conditions.
* Sunlight: Malabar spinach loves sunshine! Aim for at least 6 hours of direct sunlight per day.
* Soil: Well-draining soil that’s rich in organic matter is key. It prefers a slightly acidic to neutral pH (around 6.0 to 7.0).
* Water: Consistent moisture is crucial, especially during hot weather. Don’t let the soil dry out completely.
* Support: As a climbing vine, Malabar spinach needs a trellis, fence, or other structure to climb on.
* Warmth: This is a warm-weather crop, so it won’t tolerate frost. Wait until the soil has warmed up before planting.
The Secret Sauce: My DIY Growth Booster
Okay, here’s the magic formula! This involves a combination of soil amendments, strategic watering, and a little bit of foliar feeding.
Phase 1: Soil Preparation – Laying the Foundation
This is arguably the most important step. A healthy foundation leads to a healthy plant!
1. Choose Your Location: Select a spot in your garden that gets plenty of sunshine and has good drainage. Remember, at least 6 hours of direct sunlight is ideal.
2. Amend the Soil: This is where we really boost the soil’s fertility. Dig a hole that’s about twice as wide and just as deep as the container your Malabar spinach seedling is in (or where you plan to sow your seeds).
* Compost Power: Mix in a generous amount of compost. I’m talking about at least 1/3 compost to 2/3 existing soil. Compost provides essential nutrients, improves drainage, and helps retain moisture. I personally love using homemade compost, but store-bought works just fine too.
* Worm Castings Wonder: Add a handful or two of worm castings. These are like little nutrient bombs for your plants! They’re packed with beneficial microbes and plant-available nutrients.
* Bone Meal Boost: Sprinkle in a tablespoon or two of bone meal. Bone meal is a great source of phosphorus, which is essential for root development. Strong roots mean a strong plant!
* Optional: Epsom Salt Enhancement: If your soil is particularly lacking in magnesium (which can sometimes be the case), add a teaspoon of Epsom salts. Magnesium helps with chlorophyll production, which is vital for photosynthesis.
3. Mix it Up: Thoroughly mix all the amendments into the existing soil. You want to create a nice, homogenous blend.
4. Backfill and Water: Backfill the hole with the amended soil, leaving a slight mound. Water the area thoroughly to settle the soil.
Phase 2: Planting and Initial Care – Getting Started Right
Now that our soil is prepped, it’s time to get our Malabar spinach in the ground!
1. Planting Seedlings (or Seeds):
* Seedlings: Gently remove the seedling from its container, being careful not to damage the roots. Loosen the roots slightly if they’re tightly bound. Place the seedling in the hole, ensuring that the top of the root ball is level with the surrounding soil.
* Seeds: If you’re starting from seed, sow the seeds directly into the prepared soil. Plant them about 1/2 inch deep and space them a few inches apart. You can always thin them out later if needed.
2. Watering Deeply: After planting, water the seedling (or seeds) deeply. This helps to establish good root contact with the soil.
3. Mulch Magic: Apply a layer of mulch around the base of the plant. Mulch helps to retain moisture, suppress weeds, and regulate soil temperature. I like to use straw or wood chips, but you can use whatever mulch you have available.
4. Provide Support: Immediately provide a trellis, fence, or other support structure for the Malabar spinach to climb on. The sooner you provide support, the sooner the plant will start climbing.
Phase 3: Ongoing Care – Keeping the Momentum Going
This is where the real magic happens! Consistent care is key to maximizing growth.
1. Watering Wisely: Water regularly, especially during hot, dry weather. Aim to keep the soil consistently moist, but not waterlogged. A good rule of thumb is to water deeply whenever the top inch of soil feels dry to the touch.
2. Foliar Feeding Fun: This is my secret weapon! Foliar feeding involves spraying the leaves of the plant with a diluted nutrient solution. The leaves absorb the nutrients directly, providing a quick boost.
* My Foliar Feed Recipe: In a spray bottle, mix 1 teaspoon of liquid seaweed extract with 1 gallon of water. Liquid seaweed is packed with micronutrients and growth hormones.
* Application: Spray the leaves of the Malabar spinach in the early morning or late evening, when the sun is not too strong. Avoid spraying during the hottest part of the day, as this can cause leaf burn.
* Frequency: I foliar feed my Malabar spinach every 2-3 weeks.
3. Fertilizing Faithfully: In addition to foliar feeding, I also fertilize my Malabar spinach with a balanced organic fertilizer every 4-6 weeks. Look for a fertilizer that’s high in nitrogen, as nitrogen promotes leafy growth. Follow the instructions on the fertilizer packaging.
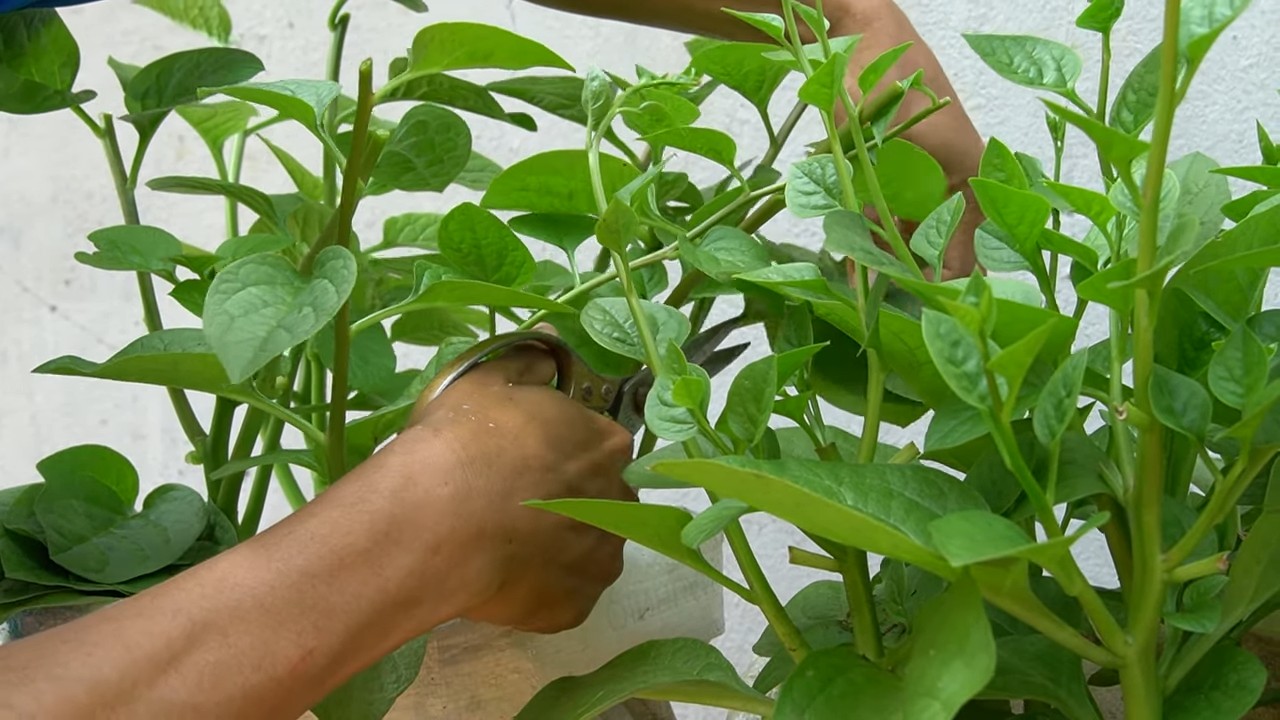
4. Pruning Power: Prune your Malabar spinach regularly to encourage bushier growth. Pinch off the tips of the vines to promote branching. You can also harvest leaves regularly, which will also encourage more growth.
5. Pest Patrol: Keep an eye out for pests, such as aphids and spider mites. If you spot any pests, treat them promptly with an organic insecticide, such as neem oil or insecticidal soap.
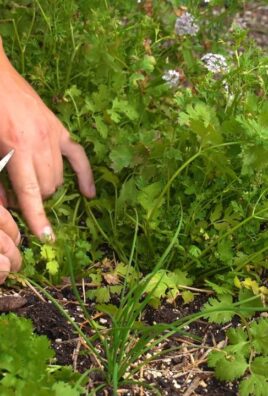
6. Weed Warrior: Regularly remove any weeds that are growing around your Malabar spinach. Weeds compete with your plants for nutrients and water.
Troubleshooting Tips
Even with the best care, you might encounter a few challenges. Here are some common issues and how to address them:
* Slow Growth: If your Malabar spinach is growing slowly, it could be due to a lack of sunlight, nutrients, or water. Make sure it’s getting enough sunlight, fertilize it regularly, and water it deeply.
* Yellowing Leaves: Yellowing leaves can be a sign of nutrient deficiency, overwatering, or underwatering. Check the soil moisture and adjust your watering accordingly. Fertilize with a balanced organic fertilizer.
* Pest Infestation: If you notice pests on your Malabar spinach, treat them promptly with an organic insecticide.
* Lack of Climbing: If your Malabar spinach isn’t climbing, it could be because the support structure is too far away or the vines are too heavy. Gently guide the vines onto the support structure and prune them if they’re too heavy.
Harvesting Your Bounty
The best part of growing Malabar spinach is, of course, harvesting the delicious leaves! You can start harvesting leaves as soon as the plant is large enough. Simply snip off the leaves with scissors or pruning shears. Harvest regularly to encourage more growth. The more you harvest, the more the plant will produce!
I hope this guide helps you grow a thriving Malabar spinach plant! With a little bit of effort and these DIY tips, you’ll be enjoying fresh, delicious spinach all season long. Happy gardening!

Conclusion
If you’ve ever dreamt of a lush, vibrant garden overflowing with fresh, nutritious greens, then mastering this simple DIY trick for Malabar Spinach Fast Growth is an absolute game-changer. Forget painstakingly slow growth and disappointing harvests. This method unlocks the true potential of your Malabar Spinach, transforming it from a slow-growing vine into a thriving, edible powerhouse.
Why is this a must-try? Because it’s efficient, cost-effective, and yields remarkable results. You’ll be amazed at how quickly your Malabar Spinach takes off, providing you with a continuous supply of delicious leaves for salads, stir-fries, soups, and more. Imagine the satisfaction of harvesting your own homegrown greens, knowing exactly where they came from and what went into their cultivation. This isn’t just about growing spinach; it’s about cultivating a sustainable food source right in your backyard.
But the benefits extend beyond just speed. This DIY approach also promotes healthier, more robust plants. By optimizing the growing conditions, you’ll encourage stronger root systems, thicker stems, and more vibrant foliage. This translates to increased resistance to pests and diseases, meaning less maintenance and more bountiful harvests.
Ready to take your Malabar Spinach game to the next level? Don’t be afraid to experiment! Try different variations of this DIY trick to see what works best for your specific climate and growing conditions. For example, if you live in a particularly hot and dry area, consider adding a layer of mulch around the base of your plants to help retain moisture. Or, if you’re growing your Malabar Spinach in containers, make sure to choose a pot that’s large enough to accommodate its vigorous growth. You can also experiment with different types of organic fertilizers to provide your plants with the nutrients they need to thrive.
Consider companion planting with herbs like basil or marigolds to deter pests naturally. Another variation could involve creating a simple trellis system to support the vines as they grow, maximizing space and airflow. You could even try propagating new plants from cuttings taken from your existing vines, expanding your Malabar Spinach patch even further. The possibilities are endless!
We’re confident that once you try this DIY trick, you’ll be hooked. The rapid growth and abundant harvests are simply too good to resist. So, grab your gardening gloves, gather your supplies, and get ready to witness the magic of Malabar Spinach Fast Growth.
We’re eager to hear about your experiences! Share your results, tips, and variations in the comments below. Let’s create a community of Malabar Spinach enthusiasts and help each other achieve gardening success. Happy growing!
Frequently Asked Questions (FAQ)
What exactly does this DIY trick entail?
The specific techniques for achieving Malabar Spinach Fast Growth can vary, but generally involve optimizing factors like soil composition, watering practices, sunlight exposure, and nutrient availability. Common methods include amending the soil with compost or other organic matter, providing consistent and adequate watering, ensuring the plants receive at least 6-8 hours of sunlight per day, and supplementing with a balanced fertilizer. The key is to create an environment that is conducive to rapid and healthy growth. Some methods also involve pruning techniques to encourage bushier growth and more abundant harvests.
What kind of soil is best for Malabar Spinach fast growth?
Malabar Spinach thrives in well-draining soil that is rich in organic matter. A slightly acidic to neutral pH (around 6.0 to 7.0) is ideal. Amend your soil with compost, well-rotted manure, or other organic materials to improve its fertility and drainage. Avoid heavy clay soils, as they can become waterlogged and inhibit root growth. If you have clay soil, consider adding sand or perlite to improve drainage. A good soil mix would be equal parts garden soil, compost, and perlite or sand.
How much sunlight does Malabar Spinach need for optimal growth?
Malabar Spinach requires at least 6-8 hours of direct sunlight per day to achieve its full growth potential. Insufficient sunlight can lead to stunted growth, leggy vines, and reduced leaf production. If you live in a particularly hot climate, providing some afternoon shade can help prevent the leaves from scorching. However, ensure that the plants still receive ample sunlight throughout the day.
How often should I water my Malabar Spinach?
Malabar Spinach prefers consistently moist soil, but it’s important to avoid overwatering, which can lead to root rot. Water deeply whenever the top inch of soil feels dry to the touch. During hot and dry weather, you may need to water more frequently. Mulching around the base of the plants can help retain moisture and reduce the need for frequent watering. Check the soil moisture regularly, especially during periods of heavy rainfall or drought.
What kind of fertilizer should I use for Malabar Spinach?
A balanced organic fertilizer with an NPK ratio of around 10-10-10 or 5-5-5 is generally suitable for Malabar Spinach. You can also use compost tea or other organic amendments to provide essential nutrients. Avoid over-fertilizing, as this can lead to excessive foliage growth at the expense of leaf production. Apply fertilizer according to the package instructions, and monitor your plants for any signs of nutrient deficiencies or toxicities.
How can I protect my Malabar Spinach from pests and diseases?
Malabar Spinach is generally resistant to pests and diseases, but it can occasionally be affected by aphids, spider mites, or fungal diseases. To prevent pest infestations, inspect your plants regularly and remove any affected leaves or stems. You can also use insecticidal soap or neem oil to control pests. To prevent fungal diseases, ensure good air circulation around your plants and avoid overwatering. If you notice any signs of disease, remove the affected leaves and treat the plants with a fungicide. Companion planting with herbs like basil or marigolds can also help deter pests naturally.
Can I grow Malabar Spinach in containers?
Yes, Malabar Spinach can be successfully grown in containers, but it’s important to choose a pot that is large enough to accommodate its vigorous growth. A pot that is at least 12 inches in diameter and 12 inches deep is recommended. Use a well-draining potting mix and provide adequate sunlight and water. You may also need to fertilize more frequently when growing in containers, as the nutrients can leach out more quickly. Consider using a trellis or other support structure to help the vines climb.
How do I harvest Malabar Spinach?
You can begin harvesting Malabar Spinach leaves as soon as they are large enough to use. Simply snip off the leaves with scissors or pruning shears. Regular harvesting will encourage the plant to produce more leaves. You can also harvest the tender stems and shoots. Avoid harvesting more than one-third of the plant at a time, as this can stress the plant and reduce its growth.
Is Malabar Spinach heat tolerant?
Yes, Malabar Spinach is very heat tolerant and actually thrives in warm weather. It is a great option for gardeners in hot climates who struggle to grow other leafy greens. However, it’s still important to provide adequate water and some afternoon shade during the hottest part of the day to prevent the leaves from scorching.
How do I propagate Malabar Spinach?
Malabar Spinach can be easily propagated from seeds or cuttings. To propagate from seeds, sow the seeds directly into the soil in spring or early summer. To propagate from cuttings, take 4-6 inch cuttings from healthy stems and remove the lower leaves. Dip the cut end in rooting hormone and plant the cutting in a pot filled with well-draining potting mix. Keep the soil moist and the cutting should root within a few weeks.

Leave a Comment