
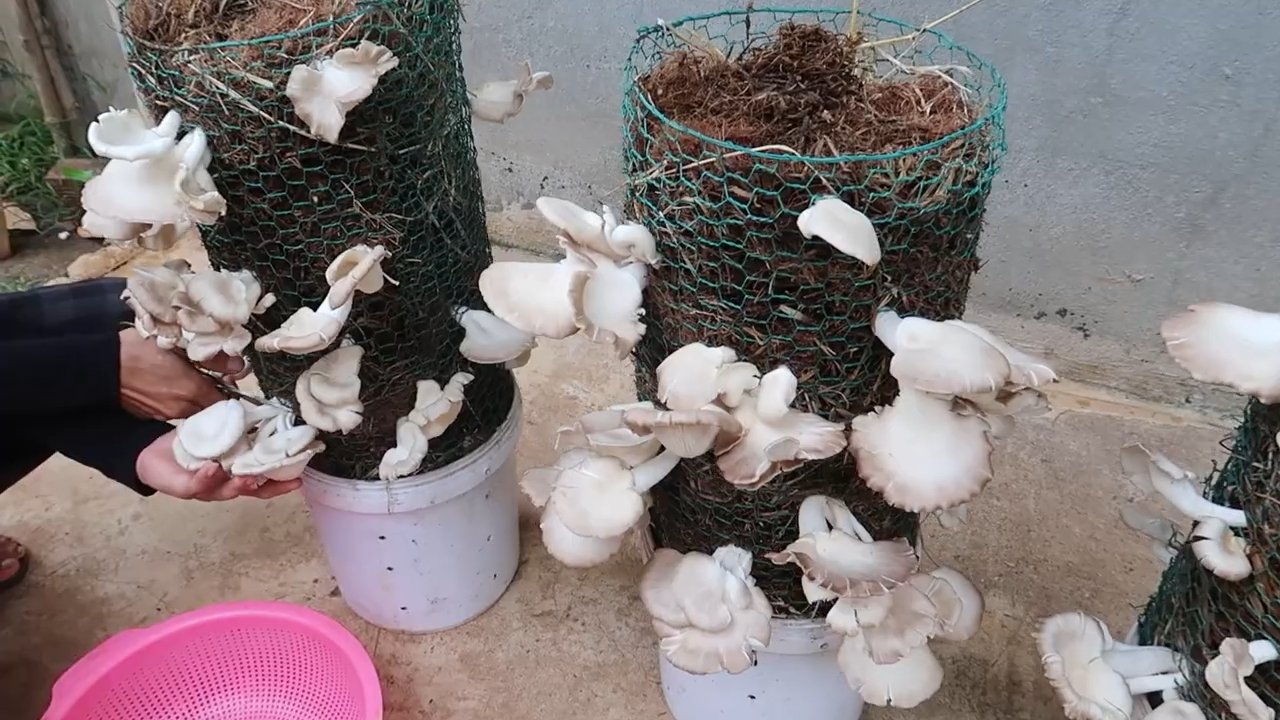
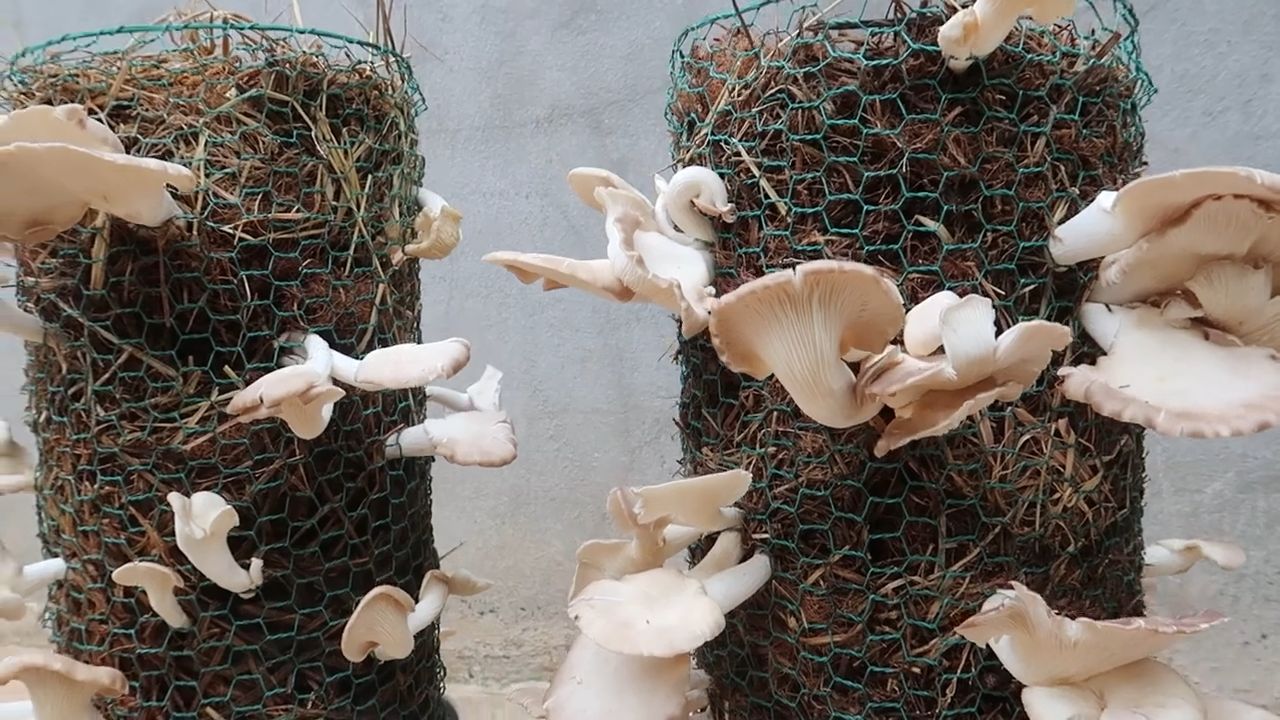
Mushroom harvesting easy strategy – that’s what we’re diving into today! Have you ever dreamt of foraging your own delicious, earthy mushrooms, but felt intimidated by the process? I know I have! The allure of plucking these hidden treasures from the forest floor, or even your own backyard, is incredibly appealing. For centuries, mushroom foraging has been a vital skill in many cultures, providing sustenance and even medicinal benefits. Think of the ancient Romans, who prized certain mushrooms as delicacies, or the traditional practices of indigenous communities who understood the intricate relationship between fungi and the ecosystem.
But let’s be honest, identifying edible mushrooms can seem like a daunting task. That’s where this guide comes in! I’m going to share some simple, yet effective, DIY tricks and hacks that will make mushroom harvesting easy strategy accessible to everyone, even beginners. We’ll cover everything from basic identification tips to sustainable harvesting practices, ensuring you can enjoy the fruits (or should I say, fungi?) of your labor safely and responsibly. So, grab your basket and let’s get started on this exciting journey into the world of mushrooms!
Pilzernte leicht gemacht: Mein ultimativer DIY-Guide für Anfänger und Fortgeschrittene
Hallo liebe Pilzfreunde! Ich bin total begeistert, euch heute in die faszinierende Welt der Pilzernte mitzunehmen. Es gibt kaum etwas Schöneres, als selbst gesammelte, frische Pilze zuzubereiten. Aber keine Sorge, wenn ihr noch Anfänger seid – mit diesem Guide werdet ihr im Handumdrehen zum Pilzprofi! Ich zeige euch, wie ihr sicher und erfolgreich Pilze sammelt, ohne dabei die Natur zu schädigen. Los geht’s!
Die richtige Ausrüstung: Was brauche ich für die Pilzernte?
Bevor wir uns auf die Suche begeben, ist es wichtig, dass wir die richtige Ausrüstung dabei haben. Das macht die Pilzernte nicht nur einfacher, sondern auch sicherer und angenehmer. Hier ist meine persönliche Checkliste:
* Ein stabiles Messer: Am besten ein Pilzmesser mit einer gebogenen Klinge und einem Pinsel am Ende. Die gebogene Klinge hilft beim sauberen Abschneiden des Pilzes, und der Pinsel ist ideal, um Erde und Schmutz zu entfernen.
* Ein luftdurchlässiger Korb oder Stoffbeutel: Vermeidet Plastiktüten! In Plastiktüten können die Pilze schnell verderben und faulen. Ein Korb oder ein Stoffbeutel sorgt für eine gute Belüftung.
* Ein Bestimmungsbuch oder eine App: Unverzichtbar, um die gesammelten Pilze sicher zu identifizieren. Es gibt viele gute Bücher und Apps, die euch dabei helfen. Ich persönlich nutze gerne eine Kombination aus beidem.
* Festes Schuhwerk und wetterfeste Kleidung: Im Wald kann es uneben und feucht sein. Festes Schuhwerk schützt eure Füße, und wetterfeste Kleidung hält euch trocken und warm.
* Eine Lupe: Hilfreich, um feine Details an den Pilzen zu erkennen, die für die Bestimmung wichtig sind.
* Ein Notizbuch und ein Stift: Um Fundorte und besondere Merkmale der Pilze zu notieren. Das hilft euch, eure Kenntnisse zu erweitern und später wieder an den gleichen Stellen zu suchen.
* Erste-Hilfe-Set: Für den Fall, dass ihr euch im Wald verletzt.
* GPS-Gerät oder Smartphone mit Karten-App: Um euch im Wald zu orientieren und den Weg zurückzufinden.
Die Grundlagen der Pilzbestimmung: Worauf muss ich achten?
Die Pilzbestimmung ist das A und O beim Pilzesammeln. Es ist absolut entscheidend, dass ihr die gesammelten Pilze sicher identifizieren könnt, bevor ihr sie esst. Hier sind einige wichtige Merkmale, auf die ihr achten solltet:
* Hut: Form, Farbe, Oberfläche (glatt, schuppig, klebrig), Durchmesser.
* Lamellen/Röhren: Farbe, Anordnung (frei, angewachsen, herablaufend), Abstand, Beschaffenheit.
* Stiel: Form, Farbe, Oberfläche, Ring (vorhanden/nicht vorhanden), Knolle (vorhanden/nicht vorhanden).
* Geruch: Charakteristisch (z.B. anisartig, mehlartig, rettichartig).
* Sporenpulverfarbe: Wichtig für die genaue Bestimmung. Ihr könnt einen Sporenabdruck machen, indem ihr den Hut eines Pilzes auf ein Blatt Papier legt und ihn über Nacht abdeckt.
* Standort: Wo wächst der Pilz? (z.B. im Wald, auf Wiesen, an Bäumen).
* Begleitbäume: Welche Bäume stehen in der Nähe? (z.B. Birke, Eiche, Fichte).
Wichtig: Wenn ihr euch bei der Bestimmung eines Pilzes nicht sicher seid, lasst ihn stehen! Es ist besser, einen Pilz zu viel stehen zu lassen, als einen giftigen zu essen.
Schritt-für-Schritt-Anleitung zur Pilzernte
Jetzt geht’s ans Eingemachte! Hier ist meine detaillierte Anleitung, wie ihr Pilze richtig sammelt:
1. Vorbereitung:
* Packt eure Ausrüstung ein und informiert euch über die aktuellen Pilzbestimmungen in eurer Region. In einigen Gebieten gibt es Schonzeiten oder Beschränkungen für bestimmte Pilzarten.
* Sucht euch ein geeignetes Gebiet aus. Wälder mit Laub- und Nadelbäumen sind oft gute Fundorte.
* Zieht euch wetterfest an und tragt festes Schuhwerk.
2. Die Suche:
* Geht langsam und aufmerksam durch den Wald. Achtet auf verdächtige Stellen, wie z.B. feuchte, schattige Plätze unter Bäumen oder in der Nähe von Moos.
* Sucht nicht nur am Boden, sondern auch an Bäumen und Baumstümpfen. Einige Pilzarten wachsen auf Holz.
* Wenn ihr einen Pilz gefunden habt, nehmt euch Zeit, ihn genau zu betrachten. Achtet auf alle Merkmale, die für die Bestimmung wichtig sind.
3. Das Ernten:
* Schneidet den Pilz mit eurem Messer knapp über dem Boden ab. Dreht den Pilz dabei leicht, um ihn sauber abzutrennen.
* Entfernt groben Schmutz mit dem Pinsel.
* Legt den Pilz vorsichtig in euren Korb oder Stoffbeutel. Vermeidet es, die Pilze zu quetschen oder zu beschädigen.
* Lasst kleine Pilze stehen, damit sie ausreifen und sich vermehren können.
* Zerstört nicht den Lebensraum der Pilze. Tretet nicht auf Pilzmyzelien und reißt keine Pilze aus dem Boden.
4. Die Bestimmung:
* Bestimmt die gesammelten Pilze so bald wie möglich nach der Ernte.
* Nutzt euer Bestimmungsbuch oder eure App, um die Pilze zu identifizieren.
* Vergleicht die Merkmale der Pilze mit den Beschreibungen und Bildern im Buch oder in der App.
* Wenn ihr euch unsicher seid, fragt einen erfahrenen Pilzberater um Rat. Viele Pilzvereine bieten kostenlose Beratungen an.
5. Die Zubereitung:
* Reinigt die Pilze gründlich, bevor ihr sie zubereitet. Entfernt Erde, Nadeln und andere Verunreinigungen.
* Schneidet die Pilze in mundgerechte Stücke.
* Bratet, kocht oder dünstet die Pilze nach eurem Geschmack.
* Genießt eure selbst gesammelten Pilze!
Häufige Fehler vermeiden: Tipps für eine sichere Pilzernte
Um sicherzustellen, dass eure Pilzernte ein voller Erfolg wird, solltet ihr einige häufige Fehler vermeiden:
* Unkenntnis: Sammelt niemals Pilze, die ihr nicht sicher identifizieren könnt.
* Gier: Sammelt nicht mehr Pilze, als ihr verarbeiten könnt.
* Unachtsamkeit: Zerstört nicht den Lebensraum der Pilze.
* Falsche Lagerung: Lagert die Pilze nicht in Plastiktüten.
* Unsachgemäße Zubereitung: Esst niemals rohe Pilze, es sei denn, ihr seid euch sicher, dass sie essbar sind. Viele Pilze sind roh giftig und müssen gekocht oder gebraten werden, um sie genießbar zu machen.
Wo finde ich Pilze? Meine persönlichen Hotspots
Die Suche nach Pilzen kann manchmal eine Herausforderung sein, aber mit ein paar Tipps und Tricks findet ihr bestimmt eure persönlichen Hotspots. Hier sind einige Orte, an denen ich besonders gerne nach Pilzen suche:
* Laubwälder: Besonders unter Buchen, Eichen und Birken findet man oft viele verschiedene Pilzarten.
* Nadelwälder: Unter Fichten und Kiefern wachsen z.B. Steinpilze und Pfifferlinge.
* Mischwälder: Hier findet man oft eine große Vielfalt an Pilzen.
* Wiesen und Weiden: Auf Wiesen und Weiden wachsen z.B. Champignons und Boviste.
* Waldränder und Lichtungen: An Waldrändern und Lichtungen ist es oft etwas wärmer und feuchter, was das Pilzwachstum fördert.
* In der Nähe von Bächen und Flüssen: Feuchte Standorte sind oft gute Fundorte für Pilze.
Wichtig: Beachtet die Naturschutzbestimmungen und betretet
Conclusion
So, there you have it! Mastering this easy strategy for mushroom harvesting isn’t just about filling your basket; it’s about connecting with nature, understanding the delicate balance of the ecosystem, and enjoying the unparalleled flavor of freshly foraged fungi. We’ve demystified the process, providing you with a clear, concise method that prioritizes sustainability and safety. Remember, responsible foraging is key to ensuring future harvests for everyone.
Why is this DIY trick a must-try? Because it empowers you to bypass expensive grocery store prices and access a gourmet ingredient right from your own backyard (or a nearby, permitted foraging location). More importantly, it fosters a deeper appreciation for the natural world and the incredible bounty it provides. Imagine the satisfaction of serving a dish featuring mushrooms you personally harvested – the bragging rights alone are worth the effort!
But the benefits extend beyond just cost savings and culinary pride. This easy strategy for mushroom harvesting promotes mindful observation. You’ll learn to identify different mushroom species, understand their preferred habitats, and recognize the signs of a healthy ecosystem. It’s an educational experience that engages all your senses and connects you to the rhythms of nature.
Looking for variations? Consider adapting this strategy to different mushroom types. While we’ve focused on general principles, researching the specific harvesting requirements of your target species is crucial. For example, some mushrooms benefit from being twisted gently from the ground, while others require a sharp knife to avoid damaging the mycelium. Experiment with different baskets or bags to find what works best for you. A breathable mesh bag is often preferred to prevent moisture buildup and spoilage.
Don’t be afraid to get creative with your mushroom preparations! Sauté them with garlic and herbs, add them to pasta dishes, incorporate them into omelets, or even dehydrate them for long-term storage. The possibilities are endless.
We wholeheartedly encourage you to try this easy strategy for mushroom harvesting. Start small, be patient, and always prioritize safety. Consult with experienced foragers or mycologists if you have any doubts about mushroom identification. And most importantly, have fun!
Once you’ve embarked on your mushroom foraging adventure, we’d love to hear about your experiences. Share your photos, tips, and recipes in the comments section below. Let’s build a community of responsible and enthusiastic mushroom harvesters! Your insights could help others discover the joys of foraging and contribute to a more sustainable approach to food sourcing. Happy foraging!
Frequently Asked Questions (FAQ)
What if I’m absolutely terrified of picking the wrong mushroom and poisoning myself?
This is a very valid concern, and one that every responsible mushroom forager takes seriously. The absolute best way to avoid poisoning is to be 100% certain of your mushroom identification. This means:
* Never eat a mushroom you can’t positively identify. If you have even the slightest doubt, discard it.
* Invest in a good mushroom identification guide specific to your region. Peterson Field Guides and Audubon Society Field Guides are excellent resources.
* Join a local mycological society or mushroom club. These groups often offer guided forays and workshops where you can learn from experienced foragers.
* Take photos of the mushroom from multiple angles. Capture the cap, gills (or pores), stem, and base. Note the surrounding habitat and any distinctive features.
* Compare your findings to multiple sources. Don’t rely on just one identification guide or website.
* Consider using a mushroom identification app, but treat it as a starting point, not a definitive answer. These apps are not always accurate.
* When in doubt, throw it out! It’s always better to be safe than sorry.
Is it legal to harvest mushrooms everywhere?
No, it is absolutely not legal to harvest mushrooms everywhere. Regulations vary widely depending on the location. Before you go foraging, it’s essential to:
* Check local, state, and federal regulations. Many national parks, state parks, and forests have restrictions on mushroom harvesting. Some require permits, while others prohibit it altogether.
* Obtain permission from private landowners. Never trespass on private property without permission.
* Be aware of protected areas. Some areas are designated as nature reserves or conservation areas where harvesting is prohibited.
* Respect private property and avoid disturbing the environment.
Ignoring these regulations can result in fines or even legal action. Always err on the side of caution and do your research before you start foraging.
How do I clean the mushrooms after I harvest them?
Cleaning mushrooms properly is crucial for removing dirt, debris, and insects. Here’s a gentle and effective method:
* Use a soft brush or cloth to gently remove loose dirt. Avoid using water if possible, as mushrooms can absorb moisture and become soggy.
* For more stubborn dirt, lightly dampen a cloth and wipe the mushrooms clean.
* If necessary, you can briefly rinse the mushrooms under cold water, but be sure to dry them thoroughly afterward. Spread them out on a clean towel or paper towels and let them air dry.
* Avoid soaking the mushrooms in water, as this will make them waterlogged and affect their flavor and texture.
* Trim any damaged or discolored parts of the mushrooms.
How do I store the mushrooms after I harvest them?
Proper storage is essential for preserving the freshness and flavor of your harvested mushrooms. Here are some tips:
* Store the mushrooms in a breathable container, such as a paper bag or a container lined with paper towels. Avoid using plastic bags, as they can trap moisture and cause the mushrooms to spoil more quickly.
* Store the mushrooms in the refrigerator. They will typically last for several days, but it’s best to use them as soon as possible.
* Avoid washing the mushrooms until you’re ready to use them. Washing them beforehand can promote spoilage.
* For longer-term storage, consider drying or freezing the mushrooms. Drying is a great option for preserving mushrooms for several months. Freezing is another option, but the mushrooms may become slightly softer in texture after thawing.
What if I find a mushroom that looks like it’s been partially eaten by animals? Is it still safe to eat?
While it might be tempting to think that if an animal ate it, it must be safe, this isn’t always the case. Animals have different digestive systems and tolerances than humans. A mushroom that’s harmless to a squirrel could be toxic to you.
It’s generally best to avoid harvesting mushrooms that show signs of significant animal damage. The damage could indicate that the mushroom is past its prime or that it’s been contaminated. However, if the damage is very minor and you are absolutely certain of the mushroom’s identification, you can carefully trim away the damaged portion and use the rest. But again, err on the side of caution.
What are some ethical considerations when harvesting mushrooms?
Ethical mushroom harvesting is crucial for ensuring the sustainability of mushroom populations and the health of the ecosystem. Here are some key considerations:
* Harvest responsibly. Take only what you need and leave plenty of mushrooms behind to reproduce.
* Avoid disturbing the surrounding habitat. Be careful not to trample plants or disturb the soil.
* Use a knife to cut the mushrooms at the base of the stem, rather than pulling them out of the ground. This helps to protect the mycelium, the underground network of fungal threads that produces the mushrooms.
* Disperse the spores. Gently tap the mushroom caps to release spores as you walk. This helps to promote the growth of new mushrooms.
* Respect private property and obtain permission before harvesting on private land.
* Educate yourself about sustainable harvesting practices and share your knowledge with others.
* Never harvest endangered or threatened mushroom species.
* Leave no trace. Pack out everything you pack in and leave the area as you found it.
By following these ethical guidelines, you can help to ensure that future generations will be able to enjoy the bounty of the forest.

Leave a Comment